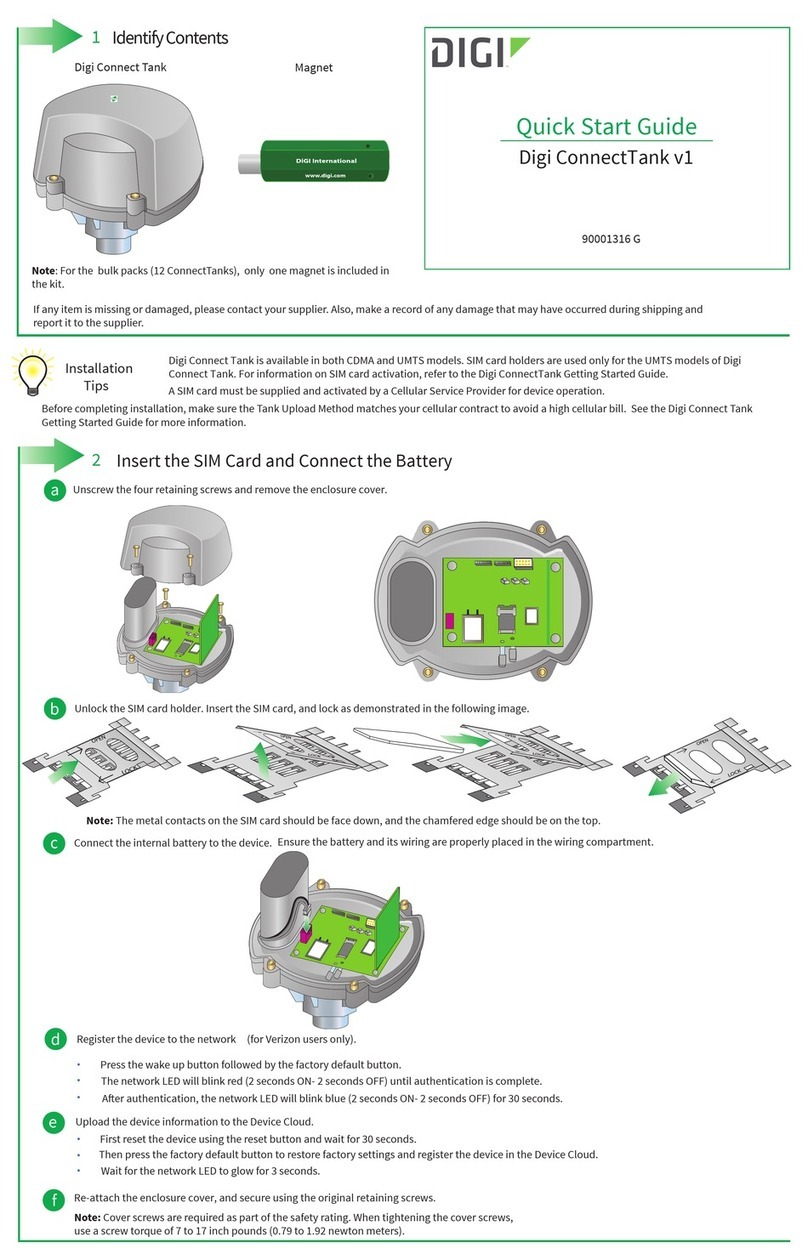
Detcon 880A-N1R User manual

Model 880A-N1R
Model 880S-N1R
PLC Graphic Control System
ON / OFF
NO COMM
POWER ALARM 1
ALARM 3
ALARM 2
FAULT
Operator’s Installation and Instruction Manual
DETCON, Inc.
3200 Research Forest Dr., A-1
The Woodlands, Texas 77381
Ph.281.367.4100 / Fax 281.298.2868
www.detcon.com
May 30, 2009 • Document # 3299 • Revision 0.0

880-N1R
880-N1R Instruction Manual ii
Page intentionally blank

880-N1R
880-N1R Instruction Manual iii
Table of Contents
1.0 Introduction.............................................................................................................................................1
1.1 Serial Systems (RS-485) ...................................................................................................................... 1
1.2 Analog Systems (4-20mA sensors) ...................................................................................................... 2
2.0 System Configuration .............................................................................................................................3
2.1 Configuration........................................................................................................................................ 3
2.2 Touch Panel Graphic Display............................................................................................................... 3
2.3 Programmable Logic Controller........................................................................................................... 4
2.4 Isolated Network Adapter .................................................................................................................... 4
2.5 Specifications ....................................................................................................................................... 6
3.0 Installation...............................................................................................................................................7
3.1 Installing I/O Modules.......................................................................................................................... 7
3.2 Unit Connections.................................................................................................................................. 8
3.3 Battery Backup - Auxiliary 24VDC Input.......................................................................................... 11
3.4 Initial Power Checks .......................................................................................................................... 11
3.5 880 Remote Display Installation (Optional)....................................................................................... 12
4.0 Setup.......................................................................................................................................................15
4.1 User interface ..................................................................................................................................... 15
4.2 Clock and Screen Adjustments........................................................................................................... 16
4.3 880 Setup............................................................................................................................................ 18
4.4 Remote Display Set-up....................................................................................................................... 23
5.0 System Operation..................................................................................................................................25
5.1 Alarm Indicators................................................................................................................................. 25
5.2 Main Screen........................................................................................................................................ 25
5.3 Channel XDetails Screen ................................................................................................................... 26
5.4 Alarm History Screen......................................................................................................................... 27
6.0 Trouble-shooting ...................................................................................................................................28
6.1 Sensor Faults ...................................................................................................................................... 28
6.2 Troubleshooting RS485 Networks ..................................................................................................... 28
7.0 Spare Parts.............................................................................................................................................30
8.0 Warranty................................................................................................................................................30
Appendix A........................................................................................................................................................31
RS-485 System Integration Wiring ................................................................................................................ 31
Appendix B ........................................................................................................................................................37
Hexadecimal Table......................................................................................................................................... 37
Appendix C........................................................................................................................................................38
Drawings and Diagrams ................................................................................................................................. 38
Table of Figures
Figure 1 RS-485 Network Configuration............................................................................................................. 1
Figure 2 DA4 4-20mA Configuration .................................................................................................................. 2
Figure 3 Back of Touch Panel Display................................................................................................................. 3
Figure 4 Basic PLC .............................................................................................................................................. 4

880-N1R
880-N1R Instruction Manual iv
Figure 5 Isolated Network Adapter ...................................................................................................................... 5
Figure 6 Unit overview......................................................................................................................................... 5
Figure 7 Dimensional Overview .......................................................................................................................... 7
Figure 8 installing Din-Rail mounted modules .................................................................................................... 8
Figure 9 Setting Device Addresses....................................................................................................................... 8
Figure 10 Typical RS-485 connections ................................................................................................................ 9
Figure 11 Typical Analog Sensor Wiring ............................................................................................................ 9
Figure 12 Typical RL4 Module.......................................................................................................................... 10
Figure 13 Main 880 terminal blocks and connections........................................................................................ 10
Figure 14 Typical Input Power connections....................................................................................................... 10
Figure 15 Typical 24VDC Input Connections.................................................................................................... 11
Figure 16 Dimensional Overview ...................................................................................................................... 12
Figure 17 Main 880 terminal blocks and connections........................................................................................ 13
Figure 18 Remote RS-422 connections.............................................................................................................. 13
Figure 19 Remote Interconnect Wiring.............................................................................................................. 13
Figure 20 Typical Input Power connections....................................................................................................... 14
Figure 21 Input Keyboard .................................................................................................................................. 15
Figure 22 Input Keypad...................................................................................................................................... 15
Figure 23 Warning Screen.................................................................................................................................. 16
Figure 24 Main Menu......................................................................................................................................... 16
Figure 25 Screen Settings................................................................................................................................... 17
Figure 26 Clock Adjust Screen........................................................................................................................... 17
Figure 27 Adjust Display Screen........................................................................................................................ 17
Figure 28 Main Screen ....................................................................................................................................... 18
Figure 29 Analog Configuration Screen............................................................................................................. 18
Figure 30 Serial Configuration Screen............................................................................................................... 19
Figure 31 Inputting the Facility Name ............................................................................................................... 19
Figure 32 Inputting numbers .............................................................................................................................. 20
Figure 33 Channel Detail Screen........................................................................................................................ 21
Figure 34 The Main Screen ................................................................................................................................26
Figure 35 Channel Details Screen ...................................................................................................................... 27
Figure 36 Alarm History Screen......................................................................................................................... 27
Figure 37 RS-485 Bus with 4 transceiver chips ................................................................................................. 31
Figure 38 Correct and incorrect wiring schemes................................................................................................ 32
Figure 39 Recommended RS-485 communications set-up ................................................................................ 33
Figure 40 Unbalanced Data Bus......................................................................................................................... 34
Figure 41 Data Bus using two repeaters............................................................................................................. 34
Figure 42 Repeater wiring diagram.................................................................................................................... 34
Figure 43 Daisy Chain wiring diagram .............................................................................................................. 35
Figure 44 Unbalanced Data Bus......................................................................................................................... 35
Figure 45 Four repeater Data Bus ...................................................................................................................... 36
Figure 46 wire length vs. data speed .................................................................................................................. 36
Shipping Address: 3200 A-1 Research Forest Dr., The Woodlands Texas 77381
Mailing Address: P.O. Box 8067, The Woodlands Texas 77387-8067

880-N1R
880-N1R Instruction Manual Rev. 0.0 Page 1 of 38
1.0 Introduction
The standard Detcon Model 880 is a PLC based graphic control system specifically designed to serve as a host
monitoring and control system for networks of gas detection sensors as well as a wide range of other field
devices. The main unit is programmed as a Modbus master and is available in two versions: Serial (Model
880S-N1R) and Analog (Model 880A-N1R). Both are fully Field configurable and are made to be mounted in
a 19” indoor rack mount cabinet or enclosure.
The Serial unit (Model 880S-N1R) is designed to monitor up to 32 serial field devices, while the Analog
version (880A-N1R) can monitor up to 72 analog devices via Detcon’s DA4 Modules. The unit features a
color touch screen that graphically displays the status of each device, provides three fully programmable
“Banks” of alarm outputs, and provides the ability to log alarm events to a USB Drive. The use of standard
industrial components makes the Detcon Model 880 an easy and practical choice when configuring point-to-
point monitoring and data acquisition. The system can also be used for remote monitoring simply by adding
the 880 Remote Display Unit.
1.1 Serial Systems (RS-485)
Another method of integration commonly used in industrial applications is the RS-485 serial communications
network, or Modbus™ (Figure 1). RS-485 serial communication is used for multipoint communications and is
a popular choice due to ease of wiring installation.
Advantages of using RS-485 serial communication:
¾Inexpensive method allowing multiple devices to communicate over a single twisted pair of wires.
¾More data/information can be sent beyond the simple 4-20mA signal.
¾Transceiver communication up to 4,000 feet without using repeaters.
¾Highly resistant to induced noise when proper cable and terminations are used.
¾Two-way (bi-directional), half-duplex, data bus communication consisting of multiple transmitter and
receiver combinations.
Most systems use the RS-485 master/slave architecture for multiple device communication. Each slave unit
has a unique address and responds to data packets generated by the master. The master periodically polls all
connected slave units.
Typical Sensors
1 2
31 32
ON / OFF
NO COMM
POWER ALARM1
ALARM 3
ALARM 2
FAULT
Figure 1 RS-485 Network Configuration
The protocol used by Detcon for the RS-485 communications is the Modbus™RTU, which is compatible with
most PLC’s, MMI’s, and distributed control systems. The Modbus™RTU protocol is standard and allows for
a maximum of 32 sensors and/or field devices to be used in this configuration.

880-N1R
880-N1R Instruction Manual Rev. 0.0 Page 2 of 38
1.2 Analog Systems (4-20mA sensors)
The signal outputs from multiple sensors provide the user with various options for integrating the Model 880
Graphic Control System. One method of integration is accomplished by using 4-20mA signal output gas
sensors with Detcon DA4 Modules (Figure 2). The DA4 Module receives an analog 4-20mA signal
corresponding to the range of detection then changes it to Modbus™ before relaying the information to the
880A. The Sensor’s output signal is calibrated so that a 4mA input represents a reading of “0” and a 20mA
input represents a reading of full scale. The scale used for each sensor is user programmable and can be set in
the field. Readings outside the range of 4-20mA will cause a Fault.
4-20mA
INPUT
COMM
M
S
D
L
S
D
Typical Sensors
Sensor 2
Sensor 1
Sensor 3
Sensor 4
Figure 2 DA4 4-20mA Configuration
Analog 4-20mA networks are typically recognized as the most fail-safe approach. When using DA4
Module(s), the 880A can communicate with up to 72 analog input channels.

880-N1R
880-N1R Instruction Manual Rev. 0.0 Page 3 of 38
2.0 System Configuration
The Model 880 is designed to monitor and display the status of field sensor devices, provide programmable
alarm outputs, and log alarm incidents via a USB drive. The system is equipped with a color graphic touch
screen display. Control electronics are industry standard PLC modules pre-selected to fit the application.
Three programmable “Banks” of Alarms are designed to give the user the ability to set up three “Zones” of
Alarm 1, Alarm 2, Alarm 3 and Fault conditions. Through the use of the Detcon RL4 Modules, each alarm
can provide multiple sets of contacts: Common, Normally Open, and Normally Closed for customer
annunciator connections.
2.1 Configuration
A Model 880 is equipped with:
•8.31" x 6.24" (211.2 x 158.4 mm) Color Graphical Touch Screen display panel
•Four slot Programmable Logic Controller (PLC)
oTwo communication port CPU Module
oEight channel Relay Output Module
oCommunications Module (2ea.)
•Isolated Network Adapter
•24VDC 5Amp Power Supply
•Fault, Alarm, Communications, and Power Panel Indicator LED’s
2.2 Touch Panel Graphic Display
The Model 880 is equipped with a graphic display panel (Figure 3) that is prompted to display information
such as the operational status of each monitoring device, alarm output readings, and record alarm incidents to a
USB Drive.
PWR
CPU
TxD
RxD
+Used
NOT
24V . . . .
Dedicated
power supply
recommended
PLC Serial Port
DC Input
Ethernet 10/100
Base T Connector
USB Type A Port
USB Type B Port
Audio Line Out
BACK VIEW
BOTTOM VIEW
Figure 3 Back of Touch Panel Display

880-N1R
880-N1R Instruction Manual Rev. 0.0 Page 4 of 38
The touch panel acts as a master interface to the internally located PLC. As such, the touch panel polls the
PLC, which, in turn, polls the field devices for information. A wand is used on the screen to operate system
controls and/or move to additional screens.
A USB port (Figure 3) is located on the back of the unit. When a USB Drive (USB Memory Stick) is
installed, the display will automatically log to the drive where any alarms and/or faults have been recorded by
the PLC. The information is logged into a folder named ‘Log’ and named ‘Alarm_yymmdd.txt’ where yy is
the year, mm is the month, and dd is the day. The files are written in text format.
2.3 Programmable Logic Controller
At the core of the Model 880 is the modular Programmable Logic Controller (PLC), which is designed to offer
maximum flexibility in system configuration (Figure 4). The PLC and all other electronic components are
mounted within the enclosure.
G
+
Direct
LOGIC205 PWR
BATT
STOP
RUN
TERM
CPU RUN
CPU
RELAY
4
5
7
6
1
3
2
0
D2-08TR
OUT RELAY
7
36
25
14
0C
C
5-240VAC
1A 50/60Hz
5-30VDC
5mA-1A
LL
D2-DCM
DATA
COM
D2-DCM
DATA
COM
Figure 4 Basic PLC
Installed in the PLC is the programmable Central Processing Unit (CPU), which processes all instructions,
data, and polls all field devices. The CPU utilizes flash memory to store the running program. All units are
shipped with firmware loaded and a lithium battery installed. The CPU has two communication ports. The
top RS232 port (Port 1) is the programming and interface for the touch display panel. The 15-pin bottom port
(Port 2) supports RS232 or RS422 and serves as I/O master for the RS-485 Modbus™ network. The PLC
contains an 8-channel Relay Output Module that controls the LED’s on the front panel of the unit. The PLC
also utilizes two Data Communication Modules (DCM’s) that are used to communicate with the Remote
Display (if connected), and Auxiliary units such as printers or other external compatible devices.
2.4 Isolated Network Adapter
The Model 880 PLC uses an Isolated Network Adapter to interface with devices on the RS-485 Modbus™
network. The Isolated Network Adapter (Figure 5) converts RS-422/485 signals from sensors and other digital
devices, to an RS-232 signal that the main CPU can utilize.
The Isolated Network Adapter performs well in noisy environments where data corruption is possible due to
induced noise. The Isolated Network Adapter can also be used to verify whether or not the unit is
communicating and polling. To simplify troubleshooting, the Isolated Network Adapter has transmit and
receive LED’s.

880-N1R
880-N1R Instruction Manual Rev. 0.0 Page 5 of 38
A
Switch Settings:
S21 - ON (1)
5V BIAS - ON (1)
0V BIAS - ON (1)
1/2 DPX - ON (1)
1/2 DPX - ON (1)
All other switces should
be set to OFF (0).
Figure 5 Isolated Network Adapter
Touch Screen Display
Room for Customer Supplied
Modules
AC Power and Communication
Terminal Blocks
Room for Customer
Supplied Modules
PLC
Power
Supply
Network Adapter
Power
Distribution
Terminal
Blocks
USB Port
TOP VIEW
(Top Removed)
BACK VIEW
TB1
TB2
A
B
RXD
TXD
TXD EN
CTS
C-A
+V
C-A
TX+
TX-
RX-
RX+
C-B
RXD
TXD
GROUND
VAC (L1)
NEU (L2)
A
B
RS-485
Primary
TXD+
TXD-
RXD+
REMOTE
OUTPUT
RXD-
0V
TXD+
TXD-
RXD+
RS-422
SLAVE
RXD-
0V
O
I
5A
I ON
C3
WMS1C03
240V- 10000
24V +
24V -
24VDC
INPUT
I ON
C3
WMS1C03
240V- 10000
A
B
+
RS-485 VDC
Primary Out
1
23
6 7 8 11 12 13 14 15 16 17 18 19 20910
USB
PORT
Figure 6 Unit overview

880-N1R
880-N1R Instruction Manual Rev. 0.0 Page 6 of 38
2.5 Specifications
Capacity
User Configurable
Serial Units: Up to 32 serial devices
Analog Units: Up to 72 analog inputs using the Detcon DA-4 Modules
Inputs
RS-485 Modbus™ RTU
Outputs
Primary: RS-485
Slave: RS-485
Remote Output: RS-422
User Configurable Relays via the use of Detcon RL4 Modules
Power Input
100-240VAC 50~60Hz
18-30VDC
Power Consumption
Base Unit <40W – Not to include I/O Modules and sensors.
Total Power is dependent on number of I/O modules, number of sensors, and the type of sensors attached.
Total power of unit with I/O modules and gas sensors not to exceed 120 Watts.
Display
8” inch diagonal Graphic Backlit LCD Touch screen display
Electrical Classification
19” Rack Mount Enclosure
Dimensions
19''W x 10.5''H x 15''D
Operating Temperature Range
0°C to +45°C
Warranty
One year

880-N1R
880-N1R Instruction Manual Rev. 0.0 Page 7 of 38
3.0 Installation
The Detcon Model 880-N1R PLC is a 19” Rack Mount enclosure. The 880-N1R is a 19” Rack Mount Unit
and should be securely mounted in a 19” Rack Mount Cabinet or other suitable 19” Rack Mount Enclosure.
Figure 7 provides a dimensional overview of the unit. The unit is 15 inches deep. Several more inches in
depth will be needed if Din-Rail Modules are added.
Care should be given to prevent sharp objects from colliding with the touch screen display as damage to the
display may cause the unit to become inoperative. The screen can be cleaned with a mild detergent and a lint
free cloth. Never use an abrasive cleaner on the display.
ON / OFF
NO COMM
POWER ALARM 1
ALARM 3
ALARM 2
FAULT
10.5"
18.3"
19.0" 12.0"15.0"
7.5"
0.218"
R0.109"
0.375"
SLOT DETAIL
Figure 7 Dimensional Overview
3.1 Installing I/O Modules
The 880-N1R provides extra Din-Rail space on the back of the unit for the addition of Din-Rail mounted I/O
Modules. There is enough room for the addition of up to 8 modules, but the number of modules that can be
mounted should be determined more by the current load imposed on the unit than by the physical space
provided. The maximum current load is to be restricted to 3Amps. An RS-485 connector is provided for
Modbus™ and power connections to the unit for these Din-Rail mounted modules.
WARNING:The use of the 880’s 24VDC to power unit mounted Din-Rail modules and external
devices is be restricted to no more than 3Amps maximum (≈75 Watts). This equates to 5 DA4
Modules (with 20 sensors and/or field devices attached) and 1 or 2 RL4 Modules. Care should be
taken to insure that the total current load of installed modules and other devices utilizing this power
does not exceed this 3Amp rating, as this may cause detrimental damage to the unit and will void the
warranty. An External Power Source should be used to power any and all modules or devices that
exceed this rating. A 3Amp fuse is installed in the unit to limit the current load of this 24VDC Output.
Modules should be mounted on the Din-Rail starting from the right and plugging additional modules in to the
left. An RS-485 cable with the appropriate I/O connector is provided on the right side of the Din-Rail and
should be plugged into the first module.

880-N1R
880-N1R Instruction Manual Rev. 0.0 Page 8 of 38
RELAY
COMM
M
S
D
L
S
D
4-20mA
INPUT
COMM
M
S
D
L
S
D
4-20mA
INPUT
COMM
M
S
D
L
S
D
4-20mA
INPUT
COMM
M
S
D
L
S
D
4-20mA
INPUT
COMM
M
S
D
L
S
D
RELAY
COMM
M
S
D
L
S
D
RELAY
COMM
M
S
D
L
S
D
RELAY
COMM
M
S
D
L
S
D
SBA-+
SBA
-
+
RS-485 I/O Connector
RS-485 and Power
(Beldon Cable P/N 1502P)
Figure 8 installing Din-Rail mounted modules
I/O Module Addressing
I/O modules must be serially addressed to establish correct communications. All Modules are addressed in
Hexadecimal. Typically, the modules will be addressed from 01 to FF Hex starting from the module on the
right hand side of the stack. The I/O module’s address is established by setting the two rotary switches to the
correspondingly correct position. The top rotary switch sets the Most Significant Bit (MSB). The bottom
rotary switch sets the Least Significant Bit (LSB). For an address of 01, set the top switch (MSB) to 0 and the
bottom switch (LSB) to 1. See Appendix B for Decimal to Hexadecimal conversion.
NOTE: All addresses must be unique. There can be no duplication of addresses or a Communication
Error (NO COMM) will occur.
RELAY
COMM
M
S
D
L
S
D
4-20mA
INPUT
COMM
M
S
D
L
S
D
4-20mA
INPUT
COMM
M
S
D
L
S
D
4-20mA
INPUT
COMM
M
S
D
L
S
D
4-20mA
INPUT
COMM
M
S
D
L
S
D
RELAY
COMM
M
S
D
L
S
D
RELAY
COMM
M
S
D
L
S
D
RELAY
COMM
M
S
D
L
S
D
M
S
B
L
S
B
0
1
2
3
4
5
6
7
8
9
A
B
C
D
E
F
0
1
2
3
4
5
6
7
8
9
A
B
C
D
E
F
Figure 9 Setting Device Addresses
3.2 Unit Connections
Connections to the 880 are made via terminals on TB1, located on the back of the unit, refer to Figure 6.
Serial Connections
1. For Serial Units (880S), connect the RS-485 Modbus™ network to the terminal blocks labeled
“Primary RS-485,” “A,” “B,” and “Shld” (Figure 10). Ensure that the network is properly laid out.
Proper layout of the RS-485 network is important for correct operation. Refer to Appendix A (RS-485
Integration and Wiring) for proper network layouts. The unit provides no power for external serial
devices connected to the unit.

880-N1R
880-N1R Instruction Manual Rev. 0.0 Page 9 of 38
WARNING:The use of the 880’s 24VDC to power external devices and unit mounted Din-Rail
modules are to be restricted to no more than 3Amps maximum (≈75 Watts). This equates to about 32
sensors, maximum. Care should be taken to insure that the total current load of devices and Din-Rail
mounted modules utilizing this power does not exceed this 3Amp rating, as this may cause detrimental
damage to the unit and will void the warranty. An External Power Source should be used to power
any and all modules or devices that exceed this rating. A 3Amp fuse is installed in the unit to limit the
current load of this 24VDC Output.
A
B
RS-485
Primary
A
B
+
RS-485 VDC
Primary Out
678 910
Part of
TB1
Figure 10 Typical RS-485 connections
Analog Sensor Connections
2. For Analog Units (880A), Sensor communication is accomplished by using Detcon DA4 modules and
the RS-485 Modbus™. The 4-20mA sensors are directly connected to the DA4 modules, while the
DA4 modules are connected via the RS-485 Modbus™ to the 880 PLC (Figure 11). The unit provides
power and Din-Rail space on the back of the unit for a maximum of 5 DA4 modules. Additional DA4
modules should be remotely mounted, require an external power source, and should be connected to
the unit via the RS-485 Modbus™. The correct setup of the DA4’s is covered in Section 4.3 880
Setup.
4-20mA
INPUT
COMM
M
S
D
L
S
D
Typical Sensors
RS-485 to 880
Sensor 2
Sensor 1
Sensor 3
Sensor 4
Figure 11 Typical Analog Sensor Wiring
3. External annunciators should be connected to Detcon RL4 Modules. The Detcon RL4 Modules
communicate via Modbus™, and should be connected along with other serial devices directly to the
RS-485 Modbus™. The correct setup of the RL4’s is covered in Section 4.3 880 Setup. Connections

880-N1R
880-N1R Instruction Manual Rev. 0.0 Page 10 of 38
are provided on each RL4 module for associated annunciators. These connections consist of a set of
terminals (Common, Normally Open, Normally Closed) for the associated relay.
RELAY
COMM
M
S
D
L
S
D
A
A
A
A
ALARM 1
ALARM 2
ALARM 3
FAULT
M
S
D
L
S
D
RS-485 from 880
Figure 12 Typical RL4 Module
4. Terminal blocks are provided for connection to other external devices such as a remote display, a
printer, or other device capable of communication with the 880. The Remote display should be
connected to the “REMOTE OUTPUT” terminal blocks, and other devices should be connected to the
“RS-422 SLAVE” terminal blocks.
TXD+
TXD-
RXD+
REMOTE
OUTPUT
RXD-
0V
TXD+
TXD-
RXD+
RS-422
SLAVE
RXD-
0V
11 12 13 14 15 16 17 18 19 20
Part of
TB1
Figure 13 Main 880 terminal blocks and connections
5. Connect 110-220VAC input to the Fuse Block labeled “VAC (L1)” in the lower left of the enclosure.
Connect Neutral (or L2) to terminal labeled “NEU (L2)” and Ground to the Green/Yellow terminal
labeled “GROUND” (Figure 14). The power supply is able to accept AC input voltages from 100 to
240 volts at 50 or 60Hz.
I ON
C3
WMS1C03
240V- 10000
I ON
C3
WMS1C03
240V- 10000
123
Ground
VAC (L1)
NEU (L2)
Part of
TB1
Figure 14 Typical Input Power connections

880-N1R
880-N1R Instruction Manual Rev. 0.0 Page 11 of 38
6. If applicable, connect a 24VDC Battery Backup or Auxiliary 24V source to the terminal blocks
labeled “24VDC INPUT” (24V+ and 24V–) (Figure 15).
NOTE: This input should be capable of supplying at least 5Amps at 24VDC in order for the unit to
operate properly. Insufficient current capabilities may cause detrimental damage to the unit and will
void the warranty.
O
I
5A
24V +
24V -
24VDC
INPUT
Part of
TB1
4
5
Figure 15 Typical 24VDC Input Connections
3.3 Battery Backup - Auxiliary 24VDC Input
If an Auxiliary 24VDC Input is connected to the unit, the input voltage may need to be adjusted to insure
proper operation. If the 24VDC input is being used to operate the unit, the source must be able to provide at
least 5Amps to insure proper unit operation. The unit utilizes a 5A Circuit Breaker to provide over current
protection. Measure the voltage between TB1-4 and TB1-5. This voltage should read above 21.6VDC and
below 26VDC.
If the 24VDC input is to be used as a Backup or Auxiliary 24VDC Input, adjustments may be required to
insure that this 24VDC Input is below the internal power supply voltage. To accomplish this turn “OFF” the
24VDC Input Circuit Breaker (located at TB1-5) measure the voltage between TB1-9 and TB1-10 (refer to
Figure 6 and Figure 10), this reading should be the power supply voltage. If the voltage measured across the
Power Supply is lower than the Auxiliary 24VDC Input (as measured between TB1-4 and TB1-5), the internal
power supply will not be used to supply power to the unit. The Auxiliary 24VDC Input to the unit should be
adjusted to at least 0.1-0.15VDC below the unit’s 24V Power Supply (as measured across TB1-9 and TB1-10)
for correct operation. This will insure that the unit does not operate on the Auxiliary 24VDC Input unless the
AC power is lost. Once the Auxiliary Input 24VDC is properly adjusted, turn the 24VDC Input Circuit
Breaker “ON”.
3.4 Initial Power Checks
Upon completion of all field wiring, apply power to the 880 by setting both the AC Circuit Breakers and DC
Circuit Breakers to “ON” and pushing the “POWER ON/OFF” switch on the front panel. The “POWER”
LED should illuminate. If all connections have been made properly, the “FAULT” and “ALARM” LED’s
should not be illuminated. The unit will go through a brief initialization and display the “Main Screen”
(Figure 28, Section 4.3). The “AC” box on the display should be green showing that AC is attached to the
unit. The “USB” box should be gray to indicate that no USB drive is attached.

880-N1R
880-N1R Instruction Manual Rev. 0.0 Page 12 of 38
3.5 880 Remote Display Installation (Optional)
The Detcon Model 880 Remote Display enclosure is rated NEMA 4X, which is rain tight and suitable for
outdoor locations in electrically non-hazardous environments. The enclosure is equipped with four (4) wall-
mounting brackets for easy wall mount installations. Care should be given to prevent sharp objects from
colliding with the touch screen. The screen can be cleaned with a mild detergent and a lint free cloth. Never
use an abrasive cleaner on the display.
1. Securely mount the 880 Enclosure in accordance with Figure 16.
www.detcon.com
11"
13.85"
6.8"
15.2" 15.75"
Ø0.344"
Mounting Hardware
Figure 16 Dimensional Overview
2. Run the serial cable between the Main 880 enclosure and the 880 Remote Display enclosures.
3. Connect the RS-422 Serial communications cable to the terminal blocks labeled “REMOTE
OUTPUT” in the Main 880 enclosure (Figure 17).

880-N1R
880-N1R Instruction Manual Rev. 0.0 Page 13 of 38
TXD+
TXD-
RXD+
REMOTE
OUTPUT
RXD-
0V
Figure 17 Main 880 terminal blocks and connections
4. Connect the RS-422 Serial communications cable to the input terminal blocks inside the 880 Remote
Display labeled “TERMINAL INPUT” as shown in (Figure 18).
TXD+
TXD-
RXD+
TERMINAL
INPUT
RXD-
0V
Figure 18 Remote RS-422 connections
0V
RXD-
REMOTE DISPLAY
RXD+
TXD+
TXD-
CUSTOMER SUPPLIED
WIRING
TXD+
TXD-
RXD+
TERMINAL
INPUT
RXD-
0V
TXD+
TXD-
RXD+
REMOTE
OUTPUT
RXD-
0V
MAIN 880
Figure 19 Remote Interconnect Wiring
5. Connect 110-220VAC input to the Fuse Block labeled “VAC (L1)” in the lower left of the enclosure.
Connect Neutral (or L2) to terminal labeled “NEU (L2)” and Ground to the Green/Yellow terminal
labeled “GROUND” (Figure 20). The power supply is able to accept AC input voltages from 100 to
240 volts at 50 or 60Hz.

880-N1R
880-N1R Instruction Manual Rev. 0.0 Page 14 of 38
O
I
1A
Ground
VAC (L1)
NEU (L2)
Figure 20 Typical Input Power connections
Upon completion of all field wiring, apply power to the Main 880 and the 880 Remote Display. The unit will
go through a brief initialization and display the “Main Screen” (Figure 28). The “AC” box on the display
should be green to show that AC is attached to the unit. The “USB” box will be gray to indicate if no USB
drive is attached.

880-N1R
880-N1R Instruction Manual Rev. 0.0 Page 15 of 38
4.0 Setup
4.1 User interface
When an alphanumeric or text string is called for, the unit will display an alphanumeric keyboard for the user
to input information (Figure 21). Information typed by the user will be displayed in the box just above the
keyboard. The keyboard is fully functional allowing the user to input spaces, special characters (i.e. ‘*’, ‘&’,
etc.), and make changes between lowercase characters and capitals by using the CAP key. Once the user has
input the correct information, the ‘Enter’ key will transfer the complete string to the appropriate ‘Box’ on the
screen and the alphanumeric keyboard will disappear.
Figure 21 Input Keyboard
When a number is called for, the unit will display a keypad for the user to input the appropriate numeric
response (Figure 22). Information entered by the user will be displayed in the box to the left of the keypad.
Once the user has input the correct information, the ‘Enter’ key will transfer the numeric value to the
appropriate ‘Box’ on the screen and the keypad will disappear. Many keypad entries display a minimum,
maximum, and current box. These boxes show the lower limit, upper limit, and current value of the number
being entered. Numeric entries outside of these restrictions will not be accepted.
Figure 22 Input Keypad
The display screen also contains a number of “buttons”. These “buttons” act as toggle switches that change
state when activated by the wand. These buttons will indicate the change in state by some obvious means such
as a change in color, name, or both (i.e., when changing the state of an alarm from ascending to descending the
button will change from a blue button displaying “ASC” to a gray button displaying “DES”).

880-N1R
880-N1R Instruction Manual Rev. 0.0 Page 16 of 38
4.2 Clock and Screen Adjustments
Adjustments to the clock and screen are made entering the display’s Setup Screens. Only the Clock and
Screen adjustments are discussed here. Changing other aspects of the Touch Panel may cause the unit to
operate improperly and should not be attempted.
Access the display’s System Setup Screens by touching the upper left corner of the touch panel with the wand
and holding it there for 3-5 seconds. A warning box will appear (Figure 23). If no action is taken within 60
seconds, the display system will return to the Main Screen. To return to the Main Screen select “Exit”.
WARNING: Selecting OK will stop the PLC driver; therefore, all communication between the touch
panel and the PLC will cease.
Figure 23 Warning Screen
To enter the display’s Setup Screen, select “OK”. The Main Menu will be displayed (Figure 24).
Figure 24 Main Menu
From the Main Menu select the “Setting” button to enter the “Setting” Screen (Figure 25).
This manual suits for next models
1
Table of contents
Other Detcon Control System manuals
