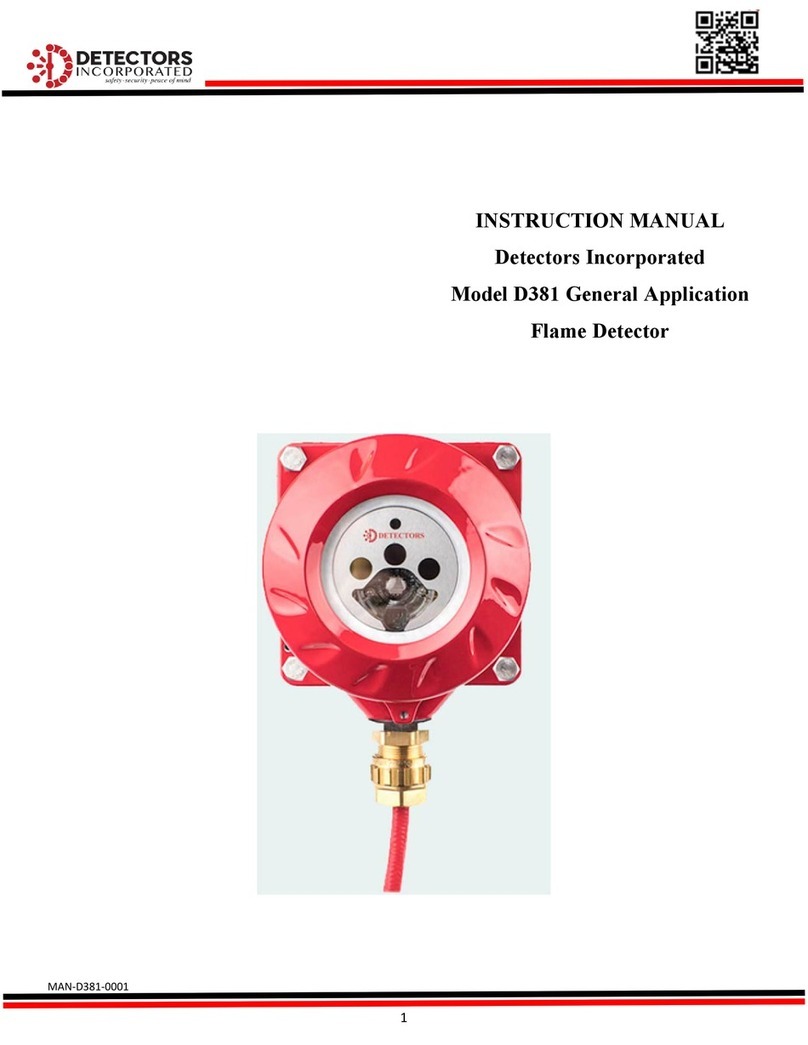
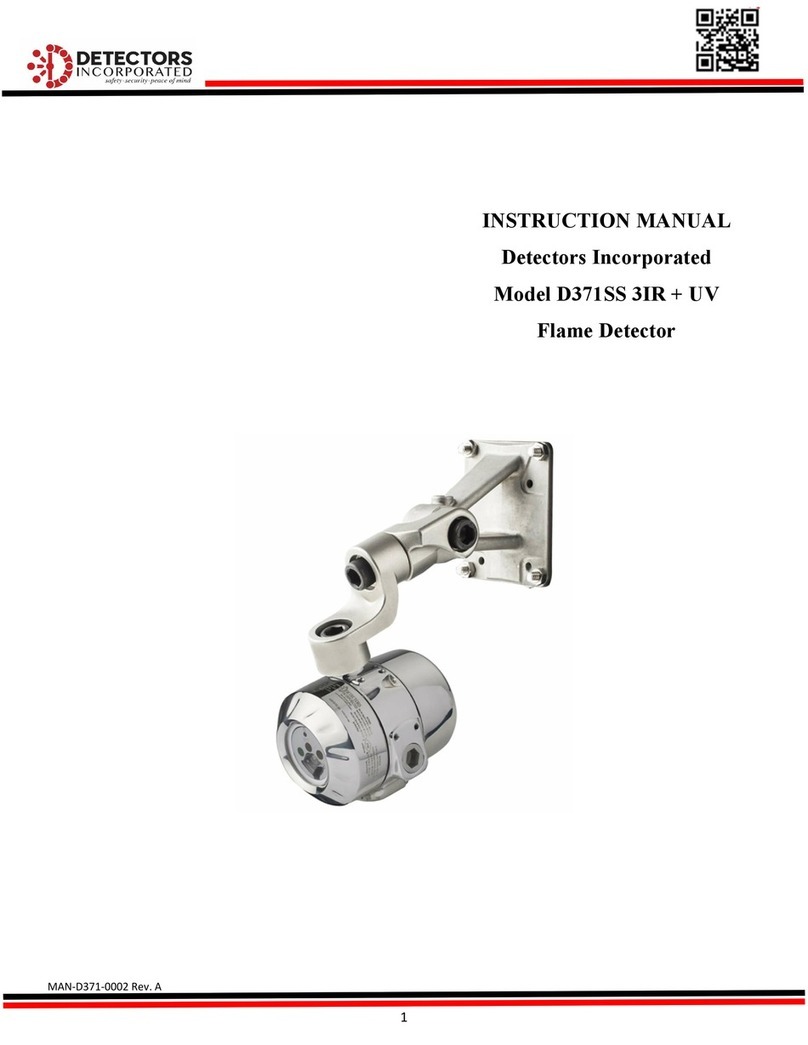
Detectors Incorporated D171SS 1IR + UV User manual

MAN-D171-0003
1
INSTRUCTION MANUAL
Detectors Incorporated
Model D171SS 1IR + UV
Flame Detector

MAN-D171-0003
2
Table of Contents
INTRODUCTION ………………………………………………………………….. 3 DETECTOR CONNECTIONS…………………………………………………… 14
Product description……………………………………………………………… 3 Wiring Connections……………………………………………………………… 14
Specifications………………………………………………………................. 4 M25 Conduit Entries…………………………………………………………… 14
Electrical………………………………………………………………………………. 4 Connector Plugs J1 and J2…………………………………………………… 15
Environmental……………………………………………………………………… 4 Wiring Schematic…………………………………………………………………16
Mechanical………………………………………………………………………….. 4
Detector Sensors, LED OPERATION AND STARTUP………………………………………………… 17
Indicators and Connection…………………………………………………… 5 Powering the Detector…………………………………………………………. 17
LED Status Indicators………………………………………..………………… 17
INSTALLATION…………………………………………………………………….. 8 Detector Self-Test………………………………………………………………… 18
GUIDELINE…………………………………………………………………………. 8 Alarm Test……………………………………………………………………………. 19
The Proper Detector…………………………………………………………… 8
Field-of-View…………………………………………………… ………………… 8 MAINTAINANCE………………………………………………………………….. 19
Positioning………………………………………………………………………… 9 Maintenance Requirements……………………………………………….19
Sensitivity Settings…………………………………………………………….. 9 Detector Inspection……………………………………………………………. 19
Environmental Conditions…………………………………………………. 10 Periodic Detector Testing…………………………………………………… 20
Wiring……………………………………………………………………............. 10 Functional Testing……………………………………………………………….. 20
Inspecting the Wiring Compartment…………………………………… 20
DETECTOR DIMENSIONS…………………………………………………. 10
MOUNTING THE DETECTOR……………………………………………. 11 D171SS Response Data……………………………………………………….. 21
Swivel Arm Assembly
(P/N: DA-001)………………………………………………………………… 11 TROUBLESHOOTING (TO BE ADDED LATER)……………………… 23
DETECTOR OUTPUT SIGNALS………………………………………. 11 EVENT LOG & FireGRAPH ………………………………..……………… 24
Outputs………………………………………………………………………….. 11 ACCESSORIES …………………………………..……..…………………… 25
Relay Latching / Non-Latching……………………………………… 12
4-20 mA Output…………………………………………………………… 12 PRODUCT SUPPORT………………………………………………………… 25
RS485 ModBus………………………………………………………………. 12 Technical and Customer Support…………………………………… 25
WARRANTY…………………………………………………………………… 26
CONFIGURING THE DETECTOR………………………………………. 12
Default Settings………………………………………………………………. 12APPENDIX “A”-
Factory Default Relay Settings………………………………………… 12 DETECTOR ORDERING INFORMATION………………………… 27
WIRING THE DETECTOR……………………………………………….. 13 APPENDIX “B”-
Wiring…………………………………………………………………………… 13APPROVALS & CERTIFICATIONS…………………………………… 28
Conduit…………………………………………………………………………. 13
Cable Glands…………………………………………………………………. 13
Shielded Cable………………………………………………………………. 13
Wire Gauge………………………………………………………………….. 13

MAN-D171-0003
3
1.0 Introduction
1.1 Product Description
The Detectors Inc. Model D171SS is an UV/IR flame detector
designed and optimized specifically for industries such
as warehouses, storage facilities, and other production
applications that require reliable general purpose fire
detection is needed. The D171SS senses the
Ultraviolet radiation in the UV spectrum and Infrared
radiation in a single band of IR in the range of 4.3-4.5
microns. The detector will respond to fires within 5 seconds.
The Model D171SS is a stand-alone flame detector in a
watertight NEMA 4-4X (IP67) and 316 stainless steel
explosion-proof enclosure designed for Class I, Division 1
(Zone 1) installations. The detector includes multiple
outputs including two fire alarm and auxiliary relays,
fault relay, 4-20 mA analog and RS485 ModBus.
The detector can be used as a stand-alone device or can be interfaced with any approved fire alarm panel, control
system, or PLC. The D171SS detector features an Automatic Self-Test for continuously monitoring its sensors and
electronics. Additionally, the detector is equipped with OptiRadar feature that continuously checks the optical
path integrity of the detector and the window blockage by external objects. This feature will initiate a Fault signal
if any object is blocking the viewing window within 1” of detector.

MAN-D171-0003
4
1.2 Specifications
1.2.1 General
Field-of-View: 100° Horizontal & Vertical
Spectral Sensitivity: UV: 180-260 nanometers
IR: 4.3-4.5 microns
Response Time: Alarm Relay: 3 - 5 Seconds
Aux. Relay: 3 - 5 Seconds
1.2.2 Electrical
Operating Voltage: 24 VDC nominal (18-31), Regulated
Power Consumption: Standby: 60 mA @ 24 VDC
Alarm: 90 mA @ 24 VDC
Heater: 180 mA additional
(Heater is optional and must be specified when ordering)
Relays Outputs: Alarm / Fault / Auxiliary
SPDT—contacts rated 2A @ 24 VDC
Alarm & Auxiliary relays: De-Energized
Fault relay: Energized
Aux. relay setting: 3 seconds
(Factory Default for Aux. Relay: 3 Seconds)
Analog Output: 0-20 mA Stepped -Source
Communication: RS485 ModBus RTU
Visual Indications: Green LED - Normal
Red LED - Alarm
Amber LED - Fault
Conduit Entries (2) M25
Optional M25 X 3/4" adapter available
Wiring: 12 AWG (3.3 mm²) - 22 AWG (33mm²)
1.2.3 Environmental
Humidity Range: 5 to 95% relative humidity, non-Condensing
Temperature Range: -40 to + 185°F (-40 to + 85 °C)
-55 to 185°F (- 48.3 to + 85 °C) [with use of Heater]
Enclosure Type: NEMA 4 & 4X, IP67
1.2.4 Mechanical
Enclosure Material: 316 Stainless Steel, Standard
Weight: 10 lbs. (4.5 kg)

MAN-D171-0003
5
Mounting: Stainless Steel Swivel Arm—Optional
Weight: 6.6 lbs. (3 kg)
1.2.5 Detector Sensors, LED Indicators and Connections
1.2.6
OptiRadar
Sensor
M25
Connection
Amber
LED
IR
Sensor
Green
LED
UV
Sensor
Red
LED
M25
Connection
M16 Connection for
Swivel Arm
(top of the enclosure)

MAN-D171-0003
6
Equipment Label, Certificate #s and Hazardous Location ratings
1.2.6.1 Label: LAB-RANG-0009
Type
Ratings
Model #
D171SS-XXXX-NX
US
FM17US0336X
Class I, Division 1, Groups A, B, C, and D T6…T4 Ta=-40°C to Tx
Class II/III, Division 1, Groups E, F and G T6…T4 Gb Ta=-40°C to +Tx
Class I, Zone 1 AEx db IIC T6…T4 Gb Ta=-40°C to +Tx
Zone 21 AEx tb IIIC T85°C…T135°C Db Ta=-40°C to Tx
Type 4X and IP66/67
For XP, DIP and AEx db, temperature code is T6 when Tx is +60°C, T5 when Tx is +75°C or T4 when Tx is +85°C
For AEx tb, temperature code is T85°C when Tx is +60°C, T100°C when Tx is +75°C or T135°C when Tx is +85°C.
Refer to installation instruction/manual
Canada
FM17CA0120X
Class I, Division 1, Groups A, B, C, and D T6…T4 Ta=-40°C to Tx
Class II/III, Division 1, Groups E, F and G T6…T4 Gb Ta=-40°C to +Tx
Ex db IIC T6…T4 Gb Ta=-40°C to +Tx
Ex tb IIIC T85°C…T135°C Db Ta =-40°C to +Tx
Type 4X and IP 66/67
For XP, DIP and Ex db, temperature code is T6 when Tx is +60°C, T5 when Tx is +75°C or T4 when Tx is +85°C
For Ex tb, temperature code is T85°C when Tx is +60°C, T100°C when Tx is +75°C or T135°C when Tx is +85°C
Refer to installation instruction/manual
ATEX
FM17ATEX0101X
II 2 G Ex db IIC T6… T4 Gb Ta=-40°C to +Tx IP66/67
For Ex db temperature code is T6 when Tx is +60°C, T5 when Tx is +75°C, T4 when Tx is +85°C
For Ex db, temperature code is T85°C when Tx is +60°C, T100°C when Tx is +75°C or T135°C when Tx is +85°C
Refer to Installation instruction/manual
IECEx
IECEx FMG 17.0034X
Exdb IIC T6…T4 Gb Ta=-40° to +Tx
Ex tb IIIC T85°C…T135°C Db Ta =-40°C to +Tx
IP66/67
T6 when Tx is +60°C, T5 when Tx is +75°C, T4 when Tx is +85°C
T85°C when Tx is +60°C, T100°C when Tx is +75°C, T135 when Tx is +85°C
Refer to installation instruction/manual
CE
1725
Warning
CAUTION: OPEN CIRCUIT BEFORE REMOVINF COVER
ATTENTION: OUVRIR LE CIRCUIT AVANT DENLEVER LE COUVERCLE
WARNING-DO NOT OPEN WHE AN EXPLOSIVE ATMOSPHERE IS PRESENT
Ne Pas Ouvir En Predence Dune Atmosphere Explosive
FOR DIVISIONS, SEAL CONDUIT WITHIN 450 mm OF ENCLOSURE
For Zone installations, install a seal within 50mm of the enclosure
Pour les zones Canadiennes, un scellement doit etre installe a mohs de 50mm du boiler
WARNING-Do not open when energized or an explosive atmosphere is present

MAN-D171-0003
7
Label: LAB-RANG-0010
Type
Ratings
Model #
D171SS-XXXX-MC
US
FM17US0336X
Class I, Division 1, Groups A, B, C, and D T6…T4 Ta=-40°C to Tx
Class II/III, Division 1, Groups E, F and G T6…T4 Gb Ta=-40°C to +Tx
Class I, Zone 1 AEx db IIC T6…T4 Gb Ta=-40°C to +Tx
Zone 21 AEx tb IIIC T85°C…T135°C Db Ta=-40°C to Tx
Type 4X and IP66/67
For XP, DIP and AEx db, temperature code is T6 when Tx is +60°C, T5 when Tx is +75°C or T4 when Tx is +85°C
For AEx tb, temperature code is T85°C when Tx is +60°C, T100°C when Tx is +75°C or T135°C when Tx is +85°C.
Refer to installation instruction/manual
Canada
FM17CA0120X
Ex db IIC T6…T4 Gb Ta=-40°C to +Tx
Ex tb IIIC T85°C…T135°C Db Ta =-40°C to +Tx
Type 4X and IP 66/67
For XP, DIP and Ex db, temperature code is T6 when Tx is +60°C, T5 when Tx is +75°C or T4 when Tx is +85°C
For Ex tb, temperature code is T85°C when Tx is +60°C, T100°C when Tx is +75°C or T135°C when Tx is +85°C
Refer to installation instruction/manual
ATEX
FM17ATEX0101X
II 2 G Ex db IIC T6… T4 Gb Ta=-40°C to +Tx IP66/67
For Ex db temperature code is T6 when Tx is +60°C, T5 when Tx is +75°C, T4 when Tx is +85°C
For Ex db, temperature code is T85°C when Tx is +60°C, T100°C when Tx is +75°C or T135°C when Tx is +85°C
Refer to Installation instruction/manual
IECEx
IECEx FMG 17.0034X
Exdb IIC T6…T4 Gb Ta=-40° to +Tx
Ex tb IIIC T85°C…T135°C Db Ta =-40°C to +Tx
IP66/67
T6 when Tx is +60°C, T5 when Tx is +75°C, T4 when Tx is +85°C
T85°C when Tx is +60°C, T100°C when Tx is +75°C, T135 when Tx is +85°C
Refer to installation instruction/manual
CE
1725
Warning
CAUTION: OPEN CIRCUIT BEFORE REMOVINF COVER
ATTENTION: OUVRIR LE CIRCUIT AVANT DENLEVER LE COUVERCLE
WARNING-DO NOT OPEN WHE AN EXPLOSIVE ATMOSPHERE IS PRESENT
Ne Pas Ouvir En Predence Dune Atmosphere Explosive
FOR DIVISIONS, SEAL CONDUIT WITHIN 450 mm OF ENCLOSURE
For Zone installations, install a seal within 50mm of the enclosure
Pour les zones Canadiennes, un scellement doit etre installe a mohs de 50mm du boiler
WARNING-Do not open when energized or an explosive atmosphere is present

MAN-D171-0003
8
2.0 Installation
2.1 Specific Conditions of use:
2.1.1 The D171SS IR1 with Enhanced UV Flame Detectors Includes flamepath joints, consult with
Detectors Inc if repair of the flamepath joints in necessary.
2.1.2 The temperature code of the D171SS IR1 with Enhanced UV Flame Detectors is based on the
following maximum ambient temperatures.
Temperature Codes (T-Codes)
Maximum Ambient Temperature (Tx)
Gases/Vapors
Dust
T6
T85°C
+60°C
T5
T100°C
+75°C
T4
T135°C
+85°C
2.2 Guideline
There are several important factors that must be considered when installing flame detectors to optimize
their performance. Below are the guidelines to be observed as a minimum:
2.2.1 The Proper Detector
Verify that you have purchased and received the right detector for your application. Survey the
hazard area to ensure that there are adequate number of detectors for proper coverage. This is
determined by the Field-of-View of detector, the distance from the hazard area and the
sensitivity setting. When in doubt, please contact the factory for additional information.
2.2.2 Field-of-View
Field-of-View (FOV) or cone of vision of
a flame detector is a three-dimensional
conical volume with the apex at the
center of flame detector and extending
outward. FOV is normally determined
by the detector enclosure, size and
shape of the window and the sensors
placement. FOV from various
manufacturers can vary from 70 - 120 degrees wide. A wide FOV does not necessarily means
the flame detector is better; different applications require different FOV for the area coverage.
Smaller hazardous areas and certain applications require precise coverage so that the FOV of
the detector does not extend beyond the area intended to be covered.

MAN-D171-0003
9
50
O
45
O
50
O
45
O
100 ft
50 ft
50
O
45
O
100° True Conical Field of View
Fire Response at maximum Angles:
Direction
Avg. Response
Time (Seconds)
Horizontal
←
8
Horizontal →
8
Vertical ↓
10
Vertical ↑
8
2.2.3 Positioning
The detector should be installed such that the center of the detector is aimed at the center of
the area to be protected (hazard area). Detectors should be installed above the hazard area
pointing downward at an angle between 35-55 degrees from horizontal with no obstruction of
the Field-of-View. Detector height generally should be approximately 1½ to 2½ times the height
of tallest object in the hazard area. The height may vary depending on the application,
indoor/outdoor installation and size of the hazard area. Detector should be easily accessible for
maintenance.
2.2.4 Sensitivity Setting
The Model D171SS detector has the following sensitivity settings and responses to 1 ft. x 1 ft. n-
heptane pan fires within 3-5 seconds
Table 1
Sensitivity
Setting
Distance
High
100 ft. (30.5 m)
Low
50 ft. (15.2 m)

MAN-D171-0003
10
2.2.5 Environmental Conditions
If possible, detectors should be installed so that they are protected from rain, snow, direct
sunlight and other intense sources of IR or UV radiation. It is critical to protect the detector
against ingress of moisture inside the enclosure. Detector’s cover must be tightened per
manufacturer’s recommended procedure and the conduits openings must be properly sealed to
prevent moisture from entering the enclosure.
2.2.6 Wiring
Approved shielded cable must be used to protect the electronics against interference from RFI
and EMI. Generally, 18 or 16 gauge shielded cable is recommended. The wire size will depend
on the distance from detector to the control system and the number of detectors connected to
the same power source. Cable shield should be terminated at a ground lug near the detector.
NOTE: Supply field wiring must be rated at least 25°C greater than the maximum ambient
temperature of the application.
2.3 Detector Dimensions
The D171SS detector is supplied with 316 Stainless Steel enclosure suitable for installation in Class I, Div.
1 (Zone 1) Hazardous areas. The enclosure is Water-Tight and rated NEMA 4 & 4X with ingress protection
of IP67. The enclosure dimensions are as shown in Figure (1).
Fig. 1
Detector Dimensions
(Dimension in mm)

MAN-D171-0003
11
2.4 Mounting the Detector
Detector should be mounted on a rigid and vibration free surface using the Swivel Arm Assembly Model
SM-37 (P/N: DA-001).
2.4.1 Swivel Arm Assembly (P/N: DA-001)
Swivel Arm assembly is fabricated from 316 stainless steel and shipped fully assembled. It
consisted of three sections: mounting base, center piece, and detector holding piece. It has a
ratchet design allowing detector rotation in vertical and horizontal planes.
Fig. 2 – Swivel Mounting Arm
To install the Swivel Arm Assembly:
1. Unpack and inspect the Swivel Arm assembly.
2. Place the mounting base on a rigid and flat surface and secure it with (4) 7mm or 1/4" bolts
of proper length (bolts not supplied).
3. Place the detector under the Swivel Arm assembly and secure it to the detector holding piece
of the Swivels Arm assembly with an M16 bolt supplied with the Swivel Arm assembly, tighten
the bolt.
4. Detector can now be adjusted vertically and horizontally by loosening the vertical and
horizontal M16 bolts on the Swivel Arm assembly and aiming the detector to the hazard area.
2.5 Detector Output Signals
2.5.1 Outputs
The detector has the following outputs (no power applied):
Fire Alarm Relay (SPDT) – Normally Open/Normally Closed
Fault Relay (SPST) – Normally Open
Auxiliary Relay (SPDT) – Normally Open/Normally Closed
Analog output: 0-20 mA stepped
RS-485 ModBus RTU

MAN-D171-0003
12
2.5.2 Relay Outputs: Latching / Non-latching
Detectors are shipped from factory with “Non-Latching” relays as factory standard. If “Latching”
relays are required, must be specified when ordering. Please refer to Appendix “A” for optional
configurations.
2.5.3 4-20mA Output
A non-isolated 0-20 mA stepped analog output (Current Source) is also provided as standard.
Following output levels are defined:
Table 2 - Analog Current output levels
Analog Output
(mA)
Detector Status
0.0
Fault - No Power
< 1.0
Fault - General
2.0 ± 0.3
Fault – self-test
4.0 ± 0.3
Normal (no alarm, no fault)
20.0 ± 0.3
Alarm
Maximum loop resistance for the analog output is 800 Ohms
2.5.4 RS485 ModBus Communication
The detector model D171SS is also equipped with a standard RS485 ModBus communication
protocol for interfacing with devices or controllers using the Modbus standard. The RS485
communication protocol is also useful in communicating with the detectors for viewing or
downloading Event Logs and Fire Charts using a laptop and the optional LabVIEW programming
software available from Detectors Inc.
2.6 Configuring the Detector
2.6.1 Default Settings:
Unless specified, The D171SS detector is shipped factory configured as described below:
Fire Alarm Relay: Normally De-Energized, Non-Latching (NO/NC)
Fault Relay: Normally Energized, Non-Latching (NC)
Auxiliary Relay Normally De-Energized, Non-Latching (NO/NC)
4-20 mA Stepped Analog, Sourcing
Communication ModBus RTU Protocol
2.6.2 Factory Default Relay Settings
All relays with standard configuration are “Non-Latching”. If “Latching” mode is required, it must
be specified when ordering

MAN-D171-0003
13
2.7 Wiring the Detector
2.7.1 Wiring
Detectors shall be wired in accordance with the local codes and standards for the area they are
intended for.
Detector shall be wired in accordance with the current National Electrical Code (NFPA 70) for
hazardous location wiring procedure in the United State; or according to the local codes in other
countries, observing the requirements for Electrical Safety.
2.7.2 Conduit
If conduit is used, conduit type and installation in a Hazardous Area shall comply with the National
Electric Code Standard, Article 500. For locations, other than the United States, use of conduit or
cable glands shall comply with the local codes. Proper conduit sealing compound must be used
to prevent ingress of moisture.
2.7.3 Cable Glands
If Cable Glands are used in Hazardous and Industrial areas, they should meet the North American
and International codes and standards for such installations.
2.7.4 Shielded Cable
Shielded cable is highly recommended for protection against RFI and EMI. Where multiple
detectors are installed, the wire size will depend on the number of detectors connected to a
power supply and the length of cables and the supply voltage. The voltage at any given detector
shall not be less than 18 VDC. Normally, 18 or 16-gauge (AWG) wire is adequate for short runs
and fewer than 10-12 detectors.
2.7.5 Wire Gauge
Table below is a partial listing of the American Wire Gauge Property and Conductor Size. Using a
power supply with 22-28 VDC output rating and the table below, calculations can be performed
to obtain the allowable voltage drop across a selected wire gauge in order to maintain minimum
of 18 V at each detector connected to the power supply.
Table 3 -American Wire Gauge (AWG) and Properties Table
AWG
Area (mm²)
Resistance
Ohms/1000 ft.
Resistance
Ohms/1000 m)
12
3.31
1.59
5.21
14
2.08
2.53
8.28
16
1.31
4.02
13.17
18
0.82
6.39
20.94
20
0.52
10.15
33.20

MAN-D171-0003
14
2.8 Detector Connections
2.8.1 Wiring Connections
Wiring connections are made to connectors located inside the rear compartment. The detector
has two separate compartments one in the front housing the detector electronics and one in the
back containing the PC boards with connector terminal for wiring. Compartments are separated
by a physical barrier in order to keep the electronics from being exposed to environment while
wiring.
NOTE: For US Zones, the internal grounding terminal must be used. The external grounding
terminal is supplementary.
CAUTION
: The front cover should not be removed at any time. Removing the electronic
module and tampering with the circuit board
will void the detector warranty. Contact
factory for detector configuration changes requiring access to DIP switches on the face of
the detector.
2.8.2 M25 Conduit Entries
There are two M25 conduit entries located at the wiring compartment, one or both conduit
entries may be used for routing the cable(s). If only one conduit entry is used, the unused conduit
entry must be properly sealed with an approved sealing material similar to Teflon dope or tape.
Metal-to-Metal will NOT provide adequate seal against the ingress of moisture. Simply remove
the 25 mm plug, apply the sealing compound and re-install the plug to ensure a weather-tight
integrity of the wiring compartment.
An M25 x 3/4” adapter will be supplied when 3/4" NPT connections are specified.
Fig. 3
M25 x 1.5
M25 x 1.5

MAN-D171-0003
15
2.8.3 Connector Plugs J1 and J2
The connector plugs J1 and J2 can be removed for wiring and re-installed once the wiring is
completed. Please note that there are 24VDC(+) and 24VDC(-) terminals on each connector.
These terminals are internally connected, and the power may be connected to one connector plug
only.
2.8.4 Wiring Schematic
A typical wiring schematic for D171SS detector is shown in Figure (4).

MAN-D171-0003
16
Fig. 4 –Detector Wiring Schematic

MAN-D171-0003
17
3.0 Operation & Startup
3.1 Powering the Detector
3.1.1 Detector Operation
Once the installation of the detector and wiring are completed, the next step is to power up each detector
individually and perform functional tests by generating Fire Alarm and Fault conditions.
NOTE: When performing functional tests during the start-up or maintenance always check to
make sure that the output of the detector to fire suppression systems has been disabled.
CAUTION: When performing functional tests during the start-up or
maintenance always check to make sure that the output of the detector
to fire suppression systems has been disabled.
3.1.2 LED Status Indicators
Apply power to the detector and wait 1-2 minutes until the detector has completed its diagnostic
process and its circuitry has been stabilized. During this process detector LEDs will flash
sequentially clockwise several times; once normalized its green LED will remain ON for one second
and OFF for one second indicating normal operation.
The detector status is indicated by 3 color LEDs as follows:
Normal Operation: The Green
LED will turn ON and OFF every
second indicating that the detector
is operating properly and there is
no Fault or Alarm. If the Green light
is not flashing, please check wiring
or the 24 VDC power to the
detector.
Fault Condition: The Amber LED
will turn on and stay on when
either a General Fault or Self-Test
Fault is detected. The detector will
return to Normal when Fault is
cleared and the Amber LED will
turn off automatically.
Green
LED
Amber
LED

MAN-D171-0003
18
3.1.3 Detector Self-Test:
The D171SS detector is programmed to perform an automatic diagnostic self-test periodically
(factory default is every 5 minutes). During the automatic Self-Test, the detector will turn on
both Amber LEDs flashing for 2-3 seconds. Following the automatic Self-Test, the detector will
return to Normal Operation if no Faults were detected. The detector will also monitor the
blockage of its viewing window every second using the OptiRadar feature. If any object is
placed within 1/2” of detector’s window for longer than 60 seconds, the detector will declare a
Fault.
Alarm Condition:
The Red LED
will turn on indicating that the
detector has detected fire. The
Red LED will remain on as long as
the fire is present and will turn off
once the fire has been
extinguished. The detector status
will then return to Normal
Condition with the
Green LED
flashing
Red
LED
OptiRadar
Sensor

MAN-D171-0003
19
3.1.4 Alarm Test: Using Manual Self-Test
Fire Alarm Test: This test can be done by forcing the detector into its Self-Test Mode. This can be
accomplished by connecting (shorting) the terminal #7 of the J2 connector to 24VDC (-) until the
Red LED is turned on (Fig. 4, Page 14).
Caution: All relay outputs to Control Panel and extinguishing systems must be disabled to prevent
system alarms and unwanted extinguishing discharge.
1. Detector with “Latching” configuration - Once in Alarm, remove 24 VDC(-) from terminal #7.
The detector, however; will remain in Alarm mode until it is reset by momentarily recycling
power to detector. To reset the detector simply connect (or short) the terminal #9 of the J2
connector to 24 VDC (-). The detector will then return to Normal.
2. Detector with “Non-Latching” configuration - Once the detector is in Alarm, removing 24
VDC(-) from terminal #7 (J2) return the detector automatically to Normal within 5 seconds.
4.0 Maintenance
4.1 Maintenance Requirements
4.1.1 Detector Inspection
The D171SS detector does not require calibration at any time after installation. The detector also
is not easily affected by dirt, dust, smoke, water and even thin layer of ice built-up on the lens. To
maintain the detector in best working condition and performance it is recommended to inspect
and clean the detector periodically. It is very important to keep the detector lens (window)
cleaned particularly in heavy industrial facilities and dirty environments. Contaminants such as
dirt and oil on the lens may attenuate some of the UV and IR radiation lowering the detector’s
sensitivity. The following is a routine maintenance guideline:
1. Inspect and clean the lens once every 6 months in clean environments or more often in dirty
environments.
2. The detector lens is made of Sapphire and thus care should be taken not to use any harsh
chemicals or scratcher pads to clean it. A simple cotton cloth or cotton balls using water and
mild detergent will be the best option. If oil has accumulated on the lens, use a small amount
of IPA solution (Isopropyl Alcohol) and a cotton ball or clean cloth to clean the lens.
OptiRadar
Sensor
Sapphire
Window

MAN-D171-0003
20
3. Unlike the conventional flame detectors, The D171SS has no external reflector or reflector
ring for reflecting the IR or UV test source generated by the detector back onto the IR or UV
sensors for determining the obscurity due to the build-up of contaminants on the lens. The
detector uses its Sapphire window as a “reflector” for self-test purposes and its OptiRadar
feature to determine the obscurity of the window. The detector will initiate a self-test FAULT
if excessive amount of dirt, dust, oil other contaminants accumulate on the lens. Should the
contamination on the lens exceed the allowable threshold, the detector will initiate a self-test
FAULT.
4.2 Periodic Detector Testing
4.2.1 Functional Testing
Every detector should be functionally tested at least once every 6 to 12 months or as required by
the local authorities having jurisdiction. This shall include but not limited a complete “end-to-end
test” of all detectors and verifying that all relays and output signals perform per manufacturer’s
original Specifications. The detector can be put into Alarm mode as described in Section 3.1.4 and
should be used for testing as follows:
1. Caution: Prior to performing the fire test, ensure that all extinguishing systems are
disabled or bypassed. Follow the procedure outline in Section 3.1.4 forcing the detector into
Alarm. Detector output signals should be monitored to verify that they are functioning
properly.
2. A Fault test can be performed by forcing the detector into a Fault condition. This can be
accomplished by lowering the input voltage to the detector to below 18 volts (low voltage
fault) and monitoring the status of the Fault relay and Fault LED.
3. To perform a self-test Fault using the OptiRadar feature built into the detector, place a small
piece of opaque material such as thin cardboard directly in front of the Window thus blocking
the detector’s view. The detector’s Amber LED (Fault) will begin flashing for 60 seconds
indicating blockage of the viewing window. Holding the cardboard longer than 60 seconds
will turn the flashing Amber LED to steady Amber LED indicating the detector has failed the
self- test and has declared a Fault.
4.2.2 Inspecting the Wiring Compartment
In locations with high humidity and rainfall it is recommended to open the back cover and visually
inspect inside of the wiring compartment for possible ingress of moisture, clean if needed. Inspect
the threads on both the enclosure and the cover. Clean and apply a small amount of Lithium-
based grease to keep the threads lubricated. Re-Close the cover and tighten it to the
manufacturer’s recommended torque 5-10 ft.-lbs.
Table of contents
Other Detectors Incorporated Security Sensor manuals
Popular Security Sensor manuals by other brands

STEINEL
STEINEL IS 1 quick start guide

MSA
MSA OptiVizor Instructions for use

Keysight Technologies
Keysight Technologies N4377A user guide

B.E.G.
B.E.G. LUXOMAT PD3-1C Installation and operating instruction

Wavetronix
Wavetronix SmartSensor V user guide

Agilent Technologies
Agilent Technologies G3485A installation instructions