manuals.online logo
Brands
  1. Home
  2. •
  3. Brands
  4. •
  5. B.E.G.
  6. •
  7. Security Sensor
  8. •
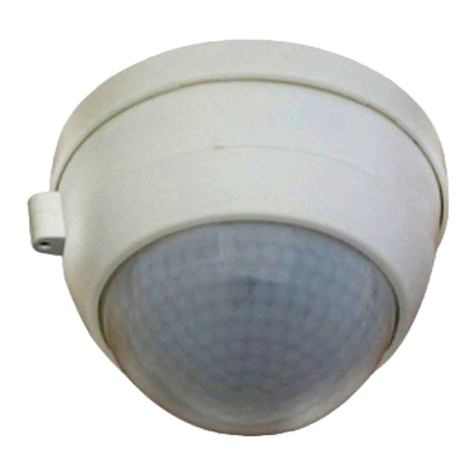
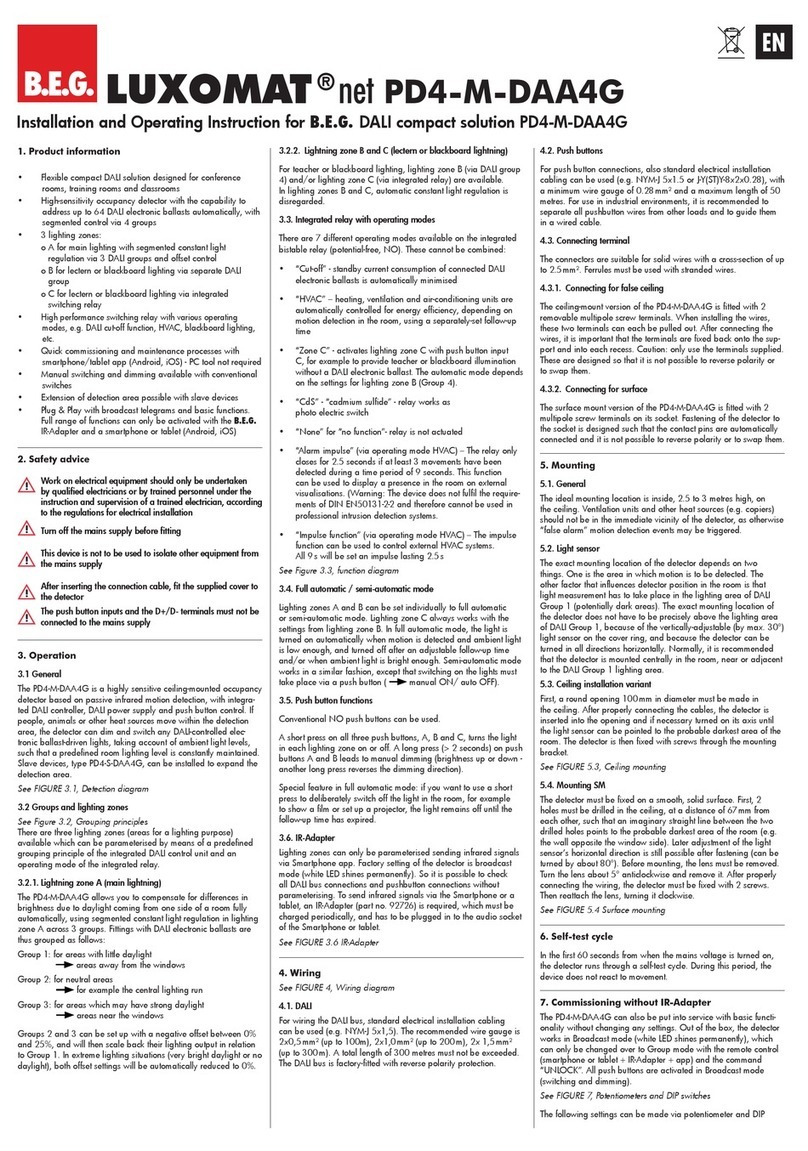
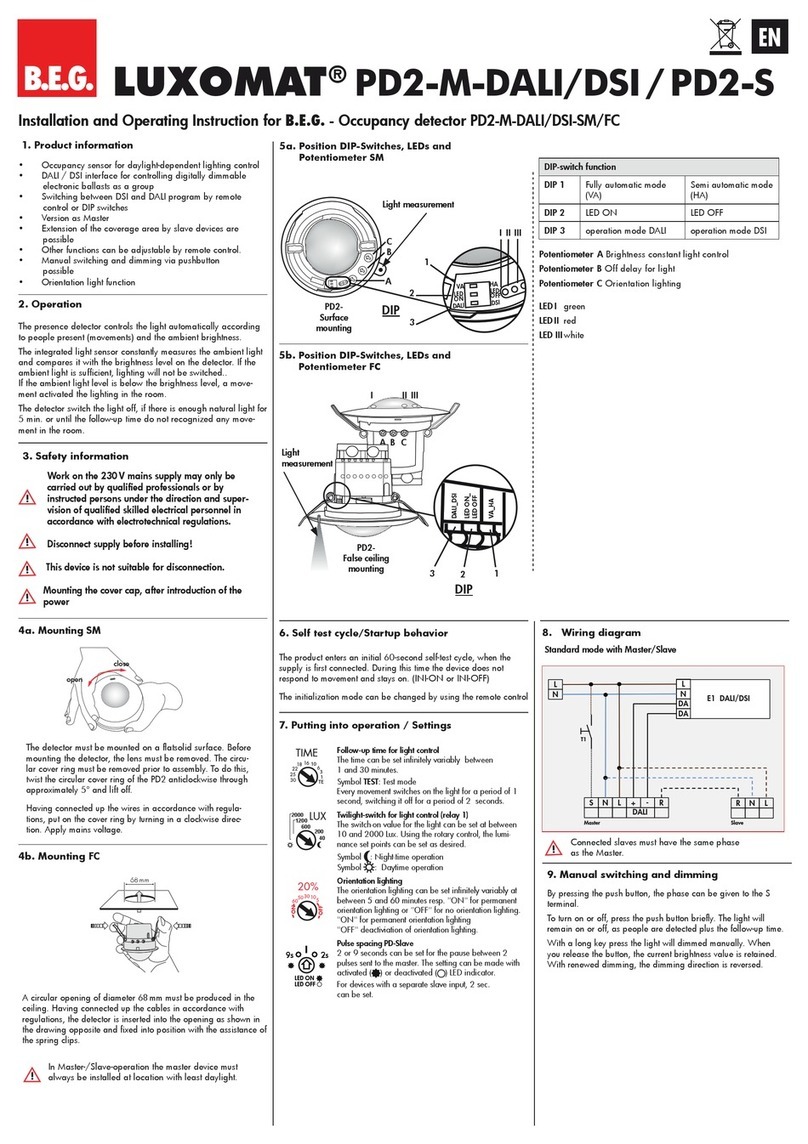
  9. B.E.G. LUXOMAT PD3-1C User guide

B.E.G. LUXOMAT PD3-1C User guide

4m
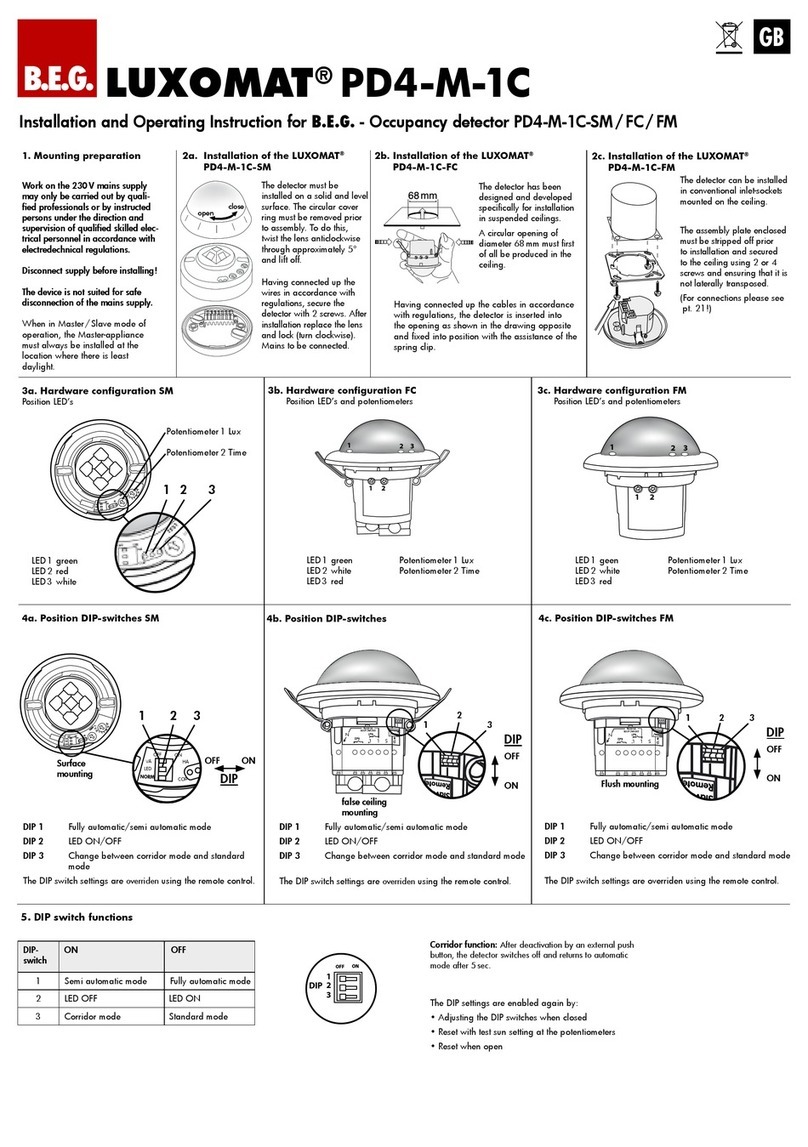
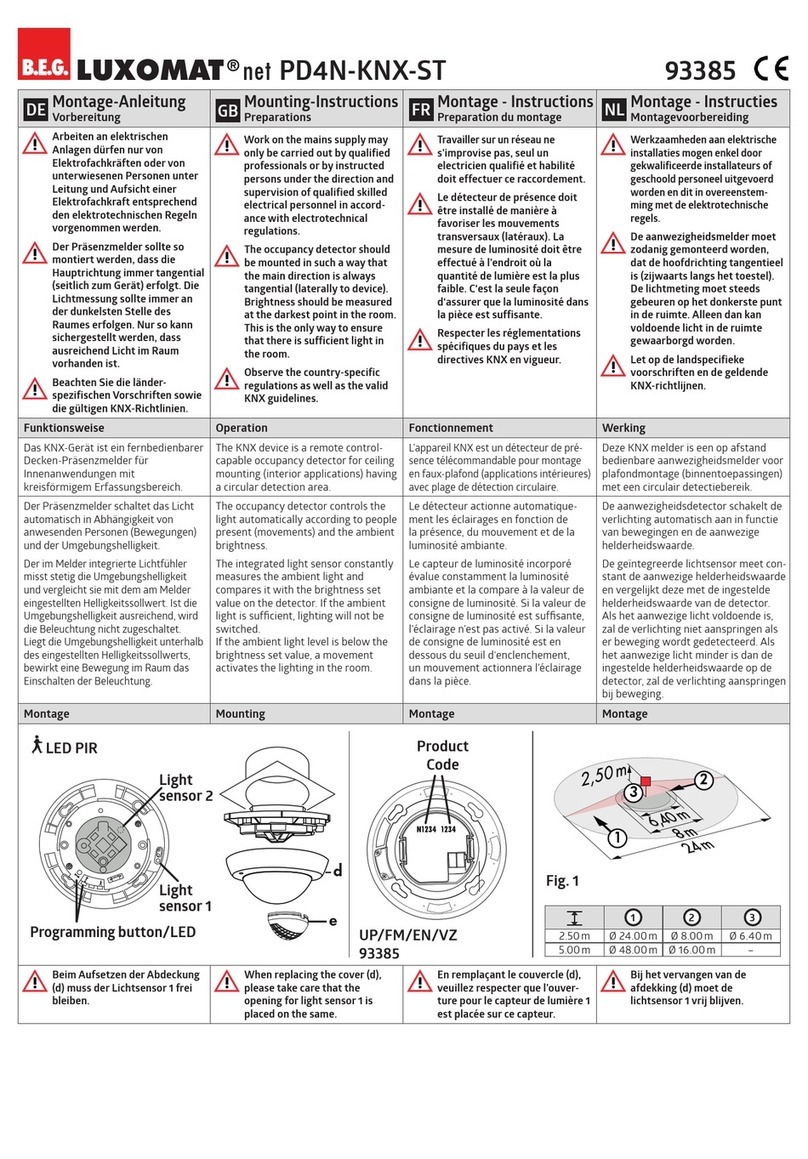
Installation and Operating Instruction
2a.
Installation of the LUXOMAT
®
PD3-1C-SM
2b.
Installation of the
LUXOMAT
®
PD3-1C-FC
Sensor and power supply in one case
Power supply: 230 V~ ±10 %
Power consumption: < 1W
Ambient temperature: -25°C to +50°C
Degree of protection/class:
SM IP44, FC IP20 / II
Settings: locally
Area of coverage: circular 360°
Range of coverage Ø H 2.50 m / T = 18°C:
smaller movements 4 m / tangential 10 m / radial 6 m
Recommended height for mounting:
2 - 3 m
Light measurement: mixed light, daylight + artificial
light
Lux values - Potentiometer: 10 - 2000Lux
• Channel 1 for light-connection
Type of contact: NOC/with pretravel tungsten
contact
Contact load: 2000 W, 230 V~, cos ϕ=1 /
1000 VA cos ϕ= 0.5
Time-settings: 30 sec. - 30 min. / Test
Dimensions H x Ø [mm] AP DE
PD3-1C 52 x 106 84.5 x 80
Visible portion when built into ceiling: 15 x 80 mm
Version: v.01
Declaration of Conformity: The product complies with
the low voltage recommendation 2006/95/EC and the
EMV recommendation 2004/108/EC.
4.
Technical data
PD3-1C
5. Trouble shooting
1. Lamp does not light up
Lamp may be defect:
Replace lamps
No mains connection/power:
Check connection and mains fuse by qualied electrician
Incorrect setting of CDS twilight threshold:
Correct setting of CDS threshold
Lens of sensor unit obstructed by dirt or other objects:
Clean lens, remove objects
2. Lamp turns ON too late or detection range too small
PD3-1C is mounted too high:
Correct mounting if required.
3. Lamp stays ON continuously
Continuous thermal activity detected ie fan, central heat-
ing ducts, animals within detection area:
Remove heatsource. Check proper function of
PD3-1C by
covering the fresnel-lens. After expiry of delay timer,
PD3-1C has to turn OFF lighting.
PD3-1C connected in parallel to a manual override
switch:
Connect switch correctly
4. Unintended switching of light
Movement of heat source within detection area:
Check on presence of animals, fans or heaters
The detector must be installed on a
solid and level surface. There is no
need for frames.
For mounting remove lens (C) (turn
anticlockwise). Fasten the mounting
base to the ceiling.
Having connected up the wires in accordance with
regulations, secure the detector with 2 screws as per the
illustration above.
1. Mounting preparations
Work on the 230 V mains supply may only be carried out by quali-
fied professionals or by instructed persons under the direction and
supervision of qualified skilled electrical personnel in accordance
with electrotechnical regulations.
Disconnect supply before installing!
The detector has been designed
and developed specifically for
installation in suspended ceilings.
A circular opening of diameter
68 mm must be cut into ceiling.
Having connected up the cables in accordance with
regulations, the detector is inserted into the opening as
shown in the drawing above and fixed into position with
the assistance of the spring clips.
7. Article / Part nr.
6. Range of Coverage
quer zum Melder gehen
frontal zum Melder gehen
Unterkriechschutz
Walking across
Walking towards
Smaller movements
1
2
3. Putting into operation / Settings
Initialization
In the first 60 seconds after connecting the power supply, the
LUXOMAT®PD3-1C goes through a self-check. During this time the
detector does not react to the movements, but the detector stays on
or off, depending on the choice of the initalization mode.
INI-OFF/ON
You can adjust, whether the detector stays on or off
during the first 60 seconds of the initialization mode.
Attention: During INI-OFF the detector does not
switch on, after adding the power supply. Even a
movement brings the detector to switch on after 60
seconds.
Follow-up time for light control
The time can be set infinitely variably at between
30 seconds and 30 minutes.
Symbol : impulse < 1sec.
Symbol TEST: Test mode
(Every movement switches on the light for a period of
1 second, switching it off for a period of 2 seconds
after that regardless of the level of brightness.)
Twilight-switch for light control
The switch-on value for the light can be set at
between 10 and 2000 Lux. Using the rotary control,
the luminance set points can be set as desired.
Symbol : Night-time operation
Symbol : Daytime/Night-time operation
Adjusting sensitivity
For sensitivity adjustment of the detector, both in
the interior and the exterior range, the PD3-1C is
equipped with an additional knob (see pictures) for
excluding sources of interference, e.g. bad weather
conditions or draught air.
Max: for interior use
(recognition of the slightest movements)
Min: for exterior use
(exclusion of sources of interference)
120 6050
40
30
15
10
A
16 10 5
2
1
30
15
TEST
2000
1200
600
200
40
5
max.
min.
2
4
6
8
12
30
secs
30
mins
1
min
TEST
2000
1200
600
200
40
10 m
6 m
4 m
10 m
360°
2.50 m
1
2
3
3
Type SM FC
PD3-1C 92194 92197
ca. 68 mm
INI-
ON
INI-
OFF
!
B.E.G.
LUXOMAT®
PD3-1C
RUS
8. Wiring diagrams
MAN 5549 – 250613–2
11. Installation examples
10. PD3-1C - Dimensions
PD3-1C-SM
PD3-1C-FC
7055
15
R L' N L L NO NO
3A
230VAC
50-60Hz
Slave /
Remote
84,5
74
14
52
106
NL'
L
N'
L
L'L N
NL'
L
N'
L
L' LN N
E1
PD3-1C-SM
PD3-1C-FC
E1
9. PD3-1C - Connections
Standard mode with 1-channel motion detector
Standard mode with 1-channel motion detector with
NC pushbutton
Parallel connection with 1-channel motion detectors
Standard mode with 1-channel motion detector
(e.g. stairs)










L
N
L΄
΄΄΄LN
C1
E1













L
N
L΄
΄΄΄LN
C1
E1
T1















L
N
L΄
΄΄΄LN
C1
E1
L΄
΄΄΄LN
C1
Standard mode with 1-channel motion detector with
permanent light function














L
N
L΄
΄΄΄LN
C1
E1
S1
optional:
S1 = switch for permanent light
RC = RC-suppression kit if required
T1 =
NC button
Manual switching addition-
ally possible (press opener
approx. 2 sec.). The position
of the potentiometers should
not be on “test” or “sun”.
If so, the pre-set time and
safety values get lost








L
N
L΄
΄΄΄LN
C1
E1
LN
34
T1
T2
30 sec. 
10 min.
~6 m
6 m 7 m
18 m
6 m
~6 m
6 m
12 m
6 m
6 m
4 m
6 m

Other B.E.G. Security Sensor manuals

B.E.G. Luxomat BL4 User manual

B.E.G.

B.E.G. Luxomat BL4 User manual

B.E.G. LUXOMAT PICO-N-M-1C-FC User guide

B.E.G.

B.E.G. LUXOMAT PICO-N-M-1C-FC User guide

B.E.G. LUXOMAT PD2N-KNX-ST-UP User manual

B.E.G.

B.E.G. LUXOMAT PD2N-KNX-ST-UP User manual

B.E.G. LUXOMAT PD4-M-2C-DS User guide

B.E.G.

B.E.G. LUXOMAT PD4-M-2C-DS User guide

B.E.G. LUXOMAT PD4-M-GH-SM User guide

B.E.G.

B.E.G. LUXOMAT PD4-M-GH-SM User guide

B.E.G. KNX RC-plus next 230 KNX Service manual

B.E.G.

B.E.G. KNX RC-plus next 230 KNX Service manual

B.E.G. LUXOMAT PD9-DIGI-FC User guide

B.E.G.

B.E.G. LUXOMAT PD9-DIGI-FC User guide

B.E.G. LUXOMAT PD4-M-1C Series User guide

B.E.G.

B.E.G. LUXOMAT PD4-M-1C Series User guide

B.E.G. Luxomat PD2-S User manual

B.E.G.

B.E.G. Luxomat PD2-S User manual

B.E.G. LUXOMAT PD9-M-DALI/DSI-FC User guide

B.E.G.

B.E.G. LUXOMAT PD9-M-DALI/DSI-FC User guide

B.E.G. LUXOMAT PD11-KNX-FLAT-DX How to use

B.E.G.

B.E.G. LUXOMAT PD11-KNX-FLAT-DX How to use

B.E.G. Luxomat PD2-S User manual

B.E.G.

B.E.G. Luxomat PD2-S User manual

B.E.G. LUXOMAT PD4N-KNX-K-DX How to use

B.E.G.

B.E.G. LUXOMAT PD4N-KNX-K-DX How to use

B.E.G. LUXOMAT PD5-M-1C-Clip User guide

B.E.G.

B.E.G. LUXOMAT PD5-M-1C-Clip User guide

B.E.G. Luxomat PICO-M-1C-FC User guide

B.E.G.

B.E.G. Luxomat PICO-M-1C-FC User guide

B.E.G. LUXOMAT Indoor 180-M-2C User guide

B.E.G.

B.E.G. LUXOMAT Indoor 180-M-2C User guide

B.E.G. LUXOMAT PD4-M-3C-TRIO-SM User guide

B.E.G.

B.E.G. LUXOMAT PD4-M-3C-TRIO-SM User guide

B.E.G. LUXOMAT PD9-M-2C User guide

B.E.G.

B.E.G. LUXOMAT PD9-M-2C User guide

B.E.G. LUXOMAT PD4-M-1C-GH-AP User manual

B.E.G.

B.E.G. LUXOMAT PD4-M-1C-GH-AP User manual

B.E.G. LUXOMAT PD4-M-2C-DUO User manual

B.E.G.

B.E.G. LUXOMAT PD4-M-2C-DUO User manual

B.E.G. LUXOMAT PD4-M-DALI User manual

B.E.G.

B.E.G. LUXOMAT PD4-M-DALI User manual

B.E.G. LUXOMAT PD4-M-DIM-Corridor Series User guide

B.E.G.

B.E.G. LUXOMAT PD4-M-DIM-Corridor Series User guide

B.E.G. 93385 User manual

B.E.G.

B.E.G. 93385 User manual

B.E.G. LUXOMAT net PD4-M-DAA4G User guide

B.E.G.

B.E.G. LUXOMAT net PD4-M-DAA4G User guide

Popular Security Sensor manuals by other brands

Endress+Hauser Nivotester FTL325N-**** Series operating instructions

Endress+Hauser

Endress+Hauser Nivotester FTL325N-**** Series operating instructions

Inficon Sensistor ISH2000 HySpeed operating manual

Inficon

Inficon Sensistor ISH2000 HySpeed operating manual

Bentel Security DT800 manual

Bentel Security

Bentel Security DT800 manual

Alean SM-HWDS-Z11 user manual

Alean

Alean SM-HWDS-Z11 user manual

Takex Quad PB-IN-50HF instruction manual

Takex

Takex Quad PB-IN-50HF instruction manual

Zircon Leak Alert + user manual

Zircon

Zircon Leak Alert + user manual

SICK Prime KTX-WP91241252 Series manual

SICK

SICK Prime KTX-WP91241252 Series manual

ATWELL UMD-SRB01 installation manual

ATWELL

ATWELL UMD-SRB01 installation manual

Jung 2103 REG ES manual

Jung

Jung 2103 REG ES manual

Vemer Sensor LED user manual

Vemer

Vemer Sensor LED user manual

Stahl FL6S Series operating instructions

Stahl

Stahl FL6S Series operating instructions

Velleman PIR050 user manual

Velleman

Velleman PIR050 user manual

CAME MR8570 user guide

CAME

CAME MR8570 user guide

schmersal AZM 160 Mounting and wiring instructions

schmersal

schmersal AZM 160 Mounting and wiring instructions

Somogyi Home HS 74 Instructions for use

Somogyi

Somogyi Home HS 74 Instructions for use

hager EE883 manual

hager

hager EE883 manual

ELMED ISOTEST 3P operating manual

ELMED

ELMED ISOTEST 3P operating manual

Sabre ELSA Instructions for use

Sabre

Sabre ELSA Instructions for use

manuals.online logo
manuals.online logoBrands
  • About & Mission
  • Contact us
  • Privacy Policy
  • Terms and Conditions

Copyright 2025 Manuals.Online. All Rights Reserved.