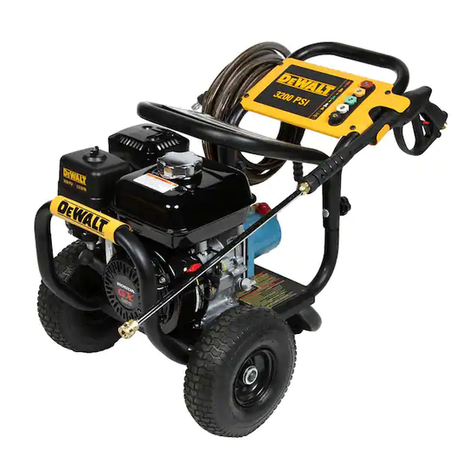
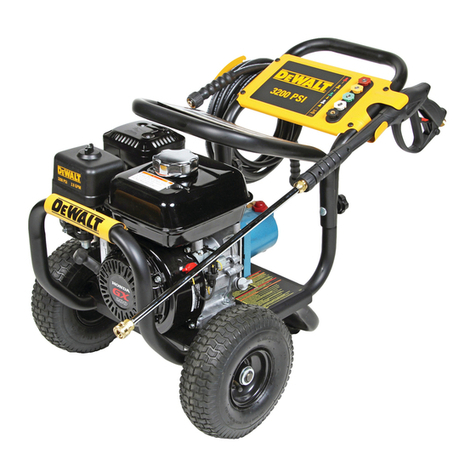
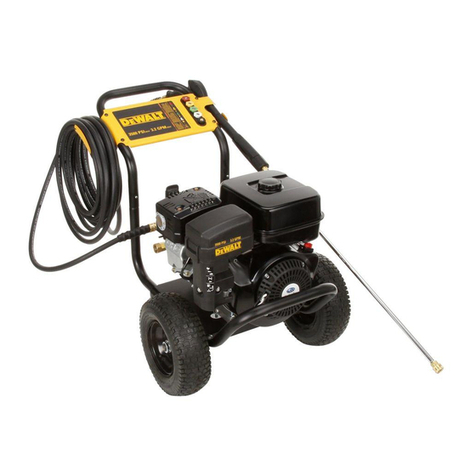
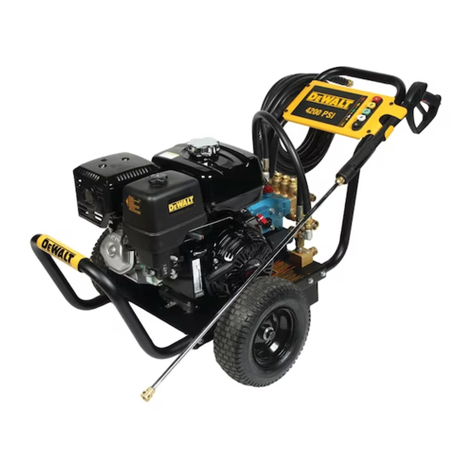
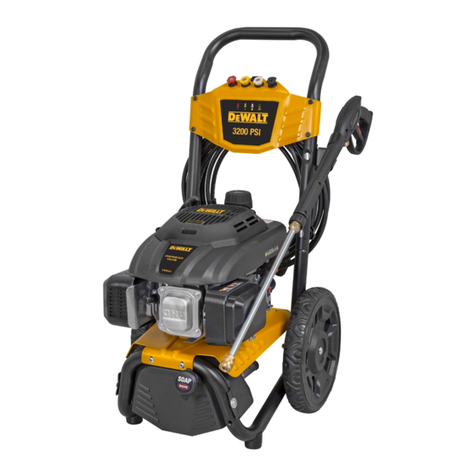
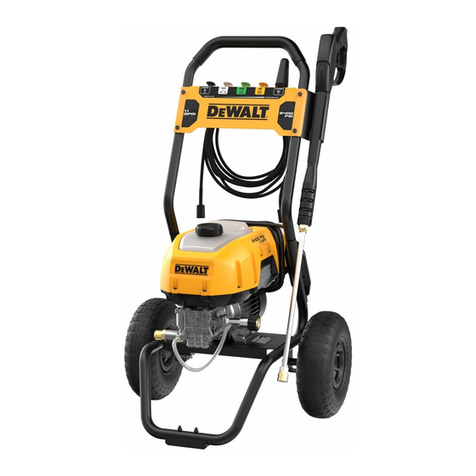
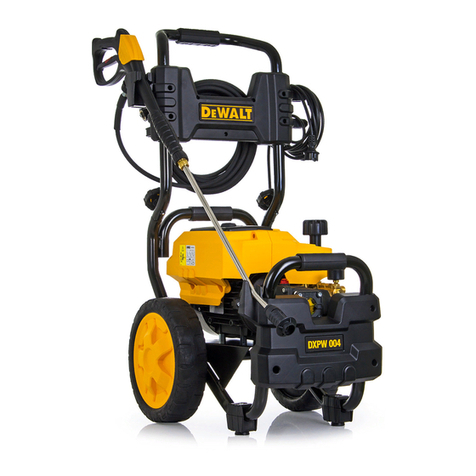
DeWalt DPE3800 User manual

DPE3800
Heavy-Duty Pressure Washer
Laveuse à pression (trés trabaja)
Lavadora a presión para trabaja pesada
INSTRUCTION MANUAL
GUIDE D'UTILISATION
MANUAL DE INSTRUCCIONES
INSTRUCTIVO DE OPERACIÓN, CENTROS DE SERVICIOY PÓLIZA
DE GARANTÍA.ADVERTENCIA: LÉASE ESTE INSTRUCTIVO ANTES
DE USAR EL PRODUCTO.
If you have questions or comments, contact us.
Pour toute question ou tout commentaire, nous contacter.
Si tiene dudas o comentarios, contáctenos.
1-800-4-De

2
CAT 67DX
Oil: Use DP70
Oil Capacity: 10.8 oz. (319.4 ml)
A. Handle assemble
B. Frame
C. High-pressure hose
D. Professional Spray gun
E. Quick-connect
spray wand
F. Panel assembly
G. Nozzle holder
H. High-pressure pump
oil plug
I. Engine dipstick/oil plug
J. High-pressure pump
K. Engine
L. Choke control
M. Starter grip
N. Fuel valve lever
O. Engine switch
P. Gas cap
Q. Throttle control lever
R. Side Handle
S. 18V DeWALT battery pack
and charger (if equipped)
DPE3800 PRESSURE WASHER
Refer to the engine instruction manual for
location and operation of other engine controls.
FIG. 1
Q
L
N
M
MODEL WEIGHT HEIGHT WIDTH LENGTH PSI MAX* OPERATING
PSI GPM MAX* OPERATING
GPM ENGINE
DPE3800 147 lbs 29" 24" 40" 3800 3420 4.0
(15,1 L/min)
3.6
(13,6 L/min)
DeWALT 389 cc
OHV, 11 Net HP,
13 Gross HP **
* Maximum psi and GPM ratings determined in accordance with the Pressure Washers Manufacturers Association (PWMA)
standard PW101
** Horsepower rating (shown as maximum output @ 3600 rpm) is in accordance with SAE J1349 for Net HP and SAE J1995 for Gross HP.
Actual engine power will be lower. Engine power depends on the application, operating speed, operating conditions and other variables.
K
D
E
C
A
F
B
G
J
H
O
I
P
R
S

3
IF YOU HAVE ANY QUESTIONS OR COMMENTS ABOUT
THIS OR ANY DeWALT TOOL, CALL US TOLL FREE AT:
1-800-4-DeWALT (1-800-433-9258)
WARNING: Do not operate this unit until you read this instruction
manual and the engine instruction manual for safety, operation and
maintenance instructions.
WARNING: When using this product basic precautions should
always be followed, including the following:
1. Read all instructions before using the product.
2. To reduce the risk of injury, close supervision is necessary when
a product is used near children.
3. Know how to stop the product and bleed pressures quickly. Be
thoroughly familiar with the controls.
4. Stay alert–watch what you are doing.
5. Do not operate the product when fatigued or under the influence
of alcohol or drugs.
6. Keep operating area clear of all persons.
7. Do not overreach or stand on unstable support. Keep good
footing and balance at all times.
8. Follow the maintenance instructions specified in the manual.
DANGER: RISK OF INJECTION OR SEVERE INJURY. KEEP
CLEAR OF NOZZLE. DO NOT DIRECT DISCHARGE STREAM AT
PERSONS. THIS PRODUCT IS TO BE USED ONLY BY TRAINED
OPERATORS.
WARNING: This product may not be equipped with a spark-
arresting muffler. If the product is not equipped and will be used
around flammable materials or on land covered with materials such
as agricultural crops, forest, brush, grass or other similar items, then
an approved spark arrester must be installed and is legally required
in the state of California. It is a violation of California statutes
section 130050 and/or sections 4442 and 4443 of the California
Public Resources Code, unless the engine is equipped with a spark
arrester, as defined in section 4442, and maintained in effective
working order. Spark arresters are also required on some U.S.
Forest Service land and may also be legally required under other
statutes and ordinances.
WARNING: This product and its exhaust contain chemicals
known to the State of California to cause cancer, and birth
defects or other reproductive harm. In addition, some cleaning
products and dust contain chemicals known to the State of
California to cause cancer, and birth defects or other reproduc-
tive harm. Wash hands after handling.
The definitions below describe the level of severity
for each signal word. Please read the manual and
pay attention to these symbols.
DANGER: Indicates an imminently hazardous
situation which, if not avoided, will result in death
or serious injury.
WARNING: Indicates a potentially hazardous
situation which, if not avoided, could result in death
or serious injury.
CAUTION: Indicates a potentially hazardous
situation which, if not avoided, may result in minor
or moderate injury.
CAUTION: Used without the safety alert symbol
indicates a potentially hazardous situation which, if
not avoided, may result in property damage.

4
DANGER: RISK OF EXPLOSION OR FIRE
WHAT CAN HAPPEN HOW TO PREVENT IT
• Spilledgasolineandit’s
vapors can become ignited
from cigarette sparks,
electrical arcing, exhaust
gases and hot engine
components such as
the muffler.
• Shutoffengineandallow
it to cool before adding fuel
to the tank.
• Usecareinfillingtankto
avoid spilling fuel. Move pres-
sure washer away
from fueling area before
starting engine.
• Makesureanyspilledfuelon
unit is dry before starting.
• Makesurefuelcapissecure
before starting.
• Heatwillexpandfuelinthe
tank which could result in
spillage and possible fire
explosion.
• Keepmaximumfuellevel
1/2" (12.7 mm) below
bottom of filler neck
to allow for expansion.
• Operatingthepressure
washer in an explosive
environment could
result in a fire.
• Operateandfuelequipment
in well-ventilated areas free
from obstructions. Equip
areas with fire extinguisher
suitable for gasoline fires.
• Materialsplacedagainstor
near the pressure washer
can interfere with its proper
ventilation features causing
overheating and possible
ignition of the materials.
• Neveroperatepressure
washer in an area containing
dry brush or weeds.
• Mufflerexhaustheatcan
damage painted surfaces,
melt any material sensitive
to heat (such as siding,
plastic, rubber, vinyl or the
pressure hose, itself), and
damage live plants.
• Alwayskeeppressurewasher
a minimum of 4' (1.2 m) away
from surfaces (such as
houses, automobiles or
live plants) that could be
damaged from muffler
exhaust heat.
• Improperly stored fuel could
lead to accidental ignition.
Fuel improperly secured
could get into the hands of
children or other unqualified
persons.
• StorefuelinanOSHA-
approved container, in a
secure location away from
work area.
• Useofacids,toxicor
corrosive chemicals,
poisons, insecticides, or any
kind of flammable solvent
with this product could result
in serious injury or death.
• Donotsprayflammable
liquids.

5
DANGER: RISK TO BREATHING (ASPHYXIATION)
WHAT CAN HAPPEN HOW TO PREVENT IT
• Breathingexhaustfumes
will cause serious injury
or death! Engine exhaust
contains carbon monoxide,
an odorless and deadly gas.
• Operatepressurewasherin
a well-ventilated area. Avoid
enclosed areas such as
garages, basements, etc.
• Neveroperateunitina
location occupied by
humans or animals.
DANGER: RISK TO BREATHING (ASPHYXIATION) CONTINUED
• Somecleaningfluids
contain substances which
could cause injury to skin,
eyes or lungs.
• Useonlycleaningfluids
specifically recommended
for high-pressure washers.
Follow manufacturers
recommendations. Do not
use chlorine bleach or any
other corrosive compound.
DANGER: RISK OF FLUID INJECTION AND LACERATION
WHAT CAN HAPPEN HOW TO PREVENT IT
• Yourpressurewasher
operates at fluid pressures
and velocities high enough to
penetrate human and
animal flesh, which could
result in amputation or
other serious injury. Leaks
caused by loose fittings or
worn or damaged hoses can
result in injection injuries.
DO NOT TREAT FLUID
INJECTION AS
A SIMPLE CUT! See a
physician immediately!
• Inspectthehigh-pressure
hose regularly. Replace
the hose immediately if it is
damaged, worn, has melted
from contacting the engine,
or shows any signs of cracks,
bubbles, pinholes, or other
leakage. Never grasp a
high-pressure hose that
is leaking or damaged.
• Nevertouch,grasporattempt
to cover a pinhole or similar
water leak on the high-
pressure hose. The stream
of water IS under high
pressure and WILL
penetrate skin.
• Neverplacehandsinfront
of nozzle.
• Directsprayawayfromself
and others.
• Makesurehoseandfittings
are tightened and in good
condition. Never hold onto
the hose or fittings during
operation.

6
DANGER: RISK OF INJURY FROM SPRAY
WHAT CAN HAPPEN HOW TO PREVENT IT
• High-velocityfluidspray
can cause objects to break,
propelling particles at high
speed.
• AlwayswearANSI-approved
Z87.1 safety glasses. Wear
protective clothing to protect
against accidental spraying.
• Neverpointwandatorspray
people or animals.
• Lightorunsecuredobjects
can become hazardous
projectiles.
• Alwayssecuretriggerlock
when wand is not in service
to prevent accidental
operation.
• Neverpermanentlysecure
trigger in pull-back (open)
position.
• Donotallowhosetocontact
muffler.
• Neverattachorremovewand
or hose fittings while system
is pressurized.
• Whenusingreplacement
lances or guns with this
pressure washer, DO NOT
use a lance and/or lance/gun
combination that is shorter
in length than what was
provided with this pressure
washer as measured from
the nozzle end of the lance
to the gun trigger.
• Injuriescanresultifsystem
pressure is not reduced
before attempting
maintenance or
disassembly.
• Torelievesystempressure,
shut off engine, turn off water
supply and pull gun trigger
until water stops flowing.
• Use only accessories rated
equal to or higher than the
rating of the pressure washer.

7
DANGER: RISK OF UNSAFE OPERATION
WHAT CAN HAPPEN HOW TO PREVENT IT
• Unsafeoperationofyour
pressure washer could lead
to serious injury or death to
you or others.
• Donotusechlorine
bleach or any other
corrosive compound.
• Becomefamiliarwiththe
operation and controls of
the pressure washer.
• Keepoperatingareaclear
of all persons, pets and
obstacles.
• Donotoperatetheproduct
when fatigued or under the
influence of alcohol or drugs.
Stay alert at all times.
• Neverdefeatthesafety
features of this product.
• Donotoperatemachine
with missing, broken or
unauthorized parts.
• Neverleavewand
unattended while unit
is running.
• Ifproperstartingprocedure
is not followed, engine can
kickback causing serious
hand and arm injury.
• Ifenginedoesnotstartafter
two pulls, squeeze trigger
of gun to relieve pump
pressure. Pull starter cord
slowly until resistance is felt.
Then pull cord rapidly to
avoid kickback and prevent
hand or arm injury.
• Thespraygun/wandis
a powerful cleaning tool
that could look like a toy
to a child.
• Keepchildrenawayfromthe
pressure washer at all times.
• Reactiveforceofspray
will cause gun/wand to
kickback, and could cause
the operator to slip or fall
or misdirect the spray.
Improper control of gun/
wand can result in
injuries to self and
others.
• Donotoverreachorstand
on an unstable support.
• Donotusepressurewasher
while standing on a ladder.
• Gripgun/wandfirmlywith
both hands. Expect the
gun to kickback when
triggered.

8
DANGER: RISK OF INJURY OR PROPERTY DAMAGE
WHEN TRANSPORTING OR STORING
WHAT CAN HAPPEN HOW TO PREVENT IT
• Fueloroilcanleakorspill
and could result in fire or
breathing hazard. Serious
injury or death can result.
Fuel or oil leaks will damage
carpet, paint or other
surfaces in vehicles
or trailers.
• Oilcouldfillthecylinderand
damage the engine if the unit
is not stored or transported in
an upright position.
• Ifpressurewasheris
equipped with a fuel shut-off
valve, turn the valve to the
OFF position before transport-
ing to avoid fuel leaks. If pres-
sure washer is not equipped
with a fuel shut-off valve,
drain the fuel from tank before
transporting. Only transport
fuel in an OSHA-approved
container.
Always place pressure washer
on a protective mat when
transporting to protect against
damage to vehicle from leaks.
Always transport and store
unit in an upright position.
Remove pressure washer
from vehicle immediately upon
arrival at your destination.
WARNING: RISK OF BURSTING
WHAT CAN HAPPEN HOW TO PREVENT IT
• Over inflation of tires could
result in serious injury and
property damage.
• Useatirepressuregauge
to check the tires pressure
before each use and while
inflating tires; see the tire side-
wall for the correct tire pres-
sure.
NOTE: Air tanks,
compressors and similar
equipment used to inflate
tires can fill small tires similar
to these very rapidly. Adjust
pressure regulator on air
supply to no more than the
rating of the tire pressure.
Add air in small increments
and frequently use the tire
gauge to prevent over
inflation.

9
• High-velocityfluidspray
directed at pneumatic tire
sidewalls (such as found
on automobiles, trailers and
the like) could damage the
sidewall resulting in serious
injury.
• Onpressurewashersrated
above 1600 psi (110 Bar)
use the widest fan spray
(40º nozzle) and keep the
spray a minimum of 8"
(20 cm) from the pneumatic
tire sidewall. Do not aim
spray directly at the joint
between the tire and rim.
WARNING: RISK OF HOT SURFACES
WHAT CAN HAPPEN HOW TO PREVENT IT
• Contactwithhotsurfaces,
such as engines exhaust
components, could result in
serious burn.
• Duringoperation,touch
only the control surfaces
of the pressure washer.
Keep children away from
the pressure washer at all
times. They may not be able
to recognize the hazards of
this product.
WARNING: RISK OF CHEMICAL BURN
WHAT CAN HAPPEN HOW TO PREVENT IT
• Useofacids,toxicor
corrosive chemicals, poisons,
insecticides, or any kind of
flammable solvent with this
product could result in seri-
ous injury or death.
• Donotuseacids,gasoline,
kerosene, or any other
flammable materials in this
product. Use only household
detergents, cleaners and
degreasers recommended
for use in pressure washers.
• Wearprotectiveclothing
to protect eyes and skin
from contact with sprayed
materials.
WARNING: RISK OF
ELECTRICAL SHOCK
WHAT CAN HAPPEN HOW TO PREVENT IT
• Spraydirectedatelectrical
outlets or switches, or objects
connected to an electrical
circuit, could result in a
fatal electrical shock.
• Unpluganyelectrically
operated product before
attempting to clean it. Direct
spray away from electric
outlets and switches.

10
WARNING: RISK OF
INJURY FROM LIFTING
WHAT CAN HAPPEN HOW TO PREVENT IT
• Seriousinjurycanresult
from attempting to lift too
heavy an object.
• Thepressurewasheristoo
heavy to be lifted by one
person. Obtain assistance
from others before lifting.
CAUTION: RISK OF
PROPERTY DAMAGE
WHAT CAN HAPPEN HOW TO PREVENT IT
• Improperlyconnected
electrical components may
cause electrical sparking,
resulting in damage to the
unit.
• Makesureallconnectorsand
electrical wires are properly
connected.
An 18V DeWALT battery pack is used to start these units using the
electric start feature. When ordering replacement battery packs, be
sure to include catalog number and voltage. Consult the chart at the
end of this manual for compatibility of chargers and battery packs.
The battery pack is not fully charged out of the carton. Before using
the battery pack and charger, read the safety instructions below.
Then follow charging procedures outlined.
Do not charge or use battery in explosive atmospheres,
such as in the presence of flammable liquids, gases or dust.
Inserting or removing the battery from the charger may ignite the
dust or fumes.
• NEVER force battery pack into charger. DO NOT modify
battery pack in any way to fit into a non-compatible charger
as battery pack may rupture causing serious personal injury.
Consult the chart at the end of this manual for compatibility of
batteries and chargers.
eWALT chargers.
DO NOT splash or immerse in water or other liquids.
• Do not store or use the tool and battery pack in locations
where the temperature may reach or exceed 105°F (40˚)
(such as outside sheds or metal buildings in summer).
DANGER: Electrocution hazard. Never attempt to open the
battery pack for any reason. If battery pack case is cracked or
damaged, do not insert into charger. Do not crush, drop or damage
battery pack. Do not use a battery pack or charger that has received
a sharp blow, been dropped, run over or damaged in any way (i.e.,
pierced with a nail, hit with a hammer, stepped on). Electric shock
or electrocution may result. Damaged battery packs should be
returned to service center for recycling.
NOTE: Battery storage and carrying caps are provided
for use whenever the battery is out of the tool or
charger. Remove cap before placing battery in charger
or tool.
WARNING: Fire hazard. Do not store or carry
battery so that metal objects can contact exposed
battery terminals. For example, do not place battery in aprons,
pockets, tool boxes, product kit boxes, drawers, etc., with loose nails,
screws, keys, etc. without battery cap. Transporting batteries can
possibly cause fires if the battery terminals inadvertently come
in contact with conductive materials such as keys, coins, hand

11
needed, the battery electrolyte is composed of a mixture of liquid
organic carbonates and lithium salts.
Contents of opened battery cells may cause respiratory
irritation. Provide fresh air. If symptoms persists, seek medical
attention.
WARNING: Burn hazard. Battery liquid may be flammable if
exposed to spark or flame.
The RBRC™ (Rechargeable Battery Recycling
Corporation) Seal on the nickel cadmium, nickel metal
hydride or lithium ion batteries (or battery packs)
indicate that the costs to recycle these batteries (or
battery packs) at the end of their useful life have
already been paid by DeWALT. In some areas, it is illegal to place
spent nickel cadmium, nickel metal hydride or lithium ion batteries in
the trash or municipal solid waste stream and the RBRC program
provides an environmentally conscious alternative.
RBRC™ in cooperation with DeWALT and other battery users,
has established programs in the United States and Canada to
facilitate the collection of spent nickel cadmium, nickel metal
hydride or lithium ion batteries. Help protect our environment and
conserve natural resources by returning the spent nickel cadmium
and nickel cadmium, nickel metal hydride or lithium ion batteries
to an authorized DeWALT service center or to your local retailer
for recycling. You may also contact your local recycling center for
information on where to drop off the spent battery.
RBRC™ is a registered trademark of the Rechargeable Battery
Recycling Corporation.
tools and the like. The US Department of Transportation Hazardous
Material Regulations (HMR) actually prohibit transporting batteries
in commerce or on airplanes (i.e., packed in suitcases and carry-on
luggage) UNLESS they are properly protected from short circuits.
So when transporting individual batteries, make sure that the battery
terminals are protected and well insulated from materials that could
contact them and cause a short circuit.
SPECIFIC SAFETY INSTRUCTIONS FOR NICKEL CADMIUM
(NiCd) OR NICKEL METAL HYDRIDE (NiMH)
Do not incinerate the battery pack even if it is severely
damaged or is completely worn out. The battery pack can
explode in a fire.
A small leakage of liquid from the battery pack cells may
occur under extreme usage or temperature conditions. This
does not indicate a failure.
However, if the outer seal is broken:
a. and the battery liquid gets on your skin, immediately wash
with soap and water for several minutes.
b. and the battery liquid gets into your eyes, flush them with
clean water for a minimum of 10 minutes and seek immediate
medical attention. (Medical note: The liquid is 25-35% solution
of potassium hydroxide.)
SPECIFIC SAFETY INSTRUCTIONS FOR LITHIUM ION (LI-ION)
Do not incinerate the battery pack even if it is severely
damaged or is completely worn out. The battery pack can
explode in a fire. Toxic fumes and materials are created when
lithium ion battery packs are burned.
If battery contents come into contact with the skin,
immediately wash area with mild soap and water. If battery
liquid gets into the eye, rinse water over the open eye for
15 minutes or until irritation ceases. If medical attention is

12
SAVE THESE INSTRUCTIONS: This manual contains important
safety and operating instructions for battery chargers.
markings on charger, battery pack, and product using battery
pack.
DANGER: Electrocution hazard. 120 volts are present at charging
terminals. Do not probe with conductive objects. Electric shock or
electrocution may result.
WARNING: Shock hazard. Do not allow any liquid to get inside
charger. Electric shock may result.
CAUTION: Burn hazard. To reduce the risk of injury, charge only
DeWALT rechargeable batteries. Other types of batteries may burst
causing personal injury and damage.
CAUTION: Under certain conditions, with the charger plugged in
to the power supply, the exposed charging contacts inside the
charger can be shorted by foreign material. Foreign materials of a
conductive nature such as, but not limited to, steel wool, aluminum
foil, or any buildup of metallic particles should be kept away from
charger cavities. Always unplug the charger from the power supply
when there is no battery pack in the cavity. Unplug charger before
attempting to clean.
DO NOT attempt to charge the battery pack with any chargers
other than the ones in this manual. The charger and battery
pack are specifically designed to work together.
These chargers are not intended for any uses other than
charging DeWALT rechargeable batteries. Any other uses may
result in risk of fire, electric shock or electrocution.
Do not expose charger to rain or snow.
Pull by plug rather than cord when disconnecting charger.
This will reduce risk of damage to electric plug and cord.
Make sure that cord is located so that it will not be stepped
on, tripped over, or otherwise subjected to damage or
stress.
Do not use an extension cord unless it is absolutely
necessary. Use of improper extension cord could result in risk of
fire, electric shock, or electrocution.
When operating a power tool outdoors, use an extension
cord suitable for outdoor use. Use of a cord suitable for out-
door use reduces the risk of electric shock.
An extension cord must have adequate wire size (AWG
or American Wire Gauge) for safety. The smaller the gauge
number of the wire, the greater the capacity of the cable, that is
16 gauge has more capacity than 18 gauge. An undersized cord
will cause a drop in line voltage resulting in loss of power and
overheating. When using more than one extension to make up the
total length, be sure each individual extension contains at least
the minimum wire size. The following table shows the correct size
to use depending on cord length and nameplate ampere rating.
If in doubt, use the next heavier gauge. The smaller the gauge
number, the heavier the cord.
Recommended Minimum Wire Size for Extension Cords
Total Length of Cord
25 ft. 50 ft. 75 ft. 100 ft. 125 ft. 150 ft. 175 ft.
7.6 m 15.2 m 22.9 m 30.5 m 38.1 m 45.7 m 53.3 m
Wire Size AWG
18 18 16 16 14 14 12
Do not place any object on top of charger or place the
charger on a soft surface that might block the ventilation
slots and result in excessive internal heat. Place the charger

13
in a position away from any heat source. The charger is ventilated
through slots in the top and the bottom of the housing.
Do not operate charger with damaged cord or plug.
Do not operate charger if it has received a sharp blow, been
dropped, or otherwise damaged in any way. Take it to an
authorized service center.
Do not disassemble charger; take it to an authorized service
center when service or repair is required. Incorrect reassembly
may result in a risk of electric shock, electrocution or fire.
Disconnect the charger from the outlet before attempting
any cleaning. This will reduce the risk of electric shock.
Removing the battery pack will not reduce this risk.
NEVER attempt to connect 2 chargers together.
The charger is designed to operate on standard 120V
household electrical power. Do not attempt to use it on any
other voltage. This does not apply to the vehicular charger.
The automatic Tune-Up™ Mode equalizes or balances the individual
cells in the battery pack allowing it to function at peak capacity.
Battery packs should be tuned up weekly or after 10 charge/
discharge cycles or whenever the pack no longer delivers the same
amount of work. To use the automatic Tune-Up™, place the battery
pack in the charger and leave it for at least 8 hours. The charger will
cycle through the following modes.
1. The red light will blink continuously indicating that the 1-hour
charge cycle has started.
2. When the 1-hour charge cycle is complete, the light will stay on
continuously and will no longer blink.This indicates that the pack
is fully charged and can be used at this time.
3. If the pack is left in the charger after the initial 1-hour charge,
the charger will begin the Automatic Tune-Up mode. This mode
continues up to 8 hours or until the individual cells in the battery
pack are equalized. The battery pack is ready for use and can
be removed at any time during the Tune-Up mode.
4. Once the Automatic Tune Up mode is complete, the charger will
begin a maintenance charge; the red indicator will remain lit.
Your tool uses a DeWALT 7.2, 9.6, 12, 14.4, 18 Volt charger. Be sure
to read all safety instructions before using your charger. Consult
the chart at the end of this manual for compatibility of chargers and
battery packs.
DANGER:Electrocution hazard. 120 volts present at charging
terminals. Do not probe with conductive objects. Danger of electric
shock or electrocution.
1. Plug the charger into an appropriate outlet before inserting
battery pack.
2. Insert the battery pack into the charger. The red (charging) light
will blink continuously indicating that the charging process has
started.
3. The completion of charge will be indicated by the red light
remaining ON continuously. The pack is fully charged and may
be used at this time or left in the charger.

14
Some chargers are designed to detect certain problems that can arise
with battery packs. Problems are indicated by the red light flashing
at a fast rate. If this occurs, re-insert battery pack into the charger. If
the problem persists, try a different battery pack to determine if the
charger is OK. If the new pack charges correctly, then the original
pack is defective and should be returned to a service center or
other collection site for recycling. If the new battery pack elicits the
same trouble indication as the original, have the charger tested at an
authorized service center.
HOT/COLD PACK DELAY
Some chargers have a Hot/Cold Pack Delay feature: when the
charger detects a battery that is hot, it automatically starts a Hot
Pack Delay, suspending charging until the battery has cooled. After
the battery has cooled, the charger automatically switches to the
Pack Charging mode. This feature ensures maximum battery life.
The red light flashes long, then short while in the Hot Pack Delay
mode.
PROBLEM POWER LINE
Some chargers have a Problem Power Line indicator. When
the charger is used with some portable power sources such as
generators or sources that convert DC to AC, the charger may
temporarily suspend operation, flashing the red light with two
fast blinks followed by a pause. This indicates the power source
is out of limits.
LEAVING THE BATTERY PACK IN THE CHARGER
The charger and battery pack can be left connected with the red light
glowing indefinitely.The charger will keep the battery pack fresh and
fully charged.
NOTE: A battery pack will slowly lose its charge when kept out of
the charger. If the battery pack has not been kept on maintenance
charge, it may need to be recharged before use. A battery pack may
also slowly lose its charge if left in a charger that is not plugged into
an appropriate AC source.
WEAK BATTERY PACKS: Chargers can also detect a weak battery
pack. Such batteries are still usable but should not be expected to
perform as much work. The charger will indicate to replace battery
pack.
1. Longest life and best performance can be obtained if the battery
pack is charged when the air temperature is between 65°F and
75°F (18°- 24°C). DO NOT charge the battery pack in an air
temperature below +40°F (+4.5°C), or above +105°F (+40.5°C).
This is important and will prevent serious damage to the battery
pack.
2. The charger and battery pack may become warm to touch while
charging. This is a normal condition, and does not indicate a
problem. To facilitate the cooling of the battery pack after use,
avoid placing the charger or battery pack in a warm environment
such as in a metal shed, or an uninsulated trailer.
3. If the battery pack does not charge properly:
a. Check current at receptacle by plugging in a lamp or other
appliance
b. Check to see if receptacle is connected to a light switch which
turns power off when you turn out the lights.
c. Move charger and battery pack to a location where the
surrounding air temperature is approximately 65°F - 75°F
(18°- 24°C).

15
d. If charging problems persist, take the tool, battery pack and
charger to your local service center.
4. The battery pack should be recharged when it fails to produce
sufficient power on jobs which were easily done previously.
DO NOT CONTINUE to use under these conditions. Follow
the charging procedure. You may also charge a partially used
pack whenever you desire with no adverse affect on the battery
pack.
5. Under certain conditions, with the charger plugged into the
power supply, the exposed charging contacts inside the charger
can be shorted by foreign material. Foreign materials of a
conductive nature such as, but not limited to, steel wool,
aluminum foil, or any buildup of metallic particles should be kept
away from charger cavities. Always unplug the charger from the
power supply when there is no battery pack in the cavity. Unplug
charger before attempting to clean.
6. Do not freeze or immerse charger in water or any other liquid.
WARNING: Shock hazard. Don’t allow any liquid to get inside
charger. Electric shock may result.
CAUTION: Never attempt to open the battery pack for any reason.
If the plastic housing of the battery pack breaks or cracks, return to
a service center for recycling.
1. The best storage place is one that is cool and dry away from
direct sunlight and excess heat or cold.
2. Long storage will not harm the battery pack or charger. Under
proper conditions, they can be stored for 5 years or more.
1. Place handle assembly (A) onto frame, depress
B
A
the snap buttons, and slide the handle assembly
onto the frame (B) until snap buttons are secured
in place.
CAUTION: Risk of personal injury. Avoid placing
hands between handle and frame when assembling
to prevent pinching.
2. Attach high-pressure hose (C) to quick connect spray gun
3. Connect quick connect spray wand (E) to spray gun.
4. Thread the side handle (R) into spray gun and tighten to desired
position.
R
E
C
5. Place the nozzle holder (G) onto the panel assembly (F) and
push each nozzle holder into place.

16
G
F
6. Remove the five colored quick-connect nozzles from the plastic
bag and insert them into correct grommet on the nozzle holder.
Nozzles are color coded to match colored nozzles on panel
assembly.
NOTE: The high-pressure pump was filled with oil at the factory.
Always check oil level before using (refer to Maintenance for more
information).
WARNING: Risk of bursting.
Use a tire pressure gauge to check
the tires pressure before each use and while inflating tires; see the tire
sidewall for the correct tire pressure.
NOTE: Air tanks, compressors and similar equipment used to
inflate tires can fill small tires similar to these very rapidly. Adjust
pressure regulator on air supply to no more than the rating of the
tire pressure. Add air in small increments and frequently use the
tire gauge to prevent over inflation.
The pressure setting is preset at the factory to achieve optimum pres-
sure and cleaning. To lower the pressure, follow these instructions.
1. Back away from the surface to be cleaned.The further away you
are, the less the pressure will be on the surface to be cleaned.
2. Change to the 40˚ nozzle (white). This nozzle delivers a less
powerful stream of water and a wider spray pattern. Refer to
Spray Wand Nozzles.
CAUTION: DO NOT attempt to increase pump pressure. A higher
pressure setting than the factory set pressure may damage pump.
The nozzles for the spray wand are stored in the nozzle holder (G) on
the panel assembly (F). Colors on the panel identify nozzle location
and spray pattern. Refer to the following chart to choose the correct
nozzle for the job to be performed.
Nozzle Color Spray Pattern Uses Surfaces*
Red
0˚ powerful
pinpoint for
very intense
cleaning
metal or
concrete;
DO NOT use
on wood
Yellow
15˚ intense
cleaning of
small areas
metal, concrete
or wood
Green
25˚intense
cleaning of
larger areas
metal, concrete
or wood
White
40˚covers wide
areas of
cleaning
metal, concrete,
wood or vinyl

17
Nozzle Color Spray Pattern Uses Surfaces*
Black
low pressure applies cleaning
solutions metal, concrete,
wood or vinyl
* CAUTION: The high-pressure spray from your pressure washer
is capable of causing damage to surfaces such as wood, glass,
automobile paint, auto striping and trim, delicate objects such
as flowers and shrubs. Before spraying, check the item to
be cleaned to assure yourself that it is strong enough to resist
damage from the force of spray.
CHANGING NOZZLES ON SPRAY WAND
DANGER: Risk of fluid injection. Do not direct discharge stream
toward persons, unprotected skin, eyes or any pets or animals.
Serious injury will occur.
WARNING: Flying objects could cause risk of serious injury. DO
NOT attempt to change nozzles while pressure washer is running.
Turn engine off before changing nozzles.
1. Pull quick-connect coupler back and insert
nozzle.
2. Release quick-connect coupler and
twist nozzle to make sure it is secure in
coupler.
WARNING: Flying object could cause risk
of serious injury. Ensure nozzle is completely
inserted in quick-connect socket and quick-
connect snap ring is fully engaged (forward)
before squeezing gun trigger.
Applying chemicals or cleaning solvents is a low-pressure operation.
NOTE: Use only soaps and chemicals designed for pressure washer
use. Do not use bleach.
TO APPLY CHEMICALS AND SOLVENTS
1. Press chemical hose (T) onto barbed
T
fitting located near high pressure hose
connection of pump as shown.
2. Place the other end of chemical hose
with filter on it into the container holding
chemical/cleaning solution.
NOTE: For every 7 gallons (26.5 liters)
of water pumped 1 gallon (3.8 liters) of chemical/cleaning solution
will be used.
3. Install low-pressure (black) nozzle into quick connect fitting of spray
wand, refer Spray Wand Nozzles.
4. After use of chemicals, place chemical hose into container of clean
water and draw clean water through chemical injection system
to rinse system thoroughly. If chemicals remain in the pump it
could be damaged. Pumps damaged due to chemicals will not be
covered under warranty.
NOTE: Chemicals and soaps will not siphon when spray wand is in the
high-pressure setting.
WARNING: To reduce the risk of injury, read the pressure washer
instruction manual and the engine instruction manual before starting
pressure washer.
DANGER: Risk of fluid injection and laceration. When using the high-
pressure setting, DO NOT allow the high-pressure spray to come in
contact with unprotected skin, eyes, or with any pets or animals. Serious
injury will occur.

18
enough to penetrate human and animal flesh, which could result
in amputation or other serious injury. Leaks caused by loose fit-
tings or worn or damaged hoses can result in injection injuries.
DO NOT TREAT FLUID INJECTION AS A SIMPLE CUT! See a
physician immediately!
WARNING: Risk of fire, asphyxiation and burning. NEVER fill fuel tank
when engine is running or hot. Do not smoke when filling fuel tank.
fill fuel tank completely. Fill tank to 1/2" (12.7 mm) below
bottom of filler neck to provide space for fuel expansion.Wipe any
fuel spillage from engine and equipment before starting engine.
run engine indoors or in enclosed, poorly ventilated
areas. Engine exhaust contains carbon monoxide, an odorless
and deadly gas.
DO NOT let hoses come in contact with very hot engine
muffler during or immediately after use of your pressure
washer. Damage to hoses from contact with hot engine
surfaces will NOT be covered by warranty.
CAUTION: NEVER pull water supply hose to move pressure washer.
This could damage hose and/or pump inlet.
DO NOT use hot water, use cold water only.
turn water supply off while pressure washer engine is
running or damage to pump will result.
DO NOT stop spraying water for more than two U
minutes at a time. Pump operates in bypass
mode when spray gun trigger is not pressed.
When the temperature inside the pump rises
too high the thermal relief valve (U) will open
and release a gush of water in an effort to lower
the temperature inside the pump. The thermal
relief valve will then close. If pump is left in bypass mode for
more than two minutes internal components of the pump can
be damaged.
START-UP PROCEDURE
1. In a well-ventilated outdoor area, add fresh, high-quality, unleaded
gasoline with a pump octane rating of 86 or higher. Do not overfill.
Wipe up spilled fuel before starting the engine. Refer to engine
instruction manual for correct procedure.
2. Check engine oil level. Refer to the engine instruction manual for
correct procedure.
3. Connect the water hose to the water source. Turn the water source
on to remove all air from the hose. When a steady stream of water
is present, turn the water source off.
4. Verify the filter screen (V) is in water inlet of
V
pump. The cone side faces out.
5. Connect the cold water source (X) to pump
inlet.
NOTE: Water source must provide a minimum
of 5 gallons per minute at 20 PSI.
WARNING: To reduce the possibility of con-
tamination always protect against backflow when
connected to a potable water system.
6. Connect high-pressure hose (C) to pump
X
C
outlet.
7. If applying a chemical or cleaning solution,
refer to Chemicals and Cleaning
Solvents.
8. Turn the water source on.
CAUTION: Risk of property damage. Failure
to do so could cause damage to the pump.
9. Remove all air from the pump and high pressure hose by depress-
ing trigger until a steady stream of water is present.
10. Prepare engine for first time use, see engine's instruction manual
for correct procedure.

19
11. Place the fuel valve lever (N) in the ON postion.
12.
If the engine is cold, move the
OPEN
CLOSED
L
NOFF
ON
choke (L) to the CLOSED position
as shown. If the engine is hot,
move the choke to the OPEN
position.
WARNING: Risk of unsafe opera-
tion. If engine does not start after two
pulls, squeeze trigger of gun to relieve
pump pressure. Pull starter cord slowly until resistance is felt. Then
pull cord rapidly to avoid kickback and prevent hand or arm injury.
13.
Recoil Start
:
a. Turn the engine START/RUN/OFF switch (O) to the RUN
position.
b.
WARNING: Risk of unsafe operation. Pull starter grip slowly
until resistance is felt.Then pull starter grip (M) rapidly to avoid
kickback and prevent hand or arm injury.
NOTE: Do not allow the starter grip to snap back. Return it
gently by hand.
WARNING: Risk of unsafe operation. If engine does not start after
two tries, squeeze trigger of gun to relieve pump pressure before
trying again.
Electric Start
a. Remove cap from 18V battery pack
(S) and plug battery power pack
into battery receptacle. Press down
on battery above battery snaps (U)
one side at a time until snaps are
heard. Battery MUST be snapped
in place. NOTE: Make sure your
battery pack is fully charged. See
Charger Procedure for charging
procedure.
b. Place
engine START/RUN/OFF switch
(O) in the
START
position and hold until the engine starts.
NOTE: Do not hold the switch in the
START
position for more
than 5 seconds. If the engine does not start, wait 10 seconds
before retrying. Failure to follow these instructions may result in
damage to the starter motor due to overheating.
c. When the engine starts, release the engine switch allowing it
to return to the RUN position.
NOTE: Do not turn the engine switch to the
START
position while
the engine is running.
NOTE: If the oil level in the engine is low, the engine will not start.
If the engine does not start, check the oil level and add oil as
needed.
NOTE: To ensure maximum oil lubrication, place the unit on a level
surface.
14. As the engine warms up, move the choke to the OPEN position.
15. Depress trigger on gun to start water flow.
WARNING: Risk of unsafe operation. Stand on a stable
surface and grip gun/wand firmly with both hands. Expect the gun to
kickback when triggered.
16. Release trigger to stop water flow.
DANGER: Risk of injury from spray. Engage the Y
accidental spraying.
13. Adjust spray for the task being performed
by changing quick connect nozzle. Refer to
Spray Wand Nozzles.
SU

20
1. Place the engine START/RUN/OFF switch (O) to the OFF
Position.
2. Place the fuel valve lever (N) in the OFF postion.
3. If chemicals were applied, place the chemical hose into a
container of clean water and draw clean water through chemical
injection system to rinse system thoroughly.
CAUTION: Risk of property damage Failure to do so could cause
damage to the pump.
4. Turn engine off. Refer to the engine instruction manual.
CAUTION: Risk of property damage. NEVER turn water supply off
while pressure washer engine is running or damage to pump will
result.
5. Turn water source off.
6. Pull trigger on spray gun to relieve any water pressure in hose or
spray gun.
7. Refer to Storage for proper storage procedures.
WARNING: Risk of burning. When performing maintenance, you
may be exposed to hot surfaces, water pressure or moving parts that
can cause serious injury or death.
WARNING: Risk of fire. Always disconnect, spark plug wire, let the
engine cool and release all water pressure before performing any
maintenance or repair. The engine contains flammable fuel. Do not
smoke or work near open flames while performing maintenance.
WARNING: To reduce the risk of serious personal injury, turn
tool off and and remove battery pack before making any adjust-
ments or removing/installing attachments or accessories.
To ensure efficient operation and longer life of your pressure washer,
a routine maintenance schedule should be prepared and followed.
If the pressure washer is used in unusual conditions, such as high
temperatures or dusty conditions, more frequent maintenance
checks will be required.
Consult the engine instruction manual for the manufacturer's recom-
mendations for any and all maintenance.
NOTE: The pressure washer frame is equipped with an oil drain
hole to help make changing the engine oil easier.
NOTE: The pump was filled with oil at the factory.
1. Change pump oil after the first 10 hours of operation and every
250 hours thereafter.
TO CHECK OIL
1. The oil level should come to the H
AA
Z
dot in the middle of the sight
glass (Z).
HOW TO CHANGE PUMP OIL
1. Loosen pump oil plug (H).
2. Place a container under the oil
drain plug (AA).
3. Remove pump oil drain plug.
4. After oil is drained, replace oil
drain plug. Tighten securely.
5. Remove pump oil plug and fill with 14 oz. (414 ml) of DP70 pump
oil. If DP70 is not available use 30W non-detergent oil.
6. Replace pump dipstick/oil plug and tighten securely.
Other manuals for DPE3800
1
Table of contents
Languages:
Other DeWalt Pressure Washer manuals

DeWalt
DeWalt A16505 User manual

DeWalt
DeWalt DXPW3425E User manual

DeWalt
DeWalt DXPW001E User manual

DeWalt
DeWalt DS3532 User manual

DeWalt
DeWalt DUMP 0-/2 User manual

DeWalt
DeWalt DXPW60606 User manual

DeWalt
DeWalt DXPW3694 User manual

DeWalt
DeWalt DXPW3425 User manual

DeWalt
DeWalt DPD3100 User manual

DeWalt
DeWalt DXPW2000E User manual

DeWalt
DeWalt DCPW1600 User manual

DeWalt
DeWalt DXPW4240 User manual

DeWalt
DeWalt DXPW1500E User manual

DeWalt
DeWalt DXPWH3040 User manual

DeWalt
DeWalt DP3100 User manual

DeWalt
DeWalt DPE3800 User manual

DeWalt
DeWalt DP3400 User manual

DeWalt
DeWalt DPH3100 User manual

DeWalt
DeWalt DXPW4240 User manual

DeWalt
DeWalt DPW4240 User manual