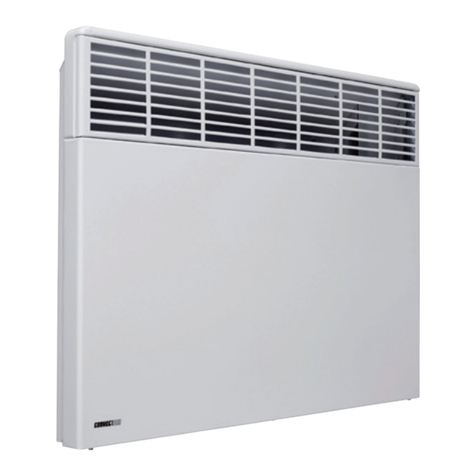
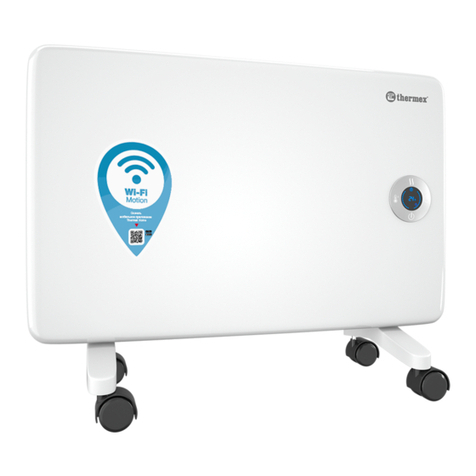
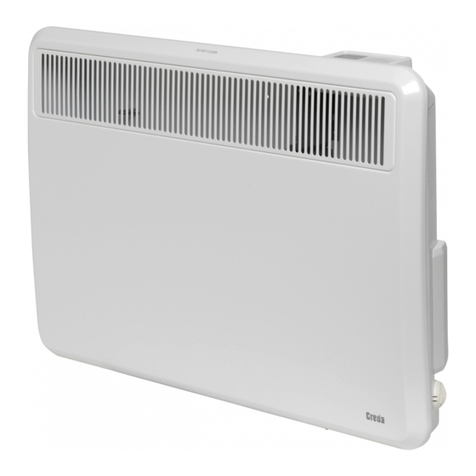
DEZIT DZ 024 EIS W User manual

DZ 024 EIS W
230V~ 50Hz 500/1000/1500/2000/2500W
EN ELECTRIC PANEL HEATER 2-7
Operation and Storage Manual of Panel Heater
RO CONVECTOR ELECTRIC 8-13
Instrucţiuni de utilizare şi depozitare а convectorului de panou
206414 -v2.0

EN
2Operation and Storage Manual of Panel Heater
IMPORTANT SAFETY MEASURES AND INSTRUCTIONS:
WARNING!
• Please read this manual before operating the appliance and keep it at a
safe place for future reference. In case the appliance is obtained by a new
owner, it should be transferred together with its manual.
•CAUTION: Children under 3 years of age should be kept away from the
appliance unless they are under constant supervision.
Children from 3 to 8 years of age are allowed to operate the on/o button
ONLY, provided that the appliance is installed and ready for operation and
such children have been supervised and instructed in safe operation of the
appliance and they understand all related risks.
Children from 3 to 8 years of age MUST NOT: connect the plug to power
sockets, make adjustments, clean it or carry out user maintenance
operations.
This appliance can be used by children older than 8 years of age and
by people with reduced physical, sensor and mental capabilities, as well
as by people with insucient experience and knowledge provided they
are supervised or instructed in safe operation of the appliance and
understand the related risks. Children should not be allowed to play with
the appliance. Cleaning and user maintenance operations must not be
carried out by children without supervision.
•CAUTION: Some of the appliance parts may get very hot during operation
and thus cause burns to users. In case there are children and vulnerable
people in the room, special attention should be paid.
•WARNING: Do not cover the appliance in order to
prevent overheating!
• The appliance must not be placed right under a socket box!
• If the supply cord is damaged, it must be replaced by the manufacturer, its
service agent or similarly qualied persons in order to avoid a hazard.
• Before connecting the appliance to the mains, check if the voltage
indicated on its technical plate corresponds to the voltage of the
electricity, supplied to your house.
• This appliance shall be used only for the purpose it has been designed
and intended for, i.e. heating of domestic premises. The appliance is not
intended for commercial/industrial application. Every other use is to be
considered improper, and therefore dangerous. The manufacturer doesn’t
bear responsibility for damages arising from improper and irrational use.
Non-adherence to these instructions would render the warranty invalid!
• Do not leave your home while the heater is operating: make sure that the
power switch is in OFF position (panel heaters with mechanical control).
• Keep inammable objects, such as furniture, pillows, bedding, paper, clothes,
curtains etc. at a safe distance of at least 100 cm away from the panel heater.
• Do not operate the appliance in areas of use or storage of combustible
substances. Do not operate the appliance in areas of combustible media
(for example in close proximity to inammable gases or aerosols) – there is
great risk of explosion and re!
• Do not insert and do not allow foreign objects to enter the ventilation
openings (inlet and outlet) because this will cause electric shock, re or will
damage the appliance.
• The appliance is not suitable for animal breeding. The panel heater is
intended for domestic/indoor operation only.
• When positioning the appliance, do not cover the safety grilles; do not
hamper the incoming and outgoing air ow. All objects must be at a safe
distance of at least 1 meter away from the appliance front and sides.
• The most common reason for overheating is dust and u deposits in the
appliance. Clean the ventilation openings on a regular basis with a vacuum
cleaner, but before that it is very important to disconnect the heater from
the mains.
• Never touch the appliance with wet or moist hands – there is risk for your life!
• The power socket should be accessible all the time in order to disconnect
the power plug when needed as fast as possible! Never pull the power
cord or the appliance itself in order to disconnect it from the mains.
• PAY ATTENTION! Outgoing air gets heated during appliance operation (up
to more than 100°С).
• If you decide to stop using an appliance of this kind, it is recommended to make
it unusable by cutting its power cord after you have disconnected it from the
mains. It is advisable all possible risks related to the appliance to be secured,
especially in relation to children that may play with out-of-use appliances.
• Warning: Do not use this appliance with a programmer, counter or any
other mechanism which could automatically turn on the heater – if the
appliance is covered or positioned incorrectly there is a risk of re.
• Position the power cord in such a way that it does not obstruct the free
movement of people and cannot be stepped on! Use only approved
extension cords, which are suitable for this appliance, i.e. they have a
compliance sign!
• Never move the appliance by pulling its power cord; do not use the power
cord for carrying other objects!
• Do not bend the power cord and do not pull it against sharp edges; do not
place the power cord on hot surfaces or open re!
PACKING
• After unpacking the appliance, check if its contents are intact and if it has
not been damaged during transportation! In case a damage or incomplete
delivery is found, contact your authorized retailer!
• Do not dispose of the original packing box! It could be used for storage and
transportation purposes in order to avoid damages during transportation!
• Disposal of packing material should be done in the appropriate way!
Children must be prevented from playing with polyethylene bags!
INSTALLATION INSTRUCTIONS
• This panel heater is designed to be used indoors, mounted on a wall.
Important: In premises bigger than 45 m3, it is recommended to use a
combination of 2 or more panel heaters.
• Do not position the panel heater under a power socket or electricity
connection box.
• DO NOT install/operate the panel heater:
1. in places where a draught is present, which could inuence the
control settings;
2. right under a power socket;
3. in“Volume 1”for bathrooms;
4. in“Volume 2”if the control board can be reached by a person who is in
a shower or in a bathtub;
• For the wall-mounting of the panel heater, only the wall braces must be
used which are delivered together with the appliance. When installing the
panel heater, minimum safe distances must be observed.
• Select position, and then select 3 points, from the suggested dimensions of
the position for drilling, then drill with a suitably drill bit holes in the marked
locations on the wall.
• Insert plastic dowels into the holes.
• Screw the screws into the dowels, and let them be submitted at least 5 mm.
• Attach the unit on the screws.

EN
Operation and Storage Manual of Panel Heater 3English
• Move slightly to the left of the appliance and then lower the down to make
sure that the screws are right at the top of the channels.
BATHROOM OPERATION
• The panel heater must be installed in accordance with the normal trade
practices and in compliance with the national legislation (EU electricity
directives and regulations concerning special installations and places
of operation including bathrooms, shower cabins HD60364-7-701(IEC
60364-7-701:2006)).
• In case this panel heater is to be used in a bathroom or other similar room,
the following installation requirements must be observed: the panel
heater is with IP24 protection (water drops protection). Hence it can be
installed in“Volume 2”(see the diagram below) in order to avoid the risk of
the control board (power switch and thermo regulator) being reached by
a person who is in a shower or a bathtub. The minimum distance between
the appliance and a water source should be not less than 1 meter and it
is compulsory the appliance to be wall-mounted! If you do not feel sure
about the installation of this panel heater in a bathroom, we recommend
you to consult a professional electrician.
Note: If the above-mentioned instructions cannot be implemented, it is
recommended to install the appliance in “VOLUME 3”.
• In wet premises the power source must be installed at a height of at least
25 cm above the oor (bathrooms and kitchens).
• The installation must be equipped with a safety fuse, and the
distance between the fuse contacts in disconnected condition
should be at least 3 mm.
Thank you for choosing DZ 024 panel heater. This is a product providing
heating in winter depending on the consumers’needs for comfortable room
temperature. If operated and taken care of properly in accordance with these
instructions, the appliance will provide you with many years of useful operation.
OPERATION INSTRUCTIONS
ELECTRONIC CONTROL
Operation Modes
Temperature LED
Time LED
“Heating”mode LED
/ Operating heater
“Delayed start” mode LED
/“Program”mode
ON/OFF Button
“Timer”button for switching on“Delayed start”
or“Program”mode
Turn on the convector, press the switch in position“I”(On) .
Time setting
The time setting is possible only in O mode – the current day of the week,
hour and minutes can be set.
To enter the time settings you need to keep simultaneously pressed the“ON/
OFF”and “Timer”buttons. The parameter which is being set blinks on the
display. To select a parameter to set, you need to press briey the“Timer”
button. To exit the settings, you need to press briey for a third time the
“Timer”button (after you have set the minutes).
You begin the settings with selecting a day of the week from 1 to 7 depending
on which in order the current day of the week is, and the setting is done by
entering the respective number. The hour and the minutes are displayed
simultaneously and the parameter which is being set is blinking. You can
change the value of the parameter by using the and buttons.
If no button is presses for 10 seconds, you will exit the settings.
Switching on“Heating”mode
When the panel convector is switched o, the digital display shows the room
temperature and only the Temperature LED is lit. If you press the“On/O”
button once, you will enable “Heating”mode. A red LED is lit indicating this
mode. The digital display shows the set temperature for about 2 seconds,
and during this time the Temperature LED is not lit. If the room temperature
is lower than the set temperature, the heater will be automatically switched on.
When the heater is on the red LED is permanently lit!
Temperature setting
By pressing either of the buttons and you will enter the“Change the set
temperature”mode. The display starts ashing and it shows the temperature
which has been set so far. By pressing the buttons you can change the
temperature setting either up or down. If you don’t press any button for 5
seconds, the new setting will be stored and the appliance with automatically
go into“Heating”mode. If you keep pressed any of the buttons or for
more than 0.7 seconds, the value of the set temperature will start increasing or
decreasing by 4 units per second. The temperature setting ranges from 10 to 30
degrees Celsius.
Note: The device shows the temperature around the location of the sensor
and is not a means of accurately measuring the ambient temperature.
“Delayed start” of the panel convector
When the convector is in O mode, by pressing the“Timer”button you
can enter a specic time after which the appliance will automatically go
in“Heating”mode. This mode is indicated by a blinking yellow LED and
inactive red LED. The digital display will show the room temperature when
the Temperature LED is lit, and it will show the remaining time in hours until
“Heating”mode will be activated and this will be indicated with a lit Timer
LED. Upon activating this mode the yellow LED becomes lit, and the display
starts ashing and showing the entered time in hours until the convector will
be automatically switched on. Initially the display will show 12 hours, and by
using the or buttons you can adjust the desired time. If you keep pressed
any of the buttons or for more than 0.7 seconds, the value of the set
time will start increasing or decreasing by 4 units per second. If you don’t press
any button for 5 seconds, or if you press the Timer button, the regulator will
automatically go into“Delayed start”mode. If you enter time 00, this mode will
not be activated. When the “Delayed start” mode is already active, if you press
the“Timer” button again, you can correct the remaining time in both possible
directions. After setting the time, the appliance goes into“Delayed start” mode
with the display showing the temperature and the hours remaining until the
appliance will switch to“Heating”mode. You can exit this mode by pressing the
“On/O” button. Then the convector will go into“Heating”mode. The “Delayed
start”mode can be set within a range from 01 to 96 hours.
Switching o“Heating”mode
You can exit “Heating”mode by pressing the “On/O” button. Then the heater
will be switched o, and if it has been on by then, the red LED will go out. The
display will continue showing the room temperature.
“Anti-frost function”
If the room temperature falls below 5 degrees Celsius and the convector is o
(the red LED is not lit, but the mechanical switch is in position“I”(On) ), the
heater will be automatically switched on in order to prevent from freezing.
Entering a temperature correction for the temperature sensor does
not apply to this function.
Enabling and disabling the anti-frost function:
• this function is enabled by default
• to disable this function, the convector must be in“O”mode, when
you press the and“On/O”button for three seconds the display will
show a blinking “ON”, and by pressing the button you will reach the

EN
4Operation and Storage Manual of Panel Heater
“OFF”position, then you need to wait for 3 seconds and the function will
automatically go in“OFF”mode.
• to enable this function again, the convector must be in“O”mode, when
you press the and“On/O”button for three seconds the display will
show a blinking “OFF”, and by pressing the button you will reach the
“ON”position, then you need to wait for 3 seconds and the function will
automatically go in“ON”mode.
“Temperature correction for the sensor” function
Due to the specics of the temperature prole in some premises there may be
dierence from the temperature shown on the display and the actually measured
temperature in the various locations of the heating appliance in the room.
• See the temperature shown on the display of the appliance
• Measure the temperature at a place where the temperature is“comfortable”
enough for you (usually at a height of 60 cm from the oor, in sitting
positon). If you nd a dierence within a range of ±4°С, you can set the
necessary correction in the convector’s menu (It is important to note that
this function can be set only after the temperature has become the same all
around the room, and depending on the room type, the minimum required
time is 7 hours) by entering the temperature dierence resulting between
the value on the display and the actually measured temperature.
Note: This function is used with the purpose of providing better
temperature comfort and energy saving for the user of the electric
convector in the room which it is in. A temperature dierence greater than ±4 °C
from the measured temperature in a specic location in the room indicates that
the room where you use the convector in is not well insulated or the temperature
is not the same all around the room.
Example: a convector in a room on a stone oor – the convector displays 18°С
(the set temperature is 22°С), the actually measured temperature (feeling of
reached comfort temperature) is 22°С at a height of 60 cm from the oor - > in
this case the convector continues to overheat the room (this is a direct energy
loss, but the convector cannot reach the set temperature because it measures the
temperature at a low height close to the oor) and it will never switch o. In this
case a temperature correction of +4°С needs to be applied to the sensor, thus the
convector will display 22°С and it will start switching o, and eventually it will
maintain the set temperature of 22°С).
The normal status of the function is 0°C by default
• to change this value, the convector must be in“O”mode, when you press
the and “On/O” buttons for three seconds the display will show a
blinking “0oc”. You can press either the or button to reach the„-4°С“
to„4°С“ range, then you need to wait for 3 seconds and the function will be
automatically stored.
• to check what correction has been set, the convector must be in “O”
mode, when you press the and “On/O”buttons for three seconds you
will see the set temperature blinking on the display. By pressing the or
buttons you can set a new value within a range from„-4°С“ to„4°С“.
Note: After activating the Return to Factory Settings function a new
temperature correction has to be entered, the value by default is 0°С)
Adaptive start
• Adaptive start control is a function which predicts and initiates the optimal
start of heating up in order to reach the set temperature in the desired time.
• this function is enabled by default
• to change the value, the convector must be in “O” mode, when you press
the„ “ and “Timer” buttons for three seconds the display will show a
blinking “A_On”. You need to press the„ “ button to reach„AOFF“; then you
need to wait for 3 seconds and the function will be automatically stored.
• To return to„ON“ status – the convector must be in“O”mode; when you
press the and “Timer” buttons for three seconds the display will show a
blinking “AOFF”; you need to press the button to reach„A_On“, then you
need to wait for 3 seconds and the function will be automatically stored.
This function can be set according to your needs. The appliance operates
for 17 hours following the set“comfort” temperature until it reaches a stable
status – this is the reference comfort temperature. Also, a temperature lower
than the comfort one, with a dierence from 4°C ± 1°С, has to be set for a
period of minimum 7 hours. When the adaptive operation is enabled, leave
the electronic thermoregulator of the appliance to operate for 4 cycles (4 х 24
hours) of comfort cycles (17 hours) and lowered temperature (7 hours). Upon
completion of the last period of low temperature, the comfort temperature
should be reached within ± 30 minutes deviation from the set time, with a
maximum dierence of ± 1°C from the reference comfort temperature.
“Protection from children”
You can lock the buttons by continuously pressing the arrows and “Timer”
buttons simultaneously, in order to prevent any changes to the settings.
Repeat the same action to unlock the buttons.
Note: If you press any of the buttons when the keypad is locked, the display
will show „LOC_“
Settings in„Weekly programmer 24/7”
Entering settings mode of “Weekly programmer” is possible only after
the time and the day of the week have already been set in the appliance..
To enter and exit the settings mode you need to continuously press the
“Timer”button.
There are three parameters to be set – day of the week, time and temperature;
switching among the three parameters is done by shortly pressing the “Timer”
button in the following sequence: day, time, temperature. To store the settings,
press shortly the “Timer”button after you nish the temperature setting.
You can change the value of each parameter by using the and buttons.
Conditions for settings storing
a. After a point has been stored, it cannot be changed any more until you exit the
current setting.
b. Upon storing the rst set point of a specic day in the current setting, all
previously set points of the day are cleared.
c. Storing further points of a specic day is possible only for the hours remaining
until the end of the day, after the last stored point.
d. When you have stored a point in the last hour of the day – 23.5h, you cannot
store any more points for this day in the current setting, and the display will
show “FUL” and the number of the day.
e. If nothing is stored in the current setting for a specic day, it will keep the
existing stored points up to the current setting.
The purpose of the settings is to store the three parameters in the so called
“SET POINTS”, where the temperature set for each set point is implemented
until the next one is reached.
Example:
If you have stored the temperature to be 22°C at 7 h and you wish the
temperature to remain the same until 19 h (you plan the temperature to increase
to 23°C then), you do not need store every single hour until 19 h, and you only
need to store the temperature to be 23°C at 19 h. By default the temperature will
be 22°C during this period of time (7 – 19 h).
The procedure for storing each point is as follows:
Upon entering settings mode the display will show dAY1, with the numeral
blinking to indicate that this is the parameter to be set (in this case it is the day
of the week).
a. to select the desired day, use the and buttons
b. to go to time setting, shortly press the “Timer” button
c. use the and buttons to select the desired time (with a 0.5h interval) per point
d. to go to temperature setting, shortly press the “Timer” button
e. to select the desired temperature, use the and buttons. The possible
temperature range is from 10 to 30°С, and OFF status is possible as well.
f. To store the point, shortly press the “Timer” button; then you are automatically
transferred to the setting of the next point (the display again shows dAYX) and
you can proceed with paragraph а) for the next point.
g. When you have stored a point in the last hour of the day – 23.5h, you cannot
store any more points for this day in the current setting, and the display will
show “FUL_” and the number of the day.
ATTENTION: Points of a particular day may be stored only in
ascending order of their times.
Note: Before implementing paragraph f) the user can go back to paragraph
а) to correct the three parameters of a point by shortly pressing the ON/OFF
button, without storing the settings in the memory.
Adding more points in a particular day may be done at random, after you
have stored points for other days, however you need to observe the rule for
ascending order of their times in a day.
To exit the settings mode, press continuously the“Timer” button and wait for
30 seconds.
Upon leaving the settings you can review the stored points by using the

EN
Operation and Storage Manual of Panel Heater 5English
and buttons, provided that the appliance is in programming mode.
Note: When you turn on the appliance, it will start operating in the (heating
or programming) mode which it has last operated.
Note: You can switch between the modes of operation (heating or
programming) by shortly pressing the “Timer” button when the
appliance is switched on.
“Return to factory settings” function
When the convector is in “O” mode, press the and buttons
simultaneously for six seconds; then the display will show„_ _ __“ and rotating
symbols. When it is “reset”, the display will show the measured value of the
room temperature.
After using the reset function, you need to re-enter the settings of the
following functions:
• time setting
• enter a value of the temperature correction (if needed)
• disable the“Anti-frost”function (if needed)
• disable the“Adaptive start” (if needed)
• weekly programme - 24/7
If the electric convector is disconnected from the mains, this will not aect
the set temperature and the mode of operation which has been active prior
to its disconnection. If for example the convector has been in “Heating”mode,
after it has been disconnected and reconnected to the mains, it will continue
operating in the same mode with the same set temperature.
The principle of operation of the electric convector with energy-
independent memory is to store the settings for 90 minutes
guaranteed, and up to 150 minutes not guaranteed.
When the room temperature is lower than the temperature set by the
electronic thermoregulator, the convector will start operating and will
continue operating until the room temperature reaches the set value. When
the room temperature is higher than the temperature set by the electronic
thermoregulator, the convector will automatically go into“Standby” mode.
Information presented on panel heater display
Indications when you are not in settings mode:
a. In O mode – consecutively showing:
• time (hour and minutes)
• measured room temperature
b. In Heating mode – it shows the measured room temperature
c. In Programming mode – consecutively showing:
• Day of the week, low line and the measured temperature. 6_22
• Day of the week, low line and the temperature set in the programme
blinking (set for the current hour), which may be also the OFF symbol. 6_23
d. Upon connecting the convector to power supply the display shows:
• Hyphens “----“, if the appliance has been in O mode before disconnecting
it from the power supply.
• Hyphens “----“, which in 2 seconds will be replaced by the value of the
current temperature, if the appliance has been in On mode before
disconnecting it from the power supply.
e. Two numerals (01÷96) and a blinking yellow LED indicate the remaining time
in hours until the delayed start, if the appliance has been in “Delayed start”
mode before disconnecting it from the power supply.
f. With the purpose of further energy saving, the electronic thermoregulator
reduces the brightness of illumination of all LEDs. Upon pressing any of the
buttons the brightness increases for 8 seconds and it is then reduced again.
g. If the display shows “t1” or “t2“, this means that the self-diagnostic system has
found a problem with the temperature sensor. “t1” indicates a disconnected
cable at the sensor, while “t2” indicates short circuit at the sensor. In this case
the electric convector will be automatically switched o and it can be switched
on again only after the problem has been xed. The problem has to be handled
by a qualied specialist.
h. Upon switching on the power supply the display will show hyphens “----“ for 2
seconds instead of temperature of time.
i. When the digital display shows the temperature the “Temperature” LED is lit,
and when it shows the time, the “Timer” LED is lit.
PROTECTION
• The appliance is equipped with a safety thermo turn-o device, which
automatically turns the heater o in cases of extreme temperature of the
panel heater /i.e. overheating of the appliance/.
• The safety thermo turn-o device will automatically restore the heater
operation when the temperature of the appliance falls below the
permissible ultimate values.
CLEANING
• It is compulsory rst to turn o the appliance through its power
switch and to disconnect it from the power socket. Before starting the
cleaning session you should wait until the panel heater cools down in a
disconnected state.
• Clean the heater body with damp cloth, vacuum cleaner or a brush.
• Never immerse the appliance into water – there is danger for your life from
electric shock!
• Never use gasoline, thinner or hard abrasive products to clean the
appliance, because they will damage the appliance coating.
STORAGE
• Before putting the panel heater away let it cool down after you have
disconnected it from the power socket
• Use the appliance original packing to store it, if the panel heater will not
be in use for a long period of time. By storing the product in its original
packing you protect it from excessive dirt and dust accumulation.
• Never put a hot panel heater in its packing!
• It is necessary the product to be stored at a dry and dark place, protected
from direct sun light.
• It is explicitly forbidden to store the panel heater in damp and wet premises.
MAINTENANCE OPERATIONS OF THE APPLIANCE
• In case of appliance malfunction, please contact the authorized service
center closest to your location. /service centers are indicated in appliance
warranty documents/.
•Important: In case of a claim and/or violation of your consumer rights,
please contact the supplier of this appliance at the indicated locations or
via the Internet page of the company: www.tesy.com
DIMENSIONS OF HEATED VOLUME AND HEATED AREA OF A ROOM /
APPLIANCE MODELS
Model Heated volume Heated area
DZ 024 050 EIS W - 500W 10* - 15 m34* - 6 m2
DZ 024 100 EIS W - 1000W 20* - 30 m38* - 12 m2
DZ 024 150 EIS W - 1500W 30* - 45 m312* - 18 m2
DZ 024 200 EIS W - 2000W 40* - 60 m316* - 24 m2
DZ 024 250 EIS W - 2500W 50* - 70 m320* - 28 m2
* Minimum guaranteed heated volume (area) for heating at an average capacity of heat transmission
factor λ=0.5 W/(m2K) for a heated room. Higher values of heated volume (area) can be achieved at an
average value of λ=0.35 W/ (m2K). Standard height of heated rooms – 2.5 meters.
This manual suits for next models
1
Table of contents
Languages:
