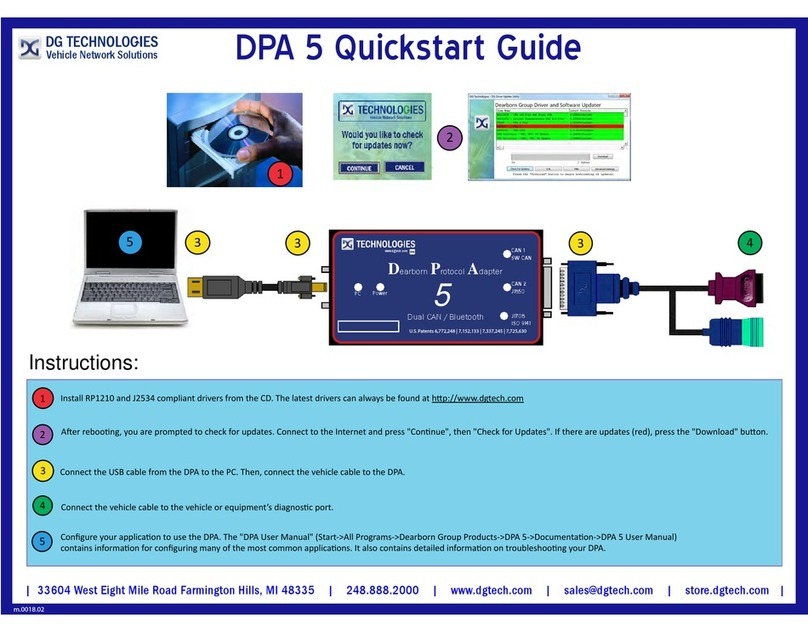
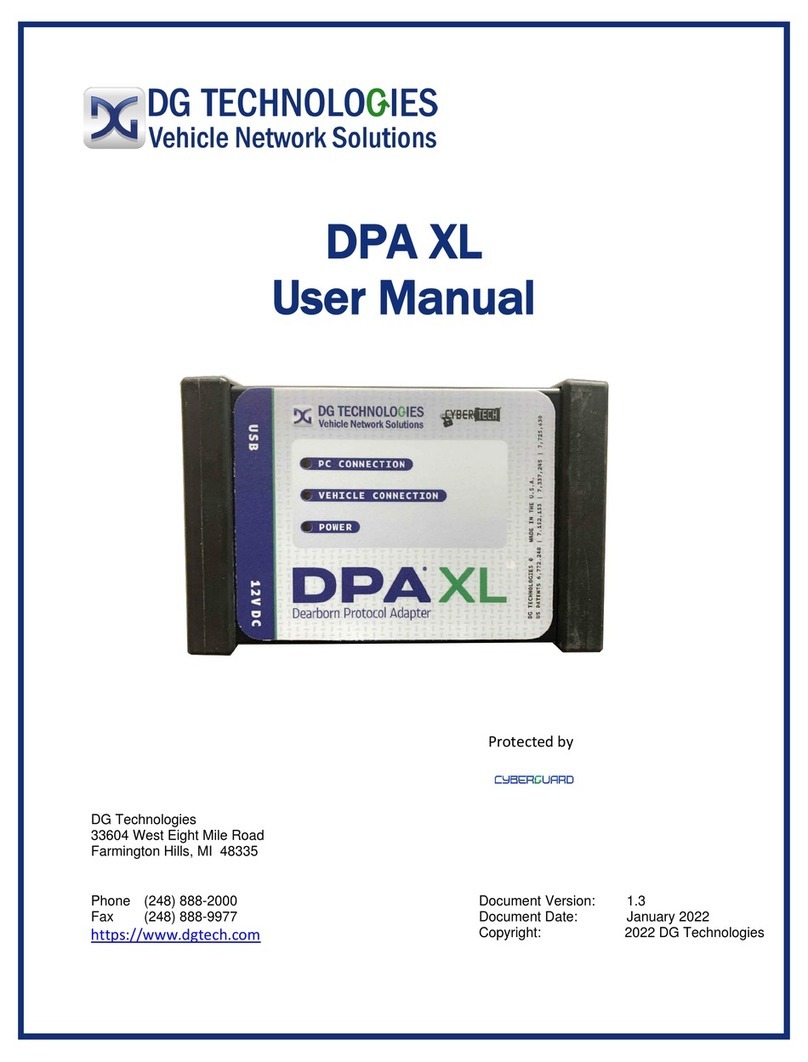
DG Technologies DPA 5 Instruction sheet

Dearborn Protocol Adapter
DPA 5 Series
Bluetooth Configuration Manual
DG Technologies
33604 West Eight Mile Road
Farmington Hills, MI 48335
Phone (248) 888-2000
Fax (248) 888-9977
Document Revision: 1.11
Document Date: June 28, 2021

Permission is granted to copy any or all portions of this manual, provided that such copies are for use with the DPA
product and that “© 2012-2021 Dearborn Group, Inc.”, (herein referred to as “Dearborn Group”, “DG Technologies”, or
“DG”), remains on all copies.
The software that is provided for use with the DPA 5 is also copyrighted. Permission is granted to copy this software for
back-up purposes only.
I M P O R T A N T
To ensure your success with this product, it is essential that you read this document carefully before using the hardware.
Damage caused by misuse of the hardware is not covered under product warranty. When using this manual, please remember the
following:
•This manual may be changed, in whole or in part, without notice.
•DG assumes no responsibility for any damage resulting from the use of this hardware or software.
•Specifications presented herein are provided for illustration purposes only and may not accurately represent the
latest revisions of hardware, software or cabling.
•No license is granted, by implication or otherwise, for any patents or other rights of DG or of any third party.
DG® logo is a registered trademark of DG Technologies, Inc. Other products that may be referenced in this manual are trademarks of
their respective manufacturers.
BLUETOOTH OVERVIEW FOR THE DPA 5.............................................................................3
EXITING BLUETOOTH RANGE AND RE-ACQUIRING SIGNAL...............................................................................................................5
STEPS IN USING THE DPA 5 IN BLUETOOTH MODE.............................................................5
INSTALL YOUR DPA 5DRIVERS FROM CD OR FROM WEBSITE DOWNLOAD........................................................................................ 5
VERIFY BLUETOOTH SUPPORT ON COMPUTER...............................................................................................................................6
COMPUTERS NOT EQUIPPED WITH BLUETOOTH ............................................................................................................................6
PAIRING YOUR DPA 5DEVICE AND CREATING A VIRTUAL COM PORT..............................................................................................6
TURNING A VIRTUAL COM PORT INTO AN RP1210 DEVICEID ........................................................................................................ 7
USING MULTIPLE DPAS IN BLUETOOTH MODE ON ONE PC .................................................7
TRADEMARKS ..........................................................................................................................................................................7
WINDOWS 10 NOTES...............................................................................................................................................................8
WINDOWS 8NOT SUPPORTED...................................................................................................................................................8
WINDOWS 7NOT SUPPORTED...................................................................................................................................................8
WINDOWS XP NOT SUPPORTED................................................................................................................................................. 8
DETAILED INSTALL –WINDOWS 10 PRO ............................................................................ 9
DETAILED INSTALL –WINDOWS 8 (NO LONGER SUPPORTED).......................................... 11
DETAILED INSTALL –WINDOWS 7 PRO (NO LONGER SUPPORTED) .................................. 12

RUNNING THE BLUETOOTH CONFIGURATION UTILITY..................................................... 13
CREATING A NEW RP1210 DEVICEID FROM A NEWLY PAIRED DPA 5............................................................................................15
DELETING AN RP1210 DEVICEID .............................................................................................................................................15
TECHNICAL SUPPORT AND RETURN MERCHANDISE AUTHORIZATION (RMA)................... 16
TECHNICAL SUPPORT ..............................................................................................................................................................16
RETURN MERCHANDISE AUTHORIZATION (RMA)........................................................................................................................16
APPENDIX –FCC AND CERTIFICATION INDUSTRY CANADA INFORMATION ....................... 17
INDUSTRY CANADA.................................................................................................................................................................17
Bluetooth Overview for the DPA 5
Bluetooth (BT) has become a very popular short-range wireless protocol for devices such as cell phone headsets. The
DPA 5 is equipped with a Bluetooth antenna that can be used instead of using a USB cable. The following are some very
broad notes to be considered with using the DPA 5 in Bluetooth mode:
✓The term dongle represents the PC to Bluetooth communications adapter that plugs into the USB port of a PC.
✓Configuring of the DPA 5 to use Bluetooth is not straightforward, nor is it easy with other Bluetooth PC to any
external device communication adapters. We have made our best efforts to make it as easy as possible, and to
document the steps to doing so as thoroughly as we can.
✓Your DPA 5 can be paired with, and be used by any Bluetooth equipped PC throughout your shop. In simple terms,
the DPA 5 in Bluetooth mode is not locked into one specific PC in the shop.
✓The range of communication is dependent on Bluetooth PC dongle radio power output. Typically, micro-sized USB
Bluetooth PC dongles do not transmit/receive as far as full-size USB Bluetooth PC dongles. There are even large
differences in the power outputs of the full-size USB PC dongles. Range is also dependent on shop operating
conditions and electromagnetic interference sources such as fluorescent lights, HVAC systems, and welding
equipment. Therefore, a specific range for communications cannot be guaranteed.
oWe have noted that the Class I Bluetooth device IOGEAR GBU321 has an effective range of about 60 feet and the
Class II IOGEAR GBU421 has an effective range of about 30 feet. The word effective meaning reliable
communications without dropouts from external influences (fluorescent lights, HVAC systems, welders, etc).
✓Note that the RP1210 committee, vehicle and component OEMs (Original Equipment Manufacturers), and DG, do
not recommend reprogramming, reflashing, or recalibrating equipment using any type of wireless protocol. A

physical cable is much more reliable and not as prone to the electromagnetic interference found in a shop floor
environment.
Since Bluetooth has become so popular, there are literally hundreds of models of Bluetooth-to-PC dongles that can be
used to communicate with the DPA 5 device. This large number makes it impossible to cover the configuration of each
one in this manual, as the documentation for those models would be outdated in weeks or months. What we will try to
accomplish in the next sections is to introduce you to the correct terminology that will be required to pair your DPA 5
with your PC and create a Virtual COM Port so that the DPA 5 Bluetooth Configuration Utility can be used to create an
RP1210 DeviceID that can be used by your OEM application software.
We apologize in advance and request your understanding.
Because there are so many dongles on the market, we are unable to
provide technical support for the installation and configuration of your
Bluetooth dongle. The Bluetooth dongle installations range from very
simple and straightforward to extremely complex and time-consuming.
If you cannot get your dongle paired with the PC into what is called a
Virtual COM Port, we suggest that you visit the website for the
manufacturer of the dongle, or contact their help desk.
Once you have your DPA 5 paired and have a Virtual COM Port assigned to
it, you can call our technical support department for assistance using the
DPA 5 Bluetooth Configuration Utility (covered below).

Exiting Bluetooth Range and Re-Acquiring Signal
With the various operating systems we have tested with, Bluetooth operations have behaved somewhat differently
and inconsistent. This has been especially so when using a Bluetooth Virtual COM Port for communications and
when the DPA 5 exits signal range and then re-enters signal range. Sometimes the DPA 5 drivers have been able to
re-establish communications, sometimes they have not. Because of this inconsistent behavior, we recommend
staying within signal range during your diagnostic session. Our experience suggests that even with the short range
mini-USB dongle you can circle the vehicle and trailer (if one is attached).
If your Bluetooth DPA 5 goes out of range during operations, the DPA drivers may not recover when the DPA 5
comes back into Bluetooth signal range. If it does go out of range, the easiest way to recover is:
1. Disconnect and exit from your OEM application.
2. Unplug the DPA from the vehicle.
3. If you are using a USB BT dongle.
a. Unplug the USB BT dongle.
b. Insert the USB BT dongle back into the same USB port.
4. Reconnect the DPA 5 to the vehicle.
5. Run Adapter Validation Tool to check if the PC can see the vehicle. If the PC cannot see the vehicle, reboot
the PC.
6. If rebooting the PC does not work, delete the DPA 5 RP1210 DeviceID (Deleting an RP1210 DeviceID).
7. Delete the DPA 5 Bluetooth device using the Bluetooth icon in the icon tray.
8. Re-create the Virtual COM Port for the DPA (Add Bluetooth Device) using the operating system specific
instructions below.
9. Re-create the RP1210 DeviceID (Creating a New RP1210 DeviceID…).
10. If these instructions do not work, please contact DG Technical Support. We will be glad to help get your DPA
5 communicating through Bluetooth.
Steps in Using the DPA 5 in Bluetooth Mode
As mentioned before the process used to setup the computer to communicate with the DPA isn’t very straight forward.
In section 3 we have broken this process down into several steps so that you can easily understand the process. The look
of these steps varies but operating system. In subsequent sections you will see sections devoted to setting up the DPA 5
Bluetooth connection for different Windows Operating Systems.
Install Your DPA 5 Drivers from CD or from Website Download
The software for the DPA 5 can be downloaded from https://www.dgtech.com/downloads/ .

Verify Bluetooth Support on Computer
1. Move your mouse cursor over system tray (located next to
your clock) in lower right corner of your computer screen.
2. Click the Show hidden icons button (circled in black).
3. If there is a Bluetooth icon (circled in red) your computer is
equipped with Bluetooth. If your computer is equipped
with an airplane mode feature you will need to turn
airplane mode off to enable wireless communication.
System tray
Computers Not Equipped with Bluetooth
Most of today’s computers come equipped with Bluetooth capabilities. If your computer does not have Bluetooth
capabilities you will need to purchase a Bluetooth dongle. Make sure that you follow the dongle manufacturer’s
directions on how to install the hardware and software on your computer.
Pairing Your DPA 5 Device and Creating a Virtual COM Port
After you have verified that your computer has Bluetooth capabilities you need to create a connection from the
computer to the DPA 5. This process is called pairing. Once the DPA 5 and computer are paired the operating system
automatically creates a Virtual COM port. DG’s software and drivers can then use this Virtual COM port to
communicate with the DPA 5.
The back label of the DPA 5 contains information that is specific to your unit.
1. DPA 5 Bluetooth ID –This is a unique serial number that allows you to know which DPA 5 you are
communicating with. This is very useful in environments where there is more than one DPA 5 Bluetooth.
2. DPA 5 Bluetooth Passkey –During the process of creating a virtual com port you may be asked for the
Bluetooth passkey. The pass key for all DPA 5s is “dgtech”.
✓Note that the DPA 5 must have power to be paired. To power a DPA 5, unit must be connected to a
vehicle using the 6/9 pin truck or OBDII car connector. If connecting the DPA 5 to a truck, the truck
ignition needs to be turned on. There is a light on the front of the DPA 5 that indicates that the unit has
power.

Turning a Virtual COM Port into an RP1210 DeviceID
What is an RP1210 DeviceID and Why Is it Necessary?
The DG Bluetooth Configuration Utility is used to create these RP1210 DeviceID entries in the DGDPA5MA.INI file with
DPA 5 units that have been paired with a PC into Virtual COM Ports. The below example shows how the DPA 5 with
the DPA 5 Bluetooth ID “0000-18AF-F507” became DeviceID=160, and the DeviceParams=/B,COM3 reflected the
Virtual COM Port that was assigned to that entry (COM3). The illustration on the right shows what AVT would show.
[DeviceInformation160]
DeviceID=160
DeviceDescription=DG DPA 5 #0000-18AF-F507 Bluetooth,Wireless
DeviceName=DG DPA 5 #0000-18AF-F507 Bluetooth
DeviceParams=/B,COM3
Using Multiple DPAs in Bluetooth Mode on One PC
As noted above, there are many different possibilities for Bluetooth PC dongles and their PC installations. There are also
major differences in the Bluetooth protocol stack (drivers) on various operating systems. The Bluetooth protocol stack
on the different operating systems is what the DPA 5 drivers use to communicate with the DPA 5.
Depending on the Bluetooth protocol stack that is being used, some will only pair a device to a single Virtual COM Port.
This would mean that if you wanted to use more than one DPA with one specific PC, you would have to do the following
(the example uses DPA 5 #1 and DPA 5 #2):
1. Use the DPA 5 Bluetooth Configuration Utility to remove DPA #1’s RP1210 DeviceID.
2. Use the Bluetooth software provided with the PC dongle to remove DPA #1 from the Virtual COM Port.
3. Use the Bluetooth software provided with the PC dongle to pair DPA #2 to the Virtual COM Port.
4. Use the DPA 5 Bluetooth Configuration Utility to create an RP1210 DeviceID for DPA #2.
Trademarks
Windows and all operating systems are registered trademarks of Microsoft Corporation.

Windows 10 Notes
An install on any Windows 10 machine should look about the same. If you note differences on a particular Windows
10 version that are not covered in this manual, please contact our technical support department. We would like to
include these screen snapshots in the next version of this manual.
Windows 8 Not Supported
Any information below is for reference purposes. Windows 8 is no longer supported.
An install on any Windows 8 machine should look about the same. If you note differences on a particular Windows
8 version that are not covered in this manual, please contact our technical support department. We would like to
include these screen snapshots in the next version of this manual.
Windows 7 Not Supported
Any information below is for reference purposes. Windows 7 is no longer supported.
An install on any Windows 7 machine should look about the same. If you note differences on a particular Windows
7 version that are not covered in this manual, please contact our technical support department. We would like to
include these screen snapshots in the next version of this manual.
Windows XP Not Supported
As of January 2018 DG Technology drivers will no longer run on Windows XP.

Detailed Install –Windows 10 Pro
NOTES:
❑Bluetooth capabilities are built-in to most Windows 10 machines. A Bluetooth dongle is not necessary
on any computer with built in Bluetooth.
Various versions of Windows 10 may have different steps than the ones listed below.
Step 1 - Move cursor over icon tray in lower right corner,
click on Show hidden icons, then click on Bluetooth icon.
Step 2 - Select Add a Bluetooth Device:
Step 3 - Match Bluetooth ID located on
back of DPA 5:
Step 4 - Highlight and select Pair:

Detailed Install –Windows 8 (NO LONGER SUPPORTED)
NOTES:
❑Bluetooth capabilities are built-in to most Windows 8 machines. A Bluetooth dongle is not necessary on
any computer with built in Bluetooth.
❑Various versions of Windows 8 may have different steps than the ones listed below.
Step 1 - Move cursor over icon tray in lower right corner,
click on Show hidden icons, then click on Bluetooth icon.
Step 2 - Select Add a Bluetooth Device
Step 3 –Windows should automatically start scanning for
new devices. Match Bluetooth ID located on back of DPA 5,
click on it:
Step 4 - Enter “dgtech” when prompted for a password.
Select the Next button.
Step 5 - Wait for processing, status is now paired.
Continue to –Running the Bluetooth Configuration Utility.

Detailed Install –Windows 7 Pro (NO LONGER SUPPORTED)
NOTES:
❑Bluetooth capabilities are built-in to most Windows 7 machines. A Bluetooth dongle is not necessary on
any computer with built in Bluetooth.Various versions of Windows 7 may have different steps than the
ones listed below.
Step 1 - Move cursor over icon tray in lower right corner,
click on Show hidden icons, then click on Bluetooth icon.
Step 2 - Select Add a Bluetooth Device
Step 3 - Match serial number displayed here with label
on DPA 5 adapter. Select Next button
Step 4 - Enter “dgtech” when prompted for a password.
Select the Next button.

Step 5 - Successful install. Select Close.
Continue to –Running the Bluetooth Configuration Utility.
Running the Bluetooth Configuration Utility
After you have successfully paired your DPA 5 with computer and have created the Virtual COM Port, run the DPA 5
Bluetooth Configuration utility. This application will create an RP1210 DeviceID entry that can be seen by OEM software
applications. The DPA 5 Bluetooth Configuration Utility can be launch directly from the start menu or from within the
RP1210 Options program.
❑Start ➔All Programs ➔DGTech Utilities ➔DPA 5 Bluetooth Configuration
❑Start ➔All Programs ➔DGTech Utilities ➔RP1210 Options

▪Press the Bluetooth Configuration Utility button
RP1210 Options Program
You must go through this configuration utility to create RP1210 DeviceID entries.
If you do not, the DPA 5 in Bluetooth mode will not work with your OEM applications.
What the DG Bluetooth Configuration Utility does is:
✓Display existing DPA 5 Bluetooth RP1210 DeviceID pairings that are found in the INI file, allowing you to delete an
RP1210 DeviceID pairing if you wish.
✓Discover DPA 5 Bluetooth devices on Virtual COM Ports and create a new RP1210 DeviceID pairing that can be used
by OEM software applications.
Note: The DPA 5 must have power in order to create the Virtual COM Port and RP1210 DeviceID pairing.

Image showing that no Bluetooth DPA 5 devices are in the INI file.
Creating a New RP1210 DeviceID from a Newly Paired DPA 5
After you have paired a DPA 5 with you PC and created a Virtual COM Port click the Discover Bluetooth DPAs
button. Any Bluetooth DPAs that you have paired with will be automatically added to the INI file. OEM applications
will now be able to see and use that particular DPA 5 as RP1210 DeviceID=160.
Image showing existing Bluetooth DPA entry (white row) and newly detected DPA Bluetooth entry (yellow row).
NOTE: Sometimes the detection process through the virtual COM port does not see the DPA on the first attempt. If
this is the case, try the discovery process again.
Deleting an RP1210 DeviceID
If you want to delete an RP1210 DeviceID, simply select that entry and click the Delete Pairing button. Note that
after the RP1210 DeviceID has been deleted, it will NOT appear in OEM software applications for selection. For
information on Bluetooth (including FCC and IC identification), see the Bluetooth Configuration Manual. It can be
found in the Windows Start Menu.

Technical Support and Return Merchandise Authorization (RMA)
Technical Support
After reading and following the troubleshooting and validation procedures in this document please check the
FAQ page at www.dgtech.com/faqs. If you are still not able to resolve an issue, please feel free to contact DG
technical support. For users in the United States, technical support is available from 9 a.m. to 5 p.m. Eastern
Time. You may also fax or e-mail your questions to us. For prompt assistance, please include your voice
telephone number and the serial number.
DG Technologies Technical Support
Phone: (248) 888-2000
Fax: (248) 888-9977
E-mail: [email protected]om
Web site: www.dgtech.com/tech-support
Users not residing in the United States should contact your local DG representative.
Return Merchandise Authorization (RMA)
If technical support has deemed that there may be a physical problem with your DPA, you will be issued you an
RMA number. You would then return the product along with any documentation of ownership you have (proof
of purchase/price) to the following address:
Product Service/Repairs
Attn: RMA# xxxxxxx
DG Technologies
33604 West 8 Mile Road
Farmington Hills, MI 48335

Appendix –FCC and Certification Industry Canada Information
The DPA 5 has been tested and found to comply with the limits for a Class B digital device, pursuant to Part 15 of the
FCC Rules (see the back of the DPA 5 for FCC and IC specific identifications). These limits are designed to provide
reasonable protection against harmful interference in a residential installation. The DPA 5 uses and generates radio
frequency energy. If not installed and used in accordance with the instructions, it may cause harmful interference to radio
communications. If the DPA 5 does cause harmful interference to radio or television reception, which can be determined
by turning the affected equipment off and on, the user is encouraged to try to correct the interference by one or more of
the following measures:
•Reorient or relocate the receiving and/or sending antennas.
•Increase the separation between the DPA 5 and the affected receiving equipment.
•Connect the equipment into an outlet on a circuit different from that to which the receiver is connected.
•Consult the dealer or an experienced radio/TV technician for help.
This product complies with FCC OET Bulletin 65 radiation exposure limits set forth for an uncontrolled environment.
Industry Canada
Operation of the DPA 5 is subject to the following two conditions:
1. This device may not cause harmful interference, and
2. This device must accept any interference received, including interference that may cause undesired
operation.
Changes not expressly approved by Dearborn Group, Inc. to the DPA 5 could void the user's authority to operate the
DPA 5. The following is a sample rear label from the DPA 5 depicting the FCC and IC identifiers.
The following are the DPA 5 Bluetooth details as required to be published by the FCC.
Operating Frequency
2.4GHz

Power Output Maximum
< 4.4dBi
Contains Transmitter Module FCC ID:
QOQWT11
Transmitter Bluetooth QDID
B012647
Other manuals for DPA 5
4
Table of contents
Other DG Technologies Adapter manuals

