DGSHAPE DWP-80S User manual

Setup Guide
• To ensure safe use with a full understanding of this machine’s performance, please be sure to read through
this manual completely.
• Store this manual in a safe place where it can be referred to when needed.
• Reproducon, citaon, or translaon, in whole or in part, of this manual is prohibited without the express
wrien consent of DGSHAPE Corporaon.
• The contents of this operaon manual and the specicaons of this product are subject to change without
noce.
• DGSHAPE Corporaon assumes no responsibility for any damage that may occur through use of this product,
regardless of any failure to perform on the part of this product or of any errors in this document. Damage
includes but is not limited to damage caused by the specicaons or performance of the product, damage
caused by non-use of the product, and damage caused by deliverables obtained through use of this product.
Such damage can be either direct or indirect.
USB
R2-170621

This device is Class A Informaon Technology Equipment. This device may cause electronic interference when
used in a household environment. In such cases, the user may be asked to implement appropriate measures.
VCCI-A
DGSHAPE Corporaon has licensed the MMP technology from
the TPL Group.

1
Contents
Modeling Machine ...............................................................................................................................................2
Photo-curable Resin ............................................................................................................................................3
Setup Guide .......................................................................................................................... 5
Checking the Included Items ...........................................................................................................................6
About the Documentation for This Machine ............................................................................................7
Items to Prepare Yourself (Ultrasonic cleaner) .........................................................................................7
Important Notes on Installation .....................................................................................................................8
Installation environment ...................................................................................................................................8
Checking the Installation Space and Height .............................................................................................9
Connecting the Power Cables ...................................................................................................................... 10
Removing and Storing the Retainers .........................................................................................................11
Adjusting the Angle .........................................................................................................................................13
System Requirements ......................................................................................................................................14
Software and Manuals to Install ..................................................................................................................14
Dierences between Installation Procedures According to Windows Version ........................ 15
Installing the Software and Manuals (Windows 10 Version 1607 and Later) ............................ 16
Installing the Software and Manuals (Windows 10 Version Earlier than 1607, Windows 8.1/7) ....23
Launching the Software and Viewing the Manuals ............................................................................. 31
Installing the DWP-80S Driver Separately ............................................................................................... 32
Installing the Projector Driver Separately ................................................................................................33
Installing Quick Denta or the Manuals Separately ............................................................................... 37
DWP-80S Driver Installation Is Impossible ...............................................................................................38
Uninstalling the DWP-80S Driver ................................................................................................................40
Projector driver Does Not Operate Correctly .........................................................................................41
Printing is No Longer Possible after Using Windows 10 ....................................................................44
Uninstalling the Projector driver ................................................................................................................ 44
Correct Installation of the DWP-80S Driver Is Impossible (Listed as “Unspecied”) ...............45
Windows® is either a registered trademark or trademark of Microso® Corporaon in the United States and/or
other countries.
Other company names and product names are trademarks or registered trademarks of their respecve holders.
Copyright © 2016 - 2017 DGSHAPE Corporaon hp://www.dgshape.com/

2
Important Notes on Handling and Use
This machine is a precision device. To ensure the full performance of this machine, be sure to
observe the following important points. Failure to observe these may not only result in loss of per-
formance but may also cause malfuncon or breakdown.
Modeling Machine
This machine is a precision device.
• Handle this machine carefully and never subject it to impacts or excessive force.
• Use within the range of specicaons.
• Never aempt to move the Z-axis unit by hand with undue force.
• Never needlessly touch anywhere inside the machine except for locaons specied in this docu-
ment.
Install in a suitable location.
• Install this machine in a locaon that meets the specied condions for temperature, humidity, and
the like.
• Install this machine in a stable locaon oering good operang condions.
• Never install outside.
• Never use this machine in an environment where silicone substances (oil, grease, sprays, etc.) are
present. Doing so may cause poor switch contact.
This machine becomes hot.
• Never cover the venlaon holes with cloth, tape, or anything else.
• Install in a well-venlated locaon.

Important Notes on Handling and Use
Photo-curable Resin
Handling of photo-curable resin
• When handling photo-curable resin, wear gloves and protecve eyewear, and do not let the resin
come into contact with skin or enter the eyes.
• If photo-curable resin gets on the skin, wash thoroughly with soap.
• If photo-curable resin gets on the machine, wipe it o using a rag or the like.
• Do not use dierent types of resin mixed together.
Disposal
To dispose of photo-curable resin, transfer the resin to a transparent container, let it cure, and then
dispose of it according to local waste sorng criteria. (Do not dispose of resin in sewage systems or
rivers.)
Handling of liquid material vat
Use dierent liquid material vats depending on the type of resin being used Using the same liquid
material vat with dierent types of resin may hasten the deterioraon of the liquid material vat.
Contact your authorized DGSHAPE Corporaon dealer or visit the DGSHAPE Corporaon website
(hp://www.dgshape.com/) to purchase liquid material vats.
3

4

Setup Guide
5
6
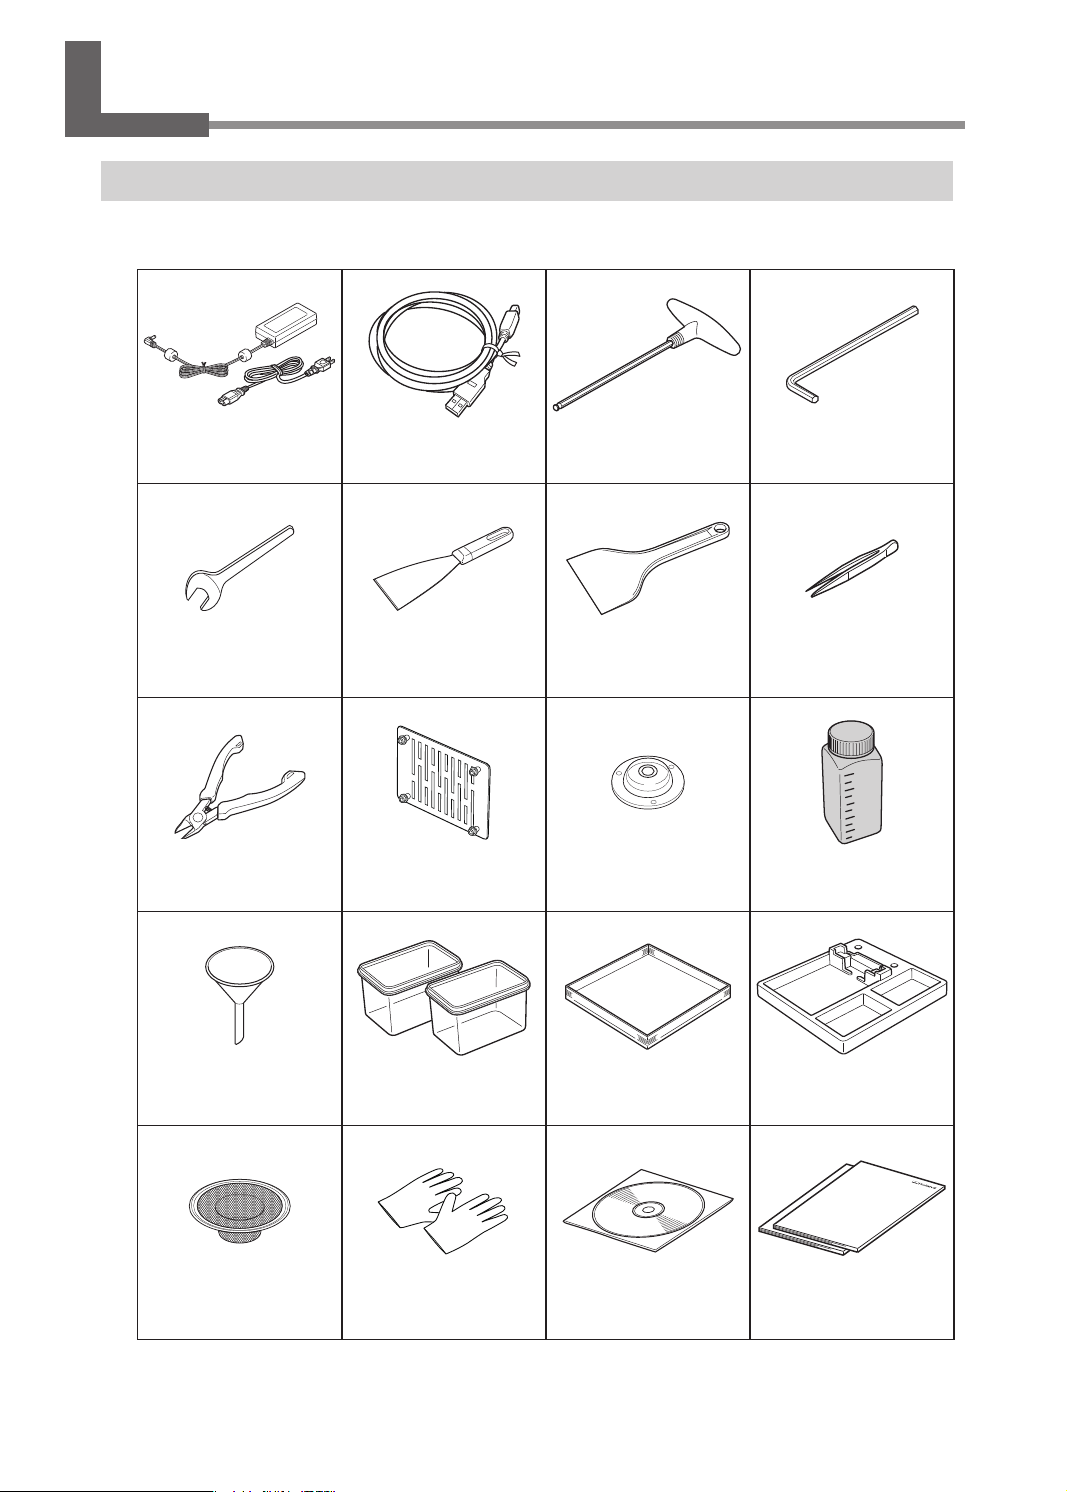
1. Checking the Included Items
Checking the Included Items
The following items are included with the machine. Make sure they are all present and accounted
for.
AC adapter (1)
Power cord (1)
USB cable (1) Hexagonal screwdriver (1) Hexagonal wrench (1)
Wrench (1) Metallic spatula (1) Plasc spatula (1) Tweezers (1)
Nippers (1) Plaorm
plates (3)*1
Level gauge (1) Light-shielding boles (3)
Funnels (3) Washing containers (2) Liquid material vat (1) Work tray (1)
Strainers (3) Rubber gloves (1 pair) DGSHAPE Soware Pack-
age CD (1)
Read this rst (1)
Setup Guide (1)
* 1: One is aached to the machine before shipment.

1. Checking the Included Items
About the Documentation for This Machine
The following documentaon is included with the machine.
Read this rst (Booklet)
This booklet explains important precauons and points that must be observed for ensuring safe
use of the machine. Read this rst.
DWP-80S Setup Guide (this document)
This document contains important notes for ensuring safe use as well as detailed informaon on
how to install and operate the machine. The Setup Guide also explains how to install and operate
the included programs.
DWP-80S User's Manual (electronic-format manual)
This manual explains how to operate the soware and how to perform prinng using this machine.
The manual is in electronic format, and no printed document is included. The manual can be found
on the included DGSHAPE Soware Package CD.
Quick Denta Help (electronic-format manuals)
This user's manual can be viewed on a computer screen. Installing the Quick Denta program makes
this manual available for viewing. This Help manual includes detailed explanaons of the com-
mands used in the programs, as well as other informaon. To view the Help manual, follow the
instrucons in the user's manual for the machine.
Items to Prepare Yourself (Ultrasonic cleaner)
An ultrasonic cleaner is required for cleaning printed objects. Please prepare an ultrasonic cleaner
separately.
Contact your authorized DGSHAPE Corporaon dealer or visit the DGSHAPE Corporaon website
(hp://www.dgshape.com/) to purchase an ultrasonic cleaner.
7
2. Installation
Important Notes on Installation
Be sure to read the booklet “Read this rst” before installing the machine.
Install the machine in a level, stable location oering good operating conditions. An unsuitable location
can cause faulty operation or breakdown.
WARNING Besuretoperformoperaonsasspeciedbytheinstrucons,andnever
touchanyareanotspeciedintheinstrucons.
Sudden movement of the machine may cause injury or burns.
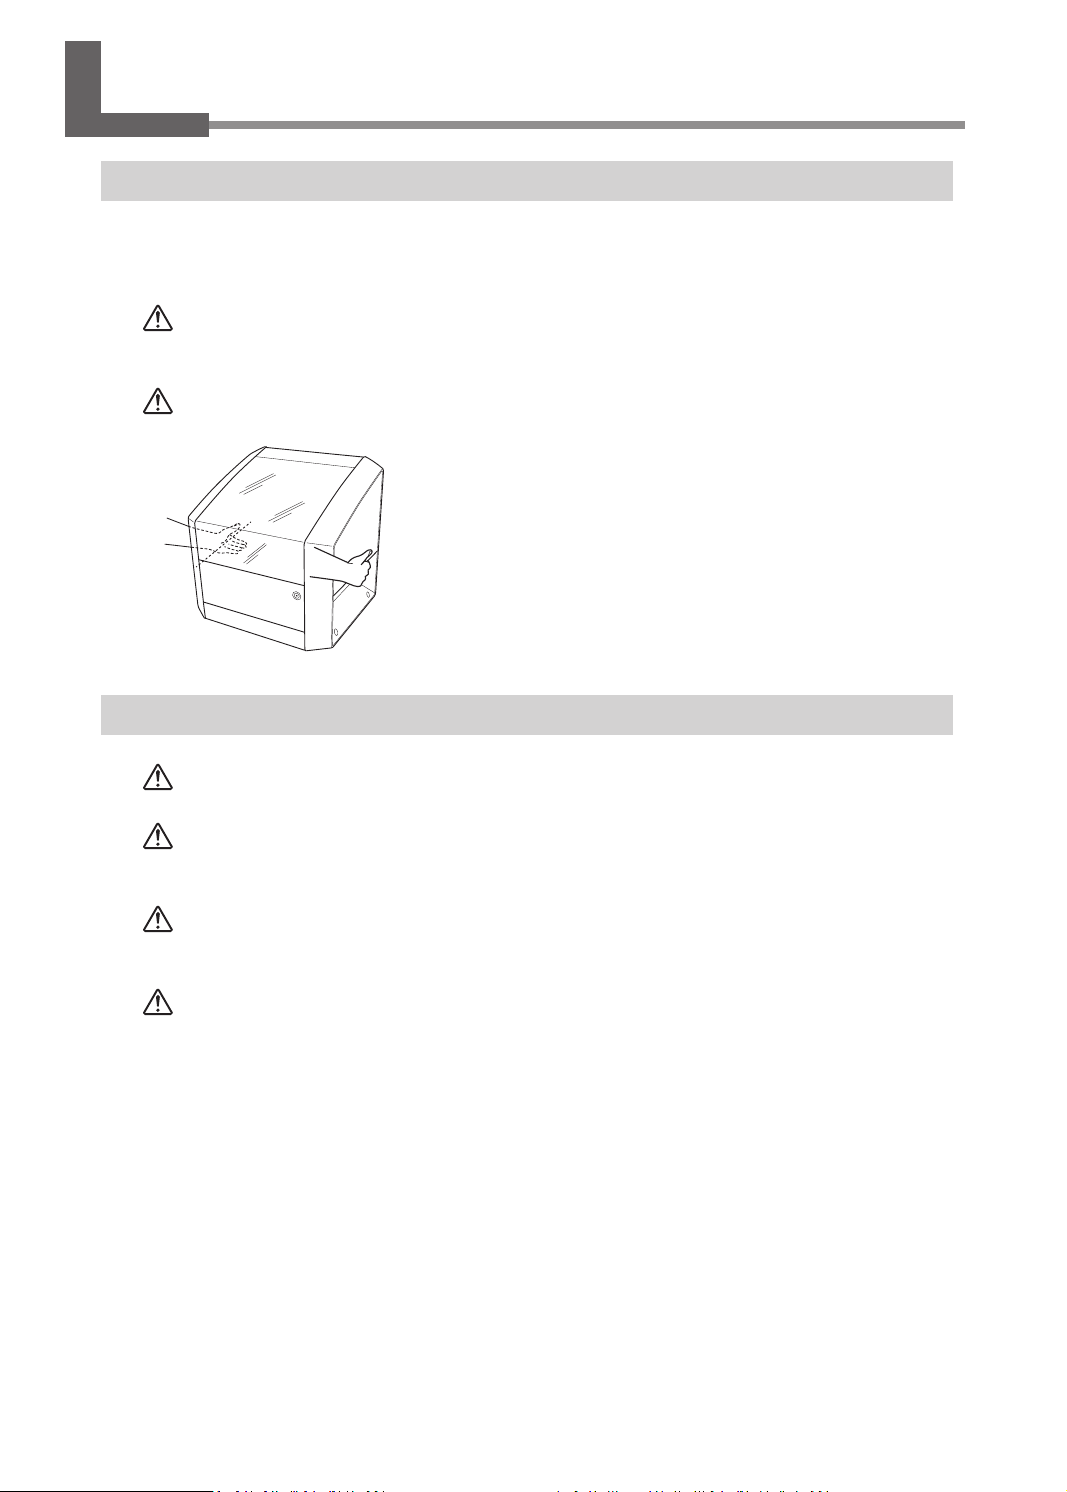
WARNING Whenliingthemachine,holdthelocaonsshowninthegure.
Failure to do so may result in the unit pping over, leading to injury.
Installation environment
CAUTION Installinalevelandstablelocaon.
Failure to do so may result in falling of the machine, leading to injury.
WARNING Neverinstallthismachineoutsideorinanylocaonwhereexposureto
waterorhighhumiditymayoccur.
Current leakage may cause electrical shock or re.
WARNING Neverinstallthemachineclosetoanyammableobjectorinagas-lled
locaon.
Combuson or explosion may occur.
WARNING Posionthemachinesothatthepowerplugiswithinimmediatereachat
allmes.
This is to enable quick disconnecon of the power plug in the event of an
emergency. Install the machine next to a power outlet. Also, provide enough
empty space to allow immediate access to the power outlet.
• Never install in a locaon subject to wide uctuaons in temperature or humidity.
• Never install in a locaon subject to shaking or vibraon.
• Never install in a locaon where the oor is lted, not level, or unstable.
• Never install in a dusty or dirty locaon, or outdoors.
• Never install in a locaon exposed to direct sunlight or near air-condioning or heang equipment.
• Never install in a locaon where heat generated while using the machine cannot easily escape.
• Never install in a locaon exposed to considerable electrical or magnec noise, or other forms of
electromagnec energy.
• Never install in an environment where silicone substances (oil, grease, spray, etc.) are present.
8
Table of contents
Other DGSHAPE Printer manuals


