Diamatic ULTRA BMG-780 RS User manual


www.diamaticusa.com
3
Table of contents
Maintenance log 2
1.
Introduction 4
2.
Machine description 4
Control keypad 6
3. Safety
7
3.1
Work area safety
7
3.2
Electrical safety
7
3.3
Personal safety
8
3.4
Machine safety
8
3.5
Maintenance safety
9
3.6
Dust collector safety
9
3.7
Grinding safety
9
3.8
Battery safety
10
3.9
Transport safety
10
3.10
Signs on the machine
11
4. Accessories
5. Initial
operation
12
5.1
Checkpoints of electrical safety
12
5.2
Checkpoints of machine safety
12
5.3
Battery drive system (option)
13
Remote controlled driving
14
AUTO DRIVE-mode
14
5.4
Manual moving of the machine
15
Diamag
16
5.5
Adjustable weights
16
5.6
Changing the wings
17
5.7
Before start-up
19
6. Operating 20
6.1 Switching the machine on 20
6.2 Turning the machine off 20
6.3 Working with the remote control 21
6.4 Operating during grinding 23
6.5 Wet grinding 24
7. Maintenance 25
7.1 Buffers 27
7.2 Control keypad 28
7.3 Remote control maintenance 31
8. Troubleshooting 31
9. Technical data 33
10. Warranty 34

4
www.diamaticusa.com
1. Introduction
Before use, operators must be provided with information, instruction and training for the use of the machine
and the substances for which it is to be used, including the safe method of removal and disposal of the
material collected. All persons who are working with or maintaining this machine must read the manual
carefully and understand it fully. In case you sell the unit, hand it on to the next owner.
Keep this manual always with the machine, to enable it to be referred to at any time.
Any other work not covered by this operating manual must not be carried out.
This machine is designed for industrial use by professionals. Only authorized and trained personnel may
operate this machine. This machine is not intended for use by persons (including children) with reduced
physical, sensory or mental capabilities, or lack of experience and knowledge. Diamatic offers a course on
the use of the machine in order to make the operating and maintenance personnel familiar with all elements
of the machine. Always use common sense when working with machines.
2. Machine description
The BMG-780 RS is an electrical driven planetary grinding machine. This is a three headed machine for
leveling and polishing of indoor floors. The 3 planetary rotating discs are Ø 240 mm. It can be used for dry
and wet applications. The BMG-780 RS can be used on almost any floor to plane, to make ready for coatings,
or to remove coatings or glue residues. The machine may not be used without an adequate dust extraction
system. A specially designed Diamatic dust collection system ensures dust-free operation of the machine and
clean air at the workspace. This machine may not be used on wood.
Due to the drive motors and the wireless Bluetooth control unit this machine is very effective and ergonomic
to operate. The 24V battery drive system enables the operator to drive the machine to the work area without
the use of the power supply cable. This feature will save precious time and contributes to the ease of use.

www.diamaticusa.com
5
1
Operating panel
12
Lower drive
2
Steer handle
13
Upper drive
3
Swing arm for dust hose
14
Grinding buffer
4
Electric control box
15
Floating shroud
5
Weight set
16
Brush for shroud
6
Tilting support
17
Dust cover
7
Drive wheel
18
Front support grinders
8
Drive wheel motor
19
Pin
9
Grinding head motor
20
Front support wheel
10
Protection cap
21
Wheel
11
Frame mounting eyes
22
Adjustable front wheel
BMG-780 RS

6
www.diamaticusa.com
23
24
25
26
8
Control keypad
27
1
28
29
6
30
31.
Main voltage
32.
Amp of motor
33.
Disc speed
34.
Down Speed
35.
Up Speed
36.
Down / Up Speed
(by scrolling)
37.
Start grinding
40.
RDY = Ready
38.
Change turning
direction of discs
39.
Stop grinding
STO = EM-Stop activated
23
Key + Battery power indicator /
Hour counter
24
Fixing knob for ergonomic steer
25
Main power switch ON/OFF
26
Dusthose attachment
8
Drive wheel motor
27
Emergency stop button
1
Control keypad
28
Lever for adjusting steering
handle
29
Key + cord for dead mans switch
6
Tilting support
30
Integrated floor nozzle on
floating shroud
31
Main voltage indication
32
Ampere of grindmotor
33
Speed of the grinding discs
34
Grinding speed DOWN button
35
Grinding speed UP button
36
Down / Up grinding speed (by
scrolling)
37
Start grinding button
38
Change the turning direction of
grinding discs button
39
Stop grinding button
40
RDY = Ready
STO = EM-Stop activated

www.diamaticusa.com
7
Warning!
3. General Safety Rules
Read all safety warnings and all instructions. Failure to follow the warnings
and instructions may result in electric shock, fire, explosions and / or serious
injuries.
Only authorized and trained personnel may operate this machine. This machine is not intended for use by
persons (including children) with reduced physical, sensory or mental capabilities, or lack of experience and
knowledge.
It is the responsibility of the user to analyse the surface to be treated. The surface may not contain any
substances which could pose a fire-, explosion- or health risk when treated. The user should make a risk
assessment on the basis of the information obtained about the surface to be treated and take proper
precautions for the work to be performed.
In case of any inappropriate usage, improper operation or repair, the producer shall be exempt from liability.
3.1
Work area safety
a) Do not use the machine in rain, damp or wet locations.
b) Avoid dangerous environments: do not work in the presence of explosive atmospheres, in the presence of
flammable liquids, gases or dust. Remove materials or debris that may be ignited by sparks.
c) In some cases sparks could be created by grinding.
d) The surface to be treated must be clean, make sure to remove all stones, screws etc..
Any stones, screws, bolts, pieces of wire etc. could cause serious damage if it gets inside the machine!
e) Make sure there is enough ambient light on the work area. Cluttered or dark areas invite accidents.
f) Do not use on wood.
g) Keep children and bystanders away while operating the machine. They are likely not to foresee the
potential dangers of the machine. Distractions could cause you to lose control of the machine.
h) Persons who are not operating the machine must not be permitted to stay in the surrounding area ofat
least 5 meter from the machine.
i) Never use the machine when the surface is not clear and if there is a risk of stumbling or tripping.
j) Make sure that there are no cables or hoses in the driving direction of the machine.
k) Make sure that there is nothing standing or situated on the surface to be treated.
l) Make sure the machine can travel over all inequalities on the surface, small inequalities like weld seams
or floor joints are no barriers for the machine.
m) Never stay in the rain with the machine.
n) Check if there are any obstacles that can snag the cables when the machine is moving.
o) Remove reinforcing steel or other objects protruding from the surface in order to prevent damage to the
machine.
p) Warning!
Make sure that the surface to be treated does not contain dangerous materials such as:
-combustible or explosive dusts or substances.
-carcinogenic or pathogenic substances.
q) Secure the work area around the machine in public areas providing an adequate safety distance from the
machine. Use a red and white safety chain and danger sign to enclose the work area.
3.2
Electrical safety
a) Use only extension cables for extending the main cable that are sized and marked in accordance with the
overall power consumption of the machine. Do not use damaged extension cables.
b) Make sure that the phases and the earth wire of the extension cable(s) are connected in the same order
as the supply cable of the machine and the power supply.
c) Electrical cables must be rolled entirely off of the reels.
d) Any damage to the electric cables and/or electrical components is not permitted.
e) The voltage on the identification plate must comply with the power supply.
f) Use an electrical power supply connection with earth connection and earth leakage circuit breaker.
g) The circuit breaker of the power supply must have a ‘’D’’ characteristic. Circuit breakers with a “C” or “B”
characteristic can give problems when switching the motor on.
h) Keep the machine original; The machine is always equipped with an earthed connection, do
not change this and always use earthed cables with an earthed plug.
i) Inspect and test the electrical components regularly. The electrical components have to satisfy with the
requirements set out in the harmonised norm EN60204-1.

8
www.diamaticusa.com
j) Always call a skilled electrician or your distributor when you have questions about the safety of the
electrical components.
k) Work on electrical equipment or operating materials may only be undertaken by a skilled electrician or by
trained persons under the guidance and supervision of a skilled electrician as well as in accordance with
the electrical engineering regulations.
l) Always use tools that are insulated against voltages.
m) Do not abuse the cables. Never use the cables for carrying, pulling or unplugging the machine. Keep
cables away from heat, oil, sharp edges or moving parts. Damaged or entangled cables increase the risk
of electric shock.
n) Be careful with water on the treated surface. Electrical cables must not come into contact with water.
o) The main power switch on the machine must be in the “Off” position before connecting to the power
supply. (Only if there is a main switch present on the electrobox.)
p) During a long standstill of the machine, pull out the main plug and cover it with plastic foil.
q) If the machine is to be operated using power from a generator, the generator must be operated in
accordance with the current legal regulations and directives in force. (this applies to the protective earth
conductor in particular) in order to ensure that all safety devices are functioning and to eliminate possible
damage to electrical components.
3.3
Personal safety
a) Always wear Personal Protective Equipment while working with the machine.
-Dust mask class FFP3 or higher
-Hearing protection
-Safety glasses with lateral protection
-Protecting gloves
-Safety shoes
b) Dress properly. Do not wear loose clothing or jewellery. Keep your hair, clothing and gloves away from
moving parts.
c) Stay alert, watch what you are doing and use common sense when operating the machine.
d) The cord of the deadmans switch key should always be fastened on your arm or on to your clothing.
e) Pull out the key of the deadmans switch before any inspections, adjustments and/or maintenance work
is started.
f) All persons in the proximity of the machine, must wear hearing protection and safety shoes.
g) Always seek professional medical attention immediately in case of injury.
h) All persons surrounding the machine should wear Personal Protective Equipment.
3.4
Machine safety general
a) Safety functions and operating functions must work correct.
b) No loose bolts and nuts permitted.
c) Never operate machine without the guards and/or safety devices in place.
d) Never change anything on the safety devices on the machine!
e) Do not use the machine when it is damaged.
f) Do not open or remove protective guards while driving gears are running.
g) The temperature of certain machine parts can be above 37° C.
h) The machine, specially the handle grips must be free of fats/oils and have to be dry.
i) If the length of the brushes is, due to wear, less than 5mm or they are extremely deformed, the brushes
have to be replaced. Check the Service Manual for the order numbers.
j) All repair work has to be done by qualified Diamatic personnel, this guarantees a safe and reliable
machine.
k) Always use original Diamatic spare parts, grinding disks, grinding wings and polishing pads.
This will ensure the best performance. Only original Diamatic parts meet the factory specifications and
quality. Otherwise Diamatic BV cannot guarantee the safety of the machine. The part numbers can be
found in the Service Manual.
l) Check the rotating direction of the motor before starting up.
m) If safety-critical changes occur to the machine or its working method, the machine must be shut
down immediately! The cause of the fault must be established, and rectified.
n) In the event of operational malfunctions the machine must be shut down immediately and secured!
3.5
Maintenance safety
a) Pull out the main plug and place it in sight, before starting inspections and repairing on the machine. Pull
out the key of the dead man’s switch and keep it in your pocket. Press the Emergency shutdown button.
b) Wait for standstill of all drives before any inspections, adjustments and/or maintenance work is started.
c) Block the machine in a stable position before doing any maintenance work.

www.diamaticusa.com
9
d) Failures due to inadequate or incorrect maintenance may generate very high repair costs and long
standstill periods of the machine. Regular maintenance therefore is imperative.
e) Operational safety and service life of the machine depends, among other things, on proper maintenance.
f) Prevent premature wear by keeping the machine as dust free as possible. Clean the machine for this
reason regularly with a dust collector and non-aggressive materials, especially the upper drive. Never use
a high pressure water cleaner to clean the machine.
g) It is advisable to stock all spare parts or wear parts that cannot be supplied quickly. As a rule, production
standstill periods are more expensive than the cost for the corresponding spare part.
h) Do not use any aggressive cleaning materials and use lint-free cleaning cloths.
i) To allow the user to carry out maintenance operations, the machine must be disassembled, cleaned and
inspected as far as reasonably possible, without causing hazards for the maintenance staff or other
people.
j) The suitable precautions include decontamination before disassembling the machine, adequate filtered
ventilation of the exhaust air from the room in which it is disassembled, cleaning of the maintenance area
and suitable personal protection equipment.
3.6
Safety regarding dust collectors
a) Always use a suitable Diamatic dust collector when working dry to ensure a dust-free operation of the
machine and clean air at the workspace. Also the airflow helps to cool the machine and prevents
overheating.
b) Read the operating instructions of the dust collector before using it.
c) The dust container/bag of the dust collector must be emptied or replaced regularly. Comply with the local
waste treatment regulations considering the removed material.
d) The dust hose must be connected properly with a hose clamp and industrial tape.
e) The dust hose must be undamaged and free of obstructions.
f) Always switch on the dust collector first!
3.7
Grinding safety
a) The machine contains rotating parts, which are protected with a sliding cover. Always leave the diamond
discs on the floor while the motor is turning.
b) The flexible couplings / buffers can become worn out with use, because of this there can be higher
vibrations than normal. Check for this reason the flexible couplings / buffers for deformation and damage
before every use.
c) Do not let the machine rest on the diamond disc or coupling when it is not in use, this will cause
deformation to the flexible coupling.
d) Make sure the brush seals are in good condition, this to avoid dust escaping.
e) Make sure the diamond tools (wings / discs / pads) are not damaged or worn out.
f) Always pull out the main plug before u start changing the wings, disks or pads.
g) When mounting or removing a diamond disc; lay the machine down backwards so it is lying on the
handle. Make sure the machine will not fall back down. A second person can hold the handle down to
make sure it will not fall back down.
h) For changing the disks/wings u should wear Personal Protective Equipment like a dust mask, safety
goggles, gloves, protective shoes, and close fitting protective clothing.
Use the vacuum cleaner to prevent excessive dust.
i) Caution! The grinding disks / wings will heat up during grinding, don’t risk getting burned, always wear
protective gloves when handling them.
j) The machine contains rotating parts; because of this never tilt the machine backwards with a turning
motor.
k) Be careful with the machine and pull or let down the machine slowly, big shocks can damage the
electrical parts.
l) Make sure the floating shroud is in transport mode when you transport the machine.
m) Be careful, the workfloor can get slippery when grinding wet.
n) Keep all electrical cables and connections away from water.
3.8
Battery safety (12V)
a) Only use Diamatic approved batteries. Diamatic cannot guarantee the safety of the machine when other
batteries are used.
b) Every service work on batteries should only be done by trained personnel.
c) The battery contains lead-acid, do not disassemble, heat above 60°C, or incinerate.
d) Immediately flush eyes with cold, fresh water for a minimum of 15 minutes if electrolytic acid comes in
contact with eyes. Seek professional medical attention immediately.
10
www.diamaticusa.com
e) For work with the battery you need to remove all metal jewelry like rings, watches, necklaces etc. They
can be a cause of serious burns.
f) The old battery should be recycled. Batteries contain harmful materials, like lead en sulphuric acid. These
materials form an environmental and health hazard. Therefore it is imperative that they are recycled
responsibly in accordance with local disposal and environmental regulations.
3.9
Transport safety
a) Be aware of your surroundings and machine operating level. Do not side hill, do not run on steep incline,
this could cause machine to tip over.
b) The weight of the grinding machine is between 399 and 639 kg. Use a crane or lift when transporting the
machine, use the lifting eyes of the machine.
c) Before every use check the lifting eyes and welds for: deformation, damages, cracks, corrosion and wear.
d) Only lift the machine as shown in the picture below.
e) When lifting the machine from the ground, always use the lowest lifting speed. The cables must firstbe
tensioned at this speed; they must not be slack when the machine is lifted from the ground.
f) During hoisting make sure to be at a safe distance from the machine with the most optimal view on the
machine and working environment.
g) Never stand directly below the machine.
h) When transporting the machine do so in such a manner that damage due to the effects of the use of
force or incorrect loading and unloading is avoided.
i) The lifting eyes can also be used to fasten the machine on a pallet or during transport.
j) Always drive backwards when driving up to a ramp or grade, and forwards when driving of the ramp.
k) Chock wheels for transport and keep control handle in neutral position.
l) Don’t leave the machine unsecured on jobsites.
m) Park the machine always on a flat horizontal and levelled surface.
n) Make sure the floating shroud is in transport mode when you transport the machine.
o) Make sure the electrical cable and dust hose are disconnected.
p) Store the cleaned and dry machine in a humid free room. Protect the electrical motor from moisture, heat
dust and shocks.
q) Never use the machine for lifting or transporting persons or items.
It is not allowed to lift the machine without appropriate appliances as a lift or crane, lift themachine
with a rope on the lifting eyes as showed in imagine mentioned below.
Make sure the floating shroud is in transport mode when you transport the machine.
65. Transport mode

www.diamaticusa.com
11
3.10
Signs on the machine
The following stickers are placed on the machine. Meanings of these symbols are:
Type plate:
Email address, Website, Telephone & fax number.
The serial number of the machine.
The year of manufacture.
The net weight of the machine in kilogram.
Wear a dust mask class FFP3 or higher.
Hearing protection is obliged.
Safety glasses with lateral protection are
obliged.
CE-mark on this machine.
Wear protecting gloves.
Safety shoes obliged.
Consult the manual before operating the
machine.
! Danger Hazardous voltage in motor even when
solid state controller is OFF. Disconnect main
power before servicing motor, controller or
associated wiring.
Name, address and CE mark.
The machine type.

12
www.diamaticusa.com
4. Accessories
Part
Description
Adaptor Plates
DIA-SUPERMAG-2
Heavy Duty Quick Change Plate
E10366
Resin Adaptor Full Round
E07240-2
(DIAMAG 780/735 Plates 2nd generation)
Buffalo Wings
BFL708320S-2
(18/20 Grit Extra Large Double Seg Soft (Red)) For Hard Concrete
BFL708340S-2
(30/40 Grit Extra Large Double Seg Soft (Red)) For Hard Concrete
BFL708380S-2
(60/80 Grit Extra Large Double Seg Soft (Red)) For Hard Concrete
BFL7083140S-2
(120/140 Grit Extra Large Double Seg Soft (Red)) For Hard Concrete
BFL708320-2
(18/20 Grit Extra Large Double Seg Medium (Green)) For Medium Concrete
BFL708340-2
(30/40 Grit Extra Large Double Seg Medium (Green)) For Medium Concrete
BFL708380-2
(60/80 Grit Extra Large Double Seg Medium (Green)) For Medium Concrete
BFL7083140-2
(120/140 Grit Extra Large Double Seg Medium (Green)) For Medium Concrete
BFL708320H-2
(18/20 Grit Extra Large Double Seg Hard (Blue)) For Soft Concrete
BFL708340H-2
(30/40 Grit Extra Large Double Seg Hard (Blue)) For Soft Concrete
BFL708380H-2
(60/80 Grit Extra Large Double Seg Hard (Blue)) For Soft Concrete
BFL7083140H-2
(120/140 Grit Extra Large Double Seg Hard (Blue)) For Soft Concrete
Poly Crystaline Diamonds
BG200995-2
(Wing PCD 1x1)
BG200997-2
(Wing PCD Split 18/20 Grit)
BG200999-2
(Wing PCD ¼ round)
Bush Hammering Tools
E09119/Set
(Replacement Bush Hammer/Specify set of 9 or 15)
E10240
(Cutter Plate with 5 Bush Hammers-Complete)
E09580
(Cutterplate Only 240mm for 5 tools)
E07240-2
(DIAMAG 780/735 Plates 2nd generation)
10 SEG Round
DIA18/20PLUG-S
(18/20 Grit 10 Seg Soft (Red)) For Hard Concrete
DIA30/40PLUG-S
(30/40 Grit 10 Seg Soft (Red)) For Hard Concrete
DIA60/80PLUG-S
(60/80 Grit 10 Seg Soft (Red)) For Hard Concrete
DIA120/150PLUG-S
(120/150 Grit 10 Seg Soft (Red)) For Hard Concrete
DIA18/20PLUG
(18/20 Grit 10 Seg Soft (Green)) For Medium Concrete
DIA30/40PLUG
(30/40 Grit 10 Seg Soft (Green)) For Medium Concrete
DIA60/80PLUG
(60/80 Grit 10 Seg Soft (Green)) For Medium Concrete
DIA120/150PLUG
(120/150 Grit 10 Seg Soft (Green)) For Medium Concrete
DIA18/20PLUG-H
(18/20 Grit 10 Seg Soft (Blue)) For Soft Concrete
DIA30/40PLUG-H
(30/40 Grit 10 Seg Soft (Blue)) For Soft Concrete
DIA60/80PLUG-H
(60/80 Grit 10 Seg Soft (Blue)) For Soft Concrete
DIA120/150PLUG-H
(120/150 Grit 10 Seg Soft (Blue)) For Soft Concrete
Resin Types
PA-103050
(#0 50 Grit 3” Transitional Diamond)
PA-103100
(#1 100 Grit 3” Transitional Diamond)
DIA3SUPERFLEX50
(50 Grit 3” Superflex Resin)
DIA3SUPERFLEX100
(100 Grit 3” Superflex Resin)
DIA3SUPERFLEX200
(200 Grit 3” Superflex Resin)
DIA3SUPERFLEX400
(400 Grit 3” Superflex Resin)
DIA3SUPERFLEX800
(800 Grit 3” Superflex Resin)
DIA3SUPERFLEX1500
(1500 Grit 3” Superflex Resin)
DIA3SUPERFLEX3000
(3000 Grit 3” Superflex Resin)
DIA3SEMI50
(50 Grit 3” Semi Metal Resin)
DIA3SEMI100
(100 Grit 3” Semi Metal Resin)
DIA3SEMI200
(200 Grit 3” Semi Metal Resin)
DIAITS800100-2
(100 Grit 3” 6mm resin Black)
DIAITS800200-2
(200 Grit 3” 6mm resin Black)
DIAITS800400-2
(400 Grit 3” 6mm resin Black)
DIAITS800800-2
(800 Grit 3” 6mm resin Black)
DIAITS801500-2
(1500 Grit 3” 6mm resin Black)
DIAITS803000-2
(3000 Grit 3” 6mm resin Black)

www.diamaticusa.com
13
5. Initial operations
Before using the machine it is important to inspect the machine.
It is not permitted to use the machine if the machine safety is not according the checkpoints below.
Before switching on the machine make sure that no-one can be endangered when the machine starts up!
5.1 Checkpoints of electrical safety
▪Use only extension cables for extending the main cable that are sized and marked in accordance with
the overall power consumption of the machine.
▪Electrical cables must be fully unwound of them reels.
▪No damage is permitted for electrical cables.
▪Use an electrical power supply connection with earth connecting.
▪The main switch of the machine should be put to ‘Off’ before connecting to the power supply. (Only if
there is a main switch present on the electrobox.)
▪Make sure the power supply is in accordance with the machine specifications.
▪If the machine is to be operated using power from a generator, the generator must be operated in
accordance with the current legal regulations and directives in force. (This applies to the protective
earth conductor in particular) in order to ensure that all safety devices are functioning and to
eliminate possible damage to electrical components.
5.2 Checkpoints of machine safety
5.2.1 Safety functions and operating functions must work correct.
5.2.2 Check the diamond wings for damages and/or wear.
5.2.3 Check all screws and other fasteners for tightness. No loose bolts and/or nuts are permitted.
5.2.4 Check the electrical components, cables and connections for wear and/or damages.
5.2.5 Dust hose connection must be reliable: use hose clamps and industrial tape.
5.2.6 Dust hoses must be undamaged and free of obstructions
5.2.7 Make sure that the dust bin / bigbag is empty and connected properly.

14
www.diamaticusa.com
5.3 Battery drive system (option)
19 20
54
66
67
65
68
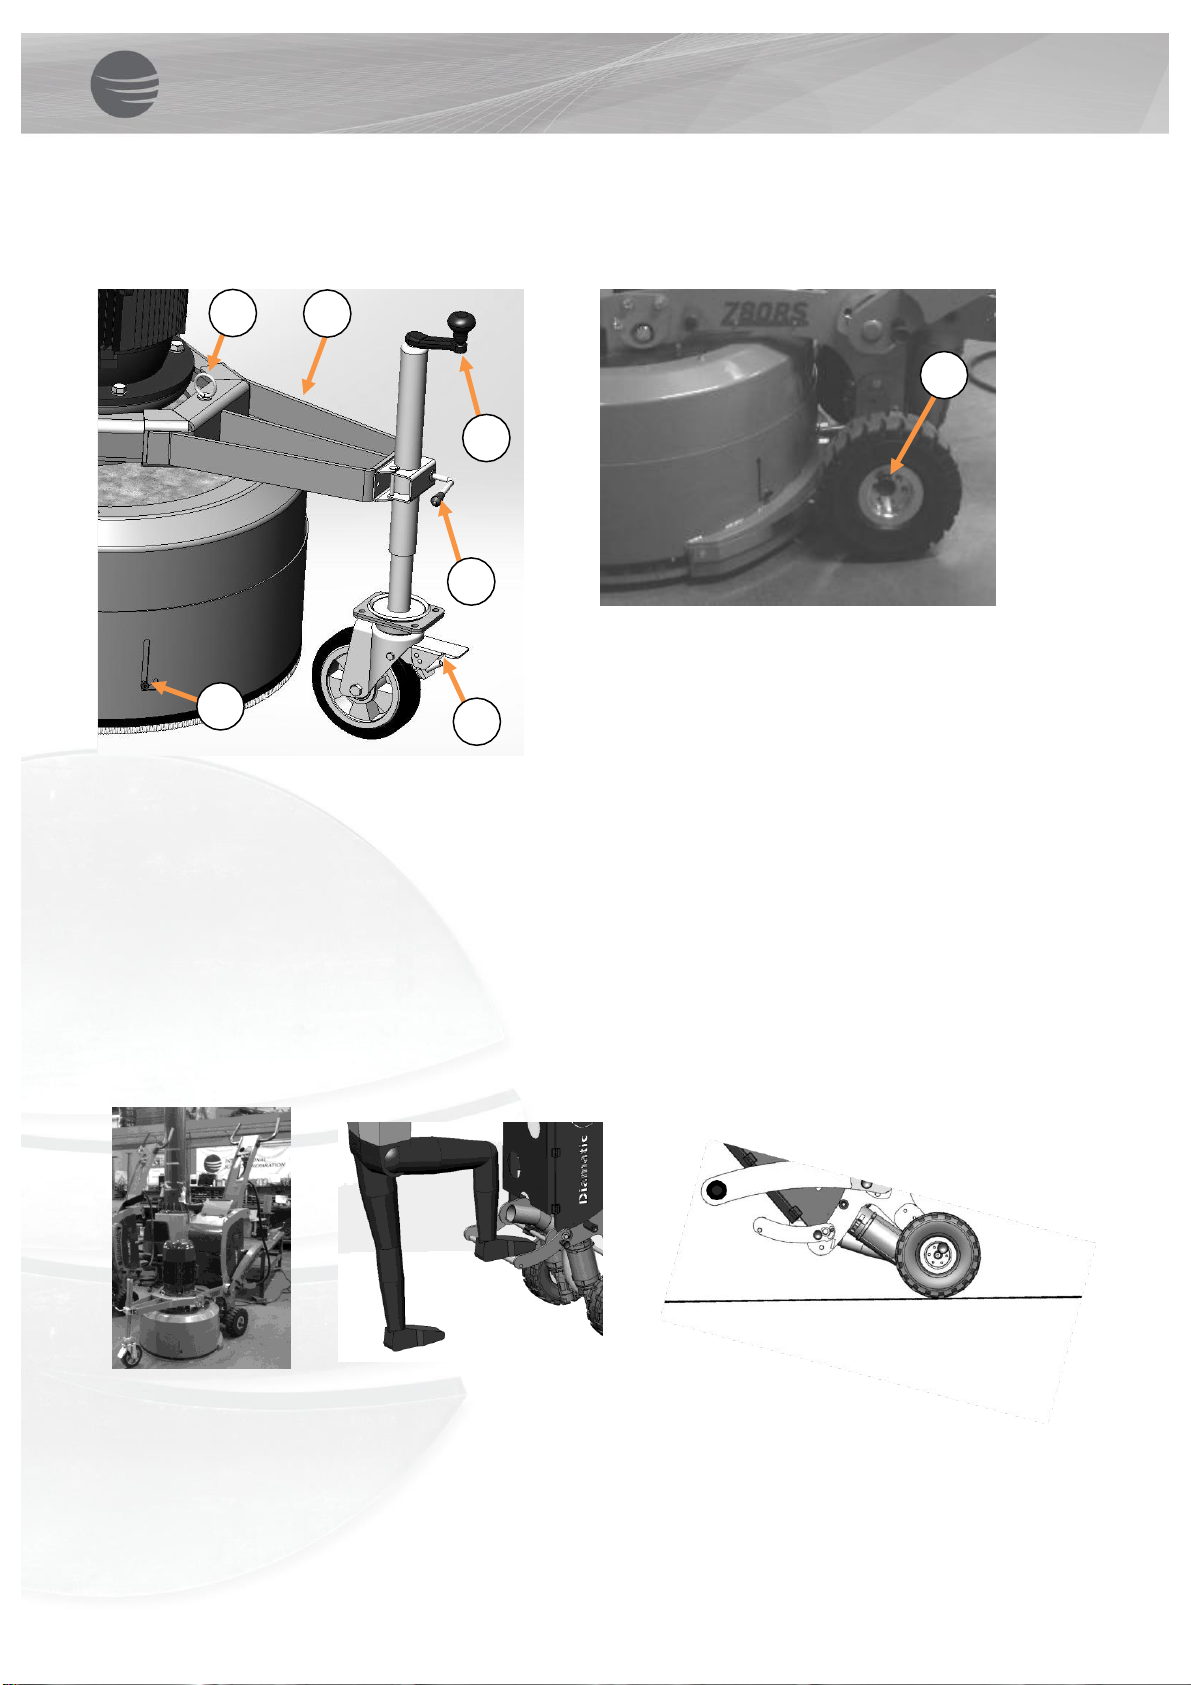
The machine can be moved around on 3 wheels using the front wheel support and battery drive system.
The 24V battery drive system enables the operator to drive the machine to and from the work area without
the use of the power supply cable. This feature will save precious time and contributes to the ease of use.
•Make sure the bracket (20) is fastened correctly and secured with the pin (19).
•Use the lever (67) to lower the wheel to the ground and fasten the lever (67) tight.
•Turn the handle (66) clockwise to lift the front off the ground.
•Release the brake (68) and make sure the floating shroud is in transport mode (65).
•The traction wheels must be connected to the drive motors, use the locking pin of each rear wheel
(54) to connect the wheels to the drive motors.
62
63 64
•Make sure the key of the dead man switch is in place and the emergency stop button is not activated
(turn to unlock).
•Now turn the key on the electrobox to ACC (63), the battery power indicator and hour counter (64)
will light up.
•Turn the remote control on (62) and push the connection button (41) for 2 seconds.
•The machine and remote control should now be linked, indicated by a little green light (45) on top of
the remote control.
There are 2 ways of driving the machine using the remote control, the AUTO DRIVE-mode or manually
controlled.

www.diamaticusa.com
15
Remote controlled driving
-Push the joystick (42) in the desirable direction to the drive the machine. The further the joystick is
pushed into the desirable position, the faster the machine moves.
-The SPEED FORWARD button (50) & the TRACKING button (51) don’t work in the manually controlled
mode, these functions only work in AUTO DRIVE-mode.
-You can turn the machine around its axle by pushing the joystick totally to the right or totally to the
left.
-The machine can also turn around one wheel, this can be done by pushing the joystick to the left or
right upper corner.
45
42
41
50 51 52 53
AUTO DRIVE-mode
-Use the FORWARD/REVERSE-switch (52) to select forward or reverse driving.
-Use the SPEED FORWARD (50) to select the driving speed, always start slowly at first.
-Set the TRACKING (51) in the middle position.
-Now push the DRIVE-button (53), to drive the machine automatically.
-Steer the machine left or right with TRACKING (51) and change the driving speed with (50).
NOTE: The joystick does not work in AUTO DRIVE-mode.
Push the DRIVE-button (53) to stop the AUTO DRIVE-mode. The machine can now be controlled with the
joystick again.
WARNING! Always make sure all rotating parts have come to a complete standstill before moving around the
machine.
Be careful! Make sure nobodies feet get under the wheels. Wear appropriate safety shoes when you drive the
machine to or from the work area.
16
www.diamaticusa.com
5.4 Manual moving of the machine
There are 2 ways of moving the machine around manually, tilting the machine backwards or by using the
front wheel support system to push the machine around on 3 wheels.
19 20
54
66
67
65
68
•Make sure the bracket (20) is fastened correctly and secured with the pin (19).
•Use the lever (67) to lower the wheel to the ground and fasten the lever (67) tight.
•Turn the handle (66) clockwise to lift the front off the ground.
•Release the brake (68) and make sure the floating shroud is in transport mode (65).
•The traction wheels must be disconnected from the drive motors, pull out the locking pin of each rear
wheel (54) to disconnect the wheels from the drive motors.
The machine can now be pushed around manually.
Another way to move the machine manually is by putting the steering handle in the upright (vertical) position
and putting the side-weights slightly backwards. Disconnect the traction wheels by pulling out the fast locking
pins (54). Stand with one foot on the bracket and pull on the handgrips to tilt the machine backwards. It can
now be pushed around on its back wheels.
The machine should only be moved around when the dust
hose, water supply and power supply cable are disconnected.
Be careful when you let the machine tilt back on the grinding heads, let the machine down slowly, big shocks
can damage the electrical parts.

www.diamaticusa.com
17
e weight forward or backward to the desired
allows the operator to regulate the grinding
DIAMAG
When using DIAMAG adapter plates, you can replace
the diamond wings without using any tools!
Because of the specially designed heat resistant magnets
and fixation pins, the diamond tools are fixed onto the
plate, but can still very simply be replaced by hand.
Contact your Diamatic distributor for more information
or check WWW.DIAMAG.EU
5.5 Adjustable weights
The machine has adjustable weights mounted at the sides, they can be set for high, medium or low grinding
pressure.
Hold the knob of the weight firmly in your hand.
Be careful! The adjustable weight is heavy!
With your other hand pull out the locking pin and adjust th
position.
Lock the locking pin back in position.
Repeat on the other side of the machine.
The position of the adjustable weights and steering handle
pressure very precise.
Grinding pressure BMG-780RS BD:
260 Kg = Steering handle horizontal and the adjustable weights backwards.
318 Kg = Steering handle up and the adjustable weights in the middle.
373 Kg = Steering handle to the front and the adjustable weights to the front.
16 www.diamaticusa.com
Hold the knob
Locking pin

www.diamaticusa.com
17
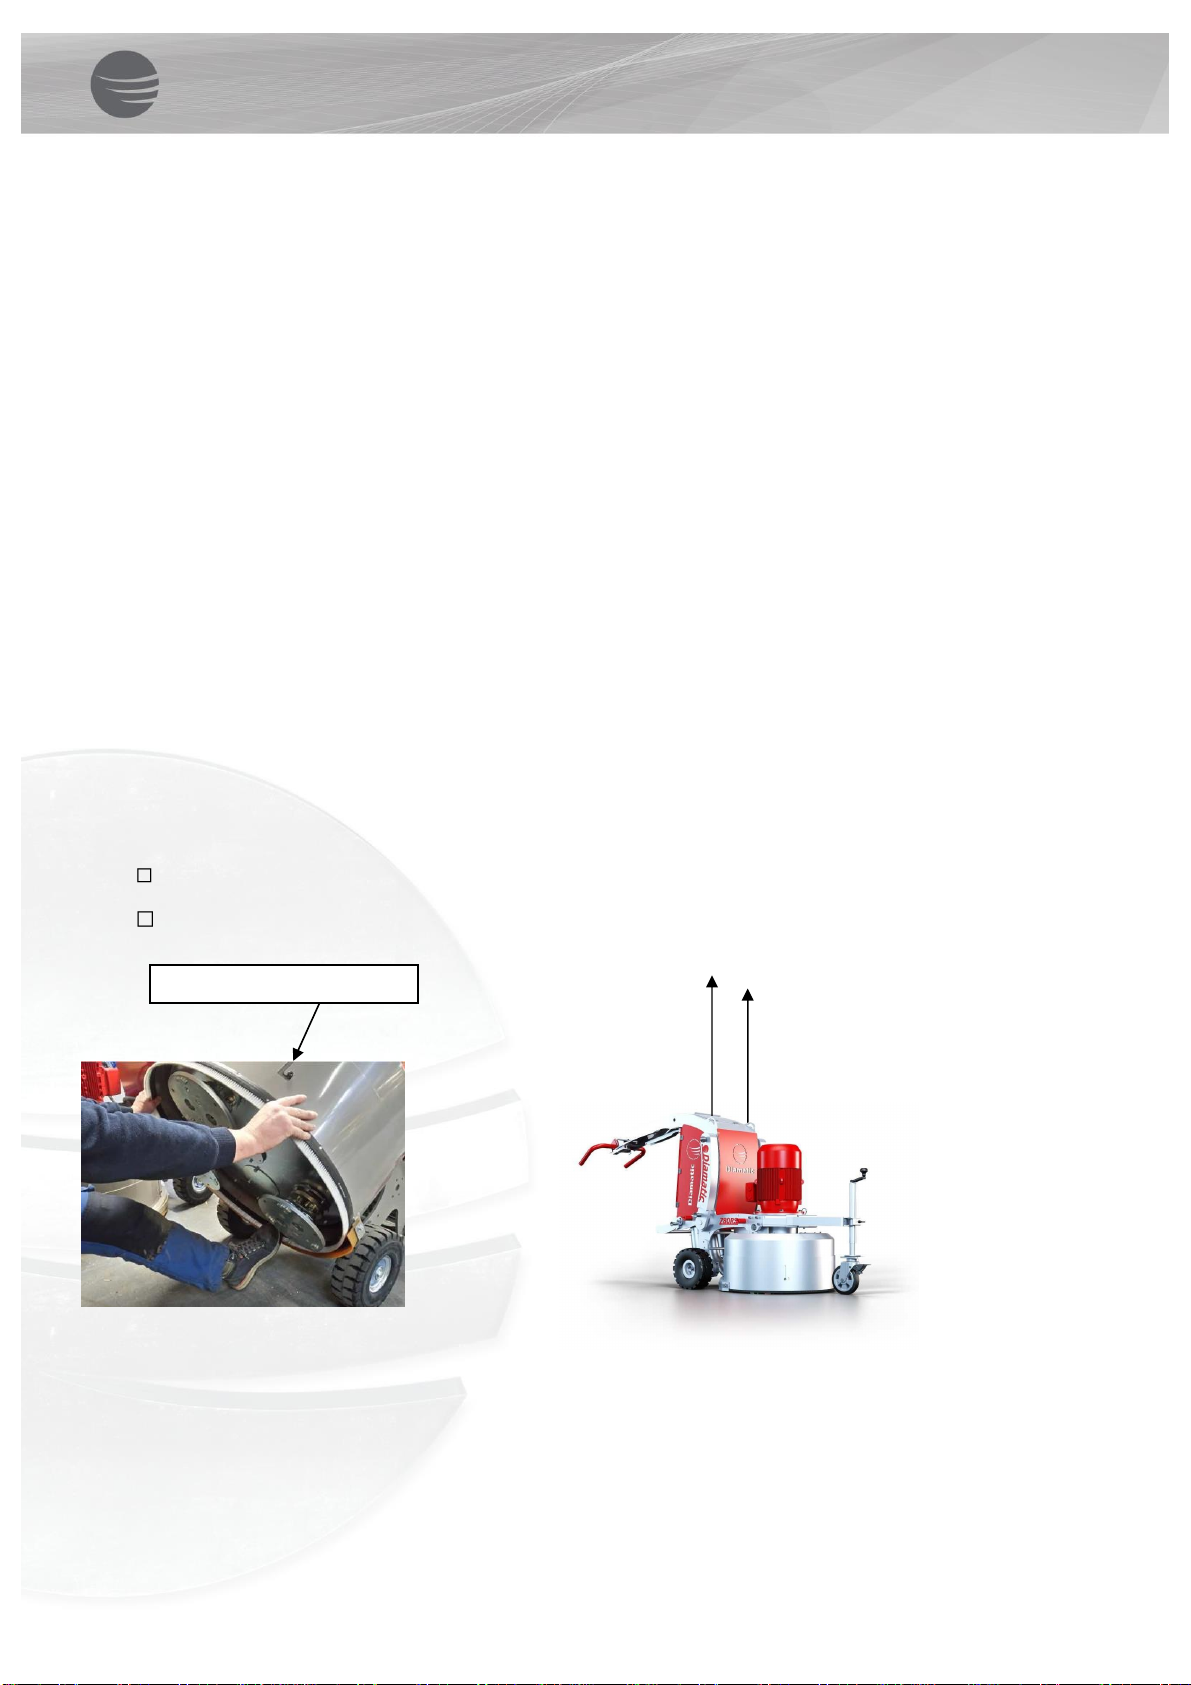
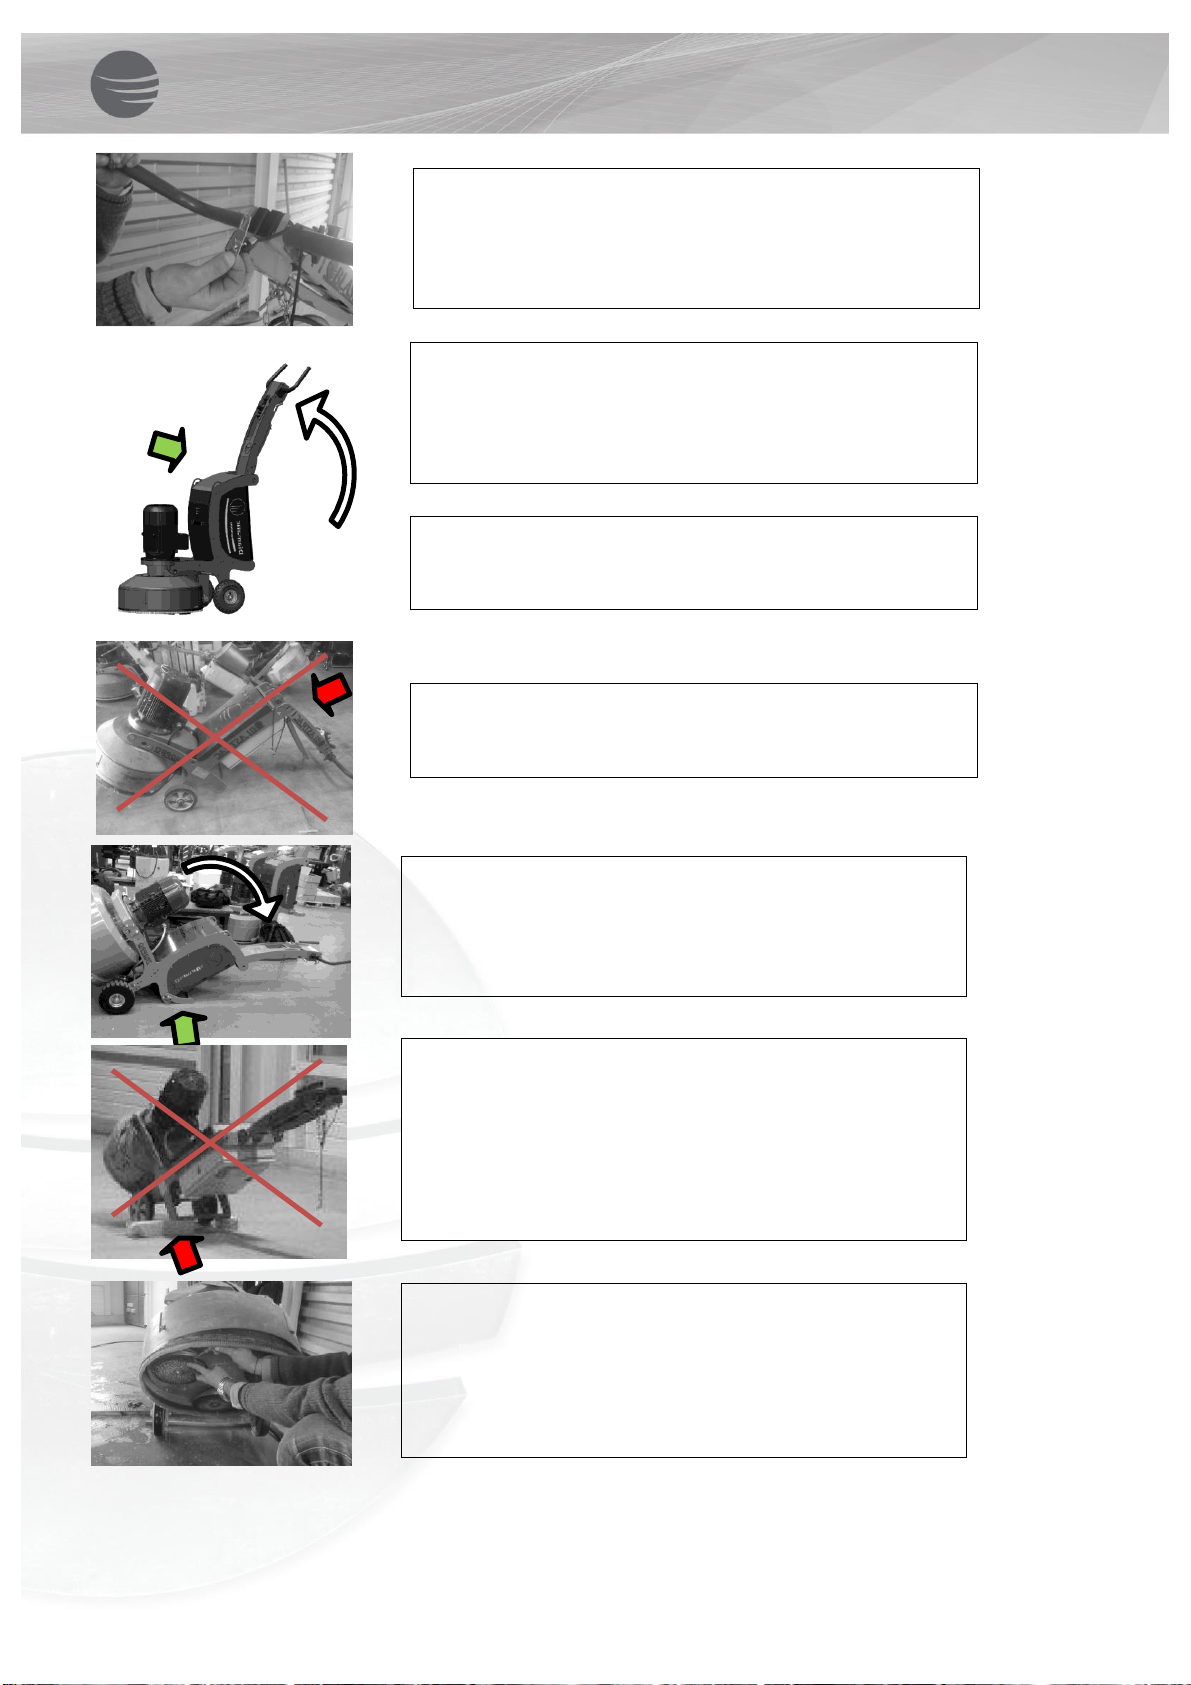
5.6 Changing the wings / discs
Warning! Always wear Personal Protective Equipment!
The dust can be hazardous to the health! Wear a dustmask!
The wings can get hot! Don’t risk burning your hands! Wear protective gloves!
Make sure all moving parts of the machine have come to a complete standstill before changing the wings.
Correct position of the machine for changing tools.
Pull out the mains plug before you start
Always wear a dust mask of at least class FFP3 and gloves.
Use the vacuum cleaner in order to work as dust free as possible
18
www.diamaticusa.com
Remove the key of the dead man’s switch, press the red
stop button, and unplug the machine from the power
supply.
This is to prevent unintentional start-up of the machine.
Before you tilt the machine back, make sure the electrical
cable and dust hose cannot get damaged when you tilt the
machine back.
Put the steering handle in the upright (vertical) position,
stand with one foot on the bracket and pull on the
handgrips to tilt the machine backwards.
WARNING!
This is an unstable position of the machine.
Danger of tipping if the handle is not raised.
Tilt the machine back and lay down the machine so it is
laying on the metal support underneath the electrical box.
Make sure the machine will not fall back down. A second
person can hold the handle down, to make sure the
machine will not fall back down.
If there is a risk of damaging the floor-coating when tilting
the machine back, you can place a piece of cloth, a sheet,
a thin wooden board or something similar underneath the
metal supports.
WARNING! Danger of injury.
Do not let the machine rest on thick wedges or thick
wooden beams. This can cause the machine to fall back
down!
Use the vacuum cleaner to remove excessive dust.
A tool (spatula, screwdriver) makes it easier to release the
plate off the velcro.
Table of contents
Other Diamatic Industrial Equipment manuals


