Diamond Shield Zapper IE User manual
Diamond Shield Professional
Instruction Manual
Page 1
Diamond Shield
Zapper IE
Instruction Manual
Valid for version 2.0

Diamond Shield Professional
Instruction Manual
Page 2

Diamond Shield Professional
Instruction Manual
Page 3
Index
Introduction ........................................................................................ 5
Important Notices............................................................................... 7
Safety Instruction .......................................................................... 7
Unpacking..................................................................................... 7
Storage and transportation ........................................................... 8
Intended Usage ............................................................................ 8
Maintenance ................................................................................. 8
Feature Identification ......................................................................... 9
Front Side ..................................................................................... 9
Connection Side .........................................................................10
Back side .................................................................................... 11
Bringing into service ........................................................................ 12
Insert the battery......................................................................... 12
Connecting the cables ................................................................ 12
Operation ......................................................................................... 13
Menu Navigation..............................................................................14
Main Menu .................................................................................. 15
„Standard“ menu .........................................................................16
Display...................................................................................17
Menu „Settings“ .....................................................................18
Working with the chip cards............................................................. 19
Playing frequency programs from a chip card............................ 19
Technical Data .................................................................................20
Declaration of Conformity ................................................................ 21
For disposal ..................................................................................... 22

Diamond Shield Professional
Instruction Manual
Page 4

Diamond Shield Professional
Instruction Manual
Page 5
Introduction
The Diamond Shield Professional is a very effective Zapper:
Very wide frequency range of 0.5 Hz to 2 MHz.
Possibility of very small voltages (0.1 V)
to high voltages (16 V)
Impulse discharge
Wobble functionality
Modulation of the output frequencies
Constant current control
Operating frequencies from special chipcards (optional
accessories)
The operation can be done via a 9V battery or an appropriate
rechargeable battery.
The device can be used to enhance the well-being.

Diamond Shield Professional
Instruction Manual
Page 6

Diamond Shield Professional
Instruction Manual
Page 7
Important Notices
Safety Instruction
Use only the supplied grounding cable
(optional accessory). Under no circumstances
use a different cable for grounding.
Under any circumstances never insert a plug
into an electrical outlet.
Always insert the grounding cable to the
Diamond Shield and then connect it to the
power outlet.
Never use this device to anyone who has a
pacemaker.
Never use this device in the eye area.
Keep the Diamond Shield always clean and
dry –wiping it with a damp cloth is permitted.
Unpacking
Before using this device, please check of the completeness of the
supplied accessories:
Connection cable for hand- or bracelet-electrodes
Grounding cable (optional accessory)
2 Bracelet electrodes
9V Battery

Diamond Shield Professional
Instruction Manual
Page 8
Storage and transportation
The equipment shall be always stored in dry, closed rooms. If the
device is transported or stored in extreme temperatures, a period of
at least 2 hours should be observed for acclimatization before
handling.
Intended Usage
The device is used to increase the subjective well-being of people
who are open to such an approach.
The devices are intended for use in clean, dry rooms. They cannot
be used in extreme dust, damp, danger of explosion or chemical
vapours.
Protect the Diamond Shield from direct sunlight.
The permissible operating temperature ranges from +15°C to +30°C.
During storage or transportation, the ambient temperature can be
between -20 °C and +70 °C. If condensation has been formed during
transportation or storage, the device must acclimate for about 2
hours and dried by appropriate circulation. Thereafter, the operation
of the device is permitted. Nominal data with tolerances are valid
after a warm-up time of minimal 30 minutes at an ambient
temperature of 23 °C. A value without tolerances is a guiding value
for the device.
Maintenance
The outside of the device should be cleaned regularly with a soft,
non-linting cloth. The Diamond Shield should never be cleaned with
alcohol or other solvents.

Diamond Shield Professional
Instruction Manual
Page 9
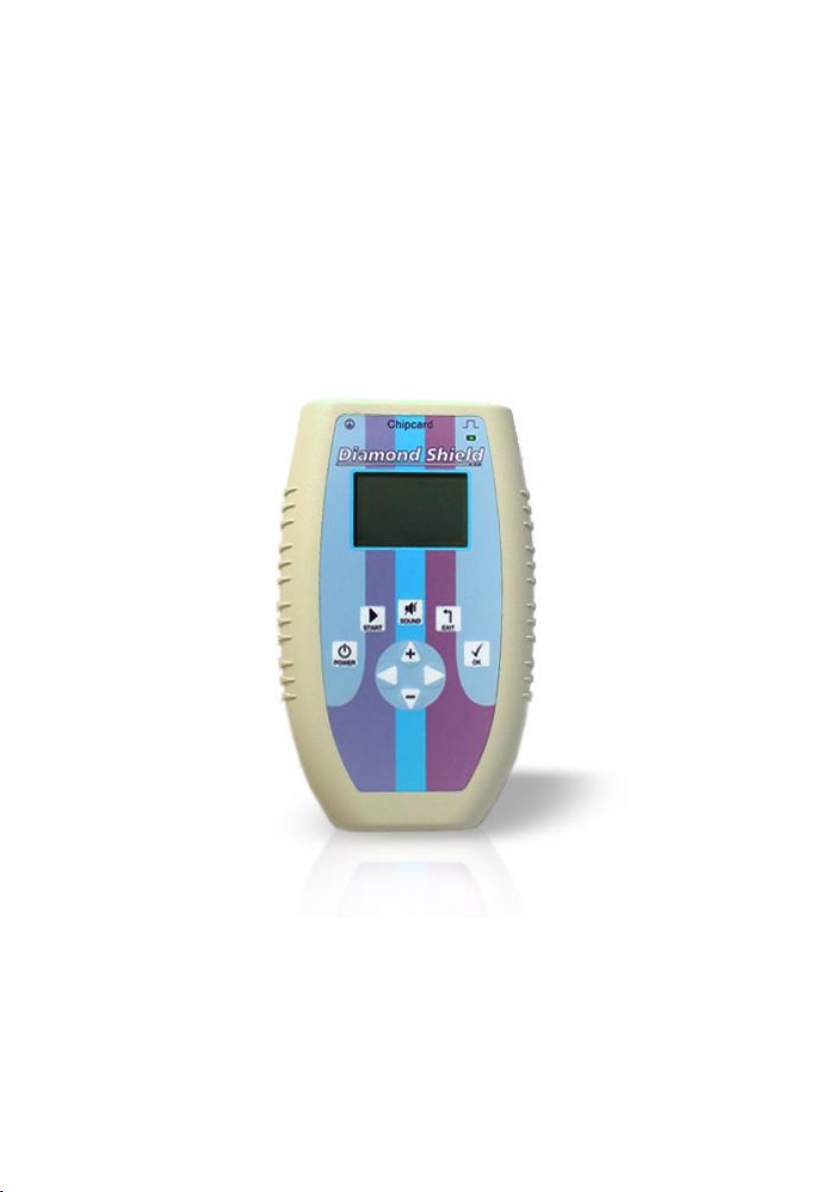
Feature Identification
Front Side
1. LED
2. LCD-Display
3. Mute Switch
4. START-button
5. On-Off switch
6. EXIT-button
7. OK-button
8. Arrow keys
1
2
6
3
4
2
5
8
7

Diamond Shield Professional
Instruction Manual
Page 10
Connection Side
1. Grounding connection
2. Chip card slot
3. Connection for hand- or bracelet-electrodes
1 2 3
Diamond Shield Professional
Instruction Manual
Page 11
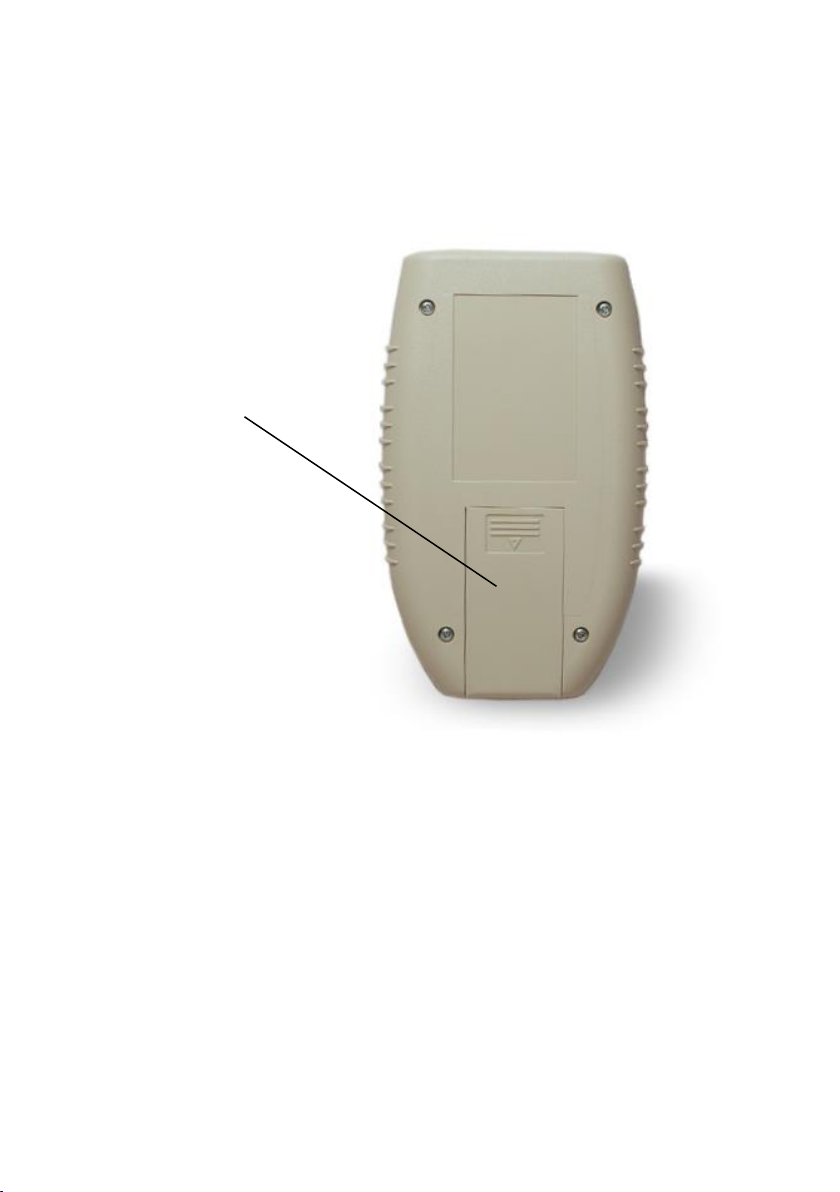
Back side
1. Battery compartment
1

Diamond Shield Professional
Instruction Manual
Page 12
Bringing into service
Insert the battery
1. Open the battery compartment cover on the back of the
device.
2. Insert the supplied battery. Please keep in mind that the
battery has to be inserted correctly according to its polarity.
(If however the battery is inserted incorrectly, the device will
not be damaged by that.)
We recommend using alkaline batteries or rechargeable batteries.
Connecting the cables
1. Connect the connection cable for the bracelet-electrodes in
the right socket (above LED)
2. Connect the bracelets.
3. If you want to work with grounding: Connect the grounding
cable to the left socket. Then connect the grounding wire to
the plug socket.

Diamond Shield Professional
Instruction Manual
Page 13
Operation
Switch On
For switching on the device please press briefly the POWER button.
Switch Off
Press the POWER button and hold it for about 1 second until the
device is turned off.
Turn off automatically
If the unit is not performing a frequency program and/or is not used
for 12 minutes, it will switch off automatically to save battery life.
Charge condition of the battery
The state of charge of the battery is displayed on the LED. If the
device is switched on, the LED flashes. When the battery is full, the
flashing frequency is slow. When the battery charge is low, the
flashing frequency is faster. If the battery is empty, a message
appears, and the device can no longer be used.
Activate / deactivate the loudspeaker
Press the SOUND button to switch the loudspeaker on or off. The
current state is then displayed briefly.

Diamond Shield Professional
Instruction Manual
Page 14
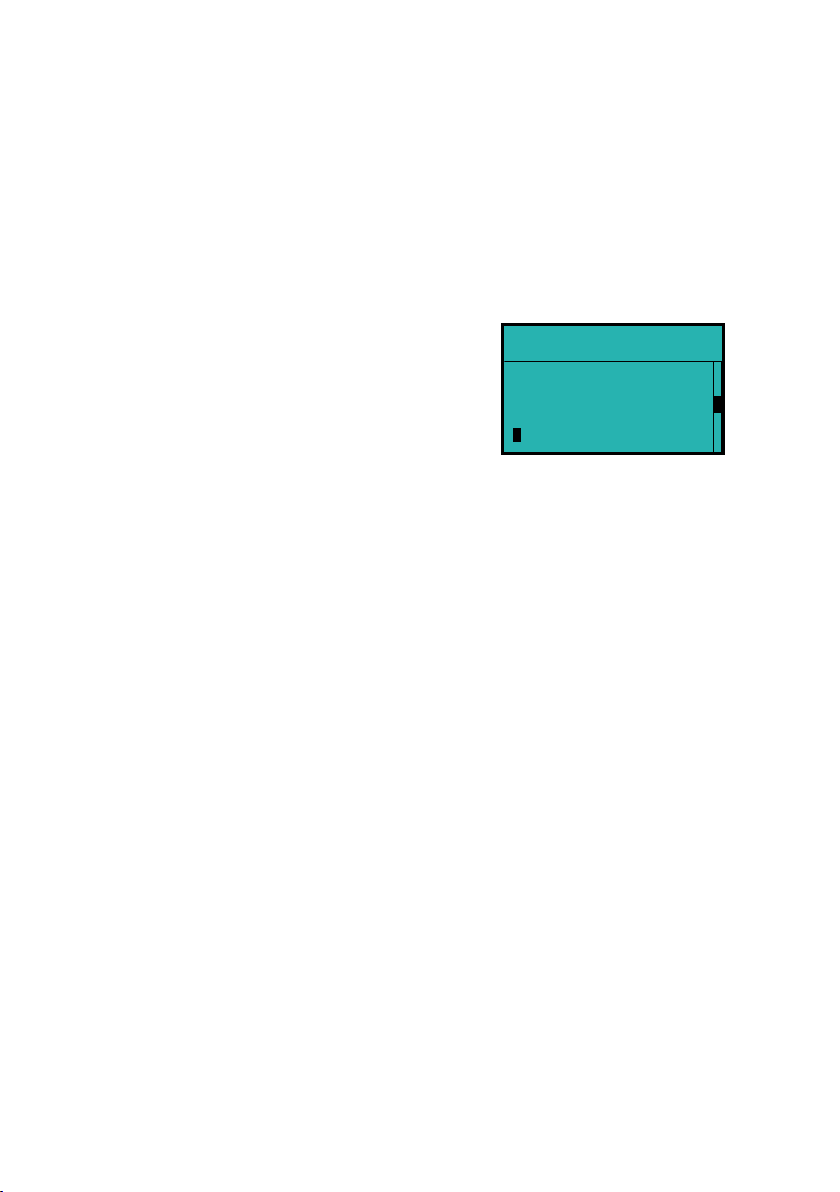
Menu Navigation
Navigation through the menu structure of the Diamond Shield is
simple and identical for all functional areas:
The currently selected item is marked with a small black
rectangle. Use the up arrow key ("+") to select the next
higher element and down ("-") arrow key to select the
following.
A scroll bar on the display’s right edge appears, when the
current list has more entries than can be displayed. The
scroll bar then indicates where you are in the list.
If you have already selected the last item in the menu and
then you press the down arrow key, the first item in the menu
will be selected. If you press the up arrow key it will go back
to the last entry. This allows you to change quickly between
the last and the first item in the menu.
Confirm your selection with the OK button. Then a new
display corresponding to the selected item appears.
Press the EXIT key to return one level up (if you are not
already in the main menu).

Diamond Shield Professional
Instruction Manual
Page 15
Main Menu
A few seconds after switching on the device, the main menu will be
displayed. You can always go back from any submenu to the main
menu by pressing (repeatedly) the EXIT button.
The Main Menu shows the following items:
Chip card: This entry is only shown if a chip card is inserted.
It allows you to review and execute the content of the chip
card.
Standard: Via this menu you can use the preinstalled
sequences and frequency programs.
Settings: Via this menu point you conduct various settings.
Important Definitions
Frequency Program: A frequency program includes all
features of a single application, such as the frequency,
intensity or duration.
Sequence: A sequence is a serial arrangement of several
frequency programs. For example, there is a sequence with
the name "Diamond Shield", including the frequency
programs DS1, DS2 ... up to 26 DS.
Diamond Shield Professional
Instruction Manual
Page 16
„Standard“ menu
Under Standard you find the pre-installed sequences the Diamond
Shield Zapper Professional is supplied with by default.
These program sequences cannot be changed or deleted.
The first level of the menu shows the available sequences. When a
sequence is selected and the OK button is pressed, a list of the
frequency programs of the selected sequence will be shown.
Executing a sequence
Select the desired sequence with the + and - button. Then press the
Start button. All individual programs of this sequence will be
performed now.
The device first checks the electrical contact (see "Contact Control").
After that all the individual programs of the selected sequence are
executed successively.
Contact Control
Before a sequence or a single program will be executed, the device
checks whether the required electrical contact exists.
If the contact is not good enough, the unit will beep every 3 seconds.
By pressing the "OK" button, the frequency program can be
executed. However, this is only useful for testing purposes.
If the required contact is made, the unit will display for a short time
the resistance in Kiloohm (kΩ) and then automatically start the
execution of the frequency program.
Diamond Shield
DS 9
DS 10
DS 11

Diamond Shield Professional
Instruction Manual
Page 17
Running a single program from a sequence
Select the desired sequence with the + and - button. Press the OK
button. The individual programs of this sequence are displayed. Then
select the desired single program.
This program is executed by pressing the START button.
Beforehand the device checks the electrical contact (see "Contact
Control").
During the execution of frequencies
Display
In the headline the sequence name and the name of the
current single frequency program are shown in turns.
Below the remaining execution time is displayed
(minutes: seconds).
Below the intensity is displayed.
◦For frequency programs with current control the actual
voltage is displayed on the left side. On the right side the
selected intensity is displayed in milliamps (1/1000
amps).
◦For frequency programs without current control the
actual voltage in volts is displayed.
DS 11
00:07
0.6V 0.30mA
Diamond Shield
00:07
0.6V 0.30mA

Diamond Shield Professional
Instruction Manual
Page 18
Operating options
Pressing the start button will stop the execution. Pressing the
start button again allows the execution to proceed.
Intensity is set by using the arrow keys to move up and down
("+" - keys and "–").
Pressing the EXIT button cancels the execution.
Menu „Settings“
This menu is used to configure the device. The settings made here
are retained even after turning off or changing the battery.
Language: Select from English or German. The input is
done with the arrow keys left and right.
Contrast: Adjusts the contrast of the LCD display. The input
is done with the arrow keys left and right.
Const amps: enables or disables constant current control. If
you press the left and right arrow then the input is done. If
'NO' is selected, the intensity of all the frequency programs
(including those that are stored on the chip cards) is usually
set on the voltage and does not have a constant current
control.
Speaker: the tone pitch of the internal speaker. Use the
arrow keys left and right to choose 4 or 5 kHz.
HW Rev.: Displays the hardware version of the device.

Diamond Shield Professional
Instruction Manual
Page 19
Working with the chip cards
Overview
As accessory, different types of chip cards are available:
Predefined chip cards contain permanently stored
sequences and frequency programs.
Master chip cards are delivered empty and can be
programmed by your therapist with individual sequences and
frequency programs.
Playing frequency programs from a chip card
Regardless of the type of chip card, their sequences and frequency
programs can be played as follows:
1. Insert the chip card in the device.
2. Press the POWER button.
3. Select the menu item "chip card" from the main menu and
press the OK button.
4. A submenu will pop up displaying the sequence(s) of the
chip card.
5. If you want to play an entire sequence, then select this
sequence, and then press the RUN button.
6. If you want to play a single frequency program, you first
select the corresponding sequence. Then press the OK
button to enter the submenu. Then select the desired
frequency program and press the RUN button.

Diamond Shield Professional
Instruction Manual
Page 20
Technical Data
General
Operating temperature: +15 °C –+30 °C
Storage temperature: -20 °C –+70 °C
Power supply: 9V alkaline (manganese) battery or
comparable accumulator.
Connections
3.5 mm socket (stereo) for grounding plug
3.5 mm socket (stereo) for signal outputs
Chip card slot
Characteristic of the output signals
Frequency range 0.5Hz - 2MHz
Waveforms: square wave signal
Minimum accuracy of the frequencies: 100 ppm
Output Voltage: 0.1 - 16V (measured from the 0V line)
Offset: No offset, positive offset, positive offset + 0.3V
Modulation up to 254 times the output frequency (2 MHz
must not be exceeded).
Wobble (maximum up to twice the fundamental frequency)
Voltage control to keep the output current constant (only at
frequencies above 20 Hz)
Internal resistance: 1 kOhm
Table of contents
Popular Medical Equipment manuals by other brands


Getinge
Getinge Arjohuntleigh Nimbus 3 Professional Instructions for use

Mettler Electronics
Mettler Electronics Sonicator 730 Maintenance manual

Pressalit Care
Pressalit Care R1100 Mounting instruction

Denas MS
Denas MS DENAS-T operating manual

bort medical
bort medical ActiveColor quick guide

AccuVein
AccuVein AV400 user manual


