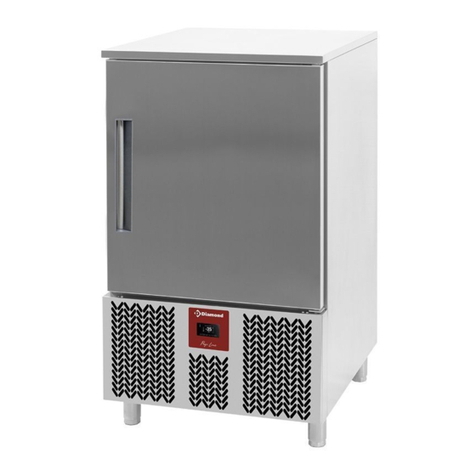
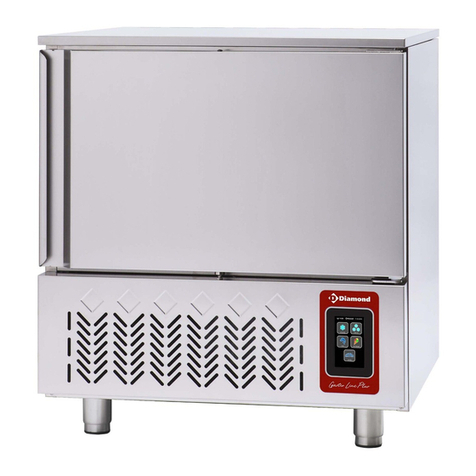
Diamond EVJ805 Setup guide

Mod: GTP-3/LD
Production code: 19048717
06/2018

25
INSTALLATION, USAGE AND
MAINTENANCE MANUAL EVJ805:
BLAST CHILLER

26
INSTALLATION, USAGE AND MAINTENANCE
MANUAL: BLAST CHILLER
CONTENTS
1INSTALLATION..........................................................................................................................................27
1.0 SITING ................................................................................................................................................27
1.1 CLEANING ..........................................................................................................................................27
1.2 WIRING...............................................................................................................................................28
1.3 GENERAL MEASUREMENTS.............................................................................................................28
2USE .............................................................................................................................................................30
2.0 –ENVIROMENTAL DATA..................................................................................................................30
2.1 –CONSTRUCTION DATA.................................................................................................................30
2.2 –UTILIZACIÓN .................................................................................................................................30
2.3 –PRODUCTION .................................................................................................................................31
3–POWER ON.............................................................................................................................................31
3.0 POWER FAILURE ...............................................................................................................................32
4–DISPLAY..................................................................................................................................................32
4.0 KEYS ....................................................................................................................................................32
4.1 Icons....................................................................................................................................................33
5–SETTINGS ..............................................................................................................................................34
5.0 OVERVIEW..........................................................................................................................................34
5.1 LANGUAGES.......................................................................................................................................34
5.2 INTERNAL STATES............................................................................................................................34
5.3 PARAMETERS .....................................................................................................................................35
5.4 HACCP ALARMS.................................................................................................................................35
5.5 REAL TIME CLOCK ............................................................................................................................35
6–FUNCTIONS ...........................................................................................................................................36
6.0 OPERATING CYCLES.........................................................................................................................36
6.1 PRE-COOLING....................................................................................................................................37
6.2 TEST OF NEEDLE PROBE INSERTION...........................................................................................37
6.3 CHILLING/FREEZING AND CONSERVATION ...............................................................................37
6.4 DEFROST MANUAL............................................................................................................................39
6.5 SANIFICACION PESCADO ...............................................................................................................39
6.6 HARDENING ICE CREAM .................................................................................................................40
6.7 HEATING OF THE NEEDLE PROBE.................................................................................................40
6.8 RECIPES..............................................................................................................................................41
7–ALARMS ..................................................................................................................................................42
7.0 USAGE PRECAUTIONS .....................................................................................................................44
8MAINTENANCE ..........................................................................................................................................44
8.0 USER CLEANING ...............................................................................................................................44
8.1 PRICK PROBE (optional)..................................................................................................................45
8.2 REGULAR CHECKS ............................................................................................................................45
8.3 NON-USE FOR LONG PERIODS OF TIME .....................................................................................45
8.4 GENERAL MACHINE CHECKS..........................................................................................................45
8.5 SPECIAL MAINTENANCE..................................................................................................................45
8.6 TESTING AND GUARANTEE ............................................................................................................46

27
INSTALLATION, USAGE AND MAINTENANCE MANUAL
Before starting the cooler up, we would like to thank you for the confidence you have placed in us on
purchasing this machine, and recommend you read and follow the steps detailed in the instructions.
This manual is designed to offer the information necessary for the installation, start-up, and maintenance of
the Temperature Coolers.
The special installation and maintenance must be carried out by qualified technicians.
OPERATING TESTS
The blast chiller you have purchased is prepared for its correct operation, the result of which is certified by
a rigorous quality control test.
1 INSTALLATION
1.0 SITING
Remove the packaging except the support pallet. It should not be dragged over the floor.
The instructions to ensure that it is not damaged during transport/storage and loading/unloading are
marked on the packaging. You should comply with the regulations in your country for disposing of the
packaging.
The area where it is positioned must be clear and clean, preventing the refrigerator equipment's fan from
absorbing materials, which are then deposited on the condenser's ribbing, reducing the efficiency of the
system.
Remove the pallet, taking care not to knock it. It can now be levelled, screwing in or unscrewing the legs.
When it is levelled, the protective film can be removed from the stainless steel using a blunt object,
avoiding scratching the steel (aluminium is recommended)
A: LEG BODY
B: SCREW:
Clockwise to lower the unit
Anticlockwise to raise the unit
1.1 CLEANING
Before start-up:
Clean the inside of the chamber and accessories with some water and neutral soap to remove the
characteristic smell of a new machine. When it is clean and dry, insert the accessories in the right places,
according to preferences.
DAILY CLEANING
Do not wash the appliance with direct water jets, as leaks in the electric components
could affect correct operation.
We recommend cleaning the outside of the unit with a damp cloth and following the direction of the
stainless steel’s polished finish. It should be dried well and neutral detergents used instead of bleach based
and/or abrasive substances.
Do not use tools that could cause cuts with the subsequent build up of rust.
If there is hardened dirt, use water and soap or neutral detergents, using a plastic or wooden spatula if
necessary.
Clean the inside of the chamber to prevent dirt from building up with neutral detergents that do not contain
bleach and that are not abrasive.
The areas surrounding the appliance should also be cleaned daily, always with soap and water and not with
toxic or bleach-based detergents. Rinse with clean water and dry well

28
1.2 WIRING
Before plugging the appliance into the socket, check that the network voltage and frequency correspond
with those indicated on its' nameplate. Also check that the section of the electricity socket is appropriate for
the consumption it is going to withstand.
It is essential that the electrical installation where it is going to be connected has an EARTHING
SOCKET, in addition to the appropriate protection of the magneto-thermal switch and differential
(we recommend 30 mA.)
For your safety, it is prohibited to lengthen this power cable.
Do not insert any elements through the fan guard or refrigerator equipment area grilles.
In the start-up, ensure that there are no sources of heat nearby.
For the perfect operation of the components making up the refrigerator system, it is extremely important
that the air intakes, both from the fan situated inside it and the air access to the condenser not be blocked.
Do not install the Cooler outdoors.
Electric connection with cable with European connector in models 3 GN 1/1, 5GN 1/1, 10GN 1/1.
All coolers should be installed by professional technicians with knowledge on electrical and refrigeration
installations. If you want to install them in a fixed and definitive place, a general drain should be connected
to a water fitting in the premises, making a drain tap with this drain to prevent cold losses. This operation
should be carried out by qualified staff.
The appliance has not been designed for installation in installations with the risk of explosions.
Do not use water if a fire occurs. Use C02 extinguishers (carbon dioxide) and cool down the motor area as
fast as possible.
IMPORTANT: Install the inner drainage cover before using.
Consumption table:
GN 1/1
Capacidad
Tensión
Frecuencia
Consumo
Dimensiones
600*400mm
v
Hz
(máx) W
Largo
Profundo
Alto
3
230v 1+N
50
587
560
700
520
5
5
230v 1+N
50
1200
790
700
850
10
10
230v 1+N
50
2300
790
800
1420
1.3 GENERAL MEASUREMENTS.
3 GN 1/1

29
- 5 GN 1/1
- 10GN 1/1

30
2 USE
2.0 –ENVIROMENTAL DATA
Room Temperature.
The production data have been carried out in a technical laboratory with the following environmental
conditions:
38 ºC in the premises
Noise level
Leq in the point with noise level at 1 metre and in operating conditions <70 dB(A)
Lpc at 1 metre in operating conditions <130 dB(C)
The measurements of the acoustic tests have been carried out according to ISO 230-5, in a rectangular
shaped exposure room without sound-absorbent treatments.
2.1 –CONSTRUCTION DATA
-Chamber inside in stainless steel.
-Outer machine panels in stainless steel.
-Allows for using cake trays (except for the 3 GN 1/1)
-Door with automatic closing device. (except for the 3 GN 1/1)
-Mixed model that enables making cooling cycles up to the preservation temperature
(+2 ºC) or freezing temperature (-18 ºC).
Two cooling cycles can be made in refrigeration and two in freezing (Soft and Hard):
-Refrigeration: 90 minutes.
-Freezing: 240 minutes.
It has an electronic timer and chamber temperature probe. Cycle control by time or with probe in the heart
of the food. When the cooling cycle finishes, it can be used as a refrigeration chamber: + 2, + 4 ºC; or as a
frozen food maintenance chamber: -18 ºC, for a short period of time.
-Airtight compressor/scroll with ventilated condenser.
-Injected polyurethane insulation. Density of 40 kg. Without CFC.
-Copper tube evaporator and aluminium flanges with anticorrosive paint.
-Refrigeration by forced draught.
2.2 –UTILIZACIÓN
These machines have been built according to the EC directives regarding food treatment and
preservation.
The use of the cooler consists of lowering the temperature suddenly from a level (cooked or fresh
products) to another level that guarantees the maintenance of the ideal nutritional, physical and chemical
properties of the food.
It should be pointed out that the critical temperature range between 10 ºC and 85 ºC in the product
should be passed through as fast as possible. (IT IS ESSENTIAL TO START THE COOLER
UP IN THE SET UP CYCLE BEFORE PUTTING THE HOT PRODUCT INSIDE. TO DO
SO, SELECT SET UP ON THE MAIN MENU. WHEN THE COOLER IS READY, IT
WILL INDICATE THIS.)
It is advisable when the load to bring down less than 50% of its capacity to perform the
abatement by prick probe.
Refrigerated Cooling consists of lowering the temperature of the cooked food from 90 ºC to 3 ºC in 90
minutes.
Frozen cooling consists of starting from a cooking temperature of 90 ºC, and reaching –18 ºC in 240
minutes.

31
During the cooling cycle:
-Do not open the door unit it has ended.
-Do not wrap the product or close the trays.
-Using trays with a height of over 40 mm is not recommended.
-The thickness of the product on the tray is compact from 2 to 2.5 cm.
-Using stainless steel or aluminium containers is recommended.
During the preserving cycle:
-The product should come in vacuum cooked portions to maintain aromas, freshness…
and to make it easier to regenerate it.
-Place the product where the air can circulate around it.
-Do not put elements that could obstruct air circulation on the Racks.
-Open the door and handle the product as possible as little as possible.
-Hot products or uncovered liquids should not be put inside.
2.3 –PRODUCTION
Depending on several factors and according to the prepared data, it is about advising the user about a
very homogeneous and standard product in international cuisine.
The GN trays are filled with the 25 mm thick product, obtaining the following data:
REFRIGERATION: Lower the temperature from +70 ºC to 3 ºC in 90 minutes.
FREEZING: Lower the temperature from +70 ºC to freezing at –18 ºC in 240 minutes.
3 –POWER ON
Connect the power supply of the device: will be proposed a neutral screen of loading of the system:
Model
Capacity
Kg.
3GN 1/1
8
5GN 1/1
12
10GN 1/1
30
Model
Capacity
Kg.
3GN 1/1
5
5GN 1/1
8
10GN 1/1
20

32
The upload completes, the device will be in the state it was in before being de-energized, i.e.:
- In the Home screen without any message of supply interruption;
- In cycle execution, with message POWER FAILURE to indicate the lack of power.
3.0 POWER FAILURE
If there is a power interruption when there is no function, upon restoration of the power supply device
reproposing the status to be before the interruption.
If there is a power interruption when a feature is active, for restoring the same device will behave in
the following manner:
- With chilling or a freezing cycle running, the cycle is resumed by taking into consideration the duration of
the lack of voltage;
- With a conservation running, the cycle continues maintaining the same settings.
If the duration of the interruption of the power supply was such as to cause the error clock (code "RTC"),
you will need to set up again the day and the real time.
Press any key while the buzzer is playing for switch off .
4 –DISPLAY
4.0 KEYS
Each of the 6 buttons activate different functions depending on the level of navigation or of the current
function.
Keys
Function
- Allows you to quickly select a cycle of chilling
- Once you have selected a chilling cycle, allows to pass from temperature cycle time cycle
cycle
-Within a menu or during a setting: acts as "ESC" key and returns the controller to top of
page
- Attention: with a cycle in progress button is not active, to interrupt the cycle press for 2
seconds the key "START"
- Allows you to quickly select a freezing cycle
- Once you have selected a freezing cycle, allows to pass from a freezing temperature cycle,
time cycle.
- Once you have selected the chilling cycle/freezing to perform, allows to switch from hard
mode to that soft.

33
-From Home screen: gives access to the machine set-up menu
-Within a menu: allows navigation downwards
-During a setting: decrements the value of the size that you want to modify
- From Home screen: gives access to the selection menu of special cycles of the machine
-Within a menu: allows navigation upwards
-During a setting: increases the value of the size that you want to modify
- Short press: Start the selected function or gives access to the page of the selected menu
-Press and hold for 2 seconds: Stops the current cycle
- During a setting: allows you to make editable the value that you want to modify, while a
subsequent pressing of the same confirms the value set
4.1 Icons
Icon
Meaning
Chamber temperature
Core temperature
Chilling
Chilling hard
Freezing
Freezing soft
Cycle Time
Compressor output icon
In cycle
Door open. The display will disappear automatically to the subsequent closing of the door or by
pressing a key
Flushing cycle fish in progress

34
Curing cycle ice cream running
Defrost cycle in progress
Number of the current phase
Chilling/freezing Cycle successfully completed
Chilling/freezing Cycle does not successfully completed
5 –SETTINGS
5.0 OVERVIEW
You access the list of settings by pressing from the Home screen
5.1 LANGUAGES
You can choose between English, French, German, Spanish, Portuguese, Simplified Chinese, Traditional
Chinese.
5.2 INTERNAL STATES
Below the display menu of the internal states

35
To return to the previous screen from this menu, press the key
5.3 PARAMETERS
To view the parameters from the menu it is necessary to insert previously password -17 or-19 using the
key to change the value of the parameters, select the desired parameter and with the key to
make it editable; confirm finally with the key.
The machine is set at the factory for optimal operation under specific conditions and it is not advisable to
change the parameters. If any operating time can be changed, the manufacturer will decline any
responsibility for operation or breakage of the machine.
For Data recovery go to the Settings menu by pressing button , select Restore data and
press .The submenu RESET PARAMETERS are accessed by typing in advance the password 149.
5.4 HACCP ALARMS
Go to the Settings menu from the key, select Alarms HACCP and press to see the
latest 9 HACCP alarms stored. If there is no alarm HACCP, the display shows "NO ALARM".
The alarms are present in the list of HACCP are:
- Cycle duration of Chilling/freezing
- Power failure
- Door Open
- Temperature High Alarm
Their placement time cycle depends on the presence or absence of the RTC to the edge of the product
5.5 REAL TIME CLOCK
In the page of the REAL-TIME CLOCK, pressing the 2 digits for the year will begin to flash and can
be set with the keys , confirming with a subsequent pressing. Continue with the same
modalities until completion of the changes. Once you have set the date and time, it returns to
the previous menu after 50 seconds of inactivity or by pressing the button .

36
6 –FUNCTIONS
6.0 OPERATING CYCLES
The device is able to manage the following cycles of chilling and freezing:
-Chilling temperature cycle and conservation
-Chilling hard temperature cycle and conservation
-Chilling and conservation
-Chilling hard time cycle and conservation
-Freezing temperature cycle and conservation
-Soft freezing temperature cycle and conservation
-Freezing time cycle and conservation
-Freezing soft cycle time cycle and conservation
The functions of the Chilling or Freezing is accessed in a rapid manner respectively by
pressing on the button and .
In addition to the cycles of chilling and freezing, the controller is able to manage the following special
cycles.
You access the menu of special cycles by pressing the button .
Pre-cooling, manual defrost, Sanitizing fish, Hardening ice cream, Defrosting (not available), Sterilization
chamber (not available), Heating of the probe core (only on request), Recipes (programs with preset
cycles)

37
During the execution of the cycle, the display will show the most significant facts:
When the refrigerator system is active, icon comes on compressor in top left;
-When it is running a recipe, the blue arrows are alternated to the name of the recipe;
-When defrosting is in progress, appears at the top of the writing "defrost"
It is possible to finish the cycle at any time by pressing and holding the button for 2
seconds.
6.1 PRE-COOLING
This is a refrigeration cycle of infinite life that can precede all operating cycles.
Access the menu special cycles from key and select pre-coolin. The next pressure of the cycle
will start.
Once reached the setpoint desired chamber, the buzzer sounds and the cycle continues
maintaining the chamber temperature reached until the button is pressed for 2 seconds or until
the start of a chilling cycle/freezing.
In the event of power failure, the cycle is resumed.
6.2 TEST OF NEEDLE PROBE INSERTION
The cycles with temperature are preceded by a test on two stages for the verification of the correct
insertion of the needle probe.
The test consists of two phases, the second of which is performed only if the first is not successfully
completed.
Is the second step is completed successfully the cycle start by temperature
If the test fails, i.e. the probe core temperature probe is not inserted, the buzzer will sound
and the cycle automatically switches time cycle.
6.3 CHILLING/FREEZING AND CONSERVATION
The pressure of the buttons or select respectively a cycle of chilling and a deep
freezing cycle. The device will propose a program time cycle or at a temperature depending on
the setting of P3: To switch from one mode to another, press again the button or the button.
Once you have selected the desired cycle by pressing the key it is possible to add a step (hard
for the Chilling, soft for freezing) that will be performed preliminarily with respect to the standard phase,
thereby passing from cycles at a step to cycles in two phases.

38
Example of reducingcycle at atemperature (skewer), addition of hard phase, quick change of setpointchamber
for thephase andsoft start cycle.
Example of deep freezingcycle at atemperature (skewer), conversion to cycle time, quick change of theduration
of thefreezingcycle and start cycle.
If the cycle is in the temperature, the test is performed to verify the correct insertion of the needle probe in
the food item to be chilled. If the test fails, the cycle is automatically switches on how time cycle: the
buzzer will sound and the display is converted to the type of control of the cycle by temperature at time
Once the chilling cycle/freezing, to reached the temperature of the needle probe or to the end of
time, the buzzer sounds and starts the preservation phase; if the cycle at a temperature not terms in the
time allowed, the fault will be declared by the presence of the alarm message

39
The preservation phase is infinite and has only completed by pressing the key for 2 seconds. The
defrost cycles are always enabled during a conservation.
During the execution of a cycle by pressing the key, it is possible to access advanced page where you can
change the setpoint of work for the current cycle and display all the internal states of the machine.
6.4 DEFROST MANUAL
A defrost cycle is bootable manually only if there are certain temperature conditions (see the parameters d2
and d3). Access the menu special cycles from key and select defrosting: at this point
you will display defrost and subsequent pressing of the cycle will start.
If is present the evaporator probe and the conditions for performing a defrosting are not met at the
START button pressed, the card is returned in the menu special cycles and the defrosting is not performed.
If you set a defrosting with open door (D1=3), you will see the word "OPEN DOOR" if this is closed.
It is advisable to do a manual defrost after each cycle.
6.5 SANIFICACION PESCADO
Access the menu special cycles from key and select sanitizing FISH: at this point you will
display the splash screen and subsequent pressing of the cycle will start.
This is a special cycle consists of the following steps:
During the execution of a sanitizing, the device will always display the temperature of the chamber and,
depending on the current phase, the temperature at end of Chilling or the duration of the maintenance.

40
The flushing cycle begins with the removal step. When the temperature detected by the needle probe
reaches the temperature at end of Chilling, the device will automatically switch to the maintenance.
The temperature at the end of Chilling also represents the setpoint of the work during the
maintenance.
When the set time has elapsed for the maintenance, the device automatically switches to the conservation.
The test of inserting the skewer is always carried out at the beginning of the cycle: if the test is not
completed, the buzzer sounds and the cycle is interrupted.
The cycle can be interrupted in advance by pressing the key for 2 seconds.
6.6 HARDENING ICE CREAM
This type of loop is used mainly in the sectors gelato and pastry to give a "thermal shock" to the
products being processed. It is a cycle of continuous freezing.
Access the menu special cycles from key and select INDURIMENTIO GELATO: at this point you will
display the splash screen from which with the keys it is possible to change the time
of the timer. The next pressure of the cycle will start and expiry of the timer will be
declared by the sound of the buzzer. The cycle will continue anyway until is pressed for 2 seconds the
key.
6.7 HEATING OF THE NEEDLE PROBE
The heating must be carried out with the door open and the possible closure of the door to the cycle already
begun will not affect the operation of the same.
Access the menu special cycles from key and select HEATING SKEWER: at this point you have
access to the boot screen. The next pressure of the cycle will start and can be interrupted
at any time by pressing the key for 2 seconds.
The conclusion of the heating, the buzzer beeps for one second and the card back to the home page.

41
6.8 RECIPES
The recipes are programs pre-attached ready to use that propose a series of cycles that are optimized for
the type of dish.
Recipes can be changed before the start of the cycle, but may not be saved or overwritten.
Access the menu special cycles from key and select recipes to view the list of Chilling
programs/default freezing available. Use the keys to select the desired recipe, optionally change
the setpoint and start pressing the key.
Redmeat
Step 1
Set Chamber
-25°C
Set needle
20°C
Step 2
Set Chamber
-5°C
Set needle
3°C
Conservation
Set Chamber
2°C
Whitemeat
Step 1
Set Chamber
-25°C
Set Duration
27 min
Step 2
Set Chamber
-5°C
Set Duration
63 min
Conservación
Set Chamber
2°C
Fishproducts
Step 1
Set Chamber
-25°C
Set Duration
27 min
Step 2
Set Chamber
-5°C
Set Duration
63 min
Conservation
Set Chamber
2°C
Creams
Step 1
Set Chamber
-5°C
Set Duration
90 min
Conservation
Set Chamber
2°C
LASAGNA
Step 1
Set Chamber
-5°C
Set Duration
90 min
Conservation
Set Chamber
2°C
Vegetables
Step 1
Set Chamber
-5°C
Set Duration
90 min
Conservation
Set Chamber
2°C

42
Quickfreezing by needle probe
Step 1
Set Chamber
0°C
Set needle
3°C
Step 2
Set Chamber
-12°C
Set needle
-3°C
Fase 3
Set Chamber
-30°C
Set needle
-18°C
Conservation
Set Chamber
-20°C
7 –ALARMS
The alarms will be displayed on the Home page if the effect is to interrupt or not to activate the cycle; if
they are such as to allow the continuation of the current cycle will take the place of the
"progress bar cycle" until their disappearance.
The following table shows the alarms list.
Code
Meaning
RTC
Clock error.
Remedies:
-Once againset theday andthe real time.
Themainconsequences:
-Thedevice willnot store thedateandtime at which aHACCP alarm occurred
- The output of the alarm will be activated.

43
THE CHAMBER
PROBE
Probe Error chamber.
Remedies:
-Check thevalueof parameter P0
-Check theintegrityof theprobe
-Check theconnection device-probe
-Check thetemperature of thechamber. Themainconsequences:
-If theerror occurs duringthestatus "stand-by", willnot be allowed to initiate any
cycle of operation
-If theerror occurs duringChillingor freezing, thecycle continues andthe
compressor runscontinuously
- Thetemperature alarm minimum willnever be activated
-Thealarm temperature of maximum willnever be activated
-Theheaters of thedoor willnever lit
- The output of the alarm will be activated.
EVAPORATOR
PROBE
Error evaporator
probe. Remedies:
-Thesame of theprobe error chamber but relatively to theevaporator probe.
Themainconsequences:
- The output of the alarm will be activated.
NEEDLE PROBE
Probe Error skewer.
Remedies:
- The same of the probe error chamber but relatively to the needle probe..
Themainconsequences:
-If theerror occurs duringthestatus "stand-by",thecycles of operation
at atemperature willbe initiated time cycle
- If theerror occurs duringthe heating of theneedle probe, theheating will
be interrupted
- The output of the alarm will be activated.
HIGH PRESSURE
High pressure alarm
Remedies:
-Check thecondition of themultifunction input
Themainconsequences:
-If thecurrent cycle provides for theuse of thecompressor, thecycle is interrupted
-Theoutput of thealarm willbe activated
- The condenser fan will be switched on
DOOR OPEN
Open the door alarm. Remedies:
-Check the condition of the door
The main consequences:
-The output of the alarm will be activated
-Verify door switch position
This manual suits for next models
1
Table of contents
Other Diamond Chiller manuals
Popular Chiller manuals by other brands

Daikin McQuay
Daikin McQuay AWS210BDS installation manual

Carrier
Carrier AquaEdge 23XRV installation instructions

irinox
irinox Freddy 45-R user manual

Daikin
Daikin UAA-ST3M Installation & maintenance manual

TATA Motors
TATA Motors TSW Series INSTALLATION, USE AND MANTEINANCE MANUAL

Accorroni
Accorroni RPE 019 Technical manual

Glen Dimplex
Glen Dimplex Koolant Koolers WO2-2-5000 user manual

Unitrol
Unitrol PROCESS 8500 manual

System air
System air SYSCROLL AIR CO/HP 40-75 Installation and maintenance manual

System air
System air AQVL Series Installation and maintenance manual

Puretec
Puretec D20C Series user guide

Hitachi
Hitachi SAMURAI Series Service manual