Dickinson 180 User manual

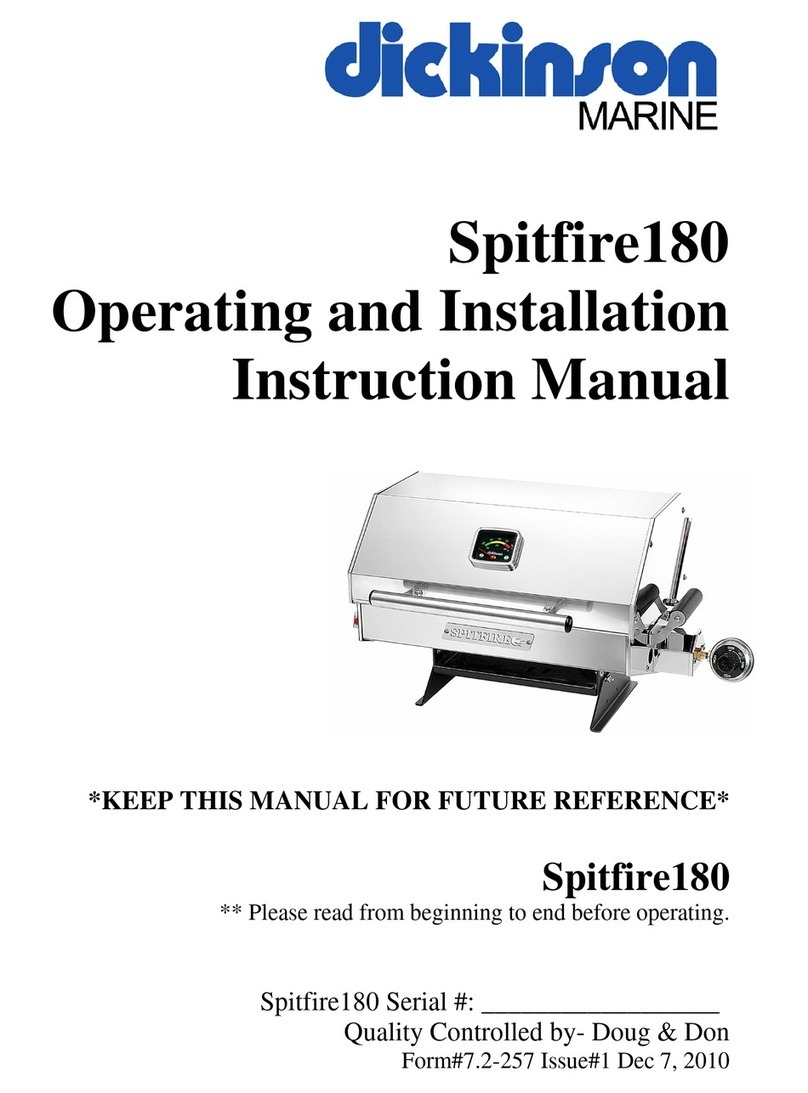
Spitfire180
Operating and Installation
Instruction Manual
*
This instruction manual contains important information necessary for
the proper assembly and safe use of the appliance
*
Spitfire180
**Read and follow all warnings and instructions before assembling and
using the appliance. Keep this manual for future reference**
Spitfire180 Serial #: __________________
Form#7.2-257 Issue #2

www.dickinsonmarine.com ~ info@dickinsonmarine.com
Form#7.2-257 Issue#2
2

www.dickinsonmarine.com ~ info@dickinsonmarine.com
Form#7.2-257 Issue#2
3
Table of Contents
1. Warning & Disclosures… Pg. 4
2. LP Gas Cylinder Specs… Pg. 6
3. Sea-B-Que Packing List… Pg. 7
4. Assembly… Pg. 8
5. Propane Fuel Connection… Pg. 8
6. Low Pressure System Connection… Pg. 9
7. Leak Test… Pg. 10
8. Lighting … Pg. 11
9. Operation … Pg. 14
10. Food Temperatures … Pg. 16
11. Cleaning & Maintenance… Pg. 17
12. Burner Cleaning and Maintenance… Pg. 18
13. Transportation and Storage… Pg. 19
14. Troubleshooting … Pg. 20
15. Spitfire Exploded View … Pg. 21
16. Sea-B-Que Accessories & Parts Available… Pg. 22
17. Warranty… Pg. 23
Registering your Warranty… Pg. 26

www.dickinsonmarine.com ~ info@dickinsonmarine.com
Form#7.2-257 Issue#2
4
GENERAL WARNINGS
Leak test all connections before first use, even though grill is
purchased fully assembled.
Leak test connections after each tank refill
Always check the grill, tank and hose prior to each use of this BBQ
This BBQ is configured for propane. Do not use natural gas.
Never use charcoal, lava rocks or any other source of solid fuel in this
BBQ
Ensure that flames are coming out of the entire burner. Occasionally
insects can enter in when the unit isn’t in use and create blockages
which can lead to burner fires.
Never check for leaks using an open flame. Use soapy water on the
connections and look for bubbles.
Never use or store gasoline or any other flammable vapors or liquids
in or near your BBQ
DO NOT block the ventilation areas of your BBQ
DO NOT wrap or cover the grills with tin foil as this can affect the
ventilation
Keep children and pets away from a hot grill. DO NOT allow
children to operate this grill.
Do not leave this grill unattended when in use.
Never cook on the BBQ without the drip tray in place.
Keep any electrical cords away from the BBQ when it’s in use
DO NOT ever use water on a grease fire. DO NOT close the lid to
extinguish a grease fire. Use type BC dry chemical fire extinguisher
or smother with baking soda or something similar.
DO NOT operate while under the influence of drugs or alcohol
For outdoor use only. Do not use indoors or in an enclosed area such
as a garage or shed.
Position your BBQ outdoors on a non combustible, level surface in a
well ventilated location
Always operate a safe distance (10ft – 3M) from combustible
materials, buildings and overhangs

www.dickinsonmarine.com ~ info@dickinsonmarine.com
Form#7.2-257 Issue#2
5
When the BBQ is installed in a recreational vehicle, it must be
installed on the opposite side from a fuel distribution/dispensing
system
When in storage in a recreational vehicle, the BBQ should be
inoperable with no possibility of fuel flow.
When connected to a recreational vehicles fuel system, the BBQ must
be connected to the vehicles propane system with a flexible hose
connector complying with the high pressure requirements of the
Standards for Pigtails and Flexible Hose Connectors for LP Gas,
ANSI/UL 569 and shall be of a length no longer then the required to
allow the grill to be mounted in the “in use” position of its mounting
system.
In recreational vehicles where there is a pull out mounting or storage
system, the extension must pull out far enough so that the BBQ is not
located under and awnings or overhangs, as well as the pull out must
be able to support a minimum of 52lbs (24Kg) when fully extended.
Further to the above, the hose shall be installed in a manner that will
not allow it to come in contact with the hot surface of the grill while
in use or in the travel/storage mode
Maintain a minimum clearance of 36 inches (91cm) between all sides
of grill, patio railings, walls or other combustible material. Not
adhering to these clearances may prevent proper ventilation and can
increase the risk of fire and/or property damage, which could also
result in personal injury
DO NOT build this model grill in an built in or slide construction
This BBQ is not intended for and should never be used as a heater.
Do not use any other regulator other than ones supplied by or ordered
from Dickinson Marine
The BBQ becomes hot when in use. To avoid burns
- DO NOT attempt to move the BBQ
- Wear protective gloves or mitts
- DO NOT touch any of the hot surfaces
- Do not wear loose clothing when using
This BBQ is not intended for commercial use.
***FAILURE TO ADHERE TO THE SAFETY WARNINGS LISTED IN
THIS MANUAL COULD RESULT IN DAMAGE O PROPERTY OR
SEVERE PERSONAL INJURY***
www.dickinsonmarine.com ~ info@dickinsonmarine.com
Form#7.2-257 Issue#2
6
LP GAS CYLINDER SPECS AND INSTALLATION
FOR OUTDOORS USE ONLY. DO NOT operate indoors or in an
enclosed area such as a garage shed or breezeway.
Use your grill outdoors in a well ventilated space away from
dwellings or other buildings to prevent dangers associated with gas
accumulation and toxic vapors. Not adhering to these clearances will
prevent proper ventilation and may increase the risk of a fire and/or
property damage, which could result in personal injury
Maintain a minimum clearance of 36 inches (91cm) between all sides
of the BBQ, patio railings, walls or other combustible material.
DO NOT use grill under overhead unprotected combustible
construction.
DO NOT install this BBQ in a recreational vehicle
The BBQ and its individual shutoff valve must me disconnected from
the gas supply piping system during any pressure testing of that
system at test pressures in excess of ½ PSI (3.5kPa)
The BBQ must be isolated from the gas supply piping system by
closing its individual manual shut-off valve during any pressure
testing of the gas supply piping system in equal or less than ½ PSI
(3.5 kPa)
The LP gas supply cylinder to be used MUST be constructed and
marked in accordance with the specifications for LP gas cylinders,
U.S. Department of Transportation (DOT) or the standard for
cylinders, spheres and tubes for the Transportation of Dangerous
Goods, CAN/CSA-B339
The propane supply cylinder system must be installed with proper
vapor withdrawal capabilities
The BBQ pressure regulator supplied with this unit must be used in
the operation.
Any replacement regulators must be of those specified by the
appliance manufacturer

www.dickinsonmarine.com ~ info@dickinsonmarine.com
Form#7.2-257 Issue#2
7
Spitfire Packing List
*PLEASE KEEP YOUR PROOF OF PURCHASE FOR WARRANTY.
Spitfire180 Part# 00-SPT-180
1. Top Lid and Main Body Assembly
2. Thermometer part# 15-120
3. Stainless Grill Section part# 15-195 (2 required)
4. Stainless Burner part# 15-063
5. Orifice Assembly part# 15-073
6. Regulator Control part# 15-110
7. Spark Igniter part# 15-101
8. Drip Tray part# 15-082
9. Deck Legs
10. Vinyl Cover part# 15-171
Installation
The installation of this BBQ must be in accordance with:
All applicable local codes, or in the absence of local codes
- National Fuel Gas Code ANSI Z223.1 NFPA 54
- Natural Gas and Propane Installation Code: CAN/CGA B149.1
- Natural Gas Installation Code: CAN/CGA B149.1 (Canada)
- Propane Installation Code: CAN/CGA B149.2 (Canada)

www.dickinsonmarine.com ~ info@dickinsonmarine.com
Form#7.2-257 Issue#2
8
Assembly
You will need to attach the feet of the BBQ to the rest of the unit. The two
feet of the Sea-B-Que slide on to the inserted studs on the base. The flanges
are to point outwards. Use the four 10 x 32 nuts and #10 lock-washers to
secure the legs to the base. The drip tray is placed in the area between both
legs. The 4 porcelain grill sections will sit on the ledges provided above the
burner. Remember to remove all protective plastic from the body.
Propane Fuel Connection
The most common LPG connection is the 1 lb. disposable bottle that
connects directly to the barbeque or a hose straight from the barbeque to a
10lb. or 20 lb. tank. We have 6ft hose part# 15-188 and 8ft hose part# 15-
189 high pressure propane hoses available. High pressure propane is
required with the regulator control included with the Sea-B-Que. The Sea-
B-Que gas control is also the pressure regulator part# 15-110.
If your boat has a regulated propane source, the fuel line to the Sea-B-Que
must be tee’d off before any regulators on the main fuel supply. A high
pressure T type connector is available from Dickinson for this. *See the high
pressure T connection diagram below.

www.dickinsonmarine.com ~ info@dickinsonmarine.com
Form#7.2-257 Issue#2
9
Low Pressure System Connection:
If you already have a low pressure line available for your Sea-b-que, you
would then need to replace the regulator control part# 15-110 with low
pressure gas valve part # 15-193. If doing so, there MUST be a separate 11”
WC low pressure regulator part# 19-151 at the bottle regulating the propane.
*See the low pressure connection diagram below.
Typical Low Pressure Propane Locker

www.dickinsonmarine.com ~ info@dickinsonmarine.com
Form#7.2-257 Issue#2
10
GAS LEAK TESTING
1. Do not use or permit sources of ignition in the area while doing the
leak test. This includes smoking.
2. Leak testing solution should be half liquid soap and half water.
3. Apply the solution to the LP gas delivery system at all connections.
4. Bubbles in the soap solution indicate that a leak is present.
5. The leak(s) must be stopped by tightening the loose joints, or
replacing the faulty parts.
6. Do all leak testing in an outdoor area
7. NEVER use a flame to check for leaks
***DO NOT USE BARBEQUE UNTIL LEAK IS CORRECTED***
Pre-start Checklist
When using your grill for the first time, ensure that;
- The BBQ is properly assembled
- All gas connections have been properly tightened and leak tested
- The grill is in a stable position on its legs or mount
- The drip tray is in place
- There are no obstructions to the ventilations
- You have read all warnings in this manual

www.dickinsonmarine.com ~ info@dickinsonmarine.com
Form#7.2-257 Issue#2
11
LIGHTING INSTRUCTIONS
Please read and understand all of the warnings and instructions in this
manual. DO NOT skip any of the warnings or instructions contained in the
previous sections of this manual.
When lighting your grill;
1) Keep the grill lid open so that fumes do not accumulate inside the body
2) Check that the regulator is in the off position
3) Do not stand with any body parts over the grill when lighting.
**If the burner does not light immediately turn control regulator to
lock-off position and do not attempt to light the burner for at least 5
minutes.**

www.dickinsonmarine.com ~ info@dickinsonmarine.com
Form#7.2-257 Issue#2
12
Lighting the BBQ - (Large Sea-B-Que Pictured)
1. Sea-B-Que control regulator in LOCK-OFF position
2. Open Lid and turn on LPG gas supply at source
3. Turn Control Regulator ON to the medium level. Press Igniter button
several times, or use a long bbq lighter through the lighting hole. Check to
make sure the propane is burning by looking through the lighting hole.

www.dickinsonmarine.com ~ info@dickinsonmarine.com
Form#7.2-257 Issue#2
13
Checking for a Good Flame
A good strong flame will encompass the length of the burner and on high
will flicker over the edge of the sides of the burner. You can check through
the lighting hole to see if the flame is consistent and burning cleanly (blue).
LIGHTING HOLE VIEW

www.dickinsonmarine.com ~ info@dickinsonmarine.com
Form#7.2-257 Issue#2
14
OPERATING THE BBQ
- Read and follow all warnings and directions contained in the previous
sections of this manual
- Never use charcoal, lava rocks or wood briquettes in a gas grill
- DO NOT cover cooking grills or other components in aluminum foil as this
blocks ventilation
- DO NOT leave grill on unattended
- DO NOT move grill when in use
- DO NOT use water on a grease fire. Use a type BC chemical fire
extinguisher or smother with dirt or sand
- Never cook without the drip tray in place
First Operation
When using the grill for the first time, it is possible that there could be some
oily residue present on the grills or inside the body. It is recommended that
you preheat your grill for 15 minutes prior to its first use to burn off any
residues.
Preheating the Grill
It is always recommended that you preheat your grill prior to placing the
food on the cooking surface. This allows for better cooking and is safer.
After lighting your grill place the knob on medium to high and close the lid.
Let the grill preheat for 5 to 10 minutes.

www.dickinsonmarine.com ~ info@dickinsonmarine.com
Form#7.2-257 Issue#2
15
Controlling Flare-ups
When cooking meat on a grill flare ups are inevitable but can be dangerous.
Use caution when opening the lid when cooking meat as the sudden
induction of oxygen can cause a flare up. To ensure minimal flare ups
always trim the excess fat from any meat you are going to cook, keep the
interior of the BBQ free of grease and do not over load the cooking surface
with food. Also ensure that the BBQ is on as level a surface as possible to
allow the grease to drain properly into the drip tray.
Grease Fires
Grease fires can be very dangerous situations. If a grease fire occurs please
follow these steps;
- If the lid is closed, do not attempt to open it as the sudden induction of
oxygen could lead to a large flare up. Just turn the regulator to the off
position and allow it to burn itself out.
- If the lid is open turn the regulator to the off position. If possible, re-
locate food to a different area or off the grill altogether to reduce the amount
of grease. Smother the flames with baking soda if necessary.
- NEVER pour water on a grease fire as it can cause the grease to flare up
and splatter and could result in bodily injury.
- If the fire does not extinguish itself quickly then use a type BC dry
chemical fire extinguisher to extinguish flames.

www.dickinsonmarine.com ~ info@dickinsonmarine.com
Form#7.2-257 Issue#2
16
Food Temperatures
It is important, when cooking meat, to ensure that the proper internal
temperatures are achieved. Use the chart below to gauge your temperatures
PROPER CARE AND MAINTENANCE

www.dickinsonmarine.com ~ info@dickinsonmarine.com
Form#7.2-257 Issue#2
17
Cleaning Interior of Grill
After the grill has cooled enough wipe out the interior of the body to remove
all the grease. Use a paper towel or rag to gently wipe out all the food
debris. DO NOT use an abrasive pad or cleaner. The heat from the grill
should burn off any food residue on the cooking surface but make sure to
clean off the grills after every use. Any food debris left over can char and
cause poor flavors to transfer to fresh food. It can also create a dangerous
potential flare up. Always empty the drip tray after each use.
Cleaning the Grill Lid
Smoke will accumulate inside the grill lid and may create a carbon build up
which can flake onto your food. Clean the inside of the lid with a mild scrub
brush/pad. If you use a cleaning solution make sure to wipe all residues
away before turning on the grill.
Maintaining the Grill Exterior
Your grill will discolor over time due
to
heat. This is something that can not
be avoided and there is no cleaner that can restore the finish. If you use an
abrasive pad to “shine” the outer shell you risk scratching the grained finish.
To keep your grill looking its best for as long as possible follow these steps;
1) If your grill is kept outside, make sure when it is not in use to cover it
with a Dickinson Marine BBQ cover
2) Always wipe the outside of the grill to keep free of grease and dirt
3) Do not lean BBQ tools against the grill as this can scratch the surface
4) Do not overheat your grill as this can cause premature discoloration
Rust – Contrary to popular belief, stainless steel can be subject to rust if not
properly cared for. Make sure to keep all surfaces clean and to minimize the
amount of time spent in the open close to salt water.

www.dickinsonmarine.com ~ info@dickinsonmarine.com
Form#7.2-257 Issue#2
18
Burner Cleaning and Maintenance
A clean burner is essential to a problem free and safe grill. It is important to
keep it clean. Grease can drip down onto the burner during cooking so make
sure to wipe all grease off the burner after each use once it has cooled
enough to be safe. Inspect the burner jets for debris as any blockage can
change the heat distribution in the BBQ as well as create a potential hazard.
If there is a blockage in one of or some of the jets remove the burner from
the BBQ, hold the burner vertical with the opening for the orifice facing
downwards. Use a small drill bit or paperclip to dislodge the blockage and
allow it to fall out of the burner. When replacing the burner make sure that
it is properly purchased on the orifice.
To ensure the burner is properly
Seated, locate the orifice hole and the
orifice (3). In the end of the burner there
is an opening for the orifice to enter (2).
Slide the burner opening onto the
orifice (3) and secure to the burner
bracket. NOTE: the burner will not

www.dickinsonmarine.com ~ info@dickinsonmarine.com
Form#7.2-257 Issue#2
19
align with the burner bracket if it is not
properly seated onto the orifice
TRANSPORTATION AND STORAGE
Never move a grill when hot or in use
Make sure that the cylinder valve is closed and the regulator is in the
off position
DO NOT store a spare LP gas cylinder under or in the grill
If the BBQ is not in use, the gas supply needs to be turned off or the
canister unscrewed from the regulator
Indoor storage of the BBQ is only permissible if the fuel supply is
completely disconnected.
Cylinders must not be stored in a building or enclosure
Cylinders must be kept out of the reach of children
Dust cap must be in place on cylinder when not in use
Cylinders with greater than 8 OZ capacity shall not be stored inside
the boat and shall be stored only on the boat exterior where escaping
vapors can only flow overboard
Fuel canisters with an eight ounce maximum capacity shall be DOT
approved 2P/2Q containers with rim vent release (RVR).
Appliances intended for use or stored in the accommodation area shall
have no more then 8oz of attached fuel capacity.
Only one cylinder may be in use at all times
Appliances with a cylinder of greater than 8oz but less than 16oz
capacity shall not be stored in the boat interior with the fuel cylinder
attached
Appliances with more than 8oz but less than 16oz of attached cylinder
capacity shall not be installed or used in the interior of the boat.

www.dickinsonmarine.com ~ info@dickinsonmarine.com
Form#7.2-257 Issue#2
20
TROUBLESHOOTING
Problem Possible Cause Possible Solution
Tank valve is closed Open up valve on propane tank all the way
LP gas tank is low or empty
Check the status of the LP tank and refill if
necessary
LP gas leak
Turn the LP gas tank off, wait for the gas to
dissipate and follow the leak testing section in
this manual
Hose/Cylinder not screwed
into the regulator tight
enough
Make sure to tighten the connection all the
way to ensure fuel flow
Obstruction in burner
Remove burner and check for debris or
obstruction
Igniter not sparking on
burner
Check with a mirror to see if the ignitor is
initiating a spark on the burner below one of
the gas jets. If not adjust so that it is.
Igniter not sparking clean off electrode
Burner will not light
Bad igniter Replace Igniter
Orifice partially blocked
Remove burner from unit and use a small pin
to clean out the orifice
Venturi may not be adjusted
properly
Adjust venturi according to "BBQ Temperature
Adjustment Procedure"
Grill not getting hot
enough
Low pressure in tank Check tank and fill if necessary
Regulator frosting up 1lb tank tilted downwards tilt the tank so that the outlet is higher than the
bottom of the tank
Burner jets clogged
Uneven heat/irregular
burning Obstruction in burner
Clean burner jets. See "Burner cleaning and
maintenance"
High or gusting winds Do not use grill in high winds
Low on LP gas Replace or refill LP gas tank
Flame Blows out Burner holes may be
obstructed Refer to "Burner cleaning and maintenance"
Other manuals for 180
1
This manual suits for next models
1
Table of contents
Other Dickinson Grill manuals

Dickinson
Dickinson 180 User manual

Dickinson
Dickinson Spitfire180 User manual

Dickinson
Dickinson Sea-B-Que User manual

Dickinson
Dickinson Spitfire 330 User manual

Dickinson
Dickinson SEA-B-QUE ROUND User manual

Dickinson
Dickinson SEA-B-QUE LARGE User manual

Dickinson
Dickinson Spitfire 330 User manual

Dickinson
Dickinson Spitfire180 User manual

Dickinson
Dickinson SEA-B-QUE LARGE User manual

Dickinson
Dickinson SEA-B-QUE SMALL User manual