Dickson SP425 User manual

Getting Started
Dickson SP425 & TP425
Start/Stop Data Logger with Display Operation
Install DicksonWare™ (compatible with Windows®
98 or higher). DicksonWare™ version 14.8 or higher
required.
If you already have DicksonWare on your PC check
the version by choosing “Help” and “About” from the
menu bar to check what version you have and make
sure it complies with the requirements of the logger.
Open DicksonWare™ using the icon on your desktop.
Connect the cable (supplied with the software) to the
logger and to a working USB port on your computer.
Click the Setup button. You will be prompted to
select USB or Serial COM port, select USB and click
Continue. A Setup window will appear, and
all fields should be automatically filled in. This
confirms that DicksonWare™ has recognized the
logger. The logger is now sampling.
Display
Below are the possible display states and the conditions
they represent:
Solid or Scrolling (Logging)
Logging normally. Pressing Start/Stop button will
stop logging. Pressing Start/Stop button again will
restart logging.
No Delay selected in Setup–Logging normally
Flashing (Not Logging)
Start after Delay selected in Setup but logging has
not yet begun due to delay.
•
•
•
•
•
•
•
•
The logger is full and Stop When Full has been
selected in Setup. To clear logger, download to
DicksonWare and select Clear.
Blank (Not Logging)
Press Button to Start has been selected in Setup but
the Start/Stop button has not been pressed.
Start/Stop button has been pressed displaying “OF”
(short for OFF) to stop logging.
“OF”
Displays for two seconds after Start/Stop button is
pressed to stop logging.
“ON”
Displays for two seconds after Start/Stop button is
pressed to start logging.
Min/Max
There are two display options: Current Readings only or
Current/Min/Max scroll, which can be selected under
Setup/Display.
To reset Min/Max readings on the display, a paper clip or
toothpick should be used to depress the Min/Max Clear
button located on the back of the unit. This will not clear
logged data.
Press Button to Start
This feature needs to be selected when the logger is
setup (Setup/Samples). Hold down the Start/Stop button
on the front of the unit until “ON” appears on the display.
The logger is now logging. Pressing the button again will
stop logging.
•
•
•
•
•
Need to Know
The Dickson Warranty
When changing logger settings (sample interval and
start date and time) the logger will automatically clear
all stored data.
To achieve longer battery life during operation, use a
less frequent sample rate and disconnect the unit from
the USB or serial port when not downloading data.
Fahrenheit/Celsius
The data logger is defaulted to log data in Fahrenheit. If
you want to view future logged data on the graph or table
in Celsius go to “File,” “Preferences” and then change the
temperature selection.
Battery Replacement
The battery level monitor on the “Setup” screen displays
the battery voltage and a low battery warning when
replacement is needed.
•
•
When changing the battery the logger will not collect
data however memory will not be lost. To start sampling
again, download the data and then clear the memory.
Setting Plot Style
Spline and Points & Spline should not be used as they will
auto fill the graph over the period(s) where the logger is
off and not logging.
Start Mode
This logger has three start modes:
1. No Delay
2 Press Button to Start
3 Start After Delay
Each time the logger is cleared it will default to No Delay
and start logging immediately. To change start mode clock
on the Start Date/Time Setup button and select Delay
Type. Click ok.
Dickson warrants this line of instrument will be free from
defects in material and workmanship under normal use
and service for a period of twelve months after delivery.
This warranty does not cover routine calibration and
battery replacement
For Specifications and Technical Support go to
www.DicksonData.com.

DICKSON SP425 & TP425
Start/Stop Data Logger
Introducción
Instale DicksonWare™ (compatible con Windows®
98 o más alto). Se requiere DicksonWare Versión
Software c.14.8 en su PC.
Si ya tiene Dickson Ware en su ordenador, verifique la
versión seleccionando “Ayuda” y “Acerca de” desde el
menú de la barra para verificar que versión
tiene instalado y asegurarse que cumple con los
requisitos del registrador.
Inicie DicksonWare™ usando el icono que está en el
escritorio.
Conecte el cable (suministrado con el software) al
registrador y a un puerto USB que este funcionando en
su ordenador.
Pinche el botón de configuración. Le indicará que
seleccione el puerto USB o Serial COM, seleccione
USB y presione “Continué”. Aparecerá una ventana de
configuración, y todos los campos deberían llenarse
automáticamente. Esto confirma que DicksonWare™
ha reconocido al registrador. El registrador esta
tomando muestras a partir de este momento.
Pantalla
A continuación aparecen los posibles estados de
pantallas y las condiciones que representan:
Sólido o Desplazable (Registro)
Iniciar registro normalmente. El botón Iniciar/ Detener
detendrá el registro. Pulsar nuevamente botón Iniciar/
Detener reiniciará el registro.
Sin demora seleccionado durante la Configuración.
Iniciar registro normalmente.
Luz intermitente (no hay registro)
Iniciar después de demora seleccionado durante la
Configuración, pero el registro aún no ha comenzado
debido a la demora.
•
•
•
•
•
•
•
•
•
El registrador está lleno y se ha seleccionado Detener
cuando esté lleno en la Configuración. Para limpiar
el registrador, descargue DicksonWare y seleccione
Limpiar.
En blanco (no hay registro)
Presionar botón para iniciar se ha seleccionado
durante la Configuración, pero se ha pulsado el botón
Iniciar/Detener.
El botón Iniciar/Detener se ha presionado y muestra
“OF” (abreviación de la palabra OFF) para detener el
registro.
“OF”
Aparece durante dos segundos después de que se haya
presionado Iniciar/Detener para abandonar el registro.
“ON”
Aparece durante dos segundos después de que se haya
presionado Iniciar/Detener para iniciar el registro.
Min/Max
Hay dos opciones de visualización: Lecturas actuales
solamente, o Actual/Min/Max desplazar, que puede ser
seleccionado en Configuración/Pantalla.
Para resetear los valores de Min/Max en la pantalla, debe
usarse un clip sujetapapeles o un palillo para presionar el
botón Min/Max que está ubicado en la parte de atrás de
la unidad. Esto no despejará datos registrados.
Presione el Botón para Comenzar
Esta función debe ser seleccionada cuando el registrador
es configurado (Configuración/Muestras). Mantenga
presionado el botón Iniciar/Detener en el frente de la
unidad hasta que aparezca “ON” en la pantalla.
El registrador ahora está registrando. El presionar el
botón nuevamente interrumpirá el proceso de registro.
•
•
•
•
•
Cuando se cambia la configuración del registrador
(intervalo de muestreo y fecha y hora de inicio) el
registrador borrará toda la información almacenada
automáticamente.
Para extender la vida de la batería durante la
operación, use una frecuencia de muestreo menos
frecuente y desconecte la unidad del puerto USB o
serial cuando no esté bajando data.
Fahrenheit/Centígrados
El registrador de datos tiene como por defecto la
captura de temperatura en grados Fahrenheit. Si
desea ver datos registrados en el futuro en el grafico
o en la tabla en grados Centígrados, vaya a “Archivo,”
“Preferencias” y luego cambie la selección de
temperatura.
•
•
•
Cambio de la Batería
El monitor de nivel de batería en la pantalla de
“Configuración” muestra el voltaje de la batería y una
advertencia de batería baja cuando es requerido que sea
cambiada.
Cuando se está cambiando la batería, el registrador no
recolecta datos sin embargo no se pierde información de
la memoria. Para reiniciar la recolección de muestras, baje
la data y luego limpie la memoria.
Importante Saber

La Garantía Dickson
Débuter
DICKSON SP425 & TP425
Start/Stop Data Logger
Installez DicksonWare™ (compatible avec Windows®
98 ou supérieur). Version DicksonWare requise:
Logiciel v.14.8 dans votre PC.
Si vous disposez déjà de DicksonWare dans votre
ordinateur, vérifiez la version en cliquant sur “Help” et
“About” dans la barre de menu pour vérifier la version
dont vous disposez et assurez-vous qu’elle est
conforme aux exigences du dispositif
d’enregistrement.
Lancez DicksonWare™ par l’icône sur votre dessus
de bureau.
Connectez le câble (fourni avec le logiciel) au
dispositif d’enregistrement et à un port série en état
de fonctionner USB, dans votre ordinateur.
Cliquez sur le bouton Setup. Vous serez invités à
sélectionner le port USB ou COM Série, sélectionnez
USB puis cliquez sur Continue. Une fenêtre de
configuration apparaîtra et tous les champs seront
automatiquement remplis. Cela confirmera que
DicksonWare™ a reconnu le dispositif d’enregistrement.
Ce dernier commencera alors l’échantillonnage.
Affichage
Vous trouverez ci-dessous les états d’affichage et les
conditions qu’ils représentent:
Solide ou par scrolling (Journalisation)
Journaliser normalementPresser le bouton Marche/
Arrêt terminera la journalisation Presser à nouveau le
bouton Marche/Arrêt redémarrera la journalisation.
Aucune Pause sélectionné à la configuration
– Journaliser normalement
Clignotement (Pas de journalisation)
Démarrer après Pause sélectionné à la
configuration mais la journalisation n’a pas encore
commencé en raison du temps de pause .
L’enregistreur chronologique automatique est
plein et Terminer si Plein a été sélectionné à la
configuration.Pour vider l’enregistreur, télécharger
DicksonWare et sélectionner Nettoyer.
•
•
•
•
•
•
•
•
•
•
Vide (Pas de journalisation)
Presser le bouton pour Démarrer a été sélectionné
à la configuration mais le bouton Marche/Arrêt n’a pas
été pressé.
Le bouton Marche/Arrêt a été pressé et affiche “OF”
(raccourci pour OFF) pour terminer la journalisation.
“OF”
S’affiche pendant deux secondes après que le
bouton Marche/Arrêt ait été pressé pour terminer
la journalisation.
“ON”
S’affiche pendant deux secondes après que le
bouton Marche/Arrêt ait été pressé pour démarrer la
journalisation.
Min/Max
Il existe deux options d’affichage: Current Readings only
(lectures courantes seulement) ou Current/Min/Max
scroll (défilement Courant/Min/Max), qui peuvent
être sélectionnées dans Setup/Display (configuration/
affichage).
Pour rétablir les lectures Min/Max dans l’affichage, une
épingle ou un cure-dents pourraient être utilisés pour
presser le bouton Min/Max Clear (effacer les valeurs
Min/Max) situé à l’arrière de l’unité. Cela n’effacera pas
les données enregistrées.
Presser le bouton pour démarrer
Cette fonction devra être sélectionnée lorsque le
dispositif d’enregistrement est configuré (Setup/
Samples), (Configuration/échantillons). Gardez le bouton
start (démarrer) enfoncé à l’avant de l’unité pendant
une seconde. L’écran affichera tous les segments et le
clignotement s’arrêtera. Le dispositif d’enregistrement
est maintenant en train d’enregistrer. Une nouvelle
pression sur ce bouton arrêtera pas l’enregistrement.
•
•
•
•
•
Lors de la modification des paramètres du dispositif
d’enregistrement (intervalle de mesure, date et heure
de début), l’enregistreur effacera automatiquement
toutes les données stockées.
Pour obtenir une plus longue durée de vie de la pile
durant l’opération, utilisez un intervalle de mesure
moins fréquent et déconnectez l’unité du port USB ou
COM série lorsque vous ne téléchargez pas de données.
•
•
Fahrenheit/Celsius
L’enregistreur de données est réglé par défaut pour
enregistrer des données en Fahrenheit. Si vous désirez
changer l’unité de mesure sur le graphique ou la table,
allez dans “File,” “Preferences” puis modifiez la sélection
de température.
Dickson garantiza que esta línea de instrumentos estará
libre de defectos materiales y de mano de obra bajo
condiciones de uso y servicio normales, por un período de
doce meses desde el momento de su entrega.
Esta garantía no cubre calibración de rutina ni reemplazo
de batería.
Para Especificaciones y Soporte Técnico vaya a
www.DicksonData.com
A savoir

DICKSON SP425 & TP425
Start/Stop Data Logger
Erste Schritte
Remplacement de la pile
Le moniteur du niveau de la pile de l’écran “Setup” affiche
la tension de la pile et une alarme de pile faible lorsqu’un
remplacement est nécessaire.
Lors du remplacement de la pile, l’enregistreur de données
ne collectera pas de données mais la mémoire ne sera pas
perdue. Pour recommencer l’échantillonnage, téléchargez
les données puis effacez la mémoire.
Dickson garantit cette ligne d’instruments sans défauts
en matériel ou en main-d’oeuvre sous usage et service
normal pour une période de douze mois à compter de
a livraison.
Cette garantie ne couvre pas l’étalonnage de routine et le
remplacement de la pile.
Veuillez visiter le site www.DicksonData.com pour des
spécifications et l’assistance technique.
Installieren Sie die DicksonWare™ Software
(Windows® 98- oder aufwärtskompatibel).
DicksonWare Version auf Ihrem PC v.14.8 Software.
Falls sich die DicksonWare Software bereits auf Ihrem
PC befindet, so schauen bitte Sie in der Menüleiste
unter „Hilfe“ und „Über ..“ nach, um welche Version
es sich handelt und vergewissern Sie sich, dass die
Software die Vorraussetzungen des Loggers erfüllt.
Öffnen Sie die DicksonWare™ Software mittels des
auf Ihrem Desktop befindlichen Icons.
Verbinden Sie das Kabel (wird zusammen mit der
Software ausgeliefert) mit der Registriereinrichtung
und einen an Ihrem Rechner befindlichen
funktionsfähigen USB Anschluss.
Klicken Sie auf den Button „Einrichten“. Sie werden
dazu aufgefordert, einen USB oder Seriellen COM
Anschluss auszuwählen. Wählen Sie daraufhin Ihren
Verbindungstyp aus und klicken Sie auf „Weiter“. Ein
Fenster zum Einrichten der Software erscheint,
woraufhin sämtliche Felder automatisch ausgefüllt
werden sollten. Dies ist eine Bestätigung, dass die
DicksonWare™ Software den Logger erkannt hat. Der
Logger ist jetzt dabei, Daten zu erfassen.
Display
Unten finden Sie die möglichen Display-Zustände und ihre
jeweilige Bedeutung:
Konstant oder Scrollend (Aufzeichnung)
Normale Aufzeichnung. Drücken auf den Start-/Stop-
Knopf beendet die Aufzeichnung. Bei abermaligem
Drücken auf den Start-/Stop-Knopf startet die
Aufzeichnung wieder.
No Delay im Setup gewählt – normale Aufzeichnung
Blinkend (keine Aufzeichnung)
Start after Delay im Setup gewählt, aber wegen
der Zeitverzögerung hat die Aufzeichnung noch nicht
begonnen.
•
•
•
•
•
•
•
•
Der Logger ist voll und Stop When Full wurde
im Setup gewählt. Zum Leeren des Loggers auf
DicksonWare herunterladen und Clear wählen.
Keine Anzeige (keine Aufzeichnung)
Press Button to Start wurde im Setup gewählt, aber
Start-/Stop-Knopf wurde noch nicht betätigt.
Der Start-/Stop-Knopf wurde betätigt und es
erscheint „OF” (kurz für OFF) zum Beenden der
Aufzeichnung.
“OF”
Erscheint zwei Sekunden lang nach dem Drücken
auf den Start-/Stop-Knopf zum Beenden der
Aufzeichnung.
“ON”
Erscheint zwei Sekunden lang nach dem Drücken auf
den Start-/Stop-Knopf zum Starten der Aufzeichnung
Min/Max
Es gibt zwei Display-Optionen: Nur aktuelle Ablesewerte
oder Aktuell/Min/Max Scrollen, die unter Einstellungen/
Display ausgewählt werden können.
Zum Rücksetzen der Min/Max Ablesewerte auf dem
Display sollte eine Büroklammer oder ein Zahnstocher
verwendet werden, um den Min/Max Löschen Button, der
sich auf der Geräterückseite befindet, herunterzudrücken.
Dieser Vorgang löscht keine erfassten Daten.
Zum Starten Button Drücken
Dieses Feature muss benutzt werden, wenn der Logger
eingestellt ist (Einstellungen/Proben). Halten Sie den
Start-Button, der sich auf der Gerätevorderseite befindet,
für 1 Sekunde niedergedrückt. Das Display zeigt alle
Segmente an und das Blinken hört auf. Der Logger erfasst
jetzt Daten. Erneutes Drücken des Buttons stoppt die
Datenerfassung nicht.
•
•
•
•
•
La garantie Dickson

Wenn Sie die Konfiguration des Loggers ändern
(Erfassungsintervalle sowie Starttermin und –zeit),
löscht der Logger automatisch alle gespeicherten
Daten.
Zur Erhöhung der Batterielebensdauer verwenden Sie
bitte eine geringere Erfassungsfrequenz und entfernen
Sie den Geräteanschluss aus dem USB oder Seriellen
Anschluss, wenn Sie keine Daten herunterladen.
Fahrenheit/Celsius
Der Datenlogger erfasst Daten standardmäßig in
Fahrenheit. Falls Sie künftig die erfassten Daten
oder die grafische Darstellung in Celsius ansehen
möchten, so wählen Sie bitte unter „Datei“ die
Menüoption „Präferenz“ aus und ändern Sie dann die
Temperaturauswahl.
•
•
Informationen zum Ändern der Einstellungen des
Displays finden Sie unter dem Abschnitt „Alarm“ in
der Gebrauchsanleitung.
Austausch der Batterie
Wenn ein Austauschen der Batterie erforderlich wird,
zeigt der Überwachungsbildschirm des Aufladezustands
der Batterie auf dem Bildschirm „Einrichten“ den
Spannungszustand der Batterie und einen Warnhinweis
bzgl. des niedrigen Batteriespannungszustands an.
Während des Austauschens der Batterie erfasst der
Logger keine Daten, diese gehen jedoch nicht verloren.
Zum erneuten Starten der Datenerfassung laden Sie die
Daten herunter und löschen danach den Speicher.
•
Per iniziare
DICKSON SP425 & TP425
Start/Stop Data Logger
Dickson garantiert, dass die Produktlinie dieses Instruments
hinsichtlich Material und Verarbeitung bei standardmäßigem
Gebrauch und Service frei von Mängeln ist.
Diese Garantie deckt keine routinemäßigen Kalibrierungen
und Austausch von Batterien.
Genauere Angaben sowie Hinweise zum Technischen
Support finden Sie unter www.DicksonData.com.
Installare DicksonWare™ (compatibile con Windows®
98 o successivo). È richiesta la versione Software
v.14.8 nel PC.
Se DicksonWare è già installato sul PC verificarne
la versione selezionando “Help” ed “About” dalla barra
di menu bar e assicurarsi che la versione sia
compatibile con i requisiti del logger.
Attivare DicksonWare™ cliccando l’icona che si trova
sul desktop.
Collegare il cavo (fornito con il software) al logger ed
a una porta operativa seriale COM o USB del
computer.
Fare clic sul pulsante Setup. Sarà chiesto di
selezionare la porta USB, ed una volta fatto cliccare
Continue. Apparrà la finestra Setup, in cui tutti i campi
sono compilati automaticamente. Questo conferma
che DicksonWare™ ha riconosciuto il logger. Il logger
sta ora eseguendo le letture.
Visualizzazione
Di seguito sono riportati gli stati possibili di
visualizzazione e le condizioni che rappresentano:
Fisso o scorrimento (Registrazione di accesso)
Registrazione di accesso La pressione del pulsante
Avvio/Arresto arresterà la registrazione di accesso
Una seconda pressione del pulsante riavvierà la
registrazione di accesso.
Nessun ritardo selezionato nella Configurazione
- Registrazione di accesso normale
Lampeggiamento (Non in registrazione d’accesso)
•
•
•
•
•
•
•
•
Avvio dopo ritardo selezionato nella Configurazione,
ma la registrazione di accesso non è ancora iniziata a
causa del ritardo.
Il server di processo è pieno e nella Configurazione è
stato selezionato Arresto quando pieno. Per svuotare
il server, scaricare nel DicksonWare e selezionare
Elimina.
Vuoto (Non in registrazione d’accesso)
Premere pulsante per avviare è stato selezionato nella
Configurazione, ma non è stato premuto il pulsante
Avvio/Arresto.
È stato premuto il pulsante Avvio/Arresto che
visualizza “OF” (abbreviazione di OFF, disattivo) per
arrestare la registrazione di accesso.
“OF”
Appare per due secondi dopo la pressione del pulsante
Avvio/Arresto per arrestare la registrazione di
accesso.
“ON”
Appare per due secondi dopo la pressione del pulsante
Avvio/Arresto per avviare la registrazione di accesso.
È stato premuto il pulsante Avvio/Arresto che
visualizza “OF” (abbreviazione di OFF, disattivo) per
arrestare la registrazione di accesso.
Min/Max
Ci sono due possibilità di display: Current Readings only o
Current/Min/Max scroll, Che possono essere selezionate
in Setup/Display.
•
•
•
•
•
•
•
Wissenswertes
Die Dickson Garantie

Per reimpostare sul display le letture Min/Max, va usato
un fermaglio o uno stuzzicadenti per premere il pulsante
Min/Max Clear che si trova sul retro dell’unità. Ciò non
cancella i dati registrati.
Premere il pulsante per iniziare
Questa funzione deve essere selezionata quando il logger
si trova in fase di impostazione setup (Setup/Samples).
Tenere premuto il pulsante d’avvio sulla parte anteriore
dell’unità per 1 secondo. Il display visualizzerà tutti i
segmenti ed il lampeggio terminerà. Il logger sta ora
raccogliendo le letture. Premendo di nuovo il pulsante
arresterà il logging.
Quando si modificano le impostazioni del logger
(intervallo fra le letture e data ed ora d’inizio) il logger
rimoverà automaticamente tutti i dati memorizzati.
Allo scopo di ottenere una maggiore durata della
batteria durante il funzionamento, usare una
frequenza di lettura inferiore e sconnettere l’unità
dalla porta seriale o USB quando non si stanno
scaricando dati.
Fahrenheit/Celsius
Il data logger è predisposto per la registrazione dei
dati in gradi Fahrenheit. Se si vogliono leggere futuri
dati registrati sul grafico o sulla tabella in gradi Celsius
•
•
selezionare “File,” “Preferences” e quindi cambiare la
selezione delle unità di misura di temperatura.
Sostituzione della batteria
Il monitor di livello batteria sul display “Setup” visualizza
la tensione della batteria e l’avviso di batteria scarica
quando è necessario sostituirla.
Nella sostituzione della batteria il logger non raccogliere
dati ma i dati registrati in memoria non andranno persi.
Per iniziare nuovamente le letture, scaricare i dati e poi
cancellare la memoria.
Dickson garantisce che questa linea di strumenti sarà
priva di difetti di materiale e manodopera nelle condizioni
normali d’uso e di servizio per il periodo di dodici mesi
dalla consegna.
Questa garanzia non copre la calibrazione di routine e la
sostituzione della batteria.
Per informazioni tecniche ed assistenza tecnica accedere
al sito www.DicksonData.com
Informazioni indispensabili
La garanzia Dickson
rev. 10/08
www.DicksonData.com
930 South Westwood Avenue • Addison, IL 60101-4917
Telephone: 630.543.3747 • Fax: 630.543.0498 • E-mail: DicksonCSR@DicksonData.com
This manual suits for next models
1
Table of contents
Languages:
Other Dickson Other manuals
Dickson
Dickson FT500 User manual
Dickson
Dickson DicksonOne User manual
Dickson
Dickson SM300 User manual
Dickson
Dickson DSB Operating and maintenance instructions
Dickson
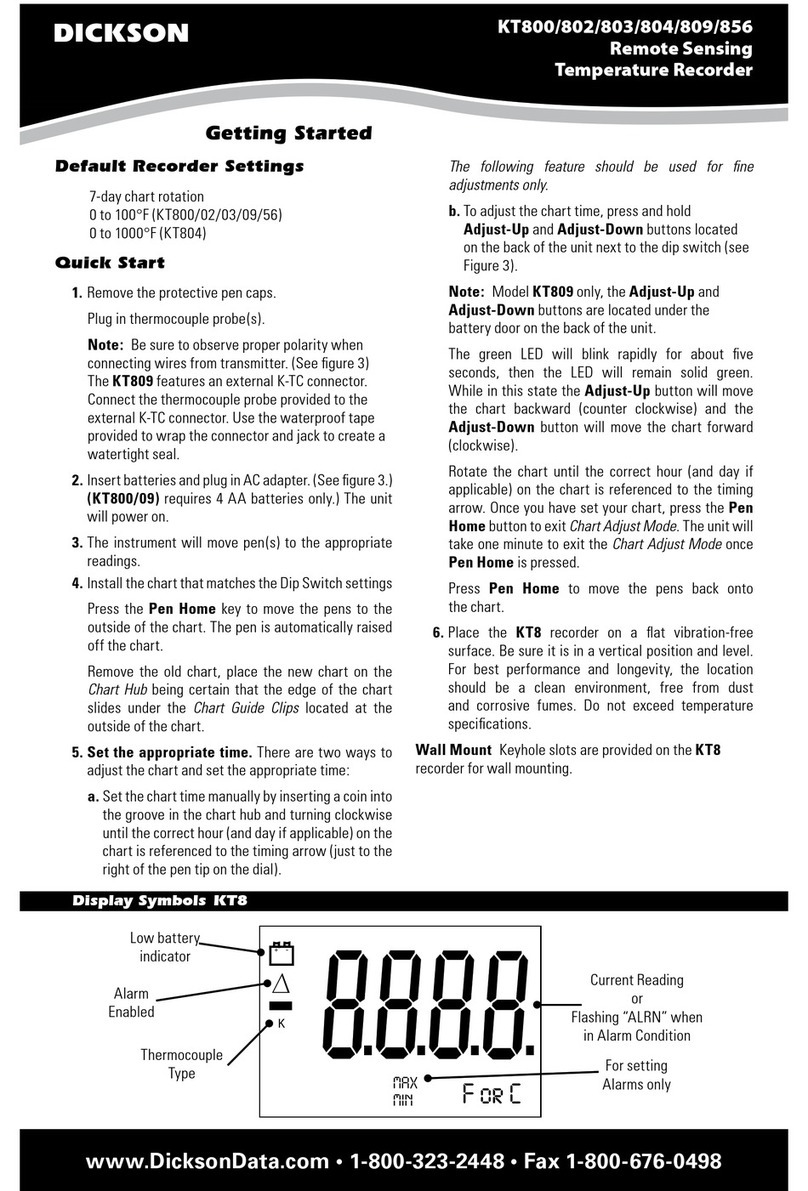
Dickson KT800 User manual
Dickson
Dickson PR125 User manual
Dickson
Dickson TH8P0 User manual
Dickson
Dickson SK550 User manual
Dickson
Dickson FT620 Instruction manual


