KT800/802/803/804/809/856
Remote Sensing
Temperature Recorder
www.DicksonData.com • 1-800-323-2448 • Fax 1-800-676-0498
pens on a two-pen unit and stores the current
adjustment value.
3. When calibration is complete, press the On/Off
button. Calibration is stored in memory even after
you turn the unit off. User calibration information
will not be lost if AC power fails.
Note: After two hours, if no buttons are pressed, the
unit will time out of user calibration and resume normal
operation. The user calibration is stored separately
from the factory calibration. If you wish to cancel out
your user calibration, simply enter Calibration Mode and
toggle through the steps without adjusting displayed
readings. Exit by pressing the On/Off button. You have
now restored factory calibration.
Note: It is recommended that you use a controlled
chamber when calibrating temperature and humidity.
Calibrating in an open room is not recommended as
humidity can vary greatly within a very small area.
NEED TO KNOW
KT809 Water Resistant Enclosure
The KT809 features an IP66 enclosure. In order to maintain
the IP66 rating the battery/switch cover, on the back of the
unit, must be screwed down tightly at all points. The door
must be closed tightly using the two side latches. The K-TC
probe must be connected using the external connector and
the connector/jack connection must be completely sealed
using waterproof tape.
It is strongly recommended that the case door gasket be
greased occasionally using a standard silicone rubber
grease. The more the door is opened and closed, the more
frequently grease should be applied.
The Door and Battery Cover gaskets should maintain the
IP66 rating for 1 year under normal use. To replace gaskets,
contact Dickson Customer Service.
KT800/09 Pen Movement
The pen movement for the KT800/09 is slower than on the
AC powered models in order to conserve battery power.
In 24-hour mode, the pen will move every 1 minute and 30
seconds. In 7-day mode, the pen will move every 8 minutes
and 30 seconds.
The recorder takes temperature readings every 50 seconds.
An average of the readings taken between pen movements
is what is drawn on the chart.
Pen adjust
Pen adjust may be needed if the pen(s) and display do not
match.
1. While the unit is on, press and hold both the Pen
Home button and the On/Off button (making sure to
press the Pen Home button first so the unit will not
turn off). The led will blink rapidly between amber
and green for about five seconds. The LED will then
turn green. Release the Pen Home and On/Off
buttons. The LED will flash amber and green for one
second and the LED will turn off.
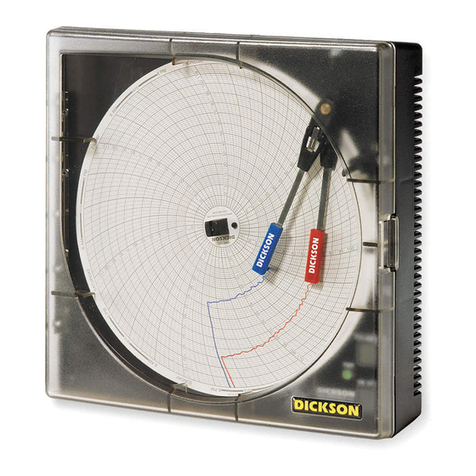
2. One-pen models The red pen will move to the outer
edge of the chart and is ready to be adjusted. Use
the Adjust-Up and Adjust-Down buttons to move
the pen to the maximum temperature line on the
chart. Once the pen is set, the Pen Home button
will move the pen to reaffirm the new pen position.
Press the On/Off button to exit Pen Home Adjust.
3. Two-pen models Both pens will move to the outer
edge of the chart, and then the shorter red pen will
move to the current position. Use the Adjust-Up
and Adjust-Down buttons to move the pen to
the maximum temperature line on the chart. Once
the shorter red pen is set, the Pen Home button
will move the shorter red pen to the outer edge of
the chart and the longer blue pen will move to its
current position. The Adjust-Up and Adjust-Down
buttons will adjust the longer blue pen position.
Once the pen is set, the Pen Home button will move
the longer blue pen to the outer edge of the chart and
the shorter red pen will move to its new position.
Each time pen home is pressed the two pens will
switch positions (moving the most recently adjusted
position) until the On/Off button is pressed to exit
pen adjust mode.
Note: Pressing the On/Off button will exit the adjustment
and return the unit to normal operation. Each time the
Pen Home or On/Off button is pressed, the adjustment
currently in progress will be stored. The unit will take one
minute to exit Pen Adjust Mode once the On/Off button
is pressed.
TROUBLESHOOTING
Why isn’t the chart keeping time or running slow?
• The chart may be “hung up” or restricted, possibly
caused by a rip on the outer edge of the chart or the
chart hub, or the chart may be caught between the
arm and pen arm platform.
• Incorrect chart installed for the selected chart speed.
Why did the chart stop turning?
• Chart hung up or restricted, (ripped chart)
• Unit may be “locked up”? This can be confirmed by


