digi-tech Auriol 4-LD5380 Parts list manual
IAN 341189_1910
RADIO
-
CONTROLLED WEATHER
STATION
Art.-Nr.: 4-LD5380
RADIO-CONTROLLED WEATHER STATION
Usage and safety instructions
RÁDIÓVEZÉRELT IDŐJÁRÁSÁLLO ÁS
Istruzioni per lúso e per la sicurezza
BEZDRÁTOVÁ ETEOSTANICE
Ná od k obsluze a bezpečnostní upozornění
ETEOSTANICA
Pokyny pre obsluhu a bezpečnostné pokyny
FUNK-WETTERSTATION
Bedienungs- und Sicherheitshinweise
Usage and safety instructions................................................................................ - 1
-
Használati és biztonsági tanácsok .................................................................... - 13
-
Ná od k obsluze a bezpečnostní upozornění ................................................. - 26
-
Pokyny pre obsluhu a bezpečnostné pokyny................................................... - 38
-
Bedienungs- und Sicherheitshinweise ....................................... - 50
-

- 1 -
Usage and safety instructions
Table of contents
Table of contents ................................... - 1 -
Introduction ............................................ - 2 -
Intended use .......................................... - 2 -
Scope of deli ery .................................. - 2 -
Specifications ........................................ - 2 -
Weather station ............................. - 2 -
Outdoor sensor ............................. - 2 -
Important safety information
Important safety informationImportant safety information
Important safety information ............. - 3 -
Important safety information for
users........................................................ - 3 -
Important safety information for
the batteries ........................................... - 3 -
Display of the weather station ............. - 3 -
Weather station controls ...................... - 4 -
Outdoor sensor ..................................... - 5 -
Securely placing or mounting
the weather station ................................ - 5 -
Securely placing or mounting
the outdoor sensor ................................ - 5 -
Setup ...................................................... - 6 -
Time zone adjustment ........................... - 6 -
Reception problems .............................. - 7 -
Switch the DCF77 radio time signal
reception on or off ................................ - 7 -
Speed setting ......................................... - 7 -
Basic settings.......................................... - 7 -
Light ........................................................ - 7 -
12/24-hour time format ...................... - 8 -
Alarm ...................................................... - 8 -
Snooze (SNOOZE) ............................. - 8 -
Temperature unit ................................... - 8 -
Trends .................................................... - 8 -
Maximum and minimum alues .......... - 8 -
Battery le el indicator .......................... - 9 -
Channel setting for sensors 1-3 .......... - 9 -
Naming the sensors .............................. - 9 -
Setting pre-set names ................... - 9 -
Setting custom names ................... - 9 -
Reset (RESET) ...................................... - 10 -
Cleaning instructions .......................... - 10 -
Simplified EU declaration of
conformity ........................................... - 10 -
Disposal ............................................... - 10 -
Disposal of the electronic
de ice .......................................... - 10 -
Disposal of the batteries............. - 10 -
Recycling ..................................... - 10 -
Waste disposal ........................... - 11 -
digi-tech gmbh warranty ................... - 11 -
Warranty conditions .......................... - 11 -
Warranty period and defects
liability ................................................. - 11 -
Scope of the warranty ....................... - 11 -
Warranty claim procedure ................ - 11 -
Ser ice ................................................. - 12 -
Supplier ............................................... - 12 -
- 2 -
RADIO-CONTROLLED WEATHER STATION
Introduction
Congratulations on the purchase of your new weather station. You ha e chosen a high
quality product. The instruction manual is part of the product- it contains important
information about safety, use and disposal. Read the manual with all usage and safety
notes before using the weather station. Only use the weather station in the intended way
and for the intended applications. If the weather station is gi en to someone else, include
all documentation with the weather station. Please keep the packaging and the
instruction manual for future reference.
Intended use
This electronic appliance is intended for time display and the described additional
features. Any other use or modification of the electronic appliance does not comply with
the intended uses. The manufacturer is not liable for damages caused by improper use or
misuse. The de ice is not intended for commercial use.
Scope of delivery
Please note: Check the scope of delivery after purchase. Please ensure that all parts
are included and undamaged.
1 x Weather station
3 x Battery 1.5 V AAA LR03
3 x Sensors for indoor or outdoor use
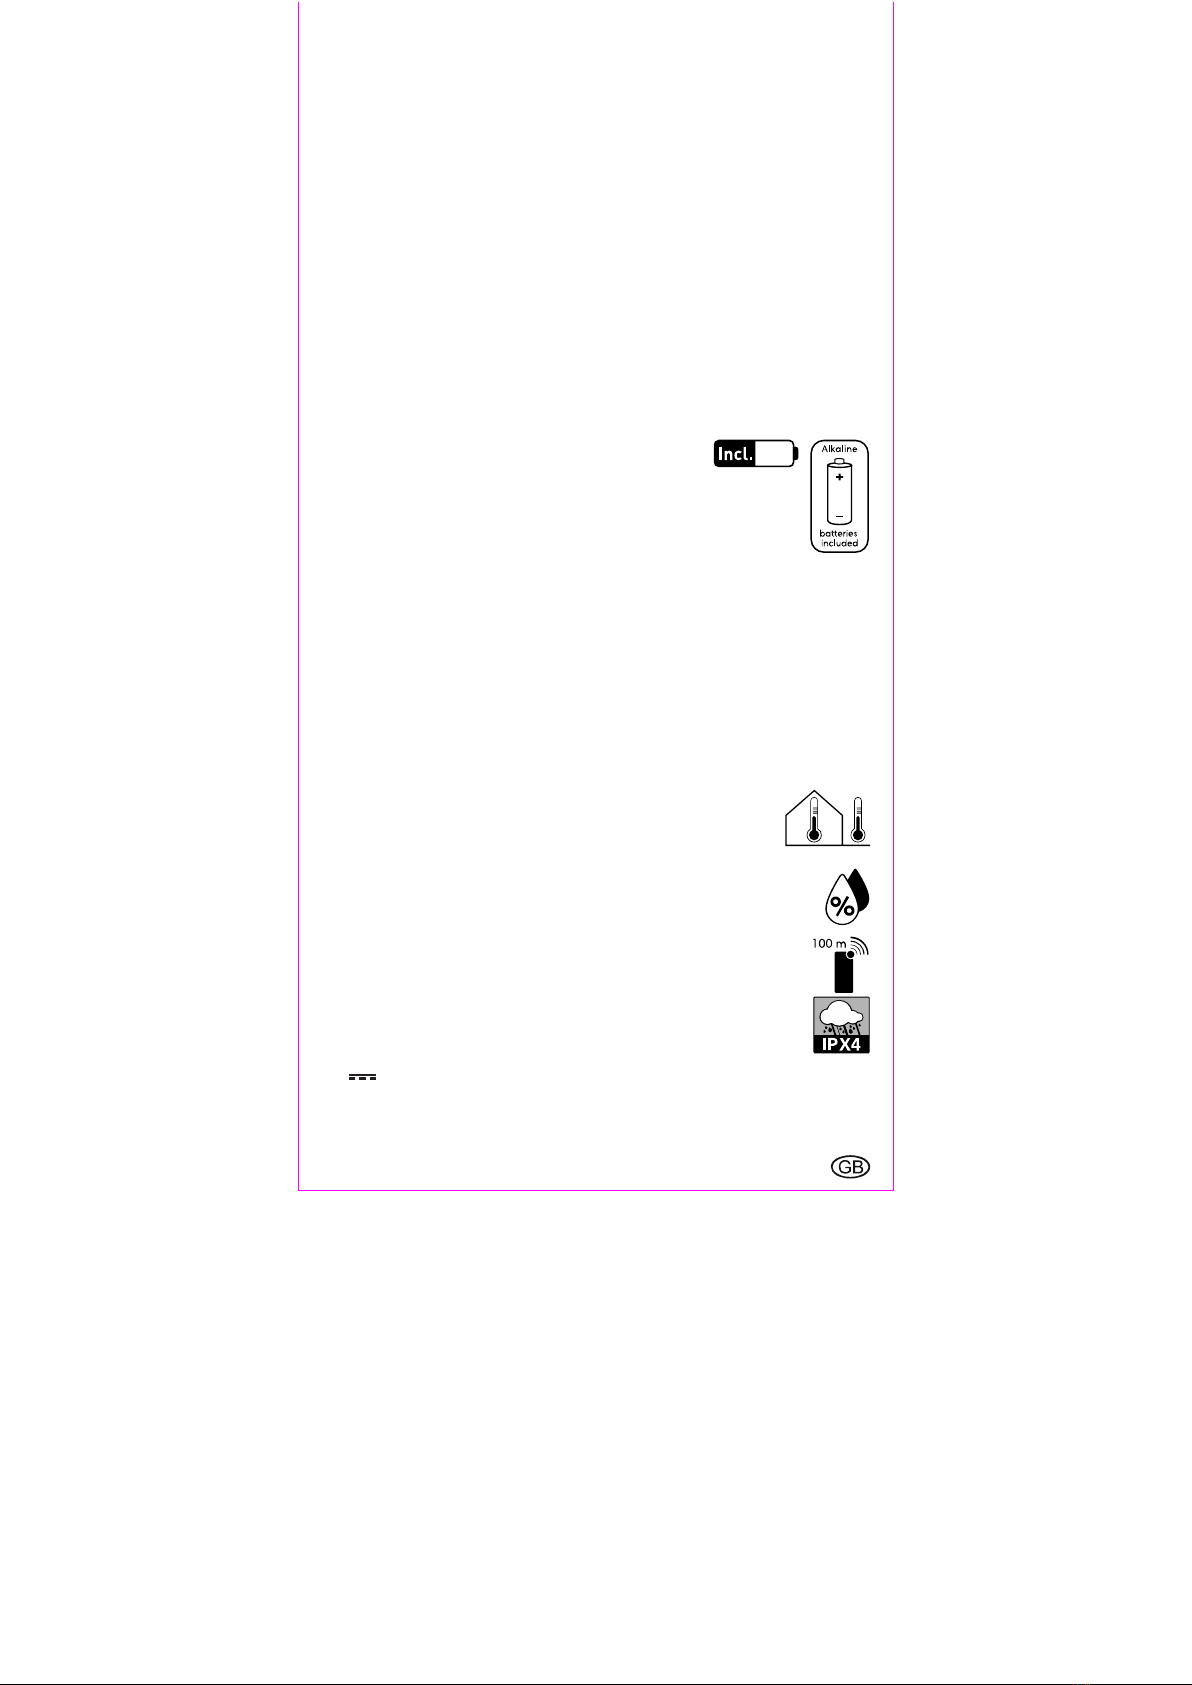
6 x Batteries 1.5 V AAA LR03
4 x Anchor/dowel
4 x Screws
1 x Instruction manual
Specifications
Weather station
DCF77 radio time signal
Measuring range/temperature: 0 - 50 °C
Temperature display/tolerance:
+/- 1 °C (0 - 40 °C); +/- 1,5 °C (40 - 50 °C)
Measuring range/humidity: 20 - 95 %
Humidity display/tolerance:
+/- 5 % (30 - 80 %); +/- 8 % (20 - 30 %, 80 - 95 %)
Battery: 3 x 1.5 V AAA R03/LR03
Outdoor sensor
Measuring range/temperature: -20 - 50 °C
Temperature display/tolerance:
+/- 1 °C (0 - 40 °C); +/- 2 °C (-20 - 0 °C, 40 - 50 °C)
Measuring range/humidity: 20 - 95 %
Humidity display/tolerance:
+/- 5 % (30 - 80 %); +/- 8 % (20 - 30 %, 80 - 95 %)
Range: max. 100 m
Frequency: 433 MHz
Transmission power: 0.024 W
Protection offered by the case (outdoor sensor):
IPX4 (Water resistant according to IEC norm 60529)
Battery: 2 x 1,5 V AAA R03/LR03
- Symbol for direct oltage
- 3 -
Important safety information
Important safety information for users
WARNING! RISK OF INJURY!
This de ice may be used by persons (including children o er 8 years of age) with
reduced physical, sensory or mental abilities or lack of experience and knowledge, if
they are super ised or instructed regarding the safe use of the de ice and understand the
dangers that may arise. Children may not play with the de ice. Cleaning and user
maintenance of the de ice may not be performed by children without super ision. Keep
packaging films out of the hands of children. There is a danger of suffocation.
Important safety information for the batteries
WARNING! HEALTH HAZARD!
RISK OF EXPLOSION!
Keep batteries out of reach of small children. If a battery is swallowed, you must seek
medical attention immediately. Batteries/rechargeable batteries must always be inserted
in the correct polarity. If necessary, clean the battery and de ice contacts. Ne er attempt
to recharge non-rechargeable batteries. Ne er short-circuit or attempt to open batteries.
Ne er heat batteries in order to re i e them. Ne er throw batteries into fire as they may
explode. If the de ice will not be used for an extended time period, remo e the batteries
and store the de ice in a dry and dust-free area. Improper use of the batteries can lead
to explosion or leakage.
If the batteries leaks, a oid contact with skin, eyes and mucous membranes. Use glo es.
If you are exposed to battery acid, rinse the affected areas with plenty of clean water
and immediately seek medical attention. Remo e discharged batteries from the de ice as
they present an increased risk of leakage.
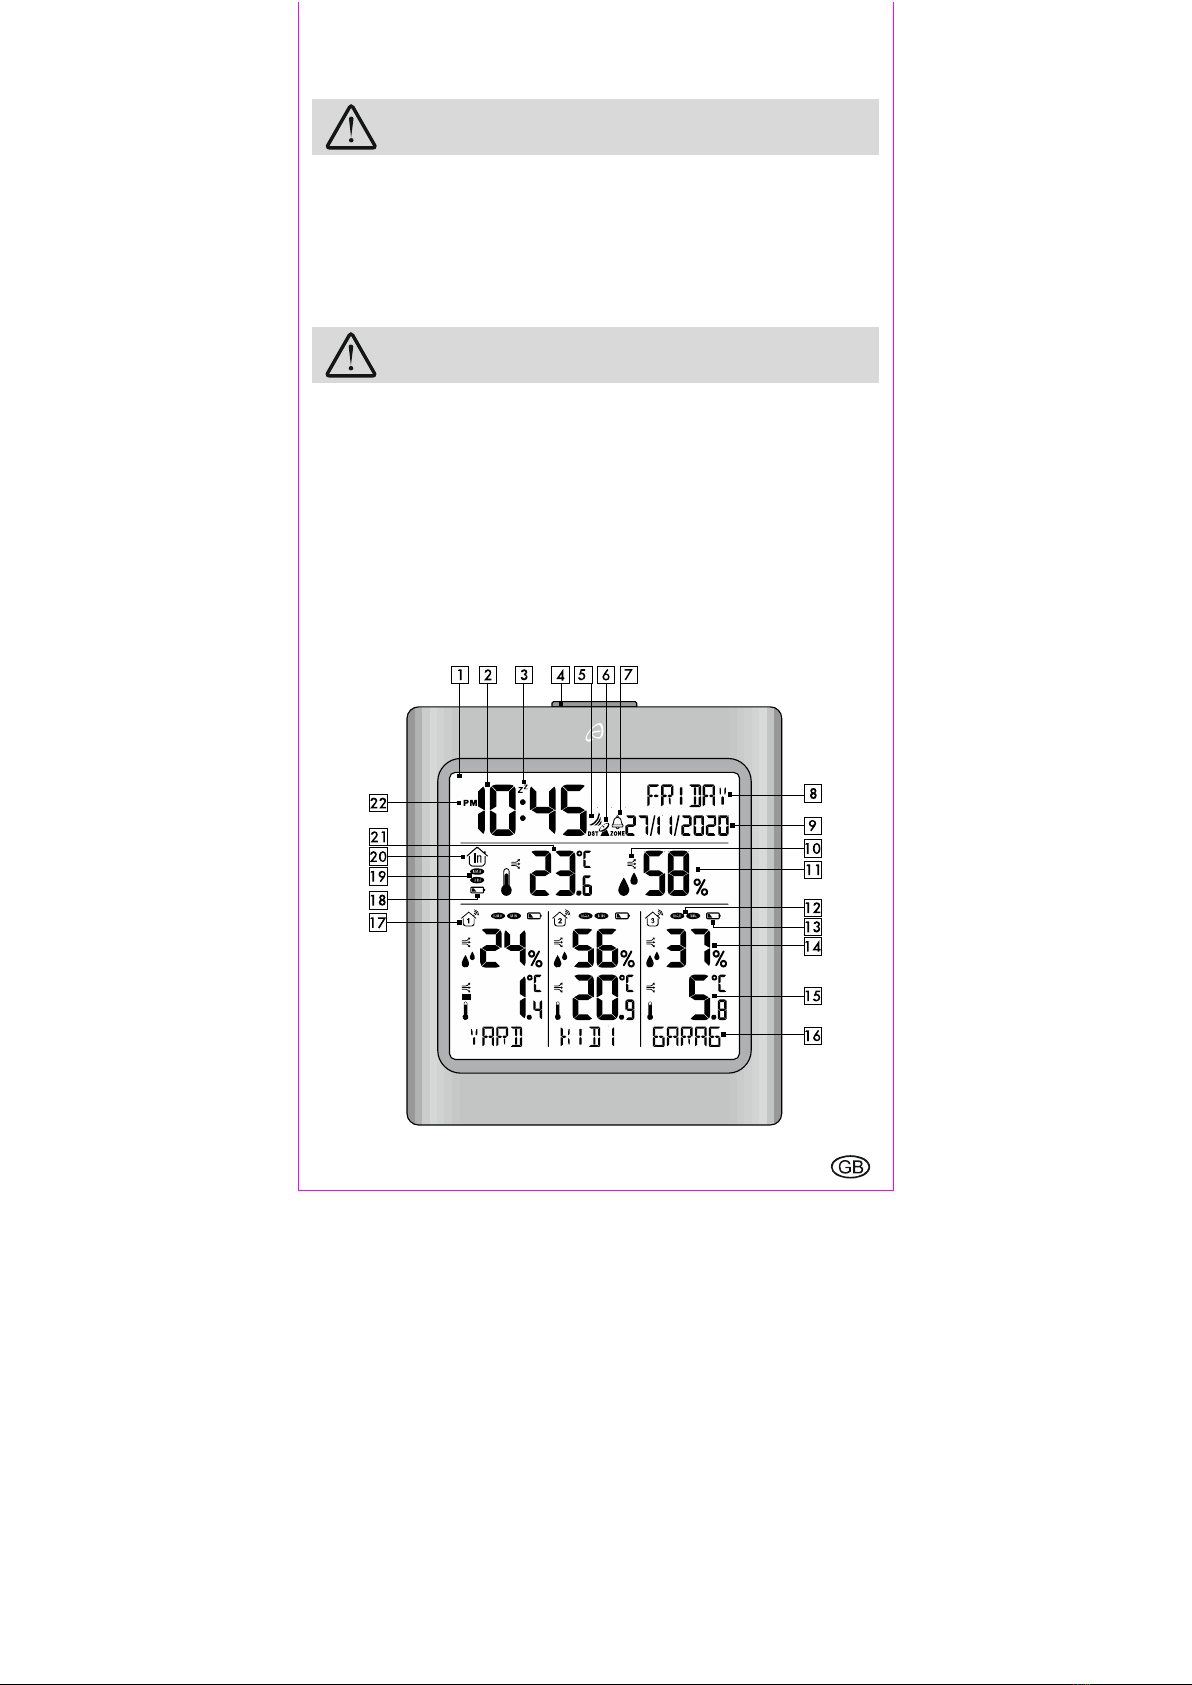
Display of the weather station
- 4 -
1 Display 2 Time display
3 SNOOZE-symbol 4 SNOOZE/LIGHT-button
5 Radio wa e symbol 6 Radio tower symbol
7 Bell symbol 8 Day of the week
9 Date (day/month/year) 10 Station trend symbol
11 Station humidity display 12
MAX/MIN
-
symbol
sensors 1, 2, 3
13
Battery le el indicator
sensors 1, 2, 3 14
Humidity display
sensors 1, 2, 3
15
Temperature display
sensors 1, 2, 3 16
Room name
sensors 1, 2, 3
17
Reception and channel
sensors 1, 2, 3 18 Station battery le el indicator
19 Station MAX/MIN-symbol 20 Station icon
21 Station temperature display 22 AM/PM-symbol
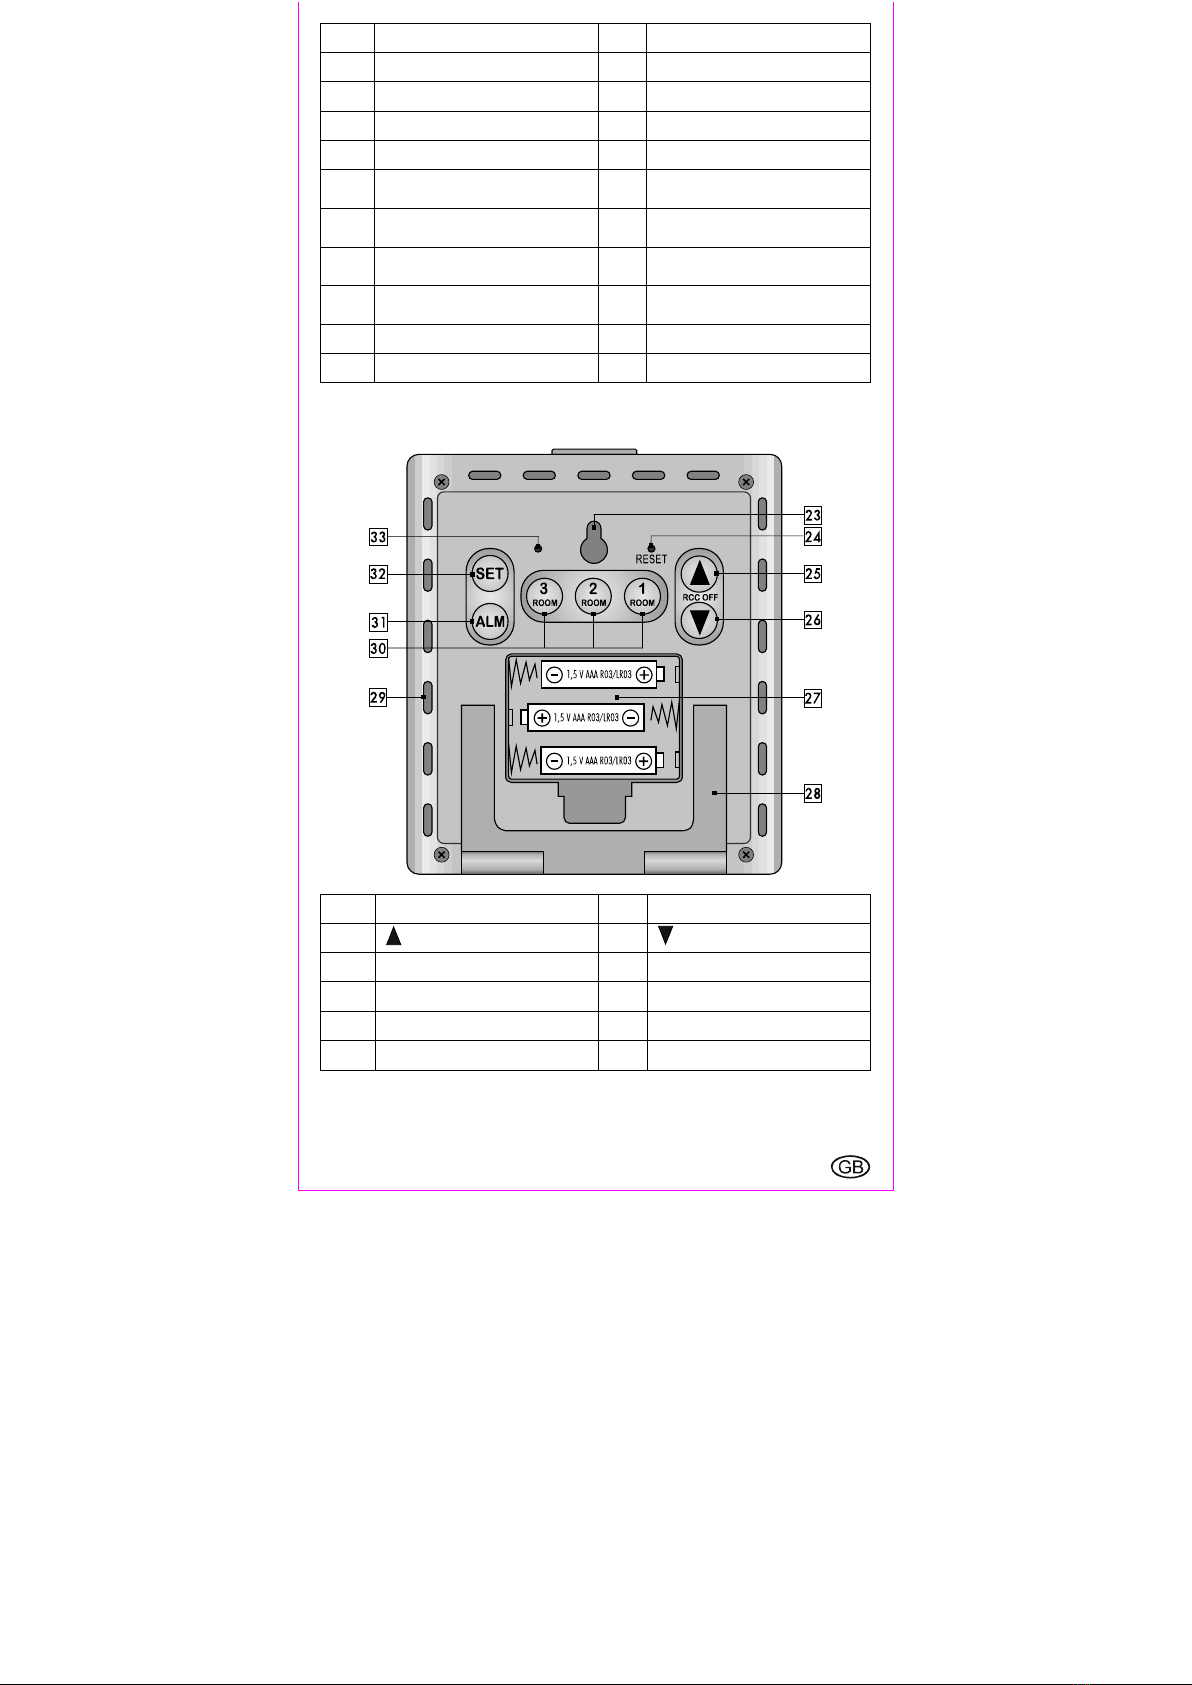
Weather station controls
23 Hole for wall mounting 24 RESET-button
25 up-button 26 down-button/RCC OFF
27 Battery compartment 28 Folding stand
29 Ventilation slots 30 ROOM-1-3-buttons
31 ALM-button / alarm 32 SET-button
33 Buzzer

- 5 -
Outdoor sensor
34 Folding stand 35 Temperature display
36 Humidity display 37 Selected channel
38 LED operating indicator 39 Hole for wall mounting
40 Channel selection switch 41 Battery compartment
42 °C/°F-button 43 TX-button
Securely placing or mounting the weather station
The weather station with outdoor sensor is not designed for operation in rooms with high
humidity (i. e. bathroom). Use the included screws and anchors for wall mounting. Make
sure that:
sufficient entilation is always guaranteed (don’t place the de ice on shel es or where
curtains or furniture block the entilation holes, and ensure that there are at least 10 cm
of space on all sides);
the de ice isn’t placed on a thick carpet or bed during operation, no direct heat
sources (i.e. radiators) influence the de ice;
no direct sunlight reaches the de ice;
contact with splashing or dripping water must be a oided (don’t place any items filled
with liquids, i.e. ases, onto or next to the de ice);
the de ice doesn’t stand near magnetic fields (i.e. speakers);
no foreign objects or dust penetrate the housing;
candles and other open flames must be kept away from this product at all times to
pre ent the spread of fire.
Securely placing or mounting the outdoor sensor
Place the sensor in a location where it is protected from the weather, for example under
an awning or carport. The sensor has an IPX4 rating and is therefore protected from
water splashes. Use the included screws and anchors for wall mounting. Make sure that:
the sensor hangs or stands upright;
sufficient entilation is always guaranteed (don’t place the de ice on shel es or where
curtains or furniture block the entilation holes, and ensure that there are at least 10 cm
of space on all sides);
no direct sunlight reaches the de ice;
the de ice doesn’t stand near magnetic fields (i.e. speakers);
no foreign objects or dust penetrate the housing;
sensiti e surfaces are protected before placement.
- 6 -
Setup
Remo e the protecti e film from the radio controlled weather station and the sensors.
Open the battery compartments 41 of the sensors 1-3. Set a different channel 1-3 40 on
each outdoor sensor and insert 2 of the included 1.5 V AAA LR03 batteries
into each compartment in the correct polarity.
The operating LED 38 will light up briefly and the temperature 35, the humidity 3 and
the selected channel 37 will appear. Close the battery compartments 41.
Open the battery compartment 27 of the radio-controlled weather station and insert 3 of
the included 1.5 V AAA LR03 batteries in the correct polarity. Close the
battery compartment 27. A short beep will sound. The temperature 21 and the
humidity 11 will appear. The radio tower symbol will blink on the display and the
radio-controlled weather station will recei e the DCF77 radio signal. This process can
take 3-10 minutes.
! Note: Please do not move the radio controlled weather station or the sensors during
the reception process.
During the reception process, no buttons except the SNOOZE/LIGHT-button 4 will
function.
If the radio signal reception is successful, the time 2, the day of the week 8 and
the date 9 will be set automatically and the radio control symbol will
appear on the display permanently.
During daylight sa ing time DST will appear on the display below the radio control
symbol . The radio-controlled weather station will now recei e the signals of the
sensors 1-3. This process can take a few minutes. If reception is successful, the signal
reception 17 of each sensor 1-3, the current temperature 15 and the current
humidity 14 will be displayed.
If reception is unsuccessful for 10 minutes, the radio control symbol will disappear.
Set the time manually (see Basic settings). The radio-controlled weather station will
attempt to recei e the DCF77 radio signal at 01:00 o’clock, 02:00 o’clock and 03:00
o’clock. If the radio signal reception remains unsuccessful, the radio-controlled weather
station will attempt to recei e the signal again at 04:00 o’clock and 05:00 o’clock and
correct the time automatically if reception is successful.
Time zone adjustment
If you are in a country, in which the current time differs from the recei ed DCF77 time
signal, use the time zone adjustment to set your radio controlled weather station to
another time zone than the default setting (UTC + 1 = Central European Time). Set the
difference in hours of your time zone (for example -01) to Central European Time.
Press the SET-button 32 1 x long and 6 x short while in normal time display mode. The
time zone (00) will blink on the display and can be set by pressing the up button 25
or the down button 2 . Press the SET-button 32 to confirm your setting. The radio-
controlled weather station will now immediately show the changed time (for example:
one hour less). Press the SET-button 32 repeatedly until the normal time display is shown.
Set a different channe
l 1
-
3 40 on each outdoor sensor.
Insert batteries into the battery compartment 41 of the
sensors first!
Then insert batteries into the battery compartment 27 of the
radio-controlled weather station.
- 7 -
Reception problems
The DCF77 radio signal is transmitted from a location near Frankfurt am Main and can
be recei ed within a radius of approximately 1500 km around Frankfurt am Main.
Howe er, there are some obstacles and sources of interference, which may substantially
hinder reception. If your weather station does not correctly recei e the DCF77 radio
signal, please hang or place the weather station in a different location at your site.
Please note that de ices such as computers, telephones, radios and tele isions may
cause electromagnetic radiation which can interfere with the DCF77 signal reception.
Other possible detriments to reception are: strong building insulation (metal building
materials), nearby mountains or atmospheric interference. It may also be necessary to
replace the batteries.
Switch the DCF77 radio time signal reception on or
off
The DCF77 radio time signal reception can be turned off by pressing the up-
button 25 and the down-button 2 (RCC OFF) together for 3 seconds. The
radio tower symbol will disappear. The radio-controlled weather station will now no
longer recei e the DCF77 radio signal.
DCF77 Radio signal reception can be turned back on by once again pressing the up-
button 25 and the down-button 2 (RCC OFF) together for 3 seconds. The radio
wa e symbol 5 will disappear. The radio-controlled weather station will attempt to
recei e the DCF77 radio signal at 01:00 o’clock, 02:00 o’clock and 03:00 o’clock. If
the DCF77 radio signal reception remains unsuccessful, the radio-controlled weather
station will attempt to recei e the signal again at 04:00 o’clock and 05:00 o’clock and
correct the time automatically if reception is successful. If reception is successful, the radio
control symbol will appear on the display permanently.
DCF77 radio signal reception can be restarted manually by pressing and holding the
down-button 2 for 3 seconds. The radio control symbol will blink and the radio
controlled weather station will attempt to recei e the DCF77 radio signal. This process
can take 3 to 10 minutes.
If the radio signal reception is successful, the time 2, the day of the week 8 and the date
9 will be set automatically and the radio control symbol will appear on the display
permanently. Radio reception has now been restored.
Speed setting
Press and hold the up-button 25 and the down-button 2 to use the speed setting
feature when setting numerical alues.
Basic settings
The following settings are a ailable: Time, time format, date, time zone and language of
the day of the week. Press and hold the SET-button 32 in normal time display mode for 3
seconds. The hours will blink and can be set by pressing the up-button 25 or the
down-button 2 . Press the SET-button 32 to confirm your setting. Set the minutes,
12/24-hour time format, year, month, day, time zone (00) ±12 hours and language of
the day of the week (ENGLISH, GERMAN, ITALIAN, FRENCH, SPANISH, DANISH and
SWEDISH) in the same way.
If no button is pressed within 30 seconds, the radio-controlled weather station will
automatically return to the normal time display.
Light
Press the SNOOZE/LIGHT-button 4 to briefly acti ate the backlight.

- 8 -
12/24-hour time format
Press the SET-button 32 1 x long and 2 x short in normal time display mode. The 12- or
24-hour time format will blink and can be set by pressing the up-button 25 or the
down-button 2 . In 12 hour time format the display will show the AM-Symbol 22
before noon and the PM symbol 22 after noon. Press the SET button 32 repeatedly to
return to normal time display mode.
Alarm
The radio-controlled weather station has an alarm feature. The pre-set
alarm time is 06:00 o’clock. To acti ate or deacti ate the alarm time,
press the ALM-button 31 on the back side of the radio-controlled
weather station. The display will switch to the alarm time display and show the words
ALARM OFF and ALARM ON to indicate whether the alarm feature is on or off. Press the
up-button 25 to acti ate the alarm. Press the down-button 2 to deacti ate the
alarm. If the alarm feature is acti ated, the bell symbol 7 will appear on the display. If the
alarm feature is deacti ated, the bell symbol 7 will disappear from the display.
To change the alarm time, first press the ALM-button 31 briefly. Then press and hold the
ALM-button 31 for 3 seconds until setting mode is acti ated. The hours will blink on the
display and can be set by pressing the up-button 25 or the down-button 2 .
Confirm your setting by pressing the ALM-button 31. Set the minutes in the same way.
After setting the minutes, the display will automatically return to the normal time display.
Snooze (SNOOZE)
Press the SNOOZE/LIGHT-button 4 when the alarm sounds to briefly deacti ate the
alarm. The bell symbol 7 and the Z
Z
symbol 3 will blink on the display. After 5 minutes,
the alarm will sound again. Press any button except the SNOOZE/LIGHT-button 4 to
turn the alarm off. The alarm will remain acti ated for the following day.
Temperature unit
Press the down-button 2 in normal time display mode to select the temperature unit
Celsius (°C) or Fahrenheit (°F).
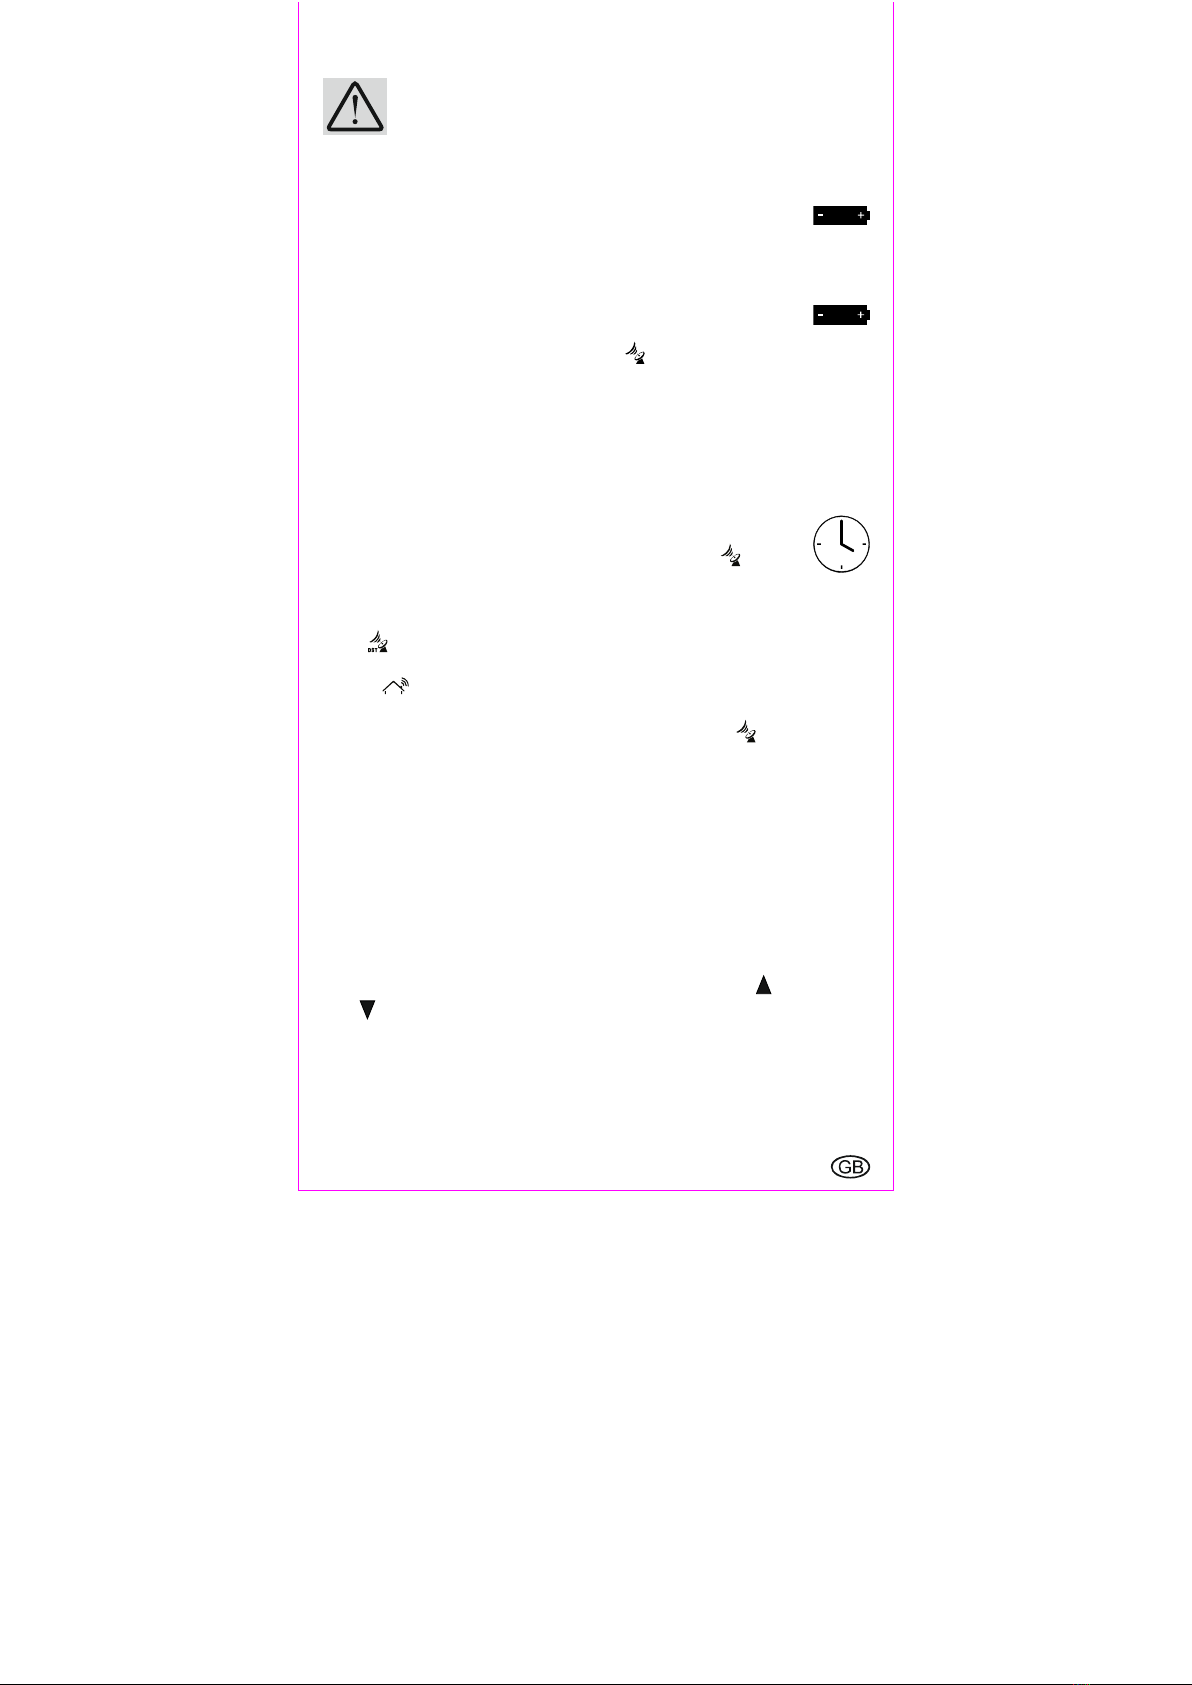
Trends
Your radio controlled weather station can show trends 10 for the weather data alues
temperature and humidity for the station and the sensors 1-3.
Humidity/temperature rising
Humidity/temperature steady
Humidity/temperature falling
aximum and minimum values
The radio-controlled weather station begins to record the maximum and minimum
temperature and humidity alues when the batteries are inserted.
Press the up-button 25 briefly to show the maximum alues for temperature and
humidity of the station 19 and the sensors 1-3 on the display 12.
Briefly press the up-button 25 repeatedly to show the minimum alue for the
temperature and humidity of the station 19 and the sensors 1-3 on the display 12.
To delete the maximum and minimum alues, press and hold the up-button 25 for 3
seconds. The stored alues are deleted and the radio-controlled weather station will
begin to record new alues.
- 9 -
Battery level indicator
If the battery charge is too low to power the radio controlled weather station, the sensors
and data transmission, the battery le el indicator 13 or 18 will appear on the
display. The batteries should be replaced in all de ices as soon as possible. Restart the
weather station.
Channel setting for sensors 1-3
Your radio-controlled weather station can be used with up to 3 sensors at the same time.
Open the battery compartments of the sensors 41and set the channel (1, 2, 3) you wish
to use for each sensor using the channel selection switches 40. The radio-controlled
weather station will now recei e the signals from the sensors 1-3 and the signal reception
symbol 17 will appear on the display of the radio-controlled weather station. To
manually transmit the measured data from the sensor to the radio-controlled weather
station, press the TX-button 43. Press the °C/°F button 42 to select the temperature unit
°C-Celsius and °F-Fahrenheit. Close the battery compartment 41.
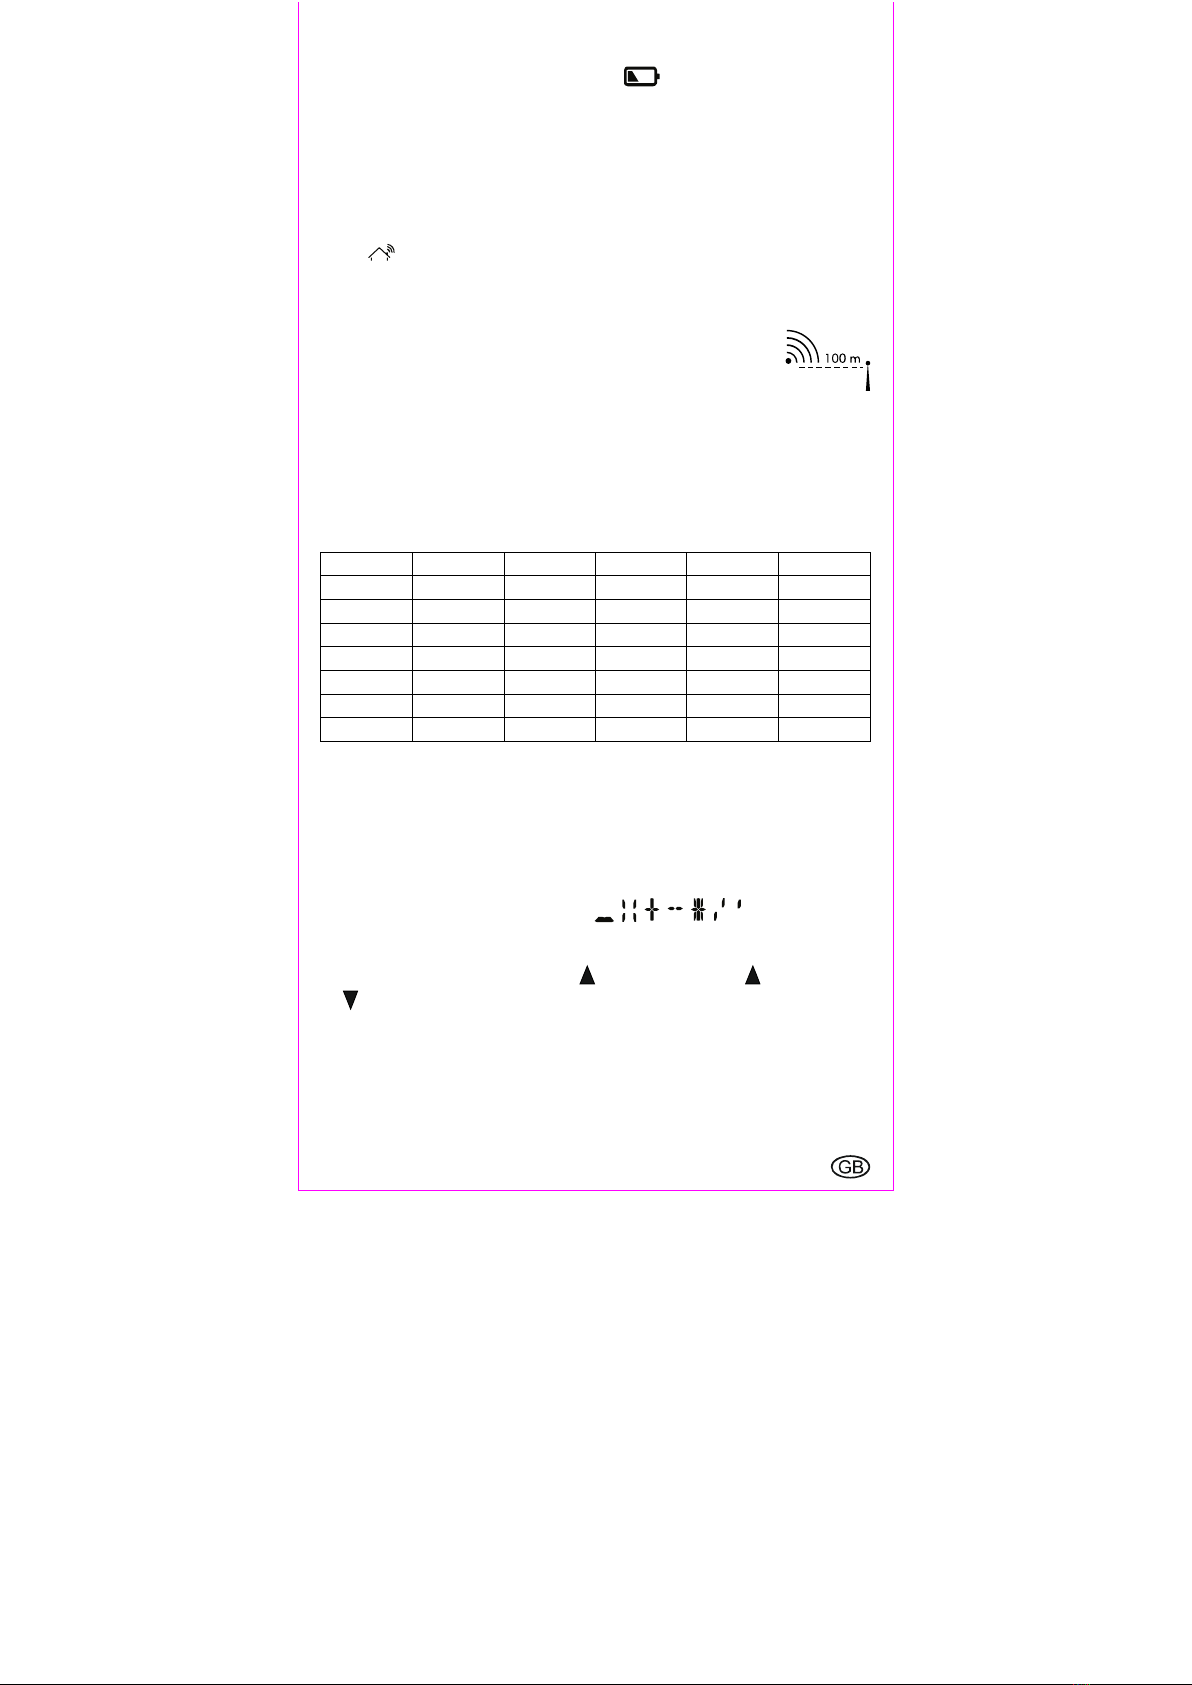
! Note: The sensors must be set up within a maximum of 100m from the
weather station with no obstacles.
Naming the sensors
The sensors can be placed in different rooms or outdoors. It is possible to assign a name
to each sensor on the radio controlled weather station at 1 . For example, a sensor
placed in the bathroom could be named BATH. When setting the names it is possible to
select one of the pre-set names: BATH, BEDRM, KID1, KID2, YARD. It is also possible to
enter custom names with up to 5 characters each.
Setting pre-set names
\ Room 1 Room 2 Room 3 Room 4 Room 5
DE BAD BETT KIND1 KIND2 GARTN
GB BATH BEDRM KID1 KID2 YARD
FR BAIN SOMML ENF1 ENF2 JARDN
IT BAGNO SONNO BAMB1 BAMB2 GIARD
ES BANO DORMI NINO1 NINO2 JARDN
DK BADEV SOEVN BARN1 BARN2 HAVE
SE BADRM SOEMN BARN1 BARN2 TRADG
To select a name for sensor 1, press the 1-ROOM-button 30. Press the 1-ROOM-button
30 again to iew the different pre-set names. If you wish to select one of the names, wait
for 5 seconds until the selected name no longer blinks. The name is now set. Select the
names for the other rooms in the same way.
Setting custom names
Custom names can also be set for the sensors. Up to 5 custom names can be set. When a
sixth name is set, the first stored name will by o erwritten automatically. To set a custom
name, the letters A-Z, the special characters , , , , , , , and the numbers 0-
9 are a ailable.
To set a custom name for Sensor 1, please proceed as follows: Press the 1-ROOM-
button 30 and then immediately press the up-button 25. Press the up-button 25 or
the down-button 2 to select a character. When the desired character appears, press
the 1-ROOM-button 30 to confirm your setting and mo e to the next character of 5
possible characters in the name. It is possible to delete characters by pressing the SET-
button 32. Once 5 characters ha e been entered the display will automatically return to
normal time display mode. If you ha e entered less than 5 characters, press the 1-
ROOM-button 30 2x to return to normal time display mode. Set the names for sensors 2
and 3 in the same way.
- 10 -
Reset (RESET)
Press the RESET-button 24 with a thin tool to reset the radio controlled weather station
and restart the radio signal reception.
Cleaning instructions
Improper cleaning can damage the de ice. Do not submerge the de ice in water or
other liquids. Do not use aggressi e cleaners, brushes with metal or nylon bristles, or
sharp or metallic cleaning tools such as kni es, scrapers or similar implements. These may
damage the surface of the de ice. Clean the de ice using a soft, dry, lint-free cloth, such
as a glasses cleaning cloth.
Simplified EU declaration of conformity
Hereby, digi-tech gmbh declares that the radio equipment type radio-
controlled weather station 4-LD5380 is in compliance with Directi e 2014/53/EU. The
full text of the EU declaration of conformity is a ailable at the following internet address:
http://www.digi-tech-gmbh.com/ce/341189_1910_FWS3S.pdf
Disposal
This de ice and all the packaging materials are recyclable. Please dispose of them
separately for better waste handling. You can find out about disposal options for your
product by contacting your municipality.
Please take note of the marking of packaging material when separating
waste materials. They are marked with abbreviations (a) and numbers
(b) with the following meanings:
1-7: plastics
20-22: paper and cardboard
80-98: composite materials.
Disposal of the electronic device
Remo e the batteries before disposal and dispose of them separately (see
Disposal of the batteries). This weather station must not be disposed of in
the normal household waste.
In the interest of the en ironment, when your de ice has reached the end
of its usefulness, do no throw it in the normal household trash. Dispose of it in the
proper and correct way. You can find out about collection sites and their business
hours from your public administration. Please adhere to applicable requirements.
Disposal of the batteries
Defecti e or spent batteries/rechargeable batteries must be recycled in
accordance with directi e 2006/66/EC and its re isions. Return
batteries, rechargeable batteries or the de ice at the a ailable collection
sites.
Improper disposal of batteries/rechargeable batteries causes
environmental damage!
Batteries/rechargeable batteries may not be disposed of in normal household
waste. They may contain toxic hea y metals and are subject to hazardous waste
treatment. The chemical symbols of the hea y metals are as follows:
Cd = Cadmium, Hg = Mercury, Pb = lead. Therefore, please dispose of spent
batteries/rechargeable batteries at a communal collection site.
Recycling
The product packaging consists of recyclable materials.
Please dispose of them properly at the a ailable collection sites.

- 11 -
Waste disposal
Dispose of the packaging in an en ironmentally responsible fashion.
Please note the marking of the different packaging materials and separate
them if applicable.
digi-tech gmbh warranty
This weather station includes a 3 year warranty starting on the day of purchase. In case
of defects of this weather station you ha e, by law, certain rights regarding the endor of
the weather station. These rights are not changed by the warranty which is described in
the following paragraphs.
Warranty conditions
The warranty duration starts on the date of purchase. Please keep the receipt in a safe
place. The receipt is needed as a proof of purchase. If a defect occurs in the weather
station within 3 years, the weather station will be repaired or replaced (according to our
choice) free of charge. This warranty requires that, within the 3 year warranty period, the
weather station and the receipt can be made a ailable to us along with a short written
description of the defect and when it occured. If the defect is co ered by the warranty,
you will recei e the repaired weather station or a new weather station. Repair or
replacement does not cause the warranty period to restart.
Warranty period and defects liability
The warranty period is not increased by the defect liability. This also applies to repaired
or replaced parts. If defects are noticed at the time of purchase they must be reported
immediately upon unpacking the item. Paid repair may be a ailable after the end of the
warranty period.
Scope of the warranty
The weather station was manufactured according to strict quality guidelines and was
carefully inspected before deli ery. The warranty does not include parts that experience
normal wear and tear and can thus be seen as wear parts or fragile parts that are
damaged. Examples include Switches, Batteries or parts made of glass.
This warranty becomes oid if the weather station is damaged, is not used in the
recommended way or is improperly repaired.
For proper use of the weather station all instructions in this manual must be adhered to
exactly. Use of the weather station in a way that is discouraged in the manual must be
a oided.
The weather station not intended for commercial use. Abusi e or improper use, excessi e
force and changes that are made by non-authorized repair centers will oid the
warranty.
Warranty claim procedure
To ensure that your call is processed in a fast and efficient manner please note the
following directions:
Ha e your receipt (as proof of purchase) and the article number (341189_1910)
handy.
The article number can be found on the type label, an engra ing, the front page of the
manual (bottom left) or a sticker on the back side or bottom side of the case.
In case defects occur, please first contact the service center (see below) by phone or
email.
Visit www.lidl-ser ice.com to download this and many other manuals,
product ideos and software.
- 12 -
With this QR-Code you can reach the Lidl-Ser ice-Site
(www.lidl-ser ice.com) directly and you can open your manual
by entering the article number (341189_1910).
Service
Name: Inter-Quartz GmbH
Street: Valterweg 27A
Town: DE-65817 Eppstein
Country: GERMANY
Email: support@inter-quartz.de
Telephone: +49 (0)6198 571825
0 80 981220
0800 80847
800 142 315
0800 004449
IAN
341189_1910
Art.
-
Nr.:
4
-
LD5380
Supplier
Please note that the following address is not a ser ice address.
Please first contact the ser ice address (see abo e).
Name: digi-tech gmbh
Street: Valterweg 27A
Town: DE-65817 Eppstein
Country: GERMANY
- 13 -
Használati és biztonsági tanácsok
Tartalomjegyzék
Tartalomjegyzék..................................- 13 -
Be ezető ..............................................- 14 -
Alap etö felhasználás ........................- 14 -
Tartozékok ...........................................- 14 -
Technikai adatok .................................- 14 -
Idöjárásjelzö készülék ................- 14 -
Külsö érzékelö .............................- 14 -
Fontos biztonsági tanácsok
Fontos biztonsági tanácsokFontos biztonsági tanácsok
Fontos biztonsági tanácsok.............- 15 -
Biztonsági tanácsok felhasználók .....- 15 -
Biztonsági tanácsok elemek ...............- 15 -
Az idöjárás állomás kijelzöje.............- 16 -
Az idöjárás állomás kezelöfelülete ...- 17 -
Érzékelök .............................................- 17 -
Az idöjárásjelzö készüléket mindig
biztonságosan helyezze el agy
akassza föl ...........................................- 18 -
A kültéri érzékelö mindig biztonságosan
helyezze el agy akassza föl ............- 18 -
Üzembe helyezés................................- 18 -
Idözóna beállítása ..............................- 19 -
Vételi za ar ..........................................- 19 -
Rádiójel étel ki- és bekapcsolása ....- 19 -
Gyors beállítás ....................................- 20 -
Alapbeállítások ...................................- 20 -
Világítás ...............................................- 20 -
12/24 órás idöformátum ..................- 20 -
Ébresztés ..............................................- 20 -
Szundi funkció (SNOOZE) ................ - 20 -
Hömérséklet mértékegység ............... - 20 -
Idöjárási tendenciák ........................... - 21 -
Maximum és minimum értékek .......... - 21 -
Elemállapot jelzés ............................... - 21 -
Az érzékelök
csatornabeállítása 1-3 ....................... - 21 -
Az érzékelök megne ezése............... - 21 -
Alapbeállítás szerinti
elne ezések ................................. - 21 -
Saját elne ezés megadása ........ - 22 -
Újraindítás (RESET) ............................. - 22 -
Tisztítási tanács.................................... - 22 -
Egyszerűsített EU-Megfelelőségi
Nyilatkozat .......................................... - 22 -
Hulladékkezelés ................................. - 22 -
Elektromos készülékek
eldobása ...................................... - 22 -
Az elemek megsemmisítése ....... - 23 -
Újrafelhasználás ......................... - 23 -
Hulladék eltá olítása .................. - 23 -
JÓTÁLLÁSI TÁJÉKOZTATÓ ............... - 23 -
A garancia kirterjedése ...................... - 24 -
Garanciaigény bejelentése ............... - 25 -
Ügyfélszolgálat/szer iz .................... - 25 -
Szállító ................................................. - 25 -
- 14 -
RÁDIÓVEZÉRELT IDŐJÁRÁSÁLLO ÁS
Bevezető
Gratulálunk Önnek az új idöjárás állomás meg étele alkalmából! Jelen termékkel
minőségi készülék mellett döntött. A használati útmutató az idöjárás állomásnak szer es
részét képezi. Fontos felhí ásokat tartalmaz a biztonságra, a használatra és az
ártalmatlanításra onatkozóan. Az idöjárás állomás használatának megkezdése előtt
kérjük, ol assa át figyelmesen a használati és biztonsági felhí ásokat. Az idöjárás
állomást csak a leírtak szerint és az ismertetett alkalmazási célra használja. Az idöjárás
állomás to ábbadásakor adja to ább jelen dokumentációt is.
Kérjük, késöbbi kérdések esetére örizze meg a csomagolást és a használati útmutatót.
Alapvetö felhasználás
A készülék az idöjelzö eszköz, alamint felhasználható az ezen dokumentumban leírt
to ábbi célokra. Minden ettöl eltérö alkalmazás, illet e a szerkezet módosítása nem
elöírásszerinti felhasználásnak minösül. Az ilyenfajta felhasználásból, illet e a nem
elöírás szerinti használatból eredö károsodásért a gyártó nem állal felelösséget. Az
idöjárás állomás kereskedelmi célú felhasználása nem megengedett.
Tartozékok
Figyelem: vásárlás után kérjük, ellenörizze a csomag tartalmát, és gyözödjön meg
róla, hogy valamennyi tartozék hiánymentesen és hibátlanul megtalálható.
1 x Idöjárásjelzö készülék
3 x 1,5 V AAA LR03 típusú elem
3 x Kültéri érzékelö
6 x 1,5 V AAA LR03 típusú elem (2 elem/kültéri érzékelö)
4 x Faszeg
4 x Csa ar
1 x Használati utasítás
Technikai adatok
Idöjárásjelzö készülék
DCF77 rádiós óra idő
Hömérséklet mérési tartomány: 0 - 50 °C
Hömérséklet mérési türéshatár:
+/- 1 °C (0 - 40 °C); +/- 1,5 °C (40 - 50 °C)
Páratartalom mérési tartomány: 20 - 95 %
Páratartalom mérési türéshatár:
+/- 5 % (30 - 80 %); +/- 8 % (20 - 30 %, 80 - 95 %)
Elemtípus: 3 x 1,5 V AAA R03/LR03
Külsö érzékelö
Hömérséklet mérési tartomány: -20 - 50 °C
Hömérséklet kijelzés pontossága / hibahatár:
+/- 1 °C (0 - 40 °C); +/- 2 °C (-20 - 0 °C, 40 - 50 °C)
Páratartalom mérési tartomány: 20 - 95 %
Páratartalom mérési türéshatár:
+/- 5 % (30 - 80 %); +/- 8 % (20 - 30 %, 80 - 95 %)
Bázisegységtöl aló tá olság: max. 100 m
Adatát iteli frek encia: 433 MHZ
Kibocsátási teljesítmény: 0,024 W
A kültéri egység borításának édettsége: IPX4 (az IEC 60529 normatí a
szerinti fröcskölés – pl. esö íz- elleni ízállóság)
Elemtípus/kültéri érzékelö: 2 x 1,5 V AAA R03/LR03
- Egyenáram jelölése

- 15 -
Fontos biztonsági tanácsok
Biztonsági tanácsok felhasználók
FIGYEL EZTETÉS! BALESETVESZÉLY!
Meg áltozott cselek ö-, érzékelö- illet e értelmi képességü alamint szükséges
tapasztalattal és ismerettel nem rendelkezö felnött (beleért e 8 é nél idösebb
kiskorúakat is) a terméket csak felügyelet mellett használhatja, illet e amennyiben a
termék használatá al járó kockázatokról elégséges tájékoztatást kapott és azt
megértette. A termék nem játékszer! A készülék tisztítását és felhasználó általi
karbantartását kiskorúak nem égezhetik. Az esetleges fulladás eszély miatt a müanyag
csomagolás gyermekektöl tá ol tartandó.
Biztonsági tanácsok elemek
FIGYEL EZTETÉS! EGÉSZSÉGRE ÁRTAL AS!
ROBBANÁSVESZÉLY!
Az elemeket kisgyermekektöl tartsa tá ol. Az elemek esetleges lenyelése esetén azonnal
forduljon or oshoz!
Az elemeket/újratölthetö akkumulátorokat megfelelö polaritás irányban helyezze a
készülékbe. Behelyezés elött, szükség esetén tisztítsa meg az elemeket és a készülék
érintkezöit. Soha ne próbáljon lemerült elemet feltölteni, illet e elemet rö idre zárni agy
felnyitni. Soha ne melegítse az elemeket újratöltéshez. A fennálló robbanás eszély miatt
soha ne dobjon elemet nyílt tüzbe.
Az elemek nem elöírás szerinti használata esetén robbanás eszély állhat fönn, illet e az
elemekben lé ö sa kifolyhat. Sa kifolyás esetén a folyadék ne kerüljön szembe és ne
érintkezzen szabad börfelülettel és nyálkahártyá al. Használjon kesztyüt! A sa al
kontaktusba került testfelületet bö ízzel öblítse le, és a to ábbi teendökért kérje or os
tanácsát. A lemerült elemeket a lehetö leggyorsabban egye ki a készülékböl, mert
sa kifolyás fokozott eszélye áll fönn.

- 16 -
Az idöjárás állomás kijelzöje
1 Kijelzö 2 Pontos idö
3 SNOOZE (szundi) jel 4
LIGHT/SNOOZE
( ilágítás/szundi) gomb
5 Rádióhullám jel 6 Rádióadó jel
7 Harang jel 8 A hét napja
9 Dátum (nap/hónap/é ) 10 Tendencia jel (bázis állomás)
11
Páratartalom kijelzés (bázis
állomás) 12
MAX/MIN jel (érzékelö 1, 2,
3)
13
Elemállapot jelzés (érzékelö 1,
2, 3) 14
Páratartalom kijelzés (érzékelö
1, 2, 3)
15
Hömérséklet kijelzés
(érzékelö
1, 2, 3) 16
Helymegjelölés (érzékelö 1, 2,
3)
17
Csatorna és jelzés érzékelés
(érzékelö 1, 2, 3) 18
Elemállapot jelzés (bázis
állomás)
19 MAX/MIN jel (bázis állomás) 20 Bázis állomás jel
21
Hömérséklet kijelzés (bázis
állomás) 22 AM/PM (délelött/délután) jel

- 17 -
Az idöjárás állomás kezelöfelülete
23 Fali akasztó 24 RESET gomb (újraindítás)
25 „föl“ gomb 26 „le“ gomb/ RCC OFF
27 Elemtartó 28 Kihajtható láb
29 Szellözö nyílások 30 ROOM/Szoba gombok 1-3
31 ALM (ébresztö) gomb 32 SET gomb
33 Hangszóró
Érzékelök

- 18 -
34 Láb 35 Hömérséklet kijelzés
36 Páratartalom jelzés 37 Ki álasztott csatorna
38 Kontroll-LED 39 Fali akasztó
40 Csatorna álasztó 41 Elemtartó
42
°C/°F
(Celsius/Fahrenheit)
gomb 43 TX gomb
Az idöjárásjelzö készüléket mindig biztonságosan
helyezze el vagy akassza föl
Az idöjárásjelzö készülék nem alkalmas magas páratartalmú helyiségben (pl.
fürdöszoba) aló üzemeltetésre. A készülék falraszereléséhez, kérjük, használja a
mellékelt csa arokat. Használatkor ügyeljen a kö etkezökre:
megfelelö szellözés biztosítása 29 (a készüléket ne helyezze polcra, illet e olyan
helyre, ahol a szabad szellözést függöny agy bútor akadályozza; elhelyezéskor
ügyeljen arra, hogy a készülék más tárgyaktól legalább 10 cm tá olságra legyen);
a készüléket ne tegye ágyra agy szönyegre és köz etlen höhatás (pl. fütötest)
közelébe;
a készüléket ne érje köz etlen napsugárzás;
kerülje a ízzel aló érintkezést (akár permet agy csepegés formájában is);
a készülék ne kerüljön mágneses mezö (pl. hangszóró) közelébe;
idegen test és por ne kerüljön a készülékbe;
a tüz esetleges to ábbterjedésének megakadályozása érdekében a készüléket ne
tegye gyertya agy más nyílt láng közelébe.
A kültéri érzékelö mindig biztonságosan helyezze el vagy
akassza föl
Az érzékelöt úgy helyezze el, hogy köz etlen idöjárási hatásoktól éd e legyen – pl.
eresz agy gépkocsibeálló alá. Az érzékelö besorolása IPX4 édelmi osztály, ezáltal
ízpermet-álló. A készülék falraszereléséhez, kérjük, használja a mellékelt csa arokat.
Használatkor ügyeljen a kö etkezökre:
hogy a kültéri egység függölegesen áll a illet e felakaszt a legyen elhelyez e;
megfelelö szellözés biztosítása ( hogy a készülék más tárgyaktól legalább 10 cm
tá olságra legyen);
a készüléket ne érje köz etlen napsugárzás;
a készülék ne kerüljön mágneses mezö (pl. hangszóró) közelébe;
idegen test és por ne kerüljön a készülékbe;
az érzékeny felületeket megó ják a felállástól.
Üzembe helyezés
Húzza le a édöfóliát az idöjárás állomásról és az érzékelökröl. Nyissa ki az érzékelök
elemtartóit 41. Az érzékelökön állítson be különbözö csatornákat (1-3) a
csatorna álasztó 40 gombbal, és helyezzen be pólusirányban érzékelönként
2 darab, a csomagolásban található 1,5 V AAA LR03 típusú elemet. A
kontroll-LED 38 átmenetileg ilágít, és a kijelzön megjelenik az aktuális hömérséklet 35
és páratartalom 3 érték, alamint a ki álasztott csatorna 37. Zárja be az elemtartót 41.
Nyissa ki az idöjárás állomás elemtartóját 27 és helyezzen be 3, a csomagolásban
található, 1,5 V AAA LR03 elemet pólusirányban. Zárja be az elemtartót 27.
Ekkor egy rö id hangjelzés hallható. A hömérséklet 21 és páratartalom 11
értékek megjelennek a kijelzön. A rádiójel illog, és az idöjárás állomás megkezdi
a DCF77 rádióhullám ételét. Ez a folyamat 3-10 percig tarthat.
ind
en érzékelöhöz külön csatornát 40
állítson be.
Elöször az érzékelök elemtartójába 41 helyezzen elemet!
Csak ez követöen helyezzen elemet a bázis állomás
elemtartójába 27.
Table of contents
Languages:
Other digi-tech Weather Station manuals

digi-tech
digi-tech XC-0430 User manual

digi-tech
digi-tech XC-0366 User manual

digi-tech
digi-tech XC0412 User manual

digi-tech
digi-tech XC0416 User manual

digi-tech
digi-tech 4-LD3030 User manual

digi-tech
digi-tech XC0440 User manual

digi-tech
digi-tech XC0434 User manual

digi-tech
digi-tech XC0438 User manual

digi-tech
digi-tech XC0436 User manual

digi-tech
digi-tech XC0412 User manual


Popular Weather Station manuals by other brands


Oregon Scientific
Oregon Scientific RMR602A user manual

La Crosse Technology
La Crosse Technology C86234 Operation manual

Vaisala
Vaisala AWS310-SITE Configuration and maintenance manual

SENSECAP
SENSECAP ONE Series user guide

Honeywell
Honeywell TE821W user manual

Ridder
Ridder Meteo-Go! CX500 quick start guide