d. Configure the cellular connection. NOTE: If you purchased Digi Bundled Services, the cellular connection is already configured on your
Connect Tank and you can skip this section
i. Connect a USB type A to B cable from your computer to the Console USB type B port on the device.
ii. Open a terminal program and connect to the device using the following settings:
Connection port: COM port connected to the device
Baud rate or Bits per second: 115200
Data: 8 bit
Parity: None
Stop: 1 bit
Flow control: None
iii. Press the Wake button. The command prompt appears in the terminal program window and the device attempts to connect to
the cellular network and obtain GPS location. The cellular and GPS LED slowly blinks red for an extended period of time during
the first time the device performs GPS location. To skip the GPS location process, press the Wake button again.
iv. At the command prompt, type set apn=thecellular.apn where thecellular.apn is the string supplied by your cellular service
provider.
v. Press Enter. The terminal program displays the APN configuration setting’s current value and the pending value. The device goes
to sleep and immediately wakes up to make the change. After the device completes the change it goes to sleep again.
vi. Press the Wake button and type set at the command prompt to make sure your change was made and that it is correct.
vii. Reassemble the device. To ensure correct placement of the cover and base, align the green dots on the same side of the device.
Note Cover screws are required as part of the safety rating. When tightening the cover screws, use a screw torque of 7 to 17 inch pounds (0.79 to
1.92 newton meters).
4Install Connect Tank
You can install the Connect Tank device directly on tanks with a 1-inch NPT threaded opening. Use the
optional adapter for tanks that have a 2-inch NPT threaded opening. Make sure:
nThe device is level (perpendicular to the liquid surface).
nThere are no obstructions between the sensor and the liquid.
nThe device is as close as possible to the center of the tank’s diameter.
Mounting the device vertically ensures proper orientation. If the device is not mounted vertically, it may send
incorrect readings.
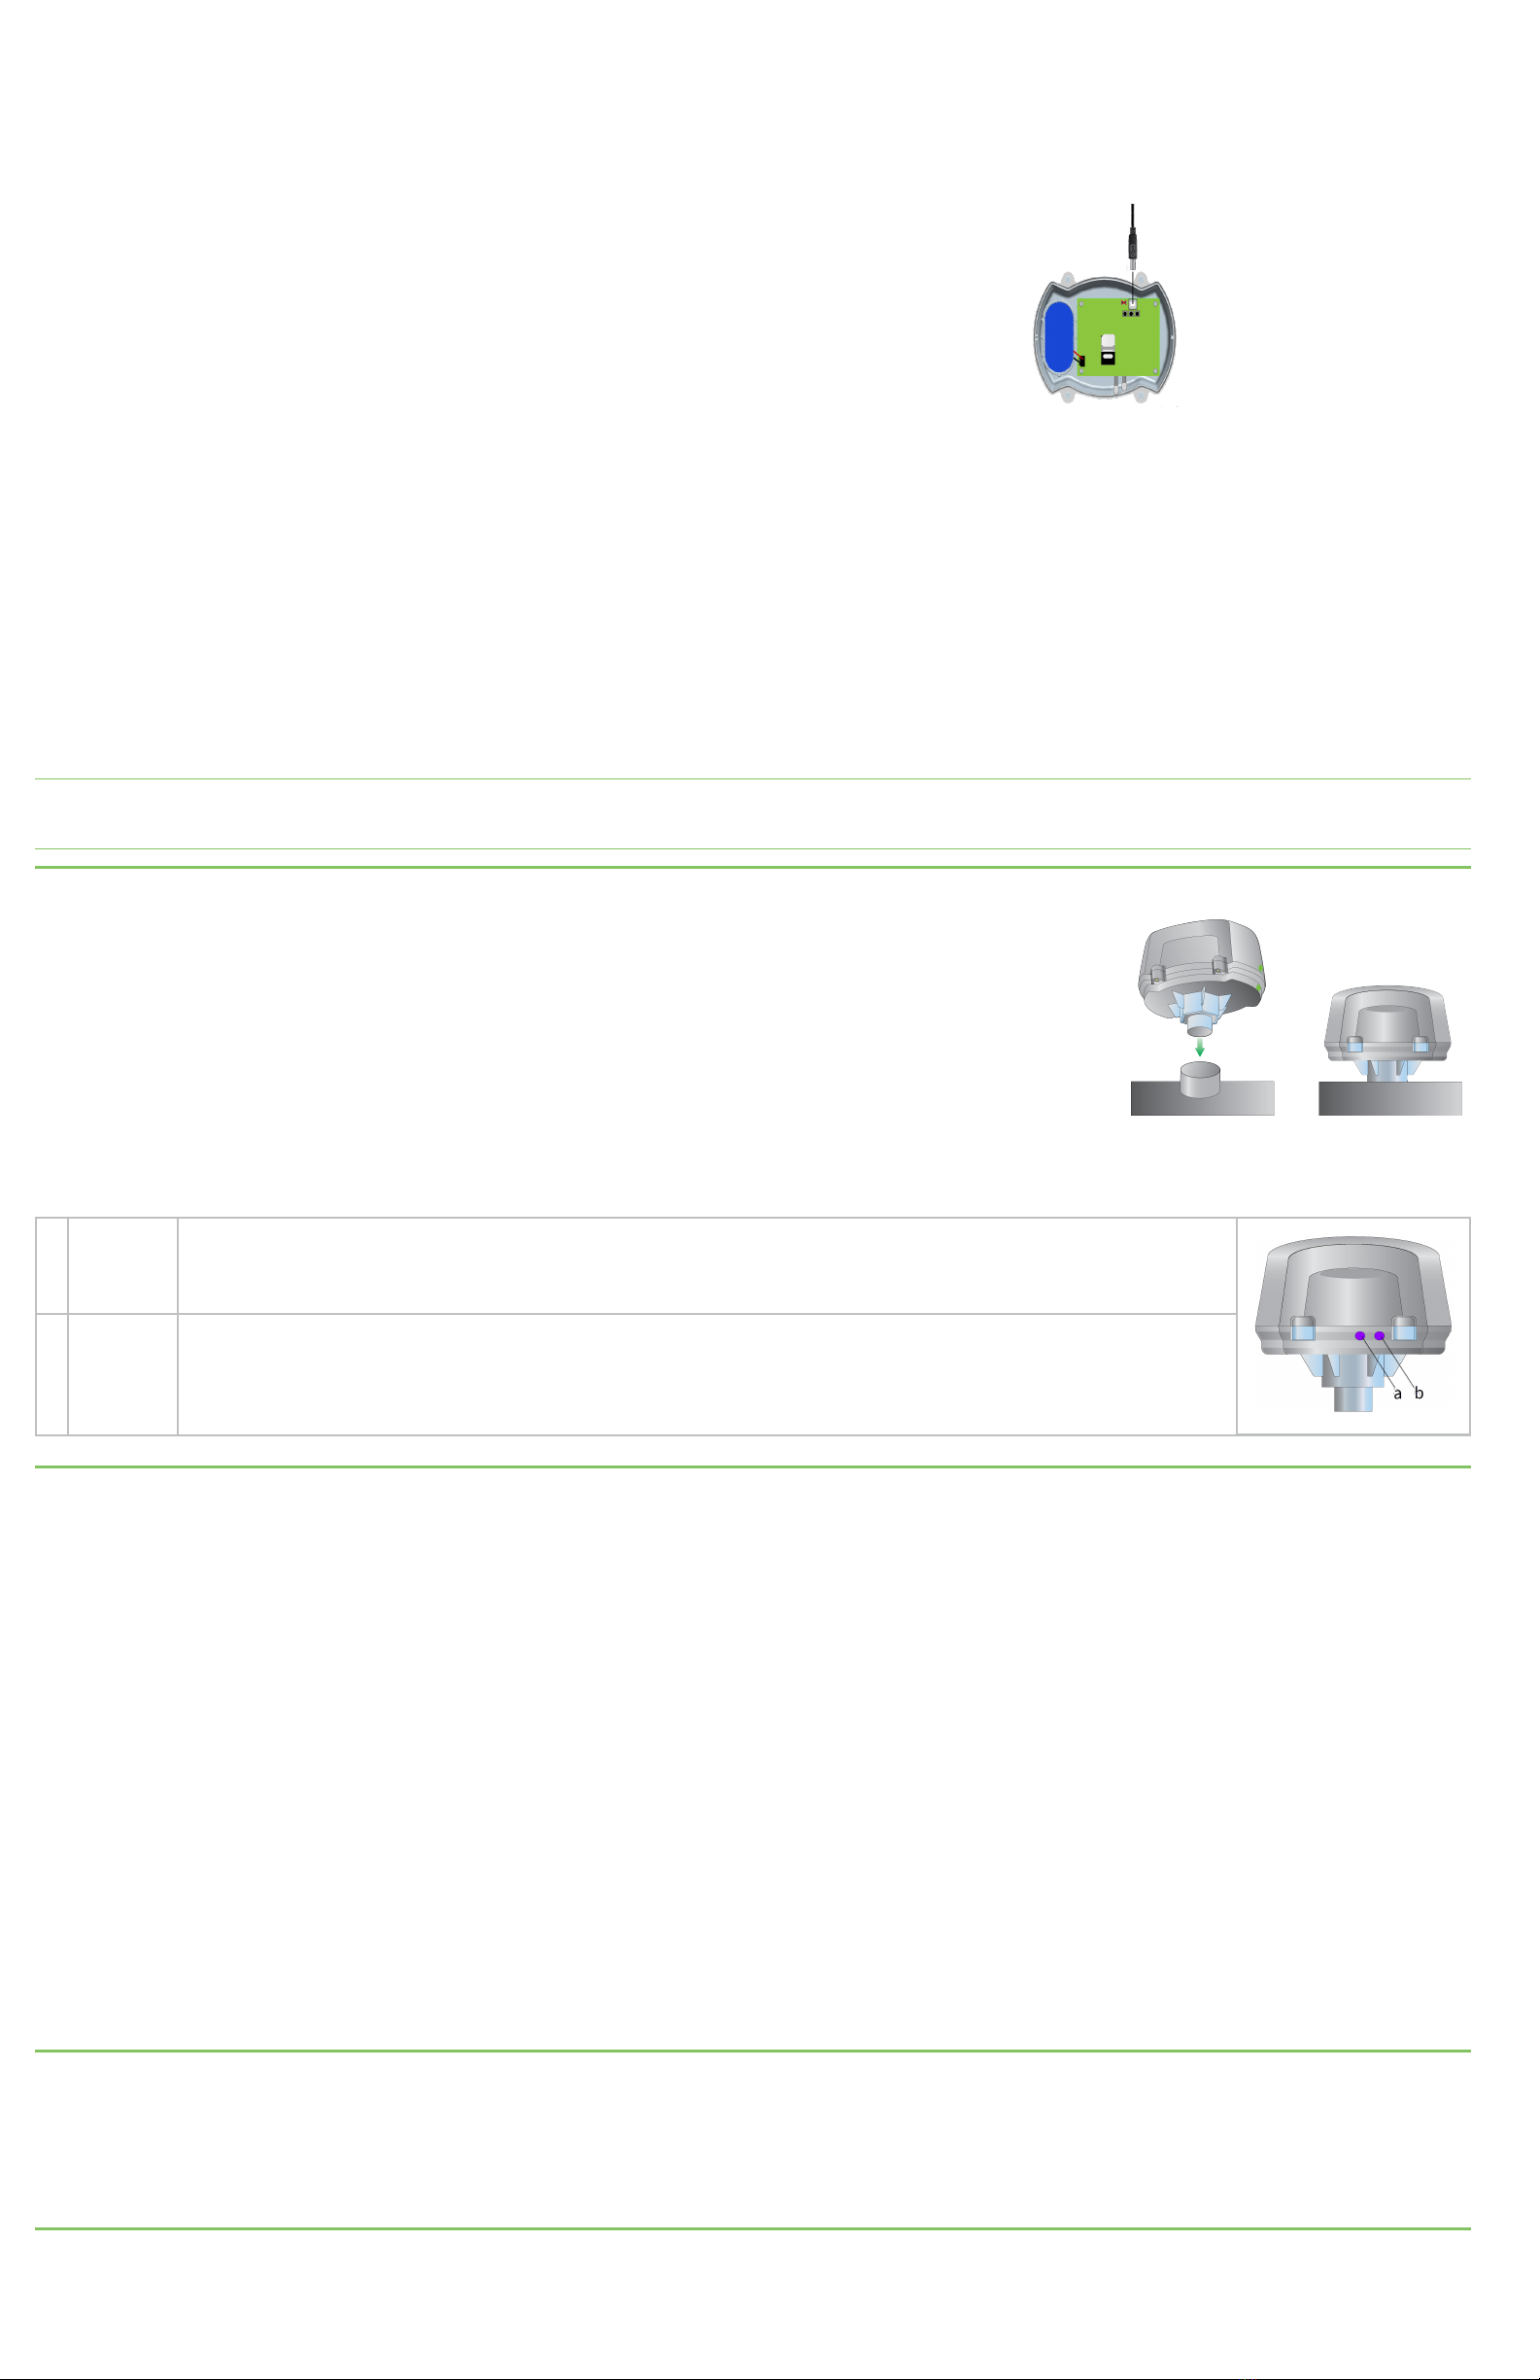
The device is now ready for use. The LEDs will glow to indicate the device’s status.
a Battery
LED
Blinking red: Weak battery life.
Blinking blue:Strong battery life.
b Cellular
and GPS
LED
Red: Slowly blinking: Performing GPS location.
Red: Quickly blinking:Searching for the cellular network.
Blue: Blinking: Connected to the cellular network and attempting to connect to Remote Manager.
Blue: Solid light: Successfully sent data to Remote Manager. The light is off after a few seconds.
5Configure custom values
a. Sign in to remotemanager.digi.com.
b. Click Device Management > Devices and double-click your Connect Tank to open its settings.
c. Click Configuration > Device Settings and then enter the appropriate values in the following fields:
nReport Sensor Every: How often the device sensor reads the liquid level in a tank (when Connect Tank is configured to read sensors
more than once a day).
nReport Sensor Data Every: How often tank data is sent to Remote Manager.
nTank Volume Unit: Unit of measurement that you are converting to, such as gallons or liters.
nTank Total Height: Total tank height in inches.
nTank Sensor Offset: Distance from the Connect Tank sensor to the top of the liquid in a full tank.
nTank Total Volume: Total volume of the tank in the defined unit, such as gallons (unit defined in Tank Volume Unit).
d. Select Schedule from the Save drop-down menu.
e. Select Immediate,select the Schedule Offline check box, and click Schedule.
The custom value settings are applied to Connect Tank the next time it connects to Remote Manager.
6View Connect Tank data
a. Sign in to remotemanager.digi.com and click Device Management > Devices.
b. Select your Connect Tank and click Data Services. Connect Tank data appears as data streams in Remote Manager.
c. To view historical data, select a data stream and click Charts or Raw Data at the bottom of the window.
7Next steps
For more information about Connect Tank, find the Digi Connect Tank v2 User Guide at www.digi.com/support/ConnectTank.


