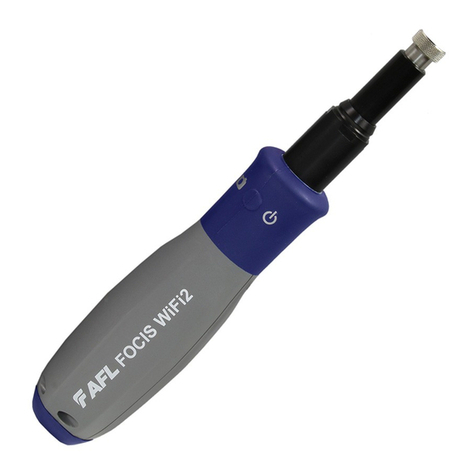
DigiFLO DigiLEAK User manual

1
DigiLEAK
DigiFLO Vacuum / Gas Leak Tester
Subsurface Water / Fuel Leak Finder

2
WARRANTY
PLEASE NOTE: THE WARRANTY BELOW WAS DRAFTED TO COMPLY WITH
FEDERAL LAW APPLICABLE TO PRODUCTS MANUFACTURED DRAFTED
AFTER JULY 4, 1975.
The warranty is extended only to original purchaser/user of our product.
This warranty gives you specific legal rights and you may also have other legal rights,
which wary from state to state.
DigiFLO warrants its parts to be free of defects in material and workmanship for a period
of One (1) year from date of purchase. If within such warranty period any such product
shall be proven to be defective, such product shall be repaired or replaced at DigiFLO
option. This warranty does not include any labor for shipping charges incurred in
replacement part installation or repair of any such product. DigiFLO’s sole obligation and
your exclusive remedy under this warranty shall be limited to repair and / or replacement.
For warranty service please contact your supplier or dealer.
DO NOT return products or parts directly to our factory without prior written consent.
Any such shipments will be refused.
LIMITATIONS AND EXCLUSIONS: THE FORGOING WARRANTY SHALL NOT
APPLY TO SERIAL NUMBERED PRODUCTS IF THE SERIAL NUMBER HAS BEEN
REMOVED OR DEFACED, PRODUCTS SUBJECT TO NEGLIGENCE, ACCIDENT,
IMPROPER OPERATION, MAINTENANCE OR STORAGE, COMMERCIAL OR
INSTITUTIONAL USE, PRODUCTS MODIFIED WITHOUT DIGIFLO EXPRESS
WRITTEN CONSENT (INCLUDING BUT NOT LIMITED TO MODIFICATIONS
THROUGH THE USE OF UNAUTHORIZED PARTS OR ATTACHMENTS) OR TO
PRODUCTS DAMAGED BY REASON OF REPAIRS MADE TO ANY COMPONENT
WITHOUT DIGIFLO SPECIFIC WRITTEN CONSENT OR TO PRODUCTS
DAMAGED BY CIRCUMSTANCES BEYOND DIGIFLO CONTROL. SUCH
EVALUATION SHALL BE SOLELY DETERMINED BY DIGIFLO. WARRANTY
SHALL NOT APPLY TO PROBLEMS ARISING FROM NORMAL WEAR OR
FAILURE TO ADHERE TO THE FOLLOWING INSTRUCTIONS.
THE FOREGOING WARRANTY IS EXCLUSIVE AND IS IN LIEU OF ALL OTHER
EXPRESS WARRANTIES. IMPLIED WARRANTIES, IF ANY, INCLUDING THE
IMPLIED WARRANTY OF MERCHANTABILITY AND FITNESS FOR A
PARTICULAR PURPOSE, SHALL NOT EXTEND BEYOND THE DURATION OF THE
EXPRESSED WARRANTY PROVIDED HEREIN AND THE REMEDY FOR
VIOLATIONS OF ANY IMPLIED WARRANTY SHALL BE LIMITED TO THE
REPAIR OR REPLACEMENT OF THE DEFECTIVE PRODUCT PURSUANT TO THE
TERMS CONTAINED HEREIN. DIGIFLO SHALL NOT BE LIABLE FOR ANY
CONSEQUENTIAL DAMAGES WHATSOEVER.
THIS WARRANTY SHALL BE EXTENDED TO COMPLY WITH
STATE/PROVINCIAL LAWS AND REQUIREMENTS.

3
gas leak detect
1. Determine if target gas molecular weight is lighter
or heavier than 29.0 –molecular weight of air.
2. Acclimate DigiLEAK to surrounding temperature for
one minute, away from the location of the leak.
3. Press for 1/2 second and then release the front
button. Display will come on displaying 29.0 –
molecular weight of clean air.
4. With inlet open repeatedly press for 1/2 second and
then release the front button. Internal pump will
activate and surrounding air will enter the sensor.
Observe the molecular weight displayed. As you
approach the desired target gas location, where
target gas is mixing with air, 29.0 molecular weight of
air, subject to target gas molecular weight, will
change to a different value. Leak Detect LED will turn
orange then Red indicating target gas close
proximity.
Measure gas molecular weight
1. Acclimate DigiLEAK to surrounding
temperature for one minute, away from
measurement location.
2. Press for 1/2 second and then release the
front button. Display will come on
displaying 29.0 –molecular weight of
clean air.
3. With inlet close to target gas, repeatedly
press for 1/2 second and then release the
front button. Internal pump will activate
and surrounding gas will enter the sensor.
Observe the displayed molecular weight.
Find Subsurface water / Fuel pipe leak
Caution: Thorough expertise in using
pressurized gases is mandatory. Tightly adhere
to gas manufacturer directions.
Close the main / street valve & Empty the
pipe.
Apply Helium, Argon, or CO2gas, as
close as possible to the leak.
Increase gas pressure up to 15psi (105
KPa).
Protruding the pavement, drill 6” deep, 1
foot apart holes in the ground.
With gas pressure applied, wait for 10 to
30 minutes to allow sufficient amount of
gas to leak through defective segment of
the pipe.
Acclimate DigiLEAK to surrounding
temperature for one minute, away from
the location of the leak.
Press for 1/2 second and then release the
front button. Internal pump will inject clean
air into the sensor. Display will turn on
displaying 29.0 –molecular weight of
clean air.
With inlet positioned, within drilled holes,
repeatedly press for 1/2 second and then
release the front red button. Internal pump
will inject ground holes’ air / gas into the
sensor. Observe the displayed molecular
weight. Molecular weight of Argonis 40;
Molecular weight of CO2 is 44; Molecular
weight of Helium is 4, molecular weight of
air is 29. Upon approaching the leak,
displayed molecular weight of air will
change as follows:
Increase, if Argon or CO2 is used
Decrease, if Helium is used
Front Leak detect / proximity LED will turn
orange and then red.
Gas Inlet
Leak detect LED
KPA
Find Vacuum mold leaks:
I. Setup:
Vacuum pump active.
Next to suspected leaks and gaps apply Helium,
Argon, or CO2.
Find a leak: Using DigiLEAK probe vacuum pump
exhaust. As gas leaks through the leak, molecular
weight of air –29.0, will change. Also, led color will
change from green to orange and then to red.
II. Setup:
Attach a valve gas outlet to the mold.
With outlet valve open, replace all air by blowing
Helium, Argon, or CO2 into the vacuum inlet port of
the mold. Slightly increase pressure by gradually
closing the outlet valve.
Find a leak: Using DigiLEAK, probe for leaks around the
mold. At the place of a leak, molecular weight of air –
29.0 will change. Also, led color will change from green
to orange and then to red

4
Specification:
Size
9” x 1.5” x 1” / 23 x 3.8 x 2.5cm
Weight
with battery
164g
Response Time
20 mili-seconds
Gas Molecular weight
range
10 to 120 g/mol
Molecular weight
accuracy of resolution
±0.1 g/mol
Operating
Temperature
-45 to 70°C
Survival Temperature
-85 to +85°C
Battery
Single Alkaline 9V battery
Battery Life
1000+ read cycles
Automatic shut down
2 minutes if not active
DigiFLO confidential
information
BATTERY
Reasons to replace the battery:
BAt is seen blinking on the display.
DigiLEAK does not respond to a Power On.
CHANGING THE BATTERY
1. Open the rear battery compartment.
Caution: Observe proper battery installation.
2. Carefully lift the battery from its location.
3. Remove the clips from the battery.
4. Apply the clips to a new battery.
5. Position the new battery within its groove, with the clips facing the Inlet.
6. Turn ON the unit. The display should turn ON. If it does, close the battery compartment. If it
does not, replace the battery with another.
TROUBLESHOOTING
There are no user serviceable parts within the DigiLEAK.
If the unit fails to come ON, replace the battery with a known good battery.
If the unit fails to come on with known good battery, contact DigiFLO Technical Service for repair.
If the unit comes on and the reading are erratic or frozen, contact DigiFLO Technical Service for repair.
If the front button does not respond, contact DigiFLO Technical Service for repair.
If a segment within the display is missing or is displayed intermittently, contact DigiFLO Technical
Service for repair.
How to pinpoint a leak
Find & mark at least 3 locations where DigiLEAK
shows a red light. Write the difference between 29.0
and DigiLEAK displayed molecular weight, at each
mark. Draw a straight line between these marks, thus
forming a triangle. Draw a circle through the edges of
the triangle. The leak is within the area of the circle.
Indication For Use:
This tool is to be used by certified technical
personnel to detect gas leaks and to measure
molecular weight of Air / other gas mixtures.
DigiLEAK can only measure molecular
weight of gas in the range of 10 to 120 g/mol
