Digital Check ReceiptNOW Elite User manual

Digital Check ReceiptNOWTM Elite User Manual
ReceiptNOWTM Elite
USER MANUAL
October 2019
8227 4813-003
© 2017 Digital Check Corp., All rights reserved

Digital Check ReceiptNOWTM Elite User Manual
NO WARRANTIES OF ANY NATURE ARE EXTENDED BY THIS DOCUMENT. Any product or related
information described herein is only furnished pursuant and subject to the terms and conditions of a duly
executed agreement to purchase or lease equipment or to license software. The only warranties made by Digital
Check Corp., if any, with respect to the products described in this document are set forth in such agreement.
Digital Check cannot accept any financial or other responsibility that may be the result of your use of the
information in this document or software material, including direct, special, or consequential damages.
You should be very careful to ensure that the use of this information and/or software material complies with the
laws, rules, and regulations of the jurisdictions with respect to which it is used. The information contained herein
is subject to change without notice. Revisions may be issued to advice of such changes and/or additions.
Notice to U.S. Government End Users: This is commercial computer software or hardware documentation
developed at private expense. Use, reproduction, or disclosure by the Government is subject to the terms of
Digital Check standard commercial license for the products, and where applicable, the restricted/limited rights
provisions of the contract data rights clauses.
FCC Statement
The statement below is included in this document to comply with a Federal Communications Commission (FCC)
regulation. The FCC is an agency of the United States government; thus, the statement below applies to
computing equipment installed in the United States of America. Digital Check is taking appropriate steps to be
in compliance with FCC regulations and similar regulations of other countries.
Note: This equipment has been tested and found to comply with the limits for a Class B digital device, pursuant to
part 15 of the FCC Rules. These limits are designed to provide reasonable protection against harmful
interference in a residential installation. This equipment generates uses and can radiate radio frequency energy
and, if not installed and used in accordance with the instructions, may cause harmful interference to radio
communications. However, there is no guarantee that interference will not occur in a particular installation. If
this equipment does cause harmful interference to radio or television reception, which can be determined by
turning the equipment off and on, the user is encouraged to try to correct the interference by one or more of the
following measures:
Reorient or relocate the receiving antenna.
Increase the separation between the equipment and receiver.
Connect the equipment into an outlet on a circuit different from that to which the receiver is connected.
Consult the dealer or an experienced radio/TV technician for help.
Caution
Changes or modifications not expressly approved by Digital Check could void your authority to operate this
equipment.
Canadian Regulatory Statement
CAN ICES-3 (B)/NMB-3(B)

Digital Check ReceiptNOWTM Elite User Manual
VCCI Regulatory Statement
Trademarks
Digital Check is a registered trademark licensed to Digital Check Corp. in the United States and other countries.
SmartSource is a registered trademark of Digital Check Corp. ReceiptNOW is a trademark of Digital Check Corp.
All other brands and products referenced in this document are acknowledged to be the trademarks or registered
trademarks of their respective holders.

Digital Check ReceiptNOWTM Elite User Manual
Contents
FCC STATEMENT..................................................... 1
CAUTION................................................................... 1
CANADIAN REGULATORY STATEMENT.............. 1
VCCI REGULATORY STATEMENT ........................ 2
TRADEMARKS.......................................................... 2
1 SUMMARY.............................................................. 3
1.1 BRIEF INTRODUCTION .......................................... 3
1.2 MAIN FEATURES .................................................. 3
2 TECHNICAL SPECIFICATIONS........................... 4
2.1PRINTER TECHNICAL SPECIFICATIONS ................... 4
2.2 CUTTER TECHNICAL SPECIFICATIONS.................... 5
2.3 PRINTING CONSUMABLE MATERIAL TECHNICAL
SPECIFICATIONS ........................................................ 5
2.4 PRINT POSITION................................................... 6
3 APPEARANCE AND COMPONENTS.................... 7
4 PRINTER INSTALLATION.................................... 8
4.1 UNPACKING THE PRINTER..................................... 8
4.2 PRINTER INSTALLATION ....................................... 9
4.3 PRINTER POWER CONNECTION.............................. 9
ATTENTION:............................................................ 9
4.4 CONNECTING INTERFACE CABLE .......................... 9
4.5 PAPER ROLL INSTALLATION AND PRINT CHECK...... 9
4.6 PRINTER POWER ON AND SELF TEST......................11
4.7 ETHERNET IPADDRESS CONFIGURATION..............11
5 JK-W03 MODULE HTTP WEB .............................21
5.1 OVERVIEW..........................................................21
5.2 INTERFACE STATUS .............................................23
5.3 PRINT STATUS .....................................................23
5.4FIRMWARE UPDATE .............................................23
5.5 WIRED TCP/IP ...................................................20
6 PRINTER ROUTINE MAINTENANCE ................21
6.1 CLEARING JAMMED PAPER ..................................21
6.2 CLEAN PRINT HEAD AND ROLLER........................23
6.3 CLEAN PAPER SENSOR ........................................23
7 INTERFACE SIGNALS..........................................24
7.1 USB INTERFACE .................................................24
7.2 ETHERNET INTERFACE ...................................24
7.3 POWER INTERFACE DEFINITION ...........................25
8RECOVERING FROM ERRORS ...........................26
8.1 PRINTER DOES NOT WORK....................................26
8.2 ERROR INDICATOR LIGHT AND BUZZER ALARM –
SEE SECTION 7.3 FOR DESCRIPTIONS.........................26
8.3 INDICATOR LIGHT AND BUZZER INFORMATION ...26
8.4 TROUBLESHOOTING PRINTING PROBLEMS.............27
9 INSTALLATION OF SMARTSOURCE® ELITE..28
10 POWER MANAGEMENT....................................28
APPENDIX A: PARAMETER SETTING BY FEED
BUTTON....................................................................29

Digital Check ReceiptNOWTM Elite User Manual
- 2 -
Safety Instruction
Before operating the printer, please read following notes carefully.
Safety warnings
Warning: Do not touch the cutter on the printer
Warning: Do not touch the print head and its surrounding parts during or just after printing as
the print head is hot.
Attention
1) Printer should be placed on a flat and stable location.
2) Leave enough space for operation and maintenance around the printer.
3) Printer should be kept away from water. Avoid direct sunlight, strong lights and heat.
4) Avoid getting water or conductive material (such as metal) into the interior of the printer. If this happens,
disconnect the printer power supply immediately.
5) Do not allow condensation to form on the surface of the printer. If condensation has formed, the printer
should not be powered on until the condensation has been eliminated.
6) Do not use or store printer in conditions of high temperature, high humidity or serious pollution.
7) Avoid placing printer in a location that would subject it to vibration or impact.
8) Connect the printer power cable to a properly grounded socket. Avoid using the same socket with large
motors or other devices which could cause power supply voltage fluctuations.
9) If the printer is not to be used for an extended period, unplug the power cord..
10) Do not attempt to print without paper. This will seriously damage the print rollers and thermal print
head.
11) To ensure print quality and product life use the recommended paper or the same quality of paper.
12) Turn off the printer power switch before plugging in or unplugging power or interface cables. Failure to
do so may damage the printer.
13) To maximize the life of the printer, it is suggested that users use the lowest level print density that
meets print quality requirements.
14) There are no user-serviceable parts inside the printer. Disassembling the printer will void the
warranty.
15) Keep this manual for reference.

Digital Check ReceiptNOWTM Elite User Manual
- 3 -
1 Summary
1.1 Brief Introduction
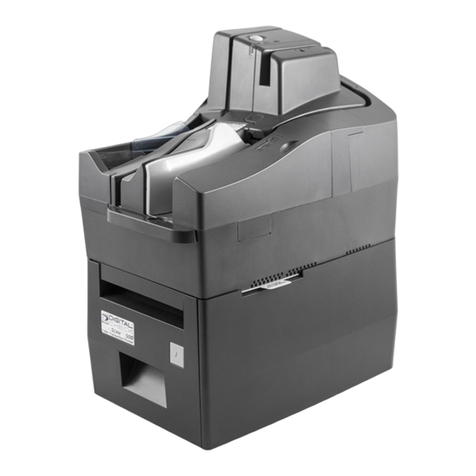
ReceiptNOW Elite is a high-performance thermal printer which can be integrated with the Digital
Check SmartSource®Elite check scanner to save desk space. It can be used for a wide range of
financial transactions to print receipts, notes, vouchers ,financial slips and transaction list printing.
ReceiptNOW Elite uses front-end paper exit, drop-in paper replacement, and provides a custom
support platform for SmartSource®Elite scanners. The ReceiptNOW Elite detects print-head-in-place,
out of paper, paper low, and low supply voltage conditions. The standard data interface is USB 2.0. It
supports Standard Font A (12 × 24), Font B (9 × 17), Kanji Font A (24 × 24), Thai, Simplified Chinese,
Korean and other languages, supports multiple code pages to print, one-dimensional bar code :
UPC-A, UPC-E, CODE 39, CODE 93, CODE 128, EAN8, EAN13, ITF, CODABAR; two-dimensional bar
codes: PDF417, QR-CODE; using ESC / POS command set, automatic state return. With the user
Custom Sample function, users can set print format and fix content of printing by firmware settings.
Paper width can be set in a row, compatible with EPSON TM-88IV.
1.2 Main Features
◇Quiet, high-speed printing
◇Supports two-tone printing, watermark and gray level printing
◇Easy, drop-in paper loading
◇Easy to use and maintain
◇Paper width can be adjusted from 56-82.5mm
◇Supports full cut and partial cut
◇USB 2.0 interface/Ethernet interface (optional)
◇Compatible with ESC / POS commands or Windows Print
◇Paper-saving
◇Low power consumption design (minimum power consumption less than 1W). Automatically defaults to
‘sleep’ mode after 5 minutes of inactivity.

Digital Check ReceiptNOWTM Elite User Manual
- 4 -
2 Technical Specifications
2.1 Printer Technical Specifications
Items
Parameter
Print method
Thermal print by line
Print resolution
203*180DPI
Print speed
Maximum print speed is 250mm/sec, two-color printing speed
100mm/sec, gray print speed 100mm/sec. Depending on print
content, the printer will automatically adjust print speed
Print Span Maximum is 80mm; paper width is from 56-82.5mm.
Paper type
Paper thickness is 0.06~0.10mm, Maximum paper roll OD is 83mm
Continuous thermal paper or thermal paper tags
Support Bar code type
Barcode 1D: UPC-A, UPC-E, CODE 39, CODE 93, CODE 128,
EAN8, EAN13, ITF, CODABAR
Barcode 2D symbols: PDF417, QR-CODE
Character support
U.S.A., France, Germany, U.K., Denmark I, Denmark II, Italy
Sweden, Spain I, Spain II, Japan, Norway, Latin America, Korean
etc. optional
Enlarge character
All characters can be enlarged from level 1-6 both in the horizontal
and vertical direction.
Character rotation
Four selectable print orientations(0°, 90°, 180°, 270°)
Paper detection
Photoelectric sensors (out of paper, paper low)
Front cover position detection Micro switch
Print head temperature
detection
Thermistor
Graphics processing Download bitmap Print bitmap directly
Download buffer size:
RAM:128KB
FLASH:512KB
Support bitmap mode, fast graphic
printing
Communication interface
USB 2.0 interface/Ethernet interface (optional)
Memory
FLASH Memory Capacity: Maximum 4MB;
SDRAM memory total capacity: Maximum 2MB;
Data receive buffer size: 64K, 4KB, 45 bytes selectable;
RAM bit map area: 128KB;
Area available to the user FLASH: 512KB;
Power
AC 110-240V 50/60 Hz, ~1.5A (Power supply)
DC 24V ± 5% average current 2.0A
Maximum instantaneous current 8A
Print head lifetime
Print head lifetime, thermal single color print : 100 Kilometers
Print head lifetime, thermal two color print: 50 Kilometers
Print duty `cycle: 12.5%
Operating temperature and
humidity
5°C-40°C (41°F-113°F). When used with a scanner, specification
of scanner may be different. Specification of scanner does not
modify specification of this product and vice-versa.
Relative humidity 20% -90% (40°C/104°F)
Storage temperature and
humidity
-40°C - 60°C (-40°F - 140°F)
, 10%~93% (40°C/104°F )
Dimensions
241mm × 146mm ×135mm (9.5in ×5.7in × 5.3in)
(
L×W×H
)

Digital Check ReceiptNOWTM Elite User Manual
- 5 -
2.2 Cutter Technical Specifications
Item
Parameter
Note
Cutting method
Sliding blade
Cutting time
500ms
Cutter cuts for one time.
Cutting interval
2s
30 cuts / min (maximum)
Type of paper 0.06~0.1mm
thermal paper or equivalent thickness
paper
Operating voltage
24VDC
Maximum operating current
1.2A
24VDC
Cutter lifetime
1.5 million times (0.06mm
thick paper)
*Includes full-cut, partial cut
Full cut: Completely severs paper
Partial cut: Partially severs paper, leaves cut end attached with tear-off tab
2.3 Printing Consumable Material Technical Specifications
2.3.1 Thermal Paper Parameters
Type ofPaper: Continuous thermal paper
Paper Feeding Method: Paper Roll
Paper Width: Maximum 80mm, width can be adjusted between 56-82.5mm
Paper Thickness: 0.06mm-0.1mm
Thermal Layer: External
Paper Roll Size: OD (Max):83 mm
Inside Diameter (Min) 12.5mm
Recommended Paper:
Part Number Manufacturer
401095994 Digital Check
F240AC,F220-VP,FV230A1,
PA220AG,HP220A Mitsubishi Paper Mill CO., LTD
FD210,PD150R,PD160R OJI Paper CO., LTD.
F70NA FUJI PHOTO FILM CO., LTD
Attention:
Please use recommended paper or equivalent quality paper. The use of other types of paper may
affect print quality and print head life.
If the paper is contaminated by chemicals or oil, the paper may become discolored or printing
result may not be clear.
Do not scratch the thermal paper with any sharp or hard object. This may cause the printing to be
obscured or unclear.
All thermal printer paper will degrade and produce poor quality printing if exposed to temperatures
greater than 70°C (158°F), high humidity or strong light. Store thermal printer paper in a cool, dry
place and in its original wrapping until ready for use.

Digital Check ReceiptNOWTM Elite User Manual
- 6 -
2.4 Print Position
2.4.1 Print Location On The Paper
L1 Maximum Paper Width:82.5±0.5mm
L2 Maximum Effective Print Width:80mm
L3 Distance from print head to left side of paper pocket (fixed width): 1.75±1mm
L4 Distance from print head to right side of paper pocket (fixed width): 1.75±1mm
L5 Left margin: Set by command (see Programming Manual), the printer default is 8mm
L6 Width of print area: Set by command (see Programming Manual), the printer default is 64mm
L7 Right margin: Set by command (see Programming Manual), the printer default is 8mm

Digital Check ReceiptNOWTM Elite User Manual
- 7 -
3 Appearance and Components
1—Top Cover
2—Power Indicator Light- Indicates power status.
3—Error Indicator Light - Reports warning or error status
(such as out of paper, etc.). Indicator light
flashes. Under normal conditions, the light remains
off.
4—Paper Feed Button
Paper Feeder:If there are no errors or
warnings, pressing this button will feed
paper.
Print Configuration Function: To review
printer configuration settings - Hold
down this button at the same time while
turning on power. Printer will print the
configuration settings (such as print
length and width, print speed and other
settings).
5—Paper Pocket
6—Paper pocket width adjustment - Roll
thumbwheel to adjust the paper pocket
width. The range of adjustment is 56
~ 82.5mm
7—Out of paper sensor - continuously
detects presence of paper roll.
8—Roller
9—Cutter
10—Handle
11—Paper low sensor (inside the printer) -
Detects how much paper remains.
Error indicator flashing rapidly means
paper roll is low and needs to be
replaced soon. The printer will continue
to work until out of paper.
12—Ethernet Interface (optional)
13—USB Interface
14—Power Interface
15—Power Switch - Press “O” to turn off the
power, press“-”to turn on the power

Digital Check ReceiptNOWTM Elite User Manual
- 8 -
4 Printer Installation
4.1 Unpacking the Printer
Please check the package contents when unpacking the printer. If something is missing or damaged,
please contact Digital Check at 847-446-2285.

Digital Check ReceiptNOWTM Elite User Manual
- 9 -
4.2 Printer Installation
1) Printer should be installed on a flat surface.
2) Printer should be kept away from water.
3) Avoid placing printer in a location that would subject it to vibration or impact.
4) The printer should only be plugged into an electrical outlet that has a safety ground.
5) Allow the proper clearance for printer operation and maintenance. Please see picture below showing
the printer open, and ensure adequate clearance.
6) Follow the Instructions on the Read Me First! document to complete the installation and to print
sample receipts. For more detailed installation instructions and to
print a test configuration printout, proceed with the next
Installation section.
4.3 Printer Power Connection
1) Make sure that the printer power switch is turned off.
2) Connect power plug into power socket behind the printer.
Attention:
If the printer is not to be used for an extended period, unplug the power cord..
4.4 Connecting Interface Cable
1) Make sure printer power switch is turned off.
2) Plug USB cable into the USB socket on the printer.
3) Connect the other end of cable to the computer.
4.5 Paper Roll Installation and Print Check
4.5.1 Check Printing Paper
Paper may be installed while the power and interface cables are connected. Please check paper type

Digital Check ReceiptNOWTM Elite User Manual
- 10 -
before printing.
4.5.2 Install/Change Paper Roll
1) Pull the handle and open front cover.
2) Using the paper width adjustment wheel, adjust to fit the width of the paper being installed, as shown
below. Roll the adjustment wheel towards the rear of the unit to adjust for wider rolls. Roll the
adjustment wheel towards the front of the unit to adjust for narrower rolls. After the paper roll is installed,
it should rotate freely.
3) Put paper roll into printer according to directions shown on the label.
4) Pull out paper end and close front cover.

Digital Check ReceiptNOWTM Elite User Manual
- 11 -
4.6 Printer power on and self test
1) Make sure power cable is connected to the printer and the paper roll is loaded.
2) Make sure POWER INDICATOR LIGHT is off and printer is powered off.
3) Hold down the feed key while turning the printer on. Keep on holding the button till ‘Interface is
configuring….’is printed out, which lasts around 2 seconds. After waiting for 15 seconds (old PCBA:
JK-E02 around 10 seconds, new PCBA JK-W03 around 15 seconds), the printer will perform a
self-test and then print ‘Press and Release FEED key to print characters’ and ‘Press and Hold FEED
key to configure the printer’. The printer will change to holding state and PAPER INDICATOR LIGHT
blinks.
4) When the self-test page is finished, press the FEED key briefly to print test characters or hold the
FEED key down to configure the printer. For specific function and operational approach for using the
FEED button to configure the printer, please refer to Appendix A “Parameter Setting by FEED
Button”.
4.7 Ethernet IP Address Configuration
ReceiptNow printers that have an Ethernet interface are factory configured for a default turning-on DHCP
mode. To turn off the unit for DHCP mode or changes to the unit’s default IP address can be done by
communicating with the unit via a web browser set to the default IP address as shown in the screen shot
below. The web browser utility can also provide printer and interface status.
The current IP address of the printer can be determined by powering on the printer while holding the feed
button down which will cause the printer to print out a test form which lists various hardware and
communication interface parameters.
If the printer does not appear to respond to the proper IP address, the most likely cause is that the printer
is not currently configured in a manner that is compatible with the network to which it is connected.
Check with your network system administrator to insure that the settings for ‘DHCP’, ‘Gate Way’ and ‘IP
Address’ are compatible with the network

Digital Check ReceiptNOWTM Elite User Manual
- 12 -
5 JK-W03 Module HTTP Web
5.1 Overview
The interface module provides HTTP service. The status of printer and interface module can display based
on WEB page at the host end through browser, and can also carry out the operation of configuring the
interface module and printing the test page. This service adopts the TCP port of port 80.
When the user adopts this service:
Firstly, the user needs to get the IP address of interface module through self-test page or special
configuration tool;
Secondly, enter IP address of interface module in location bar of browser. Then you can inquire the printer
status and maintain the interface module through WEB page. The following is the detailed explanation of
WEB page.

Digital Check ReceiptNOWTM Elite User Manual
- 14 -
5.3 Printer Status
Click “Printer Status” link to check status of printer connected to the interface. If there is abnormal status,
the letters in the page will show in red. Click “Refresh” button to refresh current status and click “Print Test
Page” to print the self-test page through printer (see Figure 2):
Figure 2 Printer status
Note: When printer is busy or there is error in the printer, then the printer cannot print the self-test page.

Digital Check ReceiptNOWTM Elite User Manual
- 15 -
5.4 Firmware update
Click “Firmware update” link and update the interface firmware through this web page (if you have set the
safety password, you can enter only when you have entered correct password, see Figure 5), see Figure 3.
Click “Browse” button to select the firmware needing to be updated, then click “Update” button to update
the firmware. When the web page like Figure 4 appears, it indicates that the updating is successful, and
the printer will restart automatically. When the file is wrong or the updating fails, the web page will pop up
the prompt message of invalid file format or updating failure.
Figure 3 Firmware updating page

Digital Check ReceiptNOWTM Elite User Manual
- 16 -
Figure 4 Firmware updating successfully
After clicking Yes, the printer will remind you to “Please wait for printer to reboot”, as shown in Figure 5.

Digital Check ReceiptNOWTM Elite User Manual
- 17 -
Figure 5 Wait for printer to reboot
Don’t do anything to the web page until the page reminds you “Reset is complete”, as shown in Figure 6.
Other manuals for ReceiptNOW Elite
1
Table of contents
Other Digital Check Printer manuals
Digital Check
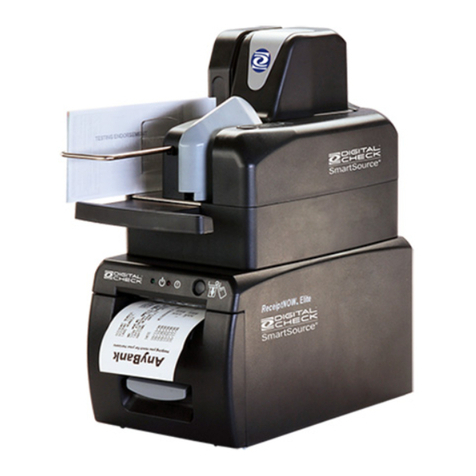
Digital Check SmartSource ReceiptNOW Elite User manual
Digital Check
Digital Check ReceiptNOW Elite User manual
Digital Check
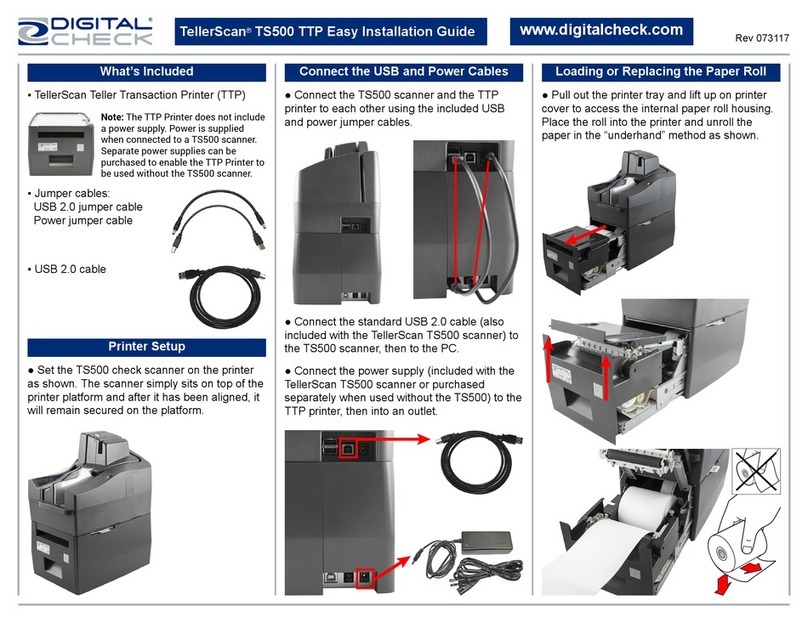
Digital Check TellerScan TS500 Datasheet
Digital Check
Digital Check ReceiptNOW Operator's manual
Digital Check
Digital Check TellerScan TS500 TTP2 Datasheet

Digital Check
Digital Check ReceiptNOW User manual

