manuals.online logo
Brands
  1. Home
  2. •
  3. Brands
  4. •
  5. Ricoh
  6. •
  7. Printer
  8. •
  9. Ricoh GX 3000S User manual

Ricoh GX 3000S User manual

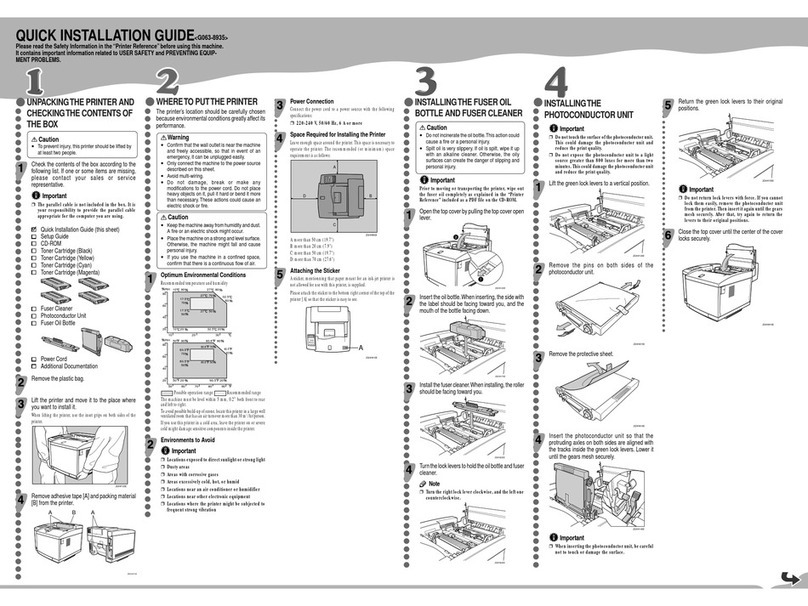
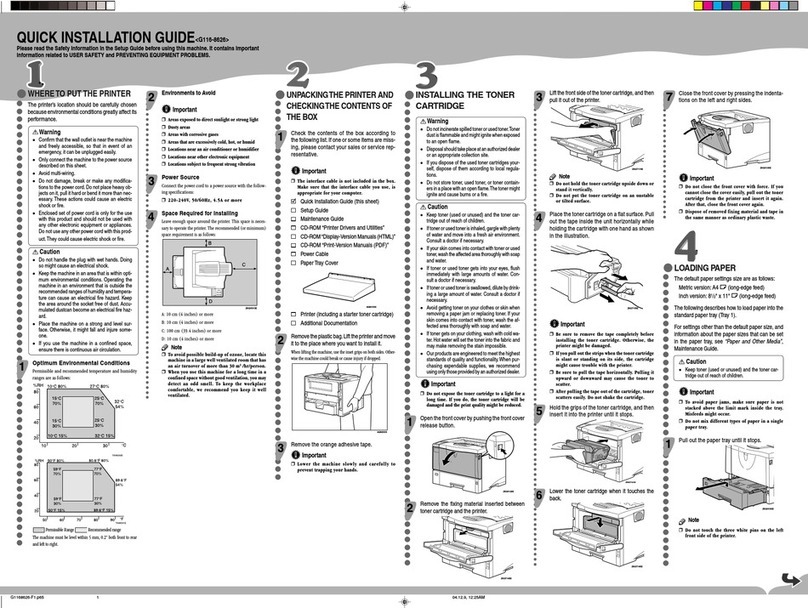
Quick Installation Guide
1/4
Read this manual carefully before you use this product and keep it handy for future reference. For safe and correct use, please
be sure to read the Safety Information before using the machine. This manual describes how to use the GX 3000S, GX 3000SF,
and GX 3050SFN models. ( Illustrations and screen shots are based on the GX 3000SF model. )
Check the power source.
The power requirements of this machine are as fol-
lows:
GX 3000S: 220-240 V, 50/60 Hz, 0.7 A or more.
GX 3000SF: 220-240 V, 50/60 Hz, 0.8 A or more.
GX 3050SFN: 220-240 V, 50/60 Hz, 0.8 A or more.
Warning
•
Keep the machine away from humidity and dust.Oth-
erwise a fire or an electric shock might occur.
•
Place the machine on a strong and level surface.
Otherwise, the machine might fall and cause per-
sonal injury.
•
If you use the machine in a confined space, confirm
that there is a continuous flow of air.
Warning
•
Only connect the machine to the power source de-
scribed on this sheet.
•
Avoid multi-wiring.
•
Connect the power cord directly into a wall outlet
and never use an extension cord.
•
Do not damage, break or make any modifications
to the power cord. Do not place heavy objects on it.
Do not pull it hard nor bend it more than necessary.
These actions could cause an electric shock or fire.
Warning
•
Do not plug or unplug the power cord with your hands
wet. Otherwise, an electric shock might occur.
Warning
•
Make sure the wall outlet is near the machine and
freely accessible so that in event of an emergency
it can be unplugged easily.
Checking the Computer to be Con-
nected.
To use this machine, computers must meet the follow-
ing specifications:
•
PC/AT-compatible computer with USB or network
interface
•
Operating system: Windows 98/Me/2000/XP, Windows
Server 2003, Windows NT 4.0 or later
•
GX 3000S: 240 MB (minimum) available hard disk space
GX 3000SF: 295 MB (minimum) available hard disk space
GX 3050SFN: 300 MB (minimum) available hard disk
space
❒For Windows NT 4.0, IE 4.0 or later is required.
❒Windows NT 4.0 does not support USB connection.
Connect your printer via a network in this case.
❒USB connection is supported by Windows 98/Me/
2000/XP and Windows Server 2003.
❒USB connection speed under Windows 98/Me is
USB 1.1 equivalent.
❒To print at the highest quality, the following memory
requirements must be met:
•Windows NT 4.0: 64 MB*1
•Windows 98/Me: at least 64 MB
•Windows 2000/XP: at least 128 MB
•Windows Server 2003: at least 256 MB
*1 We recommend at least 128 MB of memory
for high quality printing on glossy paper.
❒The machine does not support Windows XP 64-Bit
Edition or Windows Server 2003 64-Bit Edition.
Check the network interface board's ori-
entation, and then install the network
interface board gently.
AQR223S
❒Be sure to push the network interface board fully
into the machine.
❒If the network interface board is not installed prop-
erly, repeat the entire installation procedure. If you
cannot install it properly even after attempting rein-
stallation, contact your sales or service representa-
tive.
Attaching the Multi Bypass Tray Type BY1000
Check that the power cord of the ma-
chine is not plugged in.
Take the multi bypass tray out of its box.
Remove the orange tape from the multi
bypass tray.
Fully insert the multi bypass tray.
AQR196S
When using the multi bypass tray, pull
out its extension and adjust the side
guides according to the size of the loaded
paper.
J0128600A
Checking the Computer and
Installation Area
The area where the machine is to be
placed.
Choose a flat, stable area to install the machine.
•
The surface should be level within two degrees, left to
right and front to back.
•
To prevent condensation, install the machine in an area
where temperature and humidity conditions do not exceed
those indicated in the diagram below.
•
The machine may cease to print if these limitations are
exceeded.
ZDJX006J
TS4K031E
•White area: Permissible Range
•Gray area: Recommended Range
•
The diagram below shows the ideal clearance for loading
paper, replacing print cartridges, and removing jammed
paper
AQR023S
1. At least 12 cm (4.8 inches)
If you attach the multi bypass tray (option), provide
additional clearance of 23 cm (9.1 inches).
2. GX 3000S: At least 5 cm (2 inches)
GX 3000SF, GX 3050SFN: At least 7.5 cm (3
inches)
3. At least 19 cm (7.5 inches)
4. At least 5 cm (2 inches)
To avoid malfunctions, position the machine away from
the following:
•direct sunlight
•flow of air from air conditioners or heaters
•radios, televisions, or other electronic devices
•areas of high/low temperature and high/low mois-
ture
•humidifying appliances
•oil stoves and ammonia-emitting appliances (such
as diazo copiers)
Remove the orange tape from the tray.
Place the cover on the tray.
AQR190S
Align the connecting parts of the ma-
chine and paper feed unit, and then
place the machine on top of the paper
feed unit.
Always lift and carry the machine with another per-
son. Grip the indented area near the machine's base
(shown in the illustration). Lift and carry the machine
slowly and carefully.
AQR189S
❒Align the paper feed unit and machine using their
corners.
❒When the machine is placed on top of the paper feed
unit, the two devices are attached.
❒Do not tilt the machine.
❒Be careful not to trap your fingers.
Attaching the Network Interface Board GX4
❒Make sure the network interface board is not
knocked, dropped, or stressed.
Check the product and its supplied com-
ponents.
Check that the power cord of the ma-
chine is not plugged in.
Lift the connector cover.
AQR415S
Checking the Supplied Items
and Unpacking the Machine
Open the box and take out all supplied items.
Check that all the following items are present:
Power Cord
Starter cartridge - Cyan
Starter cartridge - Magenta
Starter cartridge - Yellow
Starter cartridge - Black
Quick Installation Guide (this manual)
Safety information
“Drivers, Manual & Utilities” CD-ROM
User Guide is included on this.
❒Do not turn the machine on until you have read how
to do so.
AQR191S
Take off the protective covering.
Remove the plastic bag.
Lift the machine and move it to the place
where you want to install it.
Always lift and carry the machine with another per-
son. Grip the indented area near the machine's base
(shown in the illustration). Lift and carry the machine
slowly and carefully.
AQR187S
Remove the orange tape from the ma-
chine body.
Pull the scanner unit release lever, and
then lift the scanner unit.
AQR367S
Remove the orange tape from the scanner unit release
lever.
Release the shipping lock.
AQR200S
Lower the scanner unit.
❒We recommend you keep the box , so you can use it
again when relocating the machine.
❒Remove all the orange tape, except the tape around
the power cord.
❒USB and LAN cables are not supplied.
Attaching the Options
Attaching the Paper Feed UnitTK1020
Caution
•
This machine weighs approximately ;
GX 3000S: 20 kg (44 lb.)
GX 3000SF: 23 kg (50.7 lb.)
GX 3050SFN: 23.5 kg (51.8 lb.)
•
Always lift and carry the machine with another per-
son. Grip the indented area near the machine's base.
Lift and carry the machine slowly and carefully. The
machine will break or cause injury if dropped.
Check that the power cord of the ma-
chine is not plugged in.
Take the paper feed unit out of its box.
Position the paper feed unit close to the
machine.
Quick Installation Guide
Quick Installation Guide 2/4
Next Sheet
2/4
Installing the Print Cartridges
Caution
•
If ink comes into contact with your eyes, rinse im-
mediately in running water. For other symptoms,
consult a doctor.
•
If ink is ingested, induce vomiting by drinking a
strong saline solution. Consult a doctor immediately.
•
If your skin comes into contact with ink, wash the
affected area thoroughly with soap and water.
•
Keep the ink or ink container out of reach of chil-
dren.
Print cartridges and supplies comply with the
manufacturer's safety specifications. To ensure safety
and reliability, use genuine print cartridges and sup-
plies.
Remove the packaging from the print
cartridges.
Take care not to touch the cartridge chip.
Open the right front cover.
AQR368S
Check the orientation of each cartridge,
and then install them gently.
AQR198S
Install in the following order from the left: black, cyan,
magenta, and yellow.
Push in each cartridge by pressing on
the PUSH area.
Close the right front cover.
AQR199S
Loading Paper
Loading Paper intoTray 1
A4/Letter size paper is loaded here.
Lift the output tray.
AQR192S
Hold the tray 1 grip, pull the tray half-
way out, lift it slightly, and then pull it
out further.
AQR041S
Pull tray 1 completely out. Take care not to drop it.
Squeeze the paper guide on the right
side, and then position it according to
the paper size.
AKS011S
Beforehand, make sure to squeeze the front end paper
guide, and then expand the guide.
Load paper print side down and not over
the limit mark.
AKS012S
Load paper according to the capacity of the tray.
Squeeze the front end paper guide, and
then slide it to meet the edge of the pa-
per.
AKS013S
Hold both sides of tray 1, and push it
gently in until it stops.
AQR194S
Lower the output tray.
AQR195S
Plugging in the Power Cord
and Turning the Power On
Warning
•
Only connect the machine to the power source de-
scribed on this sheet.
•
Avoid multi-wiring.
•
Connect the power cord directly into a wall outlet
and never use an extension cord.
•
Do not damage, break or make any modifications
to the power cord. Do not place heavy objects on it.
Do not pull it hard nor bend it more than necessary.
These actions could cause an electric shock or fire.
Warning
•
Do not plug or unplug the power cord with your hands
wet. Otherwise, an electric shock might occur.
Remove the orange tape from around
the power cord.
Plug the power cord fully into the wall
outlet.
ACW049S
Press the [Power] key.
AQR266S
The machine starts feeding ink into its print-heads (tak-
ing approximately 6 minutes).
Make sure the “ STD 100%” message is displayed on
the control panel.
Do not switch off the power of the machine during this
period. Make sure the plug is not removed from the
wall outlet.
You might hear a clicking sound while the print heads
are filling. This is not a malfunction. It will stop after a
while.
Print the configuration page.
Press the [Menu] key.
AQR267S
Press the [ ] or [ ] key to display [En-
gine Settings], and then press the [Yes]
key.
Press the [ ] or [ ] key to display [List/
Test Print], and then press the [Yes] key.
Press the [Yes] key.
The configuration page is printed.
The engine settings menu screen returns on comple-
tion of printing.
Press the [No] key.
The initial screen appears.
To switch the power off, hold the [Power]
key down until the machine shuts down.
If you are connecting the machine to a computer via
USB, proceed to step 7.
If you are connecting the machine to a network, pro-
ceed to step 9.
Before Installing the Software
(USB)
Connecting the Machine via USB
Make sure the machine is off.
Do not turn the machine on until you have read how to
do so.
AQR191S
Turn on the power of the computer, and
start Windows.
Lift the connector cover.
AQR415S
Remove the seal on the USB slot located
on the rear of the machine, and then in-
sert the USB cable's hexagonal (type B)
plug firmly into the slot.
AQR225S
Insert the USB cable's rectangular (type
A) plug firmly into the computer's USB
slot.
❒Insert the USB cable’s plug with the USB mark
facing up.
❒Make sure that the USB cable is fully inserted.
❒Make sure the USB cable is connected properly,
especially when the multi bypass tray is attached to
the machine, because the tray makes connecting the
cable difficult.
Quick Install for USB
Follow the procedure below to install the printer driver,
TWAIN driver, LAN-Fax driver, Device Setting Util-
ity, and User Guide.
Only the GX 3000SF and GX 3050SFN models sup-
port the LAN-Fax driver and Device Setting Utility.
The following explanation uses Windows XP as an
example. Procedures under other operating systems
may differ.
Screens vary according to the operating environment.
❒Do not turn the machine on until you have read how
to do so.
AQR191S
❒To install under Windows 2000/XP or Windows
Server 2003, you must log on as a user with admin-
istrator rights.
❒If your operating system is Windows NT, you can-
not use LAN-Fax functions.
Quick Installation Guide
Quick Installation Guide 3/4
3/4
Notes on the Installation
If the message “Digital Signature Not Found”or the
[Software Installation] or [Hardware Installation] dia-
log box appears:
1. Click [Yes] or [Continue Anyway] to continue the
installation.
If the [Found New Hardware Wizard] dialog box ap-
pears:
1. Click [Install from a list or specific location (Ad-
vanced)], and then click [Next >].
2. Click [Include this location in the search], and then
click [Browse].
3. Browse to “DRIVERS”on the CD-ROM, and then
click [OK]. Select the folder appropriate for your
operating system.
Be sure to clear the [Search remove media (floppy, CD-
ROM...)] check box.
For details about the files stored on the CD-ROM la-
belled “Drivers, Manual & Utilities”, see “Software
on the CD-ROM”, User Guide.
Start Windows, and insert the provided
“Drivers, Manual & Utilities” CD-
ROM into the CD-ROM drive.
Quit all applications currently running.
When you start Windows, the “Add New Hardware
Wizard”may appear. If this happens, click [Cancel].
Check again that the power is off.
Select a language for the interface, and
then click [OK].
The following languages are available:
Dansk (Danish), Deutsch (German), English (English),
Espanol (Spanish), Francais (French), Italiano (Italian),
Nederlands (Dutch), Norsk (Norwegian), Portugues
(Portuguese), Svenska (Swedish)
The default interface language is English.
Click [Quick Install for USB].
Read the license agreement, click [I ac-
cept the agreement.], and then click
[Next >].
Check that the power of the machine is
off, and then click [Next >].
Check again that the power of the ma-
chine is off, and then click [Next >].
Check that the dialog box below appears.
If the [Software Installation] dialog box appears, see
“Notes on the Installation”.
Make sure that the computer and ma-
chine are properly connected, and then
press the [Power] key.
AQR266S
Installation starts.
If the connection to the computer was not confirmed,
make the port settings again after installation is com-
plete.
If the message “Digital Signature Not Found”or the
[Found New Hardware Wizard] or [Hardware Instal-
lation] dialog box appears, see “Notes on the Installa-
tion”.
Select whether or not to open the ma-
chine status monitor automatically, and
then click [Next >].
Check the installation result, and then
click [Next>].
Install User Guide.
Click [Next>].
Confirm the location in which you want
to install Device Setting Utility, and then
click [Next>].
To change the installation location, click [Browse....]
Press the [Power] key.
AQR266S
Press the [Menu] key.
AQR267S
The Menu screen appears on the display.
Press the [ ] or [ ] key to display the
[Network Settings] menu, and then press
the [Yes] key.
Press the [ ] or [ ] key to display
[Machn. IP Adress], and then press the
[Yes] key.
Press the [ ] or [ ] key to select
[Specify], and then press [Yes] key.
Use the number keys to enter the IP ad-
dress, and then press [Yes] key.
To get an IP address for the machine, contact your net-
work administrator.
When using IP address, specify “Subnet
Mask” and “Gateway Address” in the
same way as when specifying the IP ad-
dress.
If necessary, specify “DNS Settings” and
“Ethernet Speed” .
Confirm the program folder in which
you want to install Device Setting Util-
ity, and then click [Next>].
Installation starts.
When installation is complete, click [Fin-
ish].
Click [Finish].
The printer driver, TWAIN driver, LAN-Fax driver,
Device Setting Utility, and User Guide are now in-
stalled.
If the message “Digital Signature Not Found”or the
[Found New Hardware Wizard] or [Hardware Instal-
lation] dialog box appears, see “Notes on the Installa-
tion”.
❒After inserting the CD-ROM, the [Drivers, Manual
& Utilities] dialog box appears. If it does not, double-
click the CD-ROM drive icon under [My Computer]
or [Explorer], and then double-click [Setup.exe].
❒When installation is complete, the User Guide icon
appears on your desktop.
❒If a message prompting you to restart the computer
appears, restart the computer.
❒Confirm the printer driver is correctly installed by
checking the machine's [Power] key is lit, and then
performing a test print.
Before Installing the Software
(
Network Interface Board
)
Connecting the Machine via the Network
Be sure to install all necessary network equipment, such
as hubs, etc. before connecting the Ethernet cable to
the machine.
You can connect a 10BASE-T or 100BASE-TX cable
to the machine.
❒Ethernet cables are not supplied with this machine.
Select your cable according to the network environ-
ment.
Lift the connector cover on the rear of
the machine, and then plug the Ethernet
cable into the Ethernet port.
AQR224S
Connect the other end of the cable to the
machine's network, such as to a hub.
AQR229S
Check the LEDs on the Ethernet port
1. The green LED lights if the machine is properly con-
nected to the network.
2. The orange LED lights when the machine is send-
ing or receiving data via the network.
Specifying Settings on the Control Panel
Make the following network settings according to the
network interface you are using.
If you have connected the machine to a network, make
the required network environment settings.
The following table shows the control panel settings
and their default values. These items appear in the [Net-
work Settings] menu.
Setting Name Value
1. Machn. IP Adress Auto
2. Subnet Mask 0.0.0.0
3. Gateway Address 0.0.0.0
4. DNS Settings Inactive
5. Ethernet Speed Auto Select
6. Reset Ethernt Bd
The following example explains making settings for
TCP/IP.
Quick Installation Guide
Quick Installation Guide 4/4
4/4
Copyright © 2006, 2007
Printed in France
GB GB J012-8600A
Click [Quick Install for Network].
Read the license agreement, click [I ac-
cept the agreement.], and then click
[Next >].
The search for the network printer
starts. If the selection dialog box ap-
pears, select the model of printer you
want to use, and then click [Install].
Installation starts.
If the [Software Installation] dialog box appears, see
“Notes on the Installation”.
If the machine cannot be found and only “Printer Port”
appears in the printer selection dialog box, either the
machine’s IPaddress has not been specified or the com-
puter and machine are not on the same network seg-
ment. Before installing the software, check the
machine’s IP address and the network topology. Oth-
erwise, select “Printer Port”in the dialog box, and then
install the printer driver. If you do this,
SmartDeviceMonitor for Client will not be simulta-
neously installed, so install it afterwards, and then con-
figure the port.
If the message “Digital Signature Not Found”or [Hard-
ware Installation] dialog box appears, see “Notes on
the Installation”.
Click [Finish].
The printer driver, User Guide, and DeskTopBinder -
SmartDeviceMonitor for Client are now installed.
Click [TWAIN Driver for Network].
Read the license agreement, click [I ac-
cept the agreement.], and then click
[Next >].
Input the IP address. See step 6, “9 Be-
fore Installing the Software (Network
Interface Board)”.
Click [Exit].
Install the LAN FAX Driver using the same procedure
as for the TWAIN Driver.
❒After inserting the CD-ROM, the [Drivers, Manual
& Utilities] dialog box appears. If it does not, double-
click the CD-ROM drive icon under [My Computer]
or [Explorer], and then double-click [Setup.exe].
❒When installation is complete, the User Guide icon
appears on your desktop.
❒If a message prompting you to restart the computer
appears, restart the computer.
❒Confirm the printer driver is correctly installed by
checking the machine's [Power] key is lit, and then
performing a test print.
❒For details about installing only the printer driver,
see “Getting Started”, User Guide.
❒For details about using the printer as a shared net-
work printer, see “Sharing the Printer”, User Guide.
With this setup is completed.
Scan to E-mail
AQR294S
You can attach scan files to e-mails and send them via
LAN and the Internet.
❒To use this function, the network interface board
must be installed.
❒For details about connecting the machine, and speci-
fying network settings, see “Managing this ma-
chine”, User Guide.
Scan to FTP
AQR295S
Using the Scan to FTP function, you can send scan
files over the network to an FTP server.
❒To use this function, the network interface board
must be installed.
❒For details about connecting the machine, and speci-
fying network settings, see “Managing this ma-
chine”, User Guide.
Facsimile functions
You can send originals by fax or e-mail, and receive
faxes from other parties.
The settings for fax transmission are automatically
configured according to the [Country] setting, so be
sure to specify the country first. For details, see “Se-
lecting the Country”in the User Guide.
❒To use facsimile functions, a telephone line must be
connected to the machine.
❒For details about connecting the machine and speci-
fying facsimile transmission and reception settings,
see “Managing this machine”, User Guide.
Internet Fax
AQR291S
This machine can convert scanned document images
to e-mail format and transmit this data over the Internet.
❒To use this function, the network interface board
must be installed.
❒For details about connecting the machine, and speci-
fying network settings, see “Managing this ma-
chine”, User Guide.
LAN FAX
AQR292S
This function allows you to send Windows application
files from a computer connected to this machine to a
fax machine.
❒If your operating system is Windows NT, you can-
not use LAN-Fax functions.
❒For details about connecting the machine, install-
ing the driver, and specifying network settings, see
“Managing this machine”, User Guide.
After you have made all the settings,
press the [No] key.
Turn the power off, wait a few seconds,
and then turn it back on.
The specified settings are set .
Quick Install for Network
Follow the procedure below to install the printer driver,
User Guide, and DeskTopBinder - SmartDeviceMonitor
for Client.
The following explanation uses Windows XP as an
example. Procedures under other operating systems
may differ.
Screens vary according to the operating environment.
❒To install under Windows 2000/XP, Windows Server
2003, Windows NT 4.0, you must have an account
that has Manage Printers permission. Log on as an
Administrator.
❒If your operating system is Windows NT, you can-
not use LAN-Fax functions.
Notes on the Installation
If the message “Digital Signature Not Found”or the
[Software Installation] or [Hardware Installation] dia-
log box appears:
1. Click [Yes] or [Continue Anyway] to continue the
installation.
Start Windows, and insert the provided
“Drivers, Manual & Utilities”CD-ROM
into the CD-ROM drive.
Quit all other applications currently running.
Select a language for the interface, and
then click [OK].
The following languages are available:
Dansk (Danish), Deutsch (German), English (English),
Espanol (Spanish), Francais (French), Italiano (Italian),
Nederlands (Dutch), Norsk (Norwegian), Portugues
(Portuguese), Svenska (Swedish)
The default interface language is English.
What You Can Do with This
Machine
This section introduces the functions of this machine
and the manual that contains detailed information about
them.
Printer, Copier, Scanner, and Facsimile Func-
tions
AQR296S
This machine provides printer, copier, scanner and fac-
simile functions.
Only the GX 3000SF and GX 3050SFN models sup-
port the fax function.
Printer functions
Printer functions such as Sort and Combining Multiple
Pages are possible when this machine is connected to
a computer via USB or network.
Copier Functions
Functions such as colour copy, duplex copy, and poster
copy allow you to make copies of originals.
❒For details about the various copier functions, see
“Managing this machine”, User Guide.
TWAIN Scanner
AQR293S
You can use this machine to scan originals into a com-
puter.
To use the TWAIN scanner, a TWAIN-compliant ap-
plication must be installed on the computer.
❒For details about connecting the machine, install-
ing the driver, and specifying the network settings,
see “Managing this machine”, User Guide.

This manual suits for next models

2

Other Ricoh Printer manuals

Ricoh Aficio MP 2500SPF Owner's manual

Ricoh

Ricoh Aficio MP 2500SPF Owner's manual

Ricoh Aficio MP 171F User manual

Ricoh

Ricoh Aficio MP 171F User manual

Ricoh Aficio SPC220N Installation instructions

Ricoh

Ricoh Aficio SPC220N Installation instructions

Ricoh Pro C9200 User manual

Ricoh

Ricoh Pro C9200 User manual

Ricoh Aficio 1515 User manual

Ricoh

Ricoh Aficio 1515 User manual

Ricoh InfoPrint Color COLOR 1767 User manual

Ricoh

Ricoh InfoPrint Color COLOR 1767 User manual

Ricoh Aficio 180 User manual

Ricoh

Ricoh Aficio 180 User manual

Ricoh Pro C9200 User manual

Ricoh

Ricoh Pro C9200 User manual

Ricoh Aficio GX3000 User manual

Ricoh

Ricoh Aficio GX3000 User manual

Ricoh SP 230DNw User manual

Ricoh

Ricoh SP 230DNw User manual

Ricoh Aficio MP C4501 User manual

Ricoh

Ricoh Aficio MP C4501 User manual

Ricoh MP C306 series User manual

Ricoh

Ricoh MP C306 series User manual

Ricoh GelSprinter GX e5550n User manual

Ricoh

Ricoh GelSprinter GX e5550n User manual

Ricoh Ri 4000 User manual

Ricoh

Ricoh Ri 4000 User manual

Ricoh Aficio MP W3600 Installation and maintenance instructions

Ricoh

Ricoh Aficio MP W3600 Installation and maintenance instructions

Ricoh AP600N User manual

Ricoh

Ricoh AP600N User manual

Ricoh SR4080 Quick start guide

Ricoh

Ricoh SR4080 Quick start guide

Ricoh Aficio AP400 User manual

Ricoh

Ricoh Aficio AP400 User manual

Ricoh InfoPrint 1754dn User manual

Ricoh

Ricoh InfoPrint 1754dn User manual

Ricoh C2000 User manual

Ricoh

Ricoh C2000 User manual

Ricoh A850 User manual

Ricoh

Ricoh A850 User manual

Ricoh IM CW2200 User manual

Ricoh

Ricoh IM CW2200 User manual

Ricoh PD-D1 Quick start guide

Ricoh

Ricoh PD-D1 Quick start guide

Ricoh C274 User manual

Ricoh

Ricoh C274 User manual

Popular Printer manuals by other brands

Oki C8600 user guide

Oki

Oki C8600 user guide

Oki B 6100 user guide

Oki

Oki B 6100 user guide

Canon PIXMA PRO-1 Series Getting started

Canon

Canon PIXMA PRO-1 Series Getting started

Epson TM-T20 Quick reference guide

Epson

Epson TM-T20 Quick reference guide

Canon BJC 6000 - Color Inkjet Printer Service manual

Canon

Canon BJC 6000 - Color Inkjet Printer Service manual

Sony UP-DR200 Specifications

Sony

Sony UP-DR200 Specifications

Epson B-500DN Start here

Epson

Epson B-500DN Start here

Rimage Everest Encore Setup and installation guide

Rimage

Rimage Everest Encore Setup and installation guide

Epson SureColor F6470H user manual

Epson

Epson SureColor F6470H user manual

Samsung ML-1200 Series quick guide

Samsung

Samsung ML-1200 Series quick guide

Kodak Professional  ML-500 user guide

Kodak

Kodak Professional ML-500 user guide

Konica Minolta Magicolor 4650 brochure

Konica Minolta

Konica Minolta Magicolor 4650 brochure

Lexmark Multifunction Laser Using

Lexmark

Lexmark Multifunction Laser Using

Panasonic KX-PX20M - Photo Printer - 20 Sheets quick guide

Panasonic

Panasonic KX-PX20M - Photo Printer - 20 Sheets quick guide

Epson R220 - Stylus Photo Color Inkjet Printer Specifications

Epson

Epson R220 - Stylus Photo Color Inkjet Printer Specifications

AMT Datasouth Documax 5380 quick start guide

AMT Datasouth

AMT Datasouth Documax 5380 quick start guide

Uninet iColor 500 manual

Uninet

Uninet iColor 500 manual

Epson PLQ-22CS quick reference

Epson

Epson PLQ-22CS quick reference

manuals.online logo
manuals.online logoBrands
  • About & Mission
  • Contact us
  • Privacy Policy
  • Terms and Conditions

Copyright 2025 Manuals.Online. All Rights Reserved.