DIGITECH Audio XC-0387 User manual

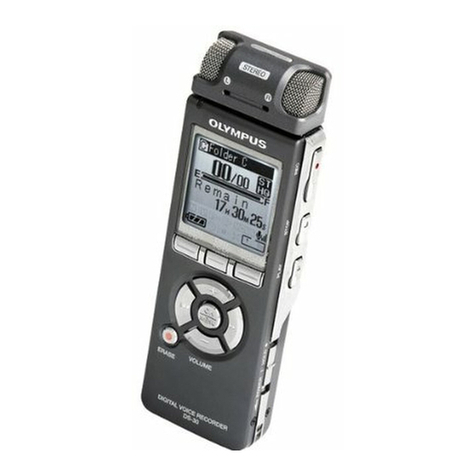
Digital Voice
Recorder
User Manual
XC-0387

Box Contents:
1 x Digital Voice Recorder
1 x Earphones
1 x Mini B USB Cable
Product Diagram:
1. In-built Microphone
2. Headphone Jack
3. Microphone Jack
4. Recording LED
5. LCD Display
6. Play/Pause Button
7. Stop/Delete Button
8. Menu Button
9. Record/Stop
10. Vol+/Previous/Rewind
11. Vol-/Next/Fast F
12. Volume Button
13. USB Mini B
14. Speaker
15. Battery Compartment

LCD Diagram:
8. Delete Icon
9. File number
10. Recording Status
Indicator
11. Recording Type & VOR
12. Recording Length
(Displays “Minutes:Secs” if
file less than 1 hour,
“Hours:Minutes” if file more
than one hour)
13. Music Mode
1. Recording LED Indicator
2. Repeat Symbol
3. Battery Capacity
4. DVR mode
5. Playback Status
6. Volume Indicator
7. Repeat Mode

Functions:
1. On/Off Power Switch:
Place the 2 x AAA batteries correctly in the battery
compartment.
Press the “ ” Play/Pause button to turn “on”/ “off”
the voice recorder.
Power Off: Press & hold the“ ” Play/Pause button
for 5 seconds until it displays “Off”.
Power On: Press & hold the “ “ Play/Pause button
for 5 seconds to power the unit on.
The device will power off automatically if the
device has not been used within 3 minutes.
Please Note: The unit will not power off under
“VOR ON”state without voice operation. Instead it
will pause recording until voice is detected again.

2. Recording:
In any state, switch the “REC” from “STOP” to “REC”
to start recording.
Slide the “REC” to “STOP”. It will save the recording
file automatically.
To pause recording, press the " " Play/Pause
button and the recording will pause. Short press “ ”
again to resume recording from pause state.
3. Playback:
Play Recorded File: Press “M” Menu button to enter
into “DVR” mode. Press “ ” Play/Pause to play the
current recorded file.
Play Music File: Press “M” Menu button to enter
into “Music” mode. Press “ ” Play/Pause button to
play the current music file.
Please Note: Each directory can store up to 200
recording files. If it displays“Disc Full”, the directory
has stored 200 recording files. Please delete some
files to create space.

Modes:
Playback/Pause/Stop:
・ 1. In standby of Music or DVR mode, press“ ”
play/pause to play current file.
・ 2. Press “ ” Play/Pause button to control pause
and play.
・ 3. In playback state, press “ ”to stop playing.
・ Music Mode: The device will only play music from
・ the root directory.
Previous/ Next, Fast Forward /Rewind:
In play or stop state, press “+” to skip to the next
file, press“-” skip to go to the previous file.
In playback state, press and hold “+” to fast-
forward, press and hold“-” to fast rewind.

Volume Adjustment:
In file playback or stopped state, press “V” volume
button first.
Then press“+” to increase the volume, or “-” to
decrease the volume. The volume bar will
increase and decrease accordingly.
Press “V”Volume button again to exit.
A-B Repeat Mode:
・ In playback state, press “M” Menu button to set up
beginning point A.
・ The LCD will display A-B, B will flash, press “M”
again to set up ending point B.
・ LCD will display AB to repeat the contents
between A-B.
・ To cancel the mode selection, press “M” Menu and
cancel A-B repeat.
・ Press “ ” to cancel A-B repeat and playback will
stop.
・ Press “ ” to cancel A-B repeat and playback
pause.

Delete File:
In the Music/DVR stopped state, find the file you
want to delete by pressing “+” and “-” .
Press and hold “ ” stop button to enter the delete
mode. LCD will display “DELETE” and "ONE”.
Press “ ” stop again to switch “ONE” and “ALL”.
Press “M” Menu to confirm; if press “+” and “-” .
Note: If no button is pressed within 8 seconds, it
will return to stop stay and not delete the file.
Switch The Recording Type Folder:
In the DVR stopped state, press“ ” Stop button to
switch the recording type folder: REC HP(HQ) folder,
SP folder and LP folder.
FM Mode (Only Played Through Earphones):
Press “M” Menu button to until “FM” is displayed.
Press “+ “or “-” key to change the frequency.
Press and hold “+” to enter auto-search.
Press “ ” Play/Pause button to stop searching. The
device can save up to 30 channels.
Press “ ” Play/Pause to change the channel in
ascending sequence.
Press and hold “-” to search next channel.
Short press“M”Menu to save the channel.
Please Note: The channel list is automatically sorted
according to frequency form low to high frequency.

Please Note: The FM radio mode can only be
heard through the earphones, the earphones act
as an antenna and will not allow you to play
through the voice recorder’s speaker. Any
earphones are suitable to use.
Delete FM Channel:
Under FM stop mode, press “ ” Play/Pause to find
the channel you want to delete.
Press and hold “ ” Stop button to enter the delete
mode, the LCD will display“DELETE” and "ONE”.
Press the “ ” Stop button again to switch “ONE”
and “ALL”.
Press“M” Menu to confirm delete.
Please Note: If no channel is deleted within 8
seconds then it will return to the stop state.
Voice-Activated Recording (VOR) Mode:
Press “M” Menu button to display the following:
Press “+ “or “-” key to switch ON and OFF.

Please Note: If you turn on the VOR, the device will
pause recording if there is no voice detected. If the
“VOX” icon flashes, the recorder will record
continually once voice is detected.
Record Modes:
Press “M” Menu button and scroll through to find
“REC type”menu:
Press “+ “or “-” key to switch between HP(HQ)”,”SP”
and ”LP” recording modes.
Press the “ ” Stop button to confirm the selection.
Please Note: The recording will auto-save in the
corresponding folder.
Check Remaining Recording Time:
Press “M” Menu button and scroll through to find
“Check remain REC time”:

Please Note: If the remaining time is less than
9999mins, the digit means“mins”. If the remaining
time is over 9999mins, the digit means “hours”.
Time & Date:
Plug the USB cable in to the voice recorder and
connect to your laptop or PC. A message will
automatically pop up with a removable storage
device, if it doesn’t then please open up my
computer and click on XC-0387. Located on the
device is a program called “Tool For Setup Device
Time”. Please double click on this program, after you
have clicked on it you should see a message saying
success. This will automatically synchronize to your
computer or laptop’s current time. Please adjust
your computers time and date if it isn’t correct.
Please Note: Please set the time & date again if

the battery has run out of has been changed.
Removing the battery will cause the device to
reset the time and date.
PC Connection:
Please connect the voice recorder to your pc using
the included Mini B cable. The name XC-0387 will
automatically pop up as a removable storage
device. If it does not open automatically then go to
my computer, it should show up as a removable
storage device.
Specifications:

Memory: 2GB Internal
Recording Modes: HQ, SP & LP
Recording Format: MP3 (HQ & LP), WAV (SP)
Recording Time: 34hrs HQ
134hrs SP
540hrs LP
Battery: 2 x AAA (Not Included)
Battery Life: Up to 27hrs HQ, 41hrs SP, 41hrs LP
Compatibility: Windows 10, 8.1, 8, 7, Vista, XP, 2000,
Mac OS X® 10.0+
Dimensions: 102(H) x 30(W) x 17(D)mm

Distributed By:
TechBrands by Electus Distribution Pty. Ltd.
320 Victoria Rd, Rydalmere
NSW 2116 Australia
Ph: 1300 738 555
Int’l: +61 2 8832 3200
Fax: 1300 738 500
www.techbrands.com
Made in China
Table of contents
