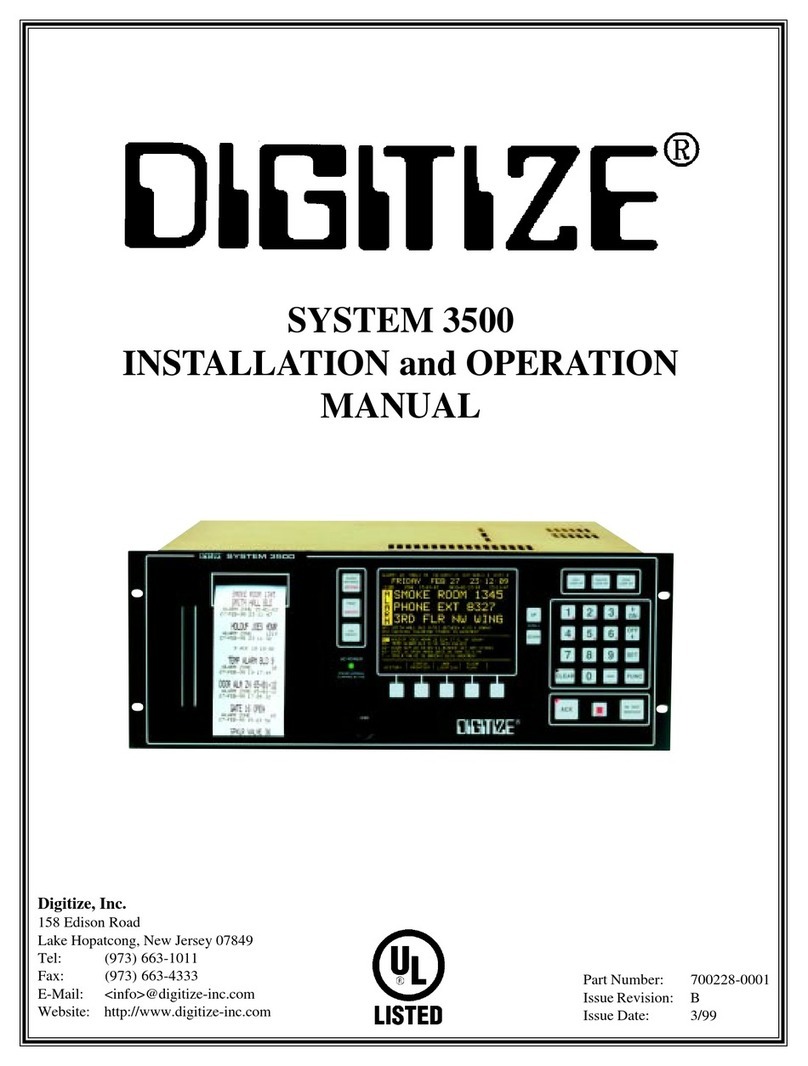
DIGITIZE RAD-16LS User manual

Digitize, Inc.
158 Edison Road
Lake Hopatcong, NJ 07849-2217
The DIGITIZE logo is a registered trademark of Digitize, Inc.

PROPRIETARY NOTICE
AND DISCLAIMER
DIGITIZE, INC.
158 EDISON ROAD
LAKE HOPATCONG, NJ 07849-2217
PH: (973) 663-1011
E-Mail: info@digitize-inc.com
Website: http://www.digitize-inc.com
This manual has been prepared by DIGITIZE, INC. for use by its licensees, distributors and
customers. The information contained herein is the property of DIGITIZE, INC. and may not
be copied, disclosed or reproduced, in whole or in part, without the prior written approval of
DIGITIZE, INC. Any unauthorized disclosure to, or use of the enclosed information by,
unauthorized third persons shall void any and all representations, warranties and obligations
on the part of DIGITIZE, INC.
DIGITIZE, INC. reserves the right to make changes to the specifications and material
contained herein without prior notice. The information and/or examples (including, but not
limited to circuitry, wiring diagrams, programming, the operation or use shown) described in
this manual are intended solely to illustrate the operating principles of the particular product.
They are not a warranty, representation or guarantee that a particular example or use shown
will perform in a particular situation. They are given for illustration purposes only. DIGITIZE,
INC. shall not be responsible, nor does it represent, that any example of illustration will perform
in a particular environment or practice unless it specifically makes a representation to that
effect.
The material set forth herein is for informational purposes only, and DIGITIZE, INC.
assumes no patent liability with respect to any information or illustrations contained herein.

FCC NOTICE
In compliance with Paragraph 15.105 of the FCC Rules and Regulations, the following
notice is provided.
NOTE: This equipment has been tested and found to comply with the limits for a Class A
digital device, pursuant to Part 15 of the FCC Rules. These limits are designed to provide
reasonable protection against harmful interference when the equipment is operated in a
commercial environment. This equipment generates, uses, and can radiate radio frequency
energy, and, if not installed and used in accordance with the instruction manual, may cause
interference to radio communications. Operation of this equipment in a residential area is likely
to cause interference, in which case the user will be required to correct the interference at the
owner's expense.

DIGITIZE, INC. 700180-0000 REV. E 10/21 i
Specifications Subject to Change Without Notice
Table of Contents
1GENERAL INFORMATION...............................................................................1-1
SYSTEM DESCRIPTION.....................................................................................................1-1
RAD-16LS DESCRIPTION...................................................................................................1-1
OPTIONS.............................................................................................................................1-2
MODULATION .....................................................................................................................1-2
1.4.1 ANTENNA ....................................................................................................................1-2
1.4.2 FREQUENCY...............................................................................................................1-3
SPECIFICATIONS ...............................................................................................................1-3
1.5.1 ELECTRICAL ...............................................................................................................1-3
1.5.2 INPUTS........................................................................................................................1-3
1.5.3 FUSES .........................................................................................................................1-4
1.5.4 CONSTRUCTION.........................................................................................................1-4
1.5.5 DIMENSIONS...............................................................................................................1-4
1.5.6 WEIGHT (with battery...................................................................................................1-4
1.5.7 TEMPERATURE AND HUMIDITY................................................................................1-4
1.5.8 TRANSMITTER............................................................................................................1-4
FCC REQUIREMENTS........................................................................................................1-4
APPLICABLE PUBLICATIONS............................................................................................1-5
2INSTALLATION................................................................................................2-1
HANDLING...........................................................................................................................2-1
2.1.1 PRECAUTIONS............................................................................................................2-1
2.1.2 UNPACKING AND INSPECTION.................................................................................2-1
CABINET MOUNTING.........................................................................................................2-1
2.2.1 SITE PREPARATION...................................................................................................2-1
2.2.2 DISASSEMBLY PROCEDURE ....................................................................................2-1
2.2.3 SELECTING PROPER BOX MOUNTING LOCATION.................................................2-2
2.2.4 MOUNTING INSTRUCTIONS......................................................................................2-2
2.2.5 WHIP ANTENNA INSTALLATION................................................................................2-2
WIRING................................................................................................................................2-3
2.3.1 CONDUIT CONNECTIONS..........................................................................................2-3
2.3.2 FIELD WIRING.............................................................................................................2-3
RF TRANSMITTER AND INTERFACE................................................................................2-3
2.4.1 WIRING........................................................................................................................2-3
ASSEMBLY..........................................................................................................................2-3
TERMINAL FUNCTIONS.....................................................................................................2-3
2.6.1 BS0, BS1, BS3, and BS4 .............................................................................................2-3
2.6.2 BS2...............................................................................................................................2-4
2.6.3 P1.................................................................................................................................2-4
2.6.4 P2.................................................................................................................................2-4
2.6.5 P3.................................................................................................................................2-4
3SYSTEM INITIALIZATION................................................................................3-1
GENERAL............................................................................................................................3-1
ASSEMBLY..........................................................................................................................3-1
CONNECTIONS AND SETTINGS .......................................................................................3-1
3.3.1 ZONE INPUTS .............................................................................................................3-1
3.3.2 ANTENNA ....................................................................................................................3-1

ii DIGITIZE, INC. 700180-0000 REV. E 10/21
Specifications Subject to Change Without Notice
BATTERY INSTALLATION ..................................................................................................3-1
POWER-UP..........................................................................................................................3-1
3.5.1 AC ................................................................................................................................3-1
3.5.2 DC................................................................................................................................3-2
4PROGRAMMING..............................................................................................4-1
PROGRAMMING AM BOX (RAD-16LS-AM)........................................................................4-1
4.1.1 PROGRAM FUNCTION SELECTION MODE ..............................................................4-1
4.1.2 SETTING BOX NUMBER (FUNCTION 1)....................................................................4-2
4.1.3 SETTING ZONE TONE ASSIGNMENT (FUNCTION 2)...............................................4-2
4.1.4 PANEL OPTIONS 1 (FUNCTION 3).............................................................................4-3
4.1.5 PANEL OPTIONS 2 (FUNCTION 4).............................................................................4-4
4.1.6 RADIO BOX FORMAT (FUNCTION 5).........................................................................4-5
4.1.7 SETTING TILT/TAMPER SENSITIVITY (FUNCTION 6)..............................................4-6
4.1.8 SETTING CURRENT TIME (FUNCTION 7).................................................................4-6
4.1.9 SETTING TIME OF FIRST TEST TRANSMISSION (FUNCTION 8)............................4-6
4.1.10 SETTING TIME INTERVAL BETWEEN TEST TRANSMISSIONS (FUNCTION 9.......4-8
4.1.11 ZONE INPUT SETTLE TIME (FUNCTION 10).............................................................4-9
4.1.12 ZONE INPUT SENSITIVITY (FUNCTION 11)..............................................................4-9
4.1.13 ASSIGNING ZONE DELAYS (FUNCTION 12).............................................................4-9
4.1.14 PRESET OPTION MEMORY (FUNCTION 13) ..........................................................4-10
4.1.15 QUICK PROGRAM DAILY TEST...............................................................................4-12
VIEWING CURRENT AM BOX SETTINGS........................................................................4-12
4.2.1 VIEW BOX NUMBER (FUNCTION 1) ........................................................................4-12
4.2.2 VIEW BOX TONES (FUNCTION 2)............................................................................4-12
4.2.3 VIEW PANEL OPTIONS 1 (FUNCTION 3).................................................................4-12
4.2.4 VIEW PANEL OPTIONS 2 (FUNCTION 4).................................................................4-13
4.2.5 VIEWING RADIO FORMAT (FUNCTION 5)...............................................................4-13
4.2.6 VIEWING TILT/TAMPER SENSITIVITY (FUNCTION 6)............................................4-13
4.2.7 VIEW CURRENT TIME OF DAY (FUNCTION 7).......................................................4-13
4.2.8 VIEW TIME OF NEXT TEST TRANSMISSION (FUNCTION 8).................................4-13
4.2.9 VIEW TIME INTERVAL BETWEEN TEST TRANSMISSIONS (FUNCTION 9)..........4-13
4.2.10 VIEWING ZONE INPUT SETTLE TIME (FUNCTION 10) ..........................................4-13
4.2.11 VIEWING ZONE INPUT SENSITIVITY (FUNCTION 11)............................................4-13
4.2.12 VIEW ZONE DELAYS (FUNCTION 12) .....................................................................4-14
4.2.13 VIEW PRESET OPTION MEMORY SETTING (FUNCTION 13)................................4-14
5THEORY OF OPERATION...............................................................................5-1
ALARM INPUT.....................................................................................................................5-1
MICROPROCESSOR ..........................................................................................................5-1
POWER SUPPLY.................................................................................................................5-1
5.3.1 AC ................................................................................................................................5-1
5.3.2 DC................................................................................................................................5-1
BATTERY MONITORING.....................................................................................................5-1
TRANSMITTER....................................................................................................................5-1
5.5.1 AM................................................................................................................................5-2
5.5.2 FM................................................................................................................................5-2
CONTROLS .........................................................................................................................5-2
5.6.1 ZONE BYPASS............................................................................................................5-2
5.6.2 TILT..............................................................................................................................5-2
5.6.3 TAMPER ......................................................................................................................5-2
5.6.4 CLEAR/ SILENCE........................................................................................................5-2
5.6.5 TEST............................................................................................................................5-2
INDICATORS.......................................................................................................................5-2

DIGITIZE, INC. 700180-0000 REV. E 10/21 iii
Specifications Subject to Change Without Notice
5.7.1 ZONE ...........................................................................................................................5-2
5.7.2 AC POWER..................................................................................................................5-3
5.7.3 BATTERY FAULT.........................................................................................................5-3
5.7.4 WATCHDOG/RESET ...................................................................................................5-3
5.7.5 COMM LINK.................................................................................................................5-3
OPERATING PROCEDURE ................................................................................................5-3
5.8.1 NORMAL QUIESCENT OPERATION ..........................................................................5-3
5.8.2 ALARM CONDITION....................................................................................................5-3
5.8.3 TROUBLE CONDITION ...............................................................................................5-3
5.8.4 STANDBY POWER OPERATION................................................................................5-4
6TESTING ..........................................................................................................6-1
ACCEPTANCE TESTING ....................................................................................................6-1
PREVENTATIVE MAINTENANCE.......................................................................................6-1
RADIO TRANSMITTER TEST .............................................................................................6-1
7MAINTENANCE................................................................................................7-1
CIRCUIT BOARD REMOVAL AND REPLACEMENT..........................................................7-1
8APPENDIX A TONE FREQUENCIES.................................................................. 1
9APPENDIX B TONE ASSIGNMENTS ................................................................. 1

iv DIGITIZE, INC. 700180-0000 REV. E 10/21
Specifications Subject to Change Without Notice

DIGITIZE, INC. 700180-0000 REV. E 10/21 1-1
Specifications Subject to Change Without Notice
1 GENERAL INFORMATION
SYSTEM DESCRIPTION
The overall system is known as the Digitize Radio Fire Alarm System and consists of a Digitize
SYSTEM 3505 Prism Lx, together with a Digitize Mark 6 Radio receiver. The system can
accommodate both AM (Amplitude Modulated) or FM (Frequency Modulated) radio boxes. A
receiver and antenna are also required at the receiving console location. The maximum
number of Radio Alarm Boxes each console can support is 2000 with the appropriate number
of receivers installed. The overall system is intended for use as a Public Fire Reporting system
per NFPA 1221.
RAD-16LS DESCRIPTION
The DIGITIZE model RAD-16LS, Fig. 1.1, is a microprocessor based Radio Fire Alarm
Municipal Transmitter, with sixteen supervised inputs, ground fault detection, AC power failure
and battery fault supervision. The standard model is housed in a painted steel enclosure, and
is supplied with a step-down AC transformer, tamper switch, cam lock, rechargeable battery
pack rated for 75 hours of standby power and an integral battery charger.
The following assemblies make up a RAD-16LS:
Microcontroller board P/N 400404-0000
Transformer assembly P/N 450449-0001
12 Volt 12 AH battery P/N 900414-0006
Plus one of the following:
FM transmitter P/N 450390-0000
AM transmitter P/N 450387-0001 (72-76 MHz)
AM transmitter P/N 450387-0002 (136-174 MHz).
The Microcontroller board is a micro-processor based controller board. All functions of the
RAD-16LS are controlled by a program that resides in an EPROM program chip. This flexibility
in the product allows the user to select such things as output format, set box number etc. The
transmitter assembly provides all power output regulation. The transmitter will provide 1 Watt
output even at 10.5 Vdc of battery voltage. The AM transmitter has a piggy backed tone card
to produce all required audio tones. The tones are produced via an on-board crystal oscillator
and programmable divider circuits. The transformer assembly provided is used to step down
the 120 VAC input voltage to 14 VAC required for proper operation of the RAD-16LS. The
sealed lead acid battery supplied provides the required 12.6 Vdc for battery backup. The
battery is a 12 Amp Hour battery and will operate the RAD-16LS for a minimum of 75 hours
during an AC failure. Slide switches and LEDs on the front panel allow the operator to view
Alarmand troubleinformation and provideaccessto field programmablefunctionsfortheRAD-
16LS.

RAD-16LS INSTALLATION AND USER MANUAL
1-2 DIGITIZE, INC. 700180-0000 REV. E 10/21
Specifications Subject to Change Without Notice
Figure 1-1, Rad-16LS
OPTIONS
The RAD-16LS has many configurations. For this reason, the options offered become
integral to the unit’s model number, (RAD-16LS-XX-X-XXXX). The RAD-16LS options are
detailed below.
MODULATION
The RAD-16LS may be ordered for AM or FM operation.
Examples: RAD-16LS-AM-X-XXXX Amplitude modulation.
RAD-16LS- FM-X-XXXX Frequency modulation.
1.4.1 ANTENNA
The RAD-16LS may be configured for use with integral whip or external antennas. When
the RAD-16LS is ordered with the integral whip antenna, the antenna is shipped inside the

RAD-16LS INSTALLATION AND USER MANUAL
DIGITIZE, INC. 700180-0000 REV. E 10/21 1-3
Specifications Subject to Change Without Notice
unit. When the RAD-16LS is ordered with the external antenna the external antenna is shipped
separately.
Examples: RAD-16LS-XX-W-XXXX with cabinet mounted whip antenna
RAD- 16LS-XX-E-XXXX with external antenna connector.
External antennas include:
P/N PXM-18 (72-74 Mhz)
P/N PXM-19 (75-76 Mhz)
P/N 900491 (132-174 Mhz).
Internal whip antennas include:
Low band P/N 450290-XXXX (72-76 MHz)
High band P/N 450289-XXXX (132-174 MHz)
1.4.2 FREQUENCY
Frequency selection will be accomplished prior to shipment of the unit. The operating
frequency is designatedbythe lastdigits ofthe RAD-16LSpartnumber(no decimalsare used).
Examples: RAD-16LS-XX-X-7278 Transmits at: 72.78 MHz
RAD-16LS-XX-X-13895 Transmits at: 138.95 M
SPECIFICATIONS
1.5.1 ELECTRICAL
Primary Power Input 120 VAC
Operating Power Consumption (pri) 150 Milliamps (max.)
Standby Battery (BATT) 12 Volt Sealed Lead Acid
Standby 75 Hours
Standby calculations are based on normal operation. During normal operation the RAD-
16LS tests in once each day. The RAD-16LS draws more power while transmitting. The
additional power (350 Ma) is needed for less than three seconds per three rounds transmitted.
The additional power draw is insignificant over a 24-hour period.
1.5.2 INPUTS
AC Power (transformer pigtails)
Low Voltage AC (16 VAC)
Standby Battery (BATT)
Supervised Zone Inputs (ZN1-ZN16)
Communication Interface (P1)
Programmer Interface (P2)

RAD-16LS INSTALLATION AND USER MANUAL
1-4 DIGITIZE, INC. 700180-0000 REV. E 10/21
Specifications Subject to Change Without Notice
1.5.3 FUSES
F1, Fuse 0.5 A Fast-blow
F2, PTC with Auto-Reset 2.5 A
F3, PTC with Auto-Reset 2.5 A
1.5.4 CONSTRUCTION
Welded 0.063 in. steel with eight pre-stressed knock outs, “Piano” style door hinge, and a
baked enamel finish.
1.5.5 DIMENSIONS
Height (with 72-76 MHz whip antenna) 51.0 in.(129.54 cm)
Height (with 138-148 MHz whip antenna) 39.0 in. (99.06 cm)
Height (cabinet only) 15.0 in. (38.1 cm)
Width 13.5 in. (34.3 cm)
Depth 4.0 in. (10.1 cm)
1.5.6 WEIGHT (with battery
With whip antenna:
Net Weight 17.0 lb.
Shipping Weight 22.0 lb.
Without whip antenna:
Net Weight 16.0 lb.
Shipping Weight 18.0 lb.
1.5.7 TEMPERATURE AND HUMIDITY
Operating Temperature Range -40 to +60 Degrees Celsius
Storage Temperature Range -40 to +60 Degrees Celsius
Operating Humidity Range 0 to 90% (non-condensing)
Storage Humidity Range 0 to 90% (non-condensing)
1.5.8 TRANSMITTER
RF Output Power (ANT) 1.0 Watts (maximum)
FCC REQUIREMENTS
The RAD-16LS complies with the limits set for a Class B computing device as specified in
Subpart J of Part 15 of The FCC Rules and Regulations. This unit also complies with Part 90
of The FCC Rules and Regulations.

RAD-16LS INSTALLATION AND USER MANUAL
DIGITIZE, INC. 700180-0000 REV. E 10/21 1-5
Specifications Subject to Change Without Notice
APPLICABLE PUBLICATIONS
Federal Communications Commission “Rules and Regulations”, Parts 15 and 90.
National Electric Code 1990
National Fire Protection Association Standards: 1221

RAD-16LS INSTALLATION AND USER MANUAL
1-6 DIGITIZE, INC. 700180-0000 REV. E 10/21
Specifications Subject to Change Without Notice

DIGITIZE, INC. 700180-0000 REV. E 10/21 2-1
Specifications Subject to Change Without Notice
2 INSTALLATION
HANDLING
2.1.1 PRECAUTIONS
2.1.2 UNPACKING AND INSPECTION
Before opening, inspect the shipping container for unusual damage. Unpack the unit and
inspect for scratches, dents, and loose internal components. If the inspection reveals any
physical damage, retain the packing material and contact the carrier immediately. Each unit
has been thoroughly inspected prior to shipment.
NOTE: Keep unit in shipping container until ready to mount.
CABINET MOUNTING
2.2.1 SITE PREPARATION
The installation area should be well lit, clean, easily accessible and free from extremes of
temperature and humidity. Refer to Section 1.4.7, Temperature and Humidity for the maximum
operating conditions.
2.2.2 DISASSEMBLY PROCEDURE
1. Remove the interface plug from connector P1.
2. Disconnect barrier strip BS2.
3. Remove the four mounting screws from the front panel.
4. Place the front panel and mounting screws in the shipping container.
For initial installation, removal of the RF transmitter is not required.
CAUTION!! DO NOT TOUCH the circuitry on the board during installation
as static discharge may damage components.

RAD-16LS INSTALLATION AND USER MANUAL
2-2 DIGITIZE, INC. 700180-0000 REV. E 10/21
Specifications Subject to Change Without Notice
2.2.3 SELECTING PROPER BOX MOUNTING LOCATION
To install a RAD-16LS with an external antenna, refer to information found in Section 2.2.1,
Site Preparation and Section 2.2.4, Mounting Instructions.
Proper mounting locations are extremely important for RAD-16LS with internal whip
antennas. It is recommended that the desired location first be tested with a known working
RAD-16LS box by holding the box in the desired location and sending a test transmission to
the receiving location. If the signal strength is adequate at the receiving location, then the
selected mounting location is good.
The mounting location will be less critical closer to the receiving location. In general, mount
the RAD-16LS close to the fire or security panel being monitored.
Avoid the following:
•Do not install box below ground level.
•Do not install box above 2nd floor (FCC rules state that tip of antenna should not be higher
than 20 feet above average terrain).
•Antenna must be at least three feet away from metal pipes. Make sure mounting wall does
not have metal pipe inside or behind it.
•Avoid installation in stucco or aluminum sided buildings (stucco buildings have a wire
mesh underneath the stucco which affects proper box transmission).
•Avoid installation in buildings that have walls with metal-backed insulation.
If any of the above is a problem, an external antenna mounted outside the building must be
used.
2.2.4 MOUNTING INSTRUCTIONS
The cabinet supplied with the standard model is designed for surface mounting. The
mounting area must be a clean, smooth surface of a permanent partition. The cabinet must be
securely fastened to the mounting surface using the four mounting holes. For cabinets with
whip antennas, refer to Section 1.4.5, Dimensions for the information necessary to determine
the proper clearance required above the cabinet.
2.2.5 WHIP ANTENNA INSTALLATION
To install a whip antenna proceed as follows:
1. On the top center of the box towards the rear, remove the 1/2 in. conduit knock-
out.
2. Remove the whip antenna from box. If 1/2 in. nut is on PVC threads, remove it.
3. Insert co-ax cable connecter through knock-out from top of box.
IMPORTANT!! IMPORTANT! Do not mount integral whip antenna in
any other location other than the top of the RAD-16LS.

RAD-16LS INSTALLATION AND USER MANUAL
DIGITIZE, INC. 700180-0000 REV. E 10/21 2-3
Specifications Subject to Change Without Notice
4. Place 1/2 in. PVC pipe threads and tighten antenna to box.
5. Connect co-ax connector to mating connector on RF Transmitter.
WIRING
2.3.1 CONDUIT CONNECTIONS
Connect all wiring conduit to the cabinet in accordance with applicable National Electric
Code and State and Local building code requirements. The cabinet is supplied with eight pre-
stressed, 1/2 in. knock-outs. Two are located on each of its four sides.
2.3.2 FIELD WIRING
Pull power feeds and all field wiring through the conduit and into the cabinet. It is important
that the field wiring for the zone inputs is isolated from power and telephone lines. Field wiring
for each zone input should be limited to less than 1000 feet in length.
All field wiring must be tested for grounds, induced voltages, open and shorted circuits. All
field wiring must be free of these conditions prior to connecting them to peripheral devices or
the RAD-16LS. Do not connect field wiring until the panel has been fully tested beforehand.
Tag all wiring for later connection to the unit. Follow the procedures outlined in Section 3,
System Initialization. Failure to comply with these guidelines may cause damage to the unit.
RF TRANSMITTER AND INTERFACE
Two transmitter types, (AM or FM) are available. The wiring for both units is the same.
2.4.1 WIRING
The interface connector, “P1” must be plugged into “P1” of the main board of the RAD-
16LS. The co-axial antenna cable must be plugged into the connector marked “ANT”.
ASSEMBLY
1. Retrieve the front panel and mount it to wall enclosure.
2. Connect barrier strip BS2 to the main board.
3. Connect the interface plug to P1 of the main board.
TERMINAL FUNCTIONS
2.6.1 BS0, BS1, BS3, and BS4
These barrier strips contain terminals for the connection of field wiring to the Class B zone
initiating inputs. Zone number and polarity are illustrated below.
IMPORTANT!! Make sure antenna ground wire lug has a good electrical
connection to the enclosure cabinet. The cabinet becomes part of the
antenna element and a good electrical connection is vital for proper
operation.

RAD-16LS INSTALLATION AND USER MANUAL
2-4 DIGITIZE, INC. 700180-0000 REV. E 10/21
Specifications Subject to Change Without Notice
Table 2-1, Zone Input
BS0
BS1
BS3
BS4
Terminal
Label
Terminal
Label
Terminal
Label
Terminal
Label
1
1+
1
5+
1
9+
1
13+
2
1-
2
5-
2
9-
2
13-
3
2+
3
6+
3
10+
3
14+
4
2-
4
6-
4
10-
4
14-
5
3+
5
7+
5
11+
5
15+
6
3-
6
7-
6
11-
6
15-
7
4+
7
8+
7
12+
7
16+
8
4-
8
8-
8
12-
8
16-
2.6.2 BS2
Terminals 1 and 2 Label: AC POWER
These terminals are connected to the secondary output of the AC transformer.
Terminal 3 Label: GROUND
This terminal is connected to an Earth or water pipe ground and is used as a reference for
the “Ground Fault” detection circuit.
Terminals 4 and 5 Label: BATT
Terminal 4 is the positive connection and Terminal 5 is the negative connection to the 12-
volt standby battery.
Terminals 6, 7 and 8 Label: TRB RELAY
These terminals are, respectively, the normally open, common and normally closed
contacts of the Trouble relay.
2.6.3 P1
This connector is used for connection to the RF transmitter assembly. The connector is
keyed so the plug from the assembly can only be inserted one way.
2.6.4 P2
Connector P2 is reserved for future use.
2.6.5 P3
Connector P3 is reserved for future use.
WARNING!! Maximum input to these terminals is 18 Volts AC.

RAD-16LS INSTALLATION AND USER MANUAL
DIGITIZE, INC. 700180-0000 REV. E 10/21 2-5
Specifications Subject to Change Without Notice
THE TERMINAL STRIPS LOCATED AT THE BOTTOM
OF THE PCB ARE REMOVEABLE.
NOTE:
TROUBLE
YELLOW
RED
ALARM 15
14
13
12
11
10
916 INDICATESINDICATES
CONTROL UNIT
LINKDOG
COMMWATCH
FAULT
BATTERY
TO REMOVE PANEL OPEN FULLY & LIFT UP.
AC
PWR
AC FAIL
FLASHING
NORMAL
STEADY
BYPASSNORMAL
POSITION
SWITCH
7
6
5
4
3
2
18
ZONES RED INDICATES ALARM, YELLOW INDICATES TROUBLE.
EXPANSION PORT
MODE OR DURING A TAMPER CONDITION.
BEEPS WHEN A ZONE IS PLACED IN BYPASS
117 VAC 60 Hz
TRANSFORMER
PANEL.
CONNECT TO FIRE OR ALARM
IS "ON".
ON ONE OF THE ZONES.
TIME, IT INDICATES A GROUND FAULT CONDITION
WHEN ALL LEDS FLASH YELLOW AT THE SAME
WITH SYSTEM 3000.
ON DURING COMMUNICATION
COMM LINK LED
AND MUST BE RESET.
ON STEADY WHEN PANEL IS STALLED
WHEN PANEL IS RUNNING PROPERLY
FLASHES ONCE EVERY 5 SECONDS
WATCHDOG LED
VOLTAGE WHEN ON
INDICATES LOW OR NO BATTERY
BATTERY FAULT LED
AC POWER FAILURE.
POWER IS OK. FLASHES TO INDICATE
WHEN ON CONTINUOUSLY, INDICATES
POWER LED
PRESS IF WATCHDOG LED
RESET BUTTON
PROGRAM CHIP
U1
NORMAL OPERATION.
MUST BE REMOVED FOR
FUSE BLOW JUMPER
1/2 AMP
FUSE PUSH TO SILENCE BEEPER
CLEAR/SILENCE BUTTON
PUSH TO SEND TEST RADIO TRANSMISSION.
TEST BUTTON
MUTUAL AID COMPUTER PORT
LED FOR ZONE TO FLASH YELLOW.
IS PLACED IN THE UPPER POSITION. CAUSES
SETS A ZONE INTO BYPASS MODE WHEN SWITCH
BYPASS SWITCHES
THE ZONE HAS BEEN PLACED IN BYPASS MODE.
FLASHING YELLOW LED INDICATES THAT
OR TROUBLE WHEN ON CONTINUOUSLY.
INDICATES THAT A ZONE IS IN ALARM
ZONE LEDS
BEEPER
AND SERIAL NUMBER
LOCATION OF REVISION
TRANSMITTER
TO RADIO
DOOR TAMPER SWITCH
CONNECT TO EARTH GROUND
12V BATTERY,
+
-
NORMALLY CLOSED
NORMALLY OPEN
COMMON
TROUBLE RELAY,
SUPERVISED
UNSUPERVISED
CONTACTS
TROUBLEN/C
4.7K CONNECTIONS RUN OVER 20 FEET.FROM THE DGM 8LS, OR WHEN LOCATED IN ROOMS SEPARATEREQUIRED FOR CONNECTIONS PROTECT BOARD, P/N 400436, ISTHE 4 ZONE LIGHTNING/SURGE
4.7K
CONTACTS
DEVICES
INITIATING
ALARM
N/O
TROUBLE
N/C
CIRCUIT.
CONNECTED ACROSS THE
AFTER THE LAST DEVICE
RESISTOR, ELECTRICALLY
THE END-OF-LINE
WIRED IN SERIES WITH
CONTACTS ARE TO BE
THE N/C TROUBLE
DEVICE
FROM ALARM INITIATING
RESISTOR INPUT CIRCUIT
TYPICAL END OF LINE
SUPERVISED
16 ZONES
TYPICAL
WHEN INSTALLING CABLE PAIR
REMOVE 4.7K RESISTOR
AND DISCARD. INSTALL
50 mA MAX. INPUT
CURRENT DRAIN
Figure 2-1, Inter-equipment Wiring Diagram

RAD-16LS INSTALLATION AND USER MANUAL
2-6 DIGITIZE, INC. 700180-0000 REV. E 10/21
Specifications Subject to Change Without Notice
Table of contents
Other DIGITIZE Controllers manuals