manuals.online logo
Brands
  1. Home
  2. •
  3. Brands
  4. •
  5. Dimplex
  6. •
  7. Stove
  8. •
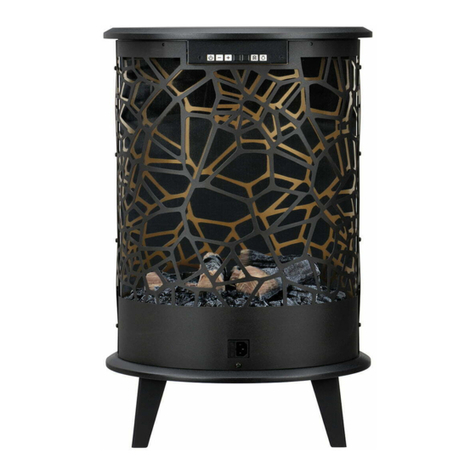
  9. Dimplex Rectory User manual

Dimplex Rectory User manual

08/19703/0 Issue 0
The product complies with the European Safety Standards EN60335-2-30 and the European Standard Electromagnetic Compatibility (EMC)
EN55014, EN60555-2 and EN60555-3 which cover the essential requirements of EEC Directives 73/23 and 89/336
UK DE NL FR ES PT IT PL
RU SE DK NO FI SK SI HR HU
RECTORY
MONTANA
SHERBORNE
max
min
T
OFF
ON
540
665
375375
665
540 540
665
375
24
3
1
7
8
RECTORY MONTANA SHERBORNE
5
6
- 1 -
IMPORTANT: THESE INSTRUCTIONS SHOULD BE READ CAREFULLY AND RETAINED FOR FUTURE REFERENCE
General
Unpack the heater carefully and retain the packaging for possible future use, in the
event of moving or returning the fire to your supplier.
The fire incorporates a flame effect, which can be used with or without heating, so that
the comforting effect may be enjoyed at any time of the year. Using the flame effect on
its own only requires little electricity.
These models are designed to be free standing and are normally positioned against a
wall.
Before connecting the heater check that the supply voltage is the same as that stated
on the heater.
Please note: Used in an environment where background noise is very low, it may
be possible to hear a sound which is related to the operation of the flame effect.
This is normal and should not be a cause for concern.
Electrical connection
WARNING – THIS APPLIANCE MUST BE EARTHED
This heater must be used on an AC ~ supply only and the voltage marked on the
heater must correspond to the supply voltage.
Before switching on, please read the safety warnings and operating instructions.
Controls - see Fig. 2
The main ON/OFF switch must first be turned ON to operate any of the other controls.
To increase or decrease the brightness of the flame effect use the / button shown
in Fig. 2.
Thermostat (T) - see Fig. 2
In order to maintain a certain room temperature, set the controller to ‘max.’. Operate
the appliance at full power until the required room temperature is reached. Set back
the thermostatic controller until the appliance switches off with an audible “click”. This
temperature will be kept almost constant by the thermostatic control switching on and
off automatically. Please note that the appliance can only be switched on when the
thermostat setting is higher then the room temperature.
LED indicators - see Fig. 6
Three LED’s as shown in Fig. 6 are indicating the heat setting for a couple of seconds
every time you change the setting.
One LED means ON (flame effect only, no heat), two LED’s means 1kW heat and all
three LED’s are lit for full 2kW heat setting.
Remote control - see Fig. 7
The maximum range of use is ~ 15 metres.
The buttons on the remote control have the same function as the switches on the
heater.
For details on the function please refer to the ‘Controls’ section in this instruction
leaflet.
Warning: It takes time for the receiver to respond to the transmitter.
Do not press the buttons more than once within two seconds for correct operation.
Battery information - see Fig. 7
1. Slide open the battery cover on the back of the remote control.
2. Install AAA batteries into the remote control.
3. Replace the battery cover.
Discard leaky batteries
Dispose of batteries in the proper manner according to provincial and local regulations.
Any battery may leak electrolyte if mixed with a different battery type, if inserted
incorrectly, if all the batteries are not replaced at the same time, if disposed of in a fire,
or if an attempt is made to charge a battery not intended to be recharged.
Thermal Safety Cut-out
A thermal safety cut-out is incorporated in the heater to prevent damage due to
overheating. This can happen if the heat outlet was restricted in any way. The heater
will switch on once the obstruction has been removed and the heater has cooled. If the
cut-out continues to operate intermittently, the heater should be switched off and a
service agent contacted.
Maintenance
WARNING: ALWAYS DISCONNECT FROM THE POWER SUPPLY BEFORE
ATTEMPTING ANY MAINTENANCE.
Instructions for fitting Coal Option - see Fig. 8
Introduction
Your fire is provided with a coal effect option. Simply follow the instructions given
below.
Removal of Log Effect
Remove the screws securing the log effect assembly and slide out (see Fig. 8).
Fitting Coal Effect
Fit the coal effect in position and secure with the screws (see Fig. 8).
Place the coal lumps on the fuel bed. A plastic glove is provided for handling the coal.
Note: The log effect should be stored away for possible future use.
Lamp Replacement - see Fig. 3, Fig. 4 and Fig. 5
To gain access to the lamps remove the fuel effect from the fire by removing the fixing
screws from the fuel bed (Fig. 3) and sliding out the fuel effect (Fig. 4). Remove the
defective lamp by unscrewing it as shown in Fig. 5.
Replace with a 25W E14 SES Clear Candle lamp. Take care not to over-tighten the
lamp.
Refit fuel effect and secure it with the screws.
Cleaning
WARNING – ALWAYS DISCONNECT FROM THE POWER SUPPLY BEFORE
CLEANING THE HEATER.
For general cleaning use a soft clean duster – never use abrasive cleaners. The glass
viewing screen should be cleaned carefully with a soft cloth. DO NOT use proprietary
glass cleaners.
To remove any accumulation of dust or fluff the soft brush attachment of a vacuum
cleaner should occasionally be used to clean the outlet grille of the fan heater.
To clean the fuel effect, remove the coals and wash in warm water. The plastic tray
should be wiped clean with a damp cloth. When dry replace the coals and arrange for
best effect.
After Sales Service
Should you require after sales service or should you need to purchase any spares,
please contact the retailer from whom the appliance was purchased or contact the
service number relevant to your country on the warranty card. Please do not return a
faulty product to us in the first instance as this may result in loss or damage and delay
in providing you with a satisfactory service. Please retain your receipt as proof of
purchase.
Important Safety Advice
When using electrical appliances, basic precautions should always be
followed to reduce the risk of fire, electrical shock and injury to persons,
including the following:
If the appliance is damaged, check with the supplier before installation and
operation.
Do not use outdoors.
Do not use in the immediate surroundings of a bath, shower or swimming
pool.
Do not locate the heater immediately below a fixed socket outlet or
connection box.
Do not cover the heater. Do not place material or garments on the heater, or
obstruct the air circulation around the heater, for instance by curtains or
furniture, as this could cause overheating and a fire risk.
This appliance is not intended for use by children or other persons without
assistance or supervision if their physical, sensory or mental capabilities
prevent them from using it safely. Children should be supervised to ensure
that they do not play with the appliance.
Do not use this heater in series with a thermal control, a program controller,
a timer or any other device that switches on the heat automatically, since a
fire risk exists when the heater is accidentally covered or displaced.
Ensure that furniture, curtains or other combustible material are positioned
no closer than 1 metre from the heater.
In the event of a fault unplug the heater.
Unplug the heater when not required for long periods.
Although this heater complies with safety standards, we do not recommend
its use on deep pile carpets or on long hair type of rugs.
The appliance must be positioned so that the plug is accessible.
If the supply cord is damaged it must be replaced by the manufacturer or
service agent or a similarly qualified person in order to avoid a hazard.
Keep the supply cord away from the front of the heater.
Setting Operation Indication
Flame effect Press the ‘I’ button once Bottom neon
Flame effect & 1kW heat Press the ‘I’ button again Bottom & middle
neon
Flame effect & 2kW heat Press the ‘I’ button again
Press the ‘I’ button again All 3 neons
To turn off any of the settings Press the ‘O’ button once
UK
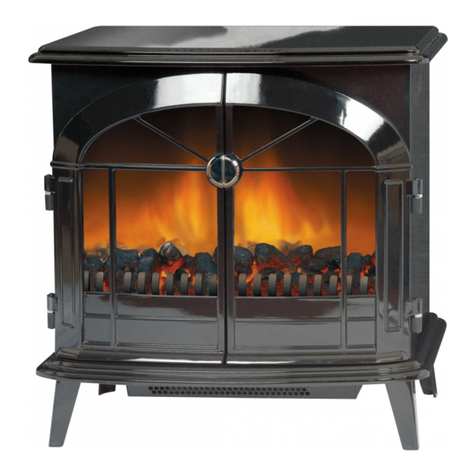
MONTANA, RECTORY &
SHERBORNE
2. Garantiezeitraum 3. Modell(e)
4. Modellbezeichnung 5. Kaufdatum 6. Stempel & Unterschrift des
Einzelhändlers
7. Fehler/Defekt
8.
1. Garantiekarte
DE
1. Garantiekarte
2. Garantiezeitraum (in Jahre)
3. Modell(e)
4. Modellbezeichnung
5. Kaufdatum
6. Stempel & Unterschrift
des Einzelhändlers
7. Fehler/Defekt
8. Kontakt-Tel.-Nr. & - Anschrift
UK
1. Warranty Card
2. Guarantee Period (in Years)
3. Model(s)
4. Model Name
5. Date of Purchase
6. Stamp & Signature of retailer
7. Fault/Defect
8. Contact Number & Address
FR
1. Bon de garantie
2. Période de garantie (en
années)
3. Modèle(s)
4. Intitulé du modèle
5. Date d’achat
6. Cachet et signature du vendeur
7. Anomalie/Défaut
8. Nom et adresse du contact
IT
1. Scheda di garanzia
2. Periodo di garanzia (in anni)
3. Modello(i)
4. Nome del modello
5. Data di acquisto
6. Timbro e firma del rivenditore
7. Guasto/difetto
8. Indirizzo e numero di contatto
ES
1. Tarjeta de garantía
2. Período de garantía (en años)
3. Modelo(s)
4. Nombre del modelo
5. Fecha de adquisición
6. Sello y firma del distribuidor
7. Avería/Defecto
8. Número y dirección de contacto
6. Žig in podpis prodajalca
7. Pomanjkljivost/okvara
8. Kontaktna številka in naslov
SK
1. Zárucný list
2. Zárucné obdobie (v rokoch)
3. Model(y)
4. Názov modelu
5. Dátum kúpy
6. Pecat & Podpis obchodníka
7. Porucha/závada
8. Kontaktujte císlo & adresu
LT
1. Garantijos kortele
2. Garantijos laikotarpis (metais)
3. Modelis (modeliai)
4. Modelio pavadinimas
5. Pirkimo data
6. Prekybininko antspaudas ir
parašas
7. Gedimas / defektas
8. Numeris ir adresas kontaktams
EE
1. Garantiikaart
2. Garantiiaeg (aastates)
3. Mudel(id)
4. Mudeli nimi
5. Ostukuupäev
6. Kaupluse tempel & allkiri
7. Viga/defekt
8. Kontaktnumber & aadress
HU
1. Garancialevél
2. Garancia idotartama (években)
3. Modell(ek)
4. Modell neve
5. Vásárlás idopontja
6. Eladó bélyegzoje és aláírása
7. Hiba/Hiány megnevezése
8. Értesítési telefonszám és cím
HR
1. Jamstvena kartica
2. Jamstveni period (u godinama)
3. Model(i)
4. Naziv modela
5. Datum kupnje
6. Pecat i potpis dobavljaca
7. Kvar/defekt
8. Broj i adresa za kontakt
GR
1. Κάρτα εγγύησης
2. Περίοδος ισχύος της
εγγύησης (έτη)
3. Μοντέλο(α)
4. *νοµα µοντέλου
5. Ηµεροµηνία αγοράς
6. Σφραγίδα και υπογραφή
εµπρου
7. Σφάλµα/Ελάττωµα
8. Αριθµς τηλεφώνου και
διεύθυνση επικοινωνίας
BG
1. Гаранционна карта
2. Гаранционен период (в
години)
3. Модел(и)
4. Наименование на модела
5. Дата на покупка
6. Печат и подпис на
търговеца
7. Неизправност/Дефект
8. Адрес и телефон за
контакт
KZ
RU
1. Гарантийная карта
2. Срок действия гарантии(в
годах)
3. Модель (модели)
4. Наименование модели
5. Дата покупки
6. Штамп и подпись
озничного продавца
7. Неисправность/дефект
8. Номер контактного
телефона и адрес
)
5.
6.
PT
1. Cartão de Garantia
2. Período de Garantia (em anos)
3. Modelo(s)
4. Nome do Modelo
5. Data de Compra
6. Carimbo e Assinatura do
retalhista
7. Falha/Defeito
8. Número de Contacto e Morada
NL
1. Garantiebewijs
2. Garantieperiode (in jaren)
3. Model(len)
4. Modelnaam
5. Aankoopdatum
6. Stempel & Ondertekening
detaillist
7. Fout/Defect
8. Telefoonnummer & Adres
DK
1. Garantikort
2. Garantiperiode (i år)
3. Model(ler)
4. Modelnavn
5. Købsdato
6. Detailhandlers stempel &
underskrift
7. Fejl/defekt
8. Kontaktnummer & -adresse
SE
1. Garantikort
2. Garantitid (i år)
3. Modell(er)
4. Modellnamn
5. Inköpsdag
6. Återförsäljarens stämpel och
underskrift
7. Fel
8. Telefonnummer och adress för
kontakt
NO
1. Garantikort
2. Garantiperiode (i år)
3. Modell(er)
4. Modellnavn
5. Kjøpsdato
6. Selgers stempel og signatur
7. Feil/defekt
8. Kontaktnummer og adresse
FI
1. Takuukortti
2. Takuuaika (vuosina)
3. Malli(t)
4. Mallin nimi
5. Ostopäivämäärä
6. Myyntiliikkeen leima ja
allekirjoitus
7. Vika/vaurio
8. Yhteysnumero ja osoite
PL
1. Karta gwarancyjna
2. Okres gwarancji (w latach)
3. Model(e)
4. Nazwa modelu
5. Data zakupu
6. Pieczec i podpis sprzedawcy
7. Usterka
8. Telefon i adres kontaktowy
CZ
1. Záruční list
2. Záruční doba (roky)
3. Model(y)
4. Název modelu
5. Datum zakoupení
6. Razítko a podpis prodejce
7. Porucha/chyba
8. Kontaktní číslo a adresa
LV
1. Garantijas talons
2. Garantijas periods (gadi)
3. Modelis(li)
4. Modela nosaukums
5. Legades datums
6. Mazumtirgotaja zimogs un
paraksts
7. Bojajums/defekts
8. Kontakttalrunis un adrese
SI
1. Garancijski list
2. Obdobje veljavnosti
garancije (v letih)
3. Model(i)
4. Ime modela
5. Datum nakupa
DE
Glen Dimplex Deutschland GmbH
ewt-Kundendienst
Otto-Bergner-Straße 28
D-96515 Sonneberg
+49 (0) 1805 / 398 346
Fax. +49 (0) 3675 / 879-235
[email protected]
UK
Glen Dimplex UK Limited
Millbrook House
Grange Drive
Hedge End
Southampton
Hampshire. SO30 2DF
0870 7270101
Fax. 0870 7270102
customer[email protected]
ES
Glen Dimplex España S.L.
C/ Bailén, 20, 4º,2ª
e-08010 BARCELONA
(+34) 93.238.61.59
Fax. (+34) 932384375
IT
Glen-Dimplex Italia S.r.l.
via delle Rose 7,
24040 lallio (BG)
035-201042
Fax. 035-200492
[email protected]
2

This manual suits for next models

2

Other Dimplex Stove manuals

Dimplex Langbrook LBK5SE User manual

Dimplex

Dimplex Langbrook LBK5SE User manual

Dimplex Optiflame Electric Fireplace Instruction Manual

Dimplex

Dimplex Optiflame Electric Fireplace Instruction Manual

Dimplex RIT20 User manual

Dimplex

Dimplex RIT20 User manual

Dimplex Corner Standing Stove User manual

Dimplex

Dimplex Corner Standing Stove User manual

Dimplex CASSINGTON EN60555-2 User manual

Dimplex

Dimplex CASSINGTON EN60555-2 User manual

Dimplex Stockbridge 2.0 User manual

Dimplex

Dimplex Stockbridge 2.0 User manual

Dimplex EOSM-2007 User manual

Dimplex

Dimplex EOSM-2007 User manual

Dimplex DS3311 User manual

Dimplex

Dimplex DS3311 User manual

Dimplex DS5629 User manual

Dimplex

Dimplex DS5629 User manual

Dimplex ELECTRIC STOVE User manual

Dimplex

Dimplex ELECTRIC STOVE User manual

Dimplex ELECTRALOG CS1205 User manual

Dimplex

Dimplex ELECTRALOG CS1205 User manual

Dimplex ELECTRALOG CS3311 User manual

Dimplex

Dimplex ELECTRALOG CS3311 User manual

Dimplex Brayford BFD20 User manual

Dimplex

Dimplex Brayford BFD20 User manual

Dimplex 143348BK User manual

Dimplex

Dimplex 143348BK User manual

Dimplex Westcott 5 WST5SE User manual

Dimplex

Dimplex Westcott 5 WST5SE User manual

Dimplex OMWFC20 User manual

Dimplex

Dimplex OMWFC20 User manual

Dimplex DCS19W User manual

Dimplex

Dimplex DCS19W User manual

Dimplex Willowbrook WLL20 Instruction Manual

Dimplex

Dimplex Willowbrook WLL20 Instruction Manual

Dimplex DS5598 User manual

Dimplex

Dimplex DS5598 User manual

Dimplex Club Stove User manual

Dimplex

Dimplex Club Stove User manual

Dimplex DS7420 Quick start guide

Dimplex

Dimplex DS7420 Quick start guide

Dimplex DS4411 User manual

Dimplex

Dimplex DS4411 User manual

Dimplex OPTIMYST RTOPSTV20 User manual

Dimplex

Dimplex OPTIMYST RTOPSTV20 User manual

Dimplex WLL20-AU User manual

Dimplex

Dimplex WLL20-AU User manual

Popular Stove manuals by other brands

United States Stove Company 5560 (I) Installation and operating manual

United States Stove Company

United States Stove Company 5560 (I) Installation and operating manual

HWAM 2610 quick start guide

HWAM

HWAM 2610 quick start guide

Nordica COMFORT IDRO L80 instruction manual

Nordica

Nordica COMFORT IDRO L80 instruction manual

Hearth & Home pelpro PP60 Service manual

Hearth & Home

Hearth & Home pelpro PP60 Service manual

Wonderfire 530U UNIVERSAL owner's guide

Wonderfire

Wonderfire 530U UNIVERSAL owner's guide

Zubler VARIO 200 operating instructions

Zubler

Zubler VARIO 200 operating instructions

KEDDY K700 installation instructions

KEDDY

KEDDY K700 installation instructions

Pacific energy NEO 1.2A SERIES Installation and operating instructions

Pacific energy

Pacific energy NEO 1.2A SERIES Installation and operating instructions

Saey 94 Installation and user manual

Saey

Saey 94 Installation and user manual

MCZ TEIA COMFORT AIR 10 S2 installation guide

MCZ

MCZ TEIA COMFORT AIR 10 S2 installation guide

Cumberland Stove Works MF3800 Installation and service manual

Cumberland Stove Works

Cumberland Stove Works MF3800 Installation and service manual

Capital fireplaces CONTOUR Window Series manual

Capital fireplaces

Capital fireplaces CONTOUR Window Series manual

Dovre 225MF Installation instructions and operating guide

Dovre

Dovre 225MF Installation instructions and operating guide

Wanderer WA1025 Assembly and operating instructions

Wanderer

Wanderer WA1025 Assembly and operating instructions

Nordpeis S-18 F user manual

Nordpeis

Nordpeis S-18 F user manual

decorflame QC111 instruction manual

decorflame

decorflame QC111 instruction manual

Diamond G9/4BA8-N operating instructions

Diamond

Diamond G9/4BA8-N operating instructions

Harman Stove Company Clarity 929 DV Installation and operating manual

Harman Stove Company

Harman Stove Company Clarity 929 DV Installation and operating manual

manuals.online logo
manuals.online logoBrands
  • About & Mission
  • Contact us
  • Privacy Policy
  • Terms and Conditions

Copyright 2025 Manuals.Online. All Rights Reserved.