Disaster Area Design DMC-3XL Gen3 User manual
!
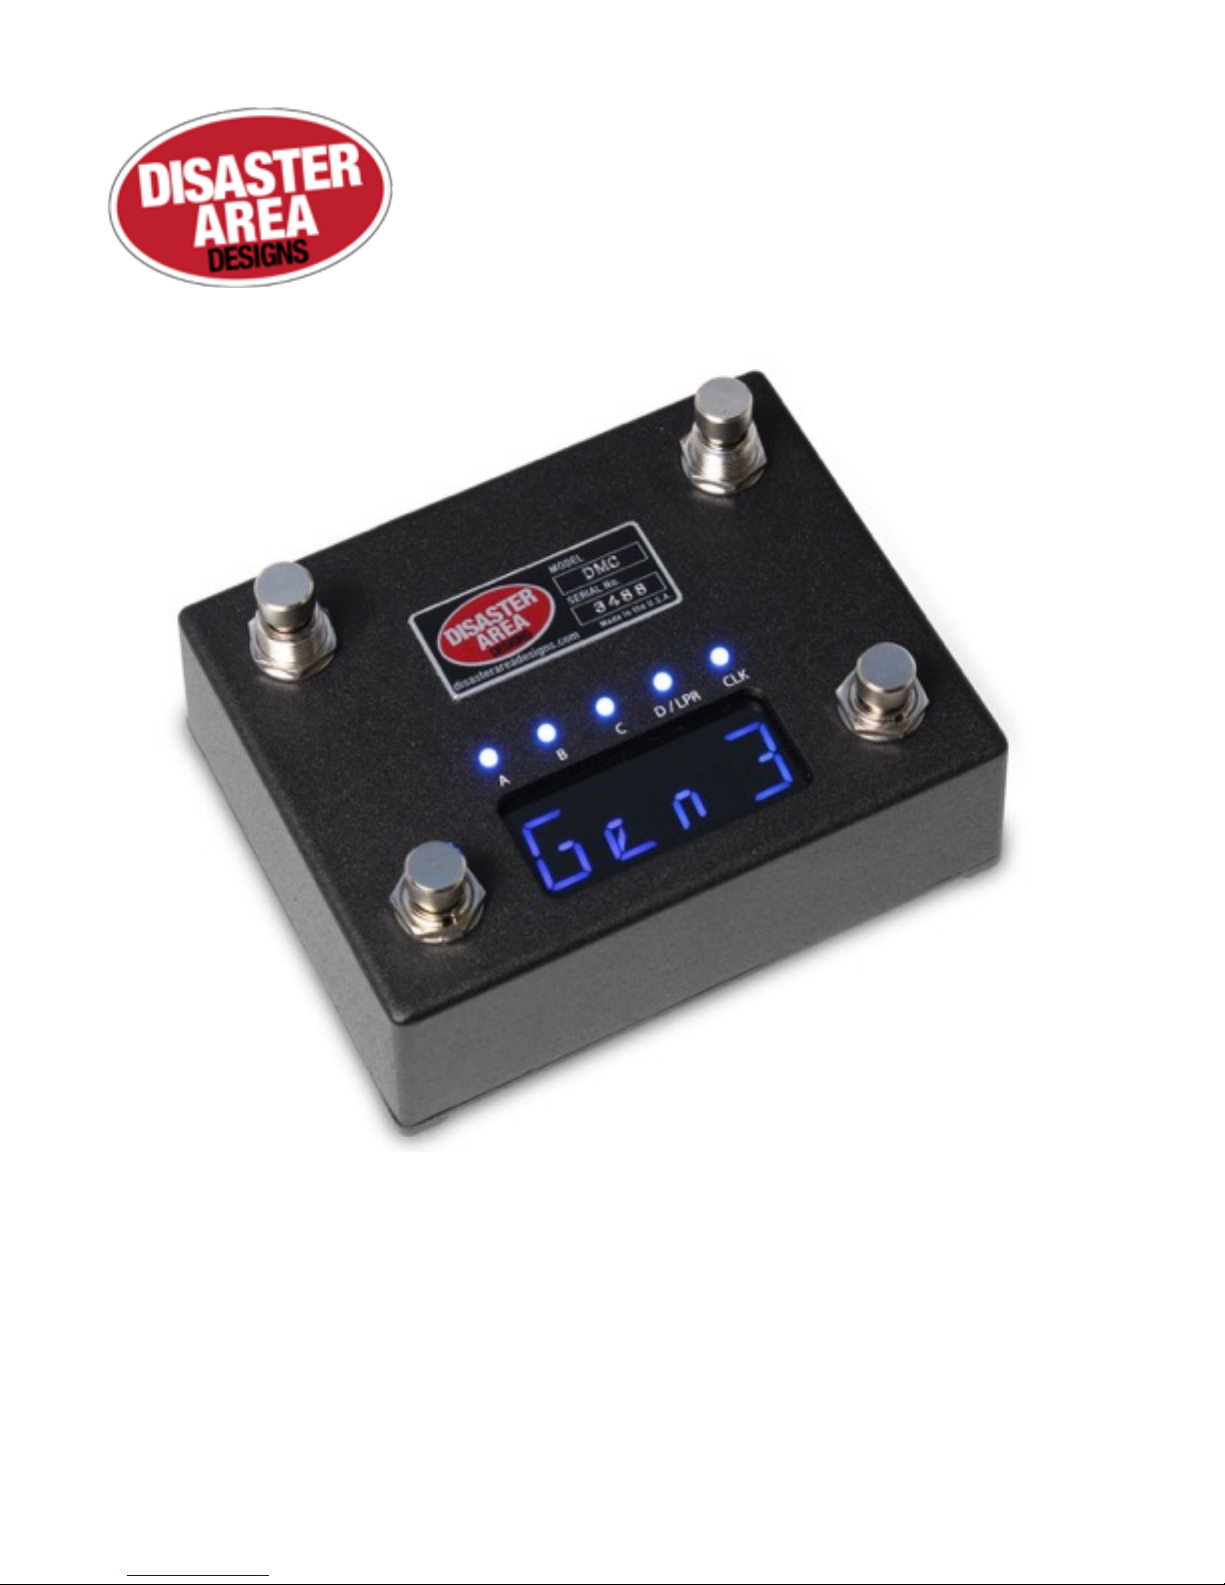
DMC-3XL Gen3
DMC-4 Gen3
User Manual
v1.01b

of 212
Revision History:
v1.01b - 08/19/2016
* Added support for the Source Audio Nemesis delay
* Fixed an issue using expression input for bank down switch
* Fixed an issue sending MIDI clock stop
* Changed the expression config to make sure we send on the D device
* Added checks to ensure MIDI was sending out the MultiJack for the D device if present
* Fixed an issue with Preset Clock mode not working with 0.5 BPM increments
v1.01a - 07/22/2016
* Fixed an issue with looper stop mode not working correctly
* Added config menu for tap tempo channel
* Allowed tap tempo menu to only tap to selected devices
* Fixed an issue with sending MIDI clock on exiting setup
* Added config menu for preset channel selection
* Added ability to turn off LEDs for unused preset channels
* Fixed an issue with the Echolution 2 bypass command
v1.01 - 07/14/2016
Removed prerequisite for Serial port in USBHostMIDI library
Added potential for two additional Chase Bliss / Serial outputs
Fixed an issue with sending FREEZE commands
Added ability to load last used preset
Added configuration for CC mode!
Added ability to send MIDI notes in CC mode
Added prevMode() function
Changed tap LED to normally OFF
Added Bank Down destination for 4th button and Expression Pedal
Added Whammy V Classic and Chords mode
v1.00
Initial Release!
Disaster Area Designs DMC-3XL / DMC-4 Gen3 Beta
of 312
DMC-3XL / DMC-4 Gen3
Operation Manual
Firmware Revision 1.01b / Revised 08.19.2016
1. Introduction
Thanks for purchasing a Disaster Area Designs DMC-3XL / DMC-4 Gen3 controller. We’ve worked hard for the last two years
developing and refining our MIDI controller technology, and we’ve incorporated suggestions from players all over the world. The Gen3
controllers have more features, more functions, and more connectivity than any of our previous controllers. In this manual we’ll cover
the operating modes, setup, and use of the Gen3 controllers. Have fun!
The DMC-3XL and DMC-4 Gen3 are compact MIDI controllers designed to interface with a wide variety of musical equipment. Up to
four MIDI devices may be controlled by the Scrolling and Preset modes, for program selection and recall. The Preset mode may also
control a fifth MIDI device with the capability for MIDI learning, such as the Disaster Area DPC-8EZ or DPC-Jr.
If your MIDI device is equipped with a phrase looper / loop recorder mode, the DMC Gen3 may be able to control it. Looper modes for
the Strymon Timeline, Line 6 M9 / M13, and Eventide H9 are supported in v1.00b. Boss DD-500 and Pigtronix Infinity looper support is
planned for a future update. Note: Using the looper disables one of the available MIDI devices in scrolling and preset modes.
The DMC Gen3 controllers can also serve as a pedalboard clock source. The Tap and Clock modes serve to select preset beats-per-
minute (BPM) tempo and the DMC will send these clock signals out using a combination of MIDI and tap tempo output to a variety of
compatible devices.
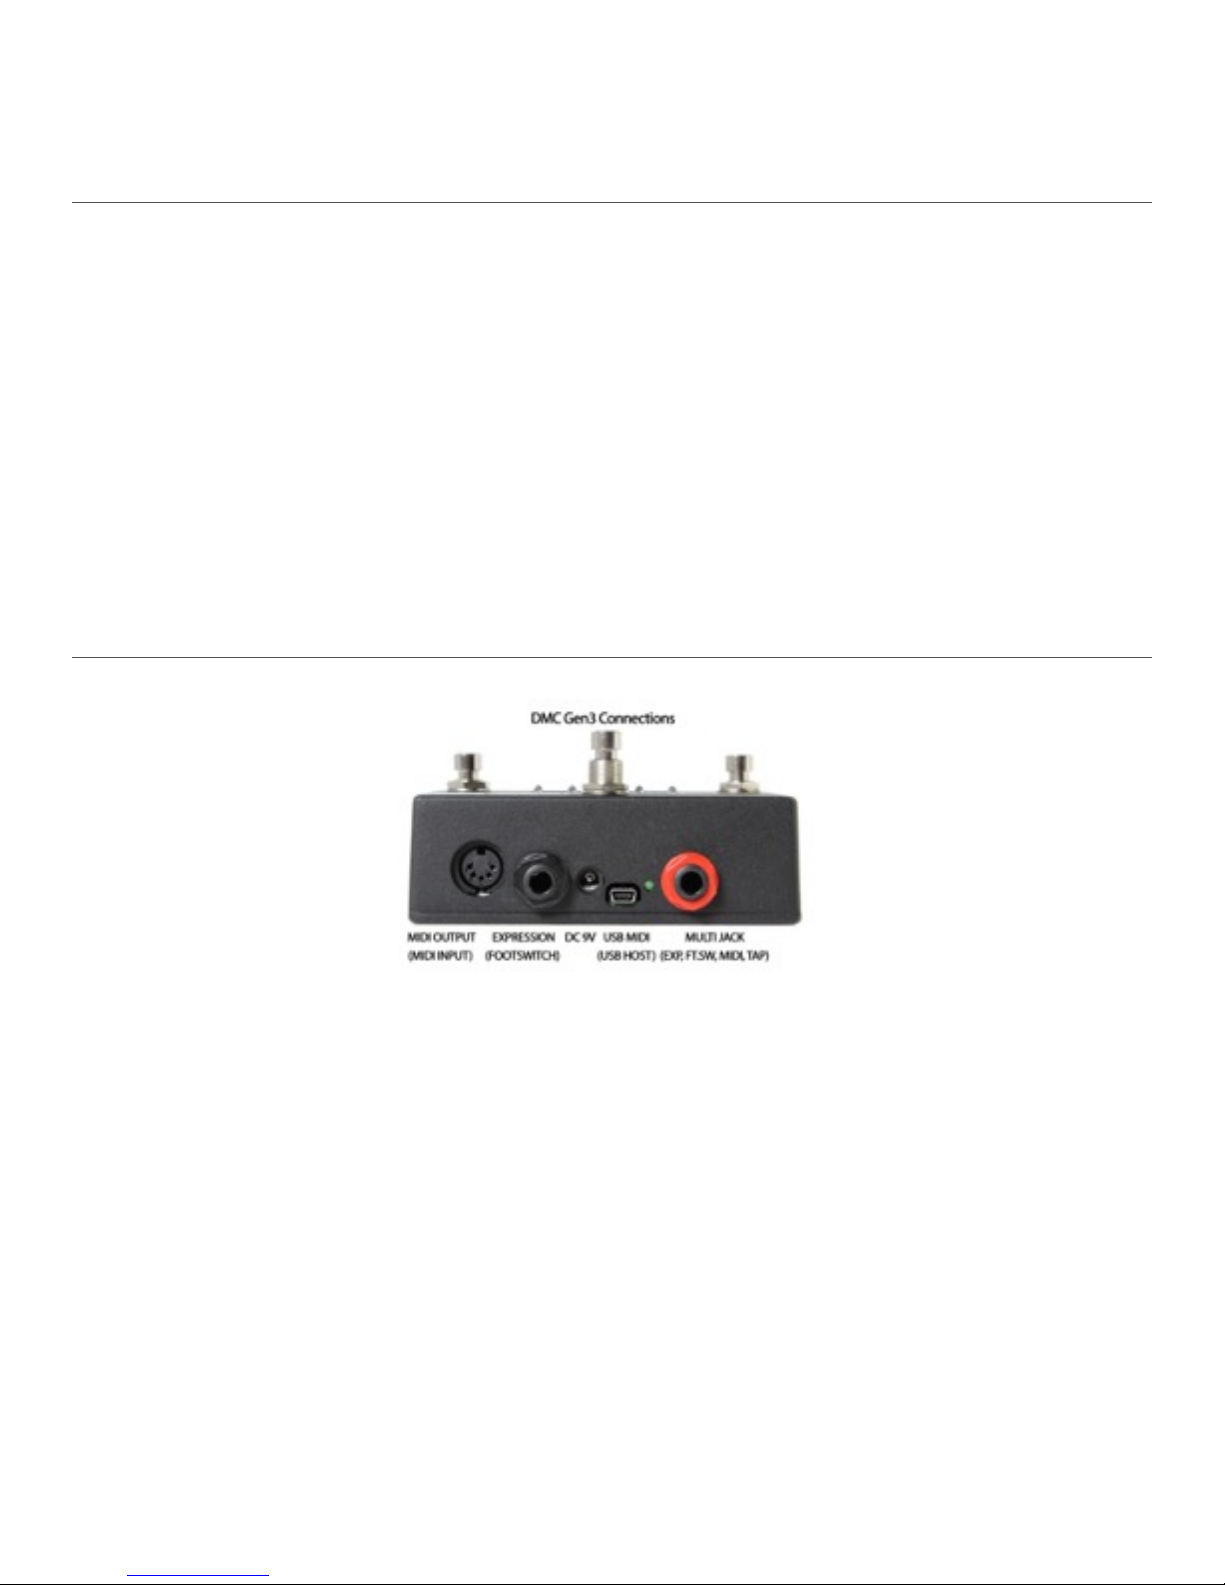
2. Connectivity Features
MIDI Output: Standard 5-pin MIDI output, connects to your first MIDI pedal input.
MIDI Input: The MIDI output jack doubles as a MIDI input using a Disaster Area MIDI Y-cable (sold separately.) The MIDI input
allows the DMC Gen3 to accept incoming MIDI messages and merge them in with its own data stream.
Expression Input: The black jack is a multi-function connector that can accept an expression pedal or a momentary footswitch. Consult
the Expression section for more details.
DC 9V: Standard DC power supply input, 9V center negative. The DMC Gen3 requires approximately 80mA if used by itself.
If an external USB HOST device is connected, the DMC will need to be supplied with enough current to power both itself and the USB
device.
USB MIDI: The standard DMC firmware allows the USB port to function as a MIDI interface for your compatible PC, Mac, or iPad
(using the Apple Camera Connection Kit.) The DMC will receive and send MIDI messages over USB for device control.
USB HOST: If the USB Host firmware is installed, the DMC USB port may be used to send and receive MIDI messages to
supported USB devices.
Status Indicator: This is just a little LED that blinks to let you know the pedal is working. It also blinks at a slower rate to indicate that
the pedal is in boot loader mode during a firmware update.
MultiJack: The red jack is our astounding MultiJack! The MultiJack can do all kinds of cool stuff, like receive expression or tap
tempo, send taps to your devices, or even send MIDI to additional devices.
Disaster Area Designs DMC-3XL / DMC-4 Gen3 Beta

of 412
3. Controls and Display
LED Indicators:
A: Lights when the A MIDI device is engaged.
B: Lights when the B MIDI device is engaged.
C: Lights when the C MIDI device is engaged.
D / LPR: Blinks when the looper is recording or overdubbing. Lights when the looper is playing.
If the D scrolling mode is active, lights when the D MIDI device is engaged.
CLK: Blinks to show the status of the tap tempo or MIDI clock output.
Left Button: Scrolls down or decrements current setting. Varies by mode.
Right Button: Scrolls up or increments current setting. Varies by mode.
Center Button: (DMC-3XL Only) Mode button, tap to change modes.
Upper Right Button: (DMC-4 Only) Mode button, tap to change modes.
Upper Left Button: (DMC-4 Only) 4 Button, assignable global button.
4. Setting up the DMC Gen3
The DMC Gen3 has a comprehensive setup menu that allows you to tailor its performance to your individual workflow. From the
factory, the DMC is set up in a very basic configuration:
Mode 1: Preset Mode (12)
Mode 2: Scrolling Mode A (Strymon Timeline on MIDI channel 1)
Mode 3: Looper Control Mode 1 (Record / Play / Stop / Overdub)
Mode 4: Tap Tempo
For many users, this will be a great starting point. If you’re a more advanced user, or you wish to add devices or change any of the
available modes, then your next stop should be the Setup Menu.
To access setup, hold the left and right buttons when the display begins to scroll.
To navigate setup, tap the left and right buttons to select a menu option.
Tap the mode button (center on DMC-3XL, upper-right on DMC-4) to select a parameter to edit.
Tap the left and right buttons to change a parameter value.
Tap the mode button again to return to the top menu.
Hold the mode button to save the configuration and restart the controller.!
Disaster Area Designs DMC-3XL / DMC-4 Gen3 Beta

of 512
SETUP PARAMETERS:
PRST - Preset Mode
0-127 presets
If PRST is set to zero, Preset Mode is disabled
P CH - Preset Mode channel selection
A B C Preset Modes enable / disable
If the location shows as zero, no commands will be
sent to that channel in Preset Mode.
SCRL - Scrolling Mode
A B C Scrolling Modes enable / disable
If the location shows as zero, the Scrolling Mode for
that channel is disabled
If all three locations show as zero, all Scrolling Modes
are disabled
DevA DevB DevC DevD - Device Control selection
Available Devices:
General MIDI
Strymon Timeline*, Mobius, BigSky
Eventide H9* or Factor series (Timefactor*, Modfactor,
Pitchfactor, SPACE)
Line 6 M5, M9*, M13*
Chase Bliss Warped Vinyl, Wombtone (mk.II versions
only,) Gravitas, Spectre, Tonal Recall
EHX HOG2 synthesizer
Pigtronix Echolution 2 / Deluxe / Filter Pro / Ultra Pro
Boss DD-500
Alexander Oblivion, Super Radical Delay
Panda Audio Future Impact I
Source Audio Neuro / SoundBox Hub
Source Audio Nemesis Delay
Free The Tone FT-1Y Flight Time
Empress Reverb, Tremolo 2
Digitech Whammy V Classic, Chords
Devices marked with * may be controlled by the DMC
Looper Modes.
The DMC Looper Modes will use the highest
numbered device with looper capability.
LOOP - Looper Modes selection
OFF - Looper Modes disabled
L 1 - Looper transport controls, record / overdub / play
/ stop / undo
L 2 - Looper FX controls, reverse / half speed
L 3 - Looper Volume controls, looper pre / post
devD - Looper mode is disabled, and MIDI scrolling
mode D is activated
LSTP - Looper Mode stop configuration
STOP - looper stops as soon as play / stop button is
pressed
PLAY - looper retriggers when play button is pressed,
stops when button is held
EXP - Expression Pedal input (black jack) configuration
OFF - disable expression pedal input jack
EXPR - expression pedal
LPLV - looper volume level
SPLT - split expression, sends looper volume level in
looper modes and expression in all others
TAP - tap tempo footswitch input
LATC - latching freeze / hold footswitch input
FAVE - favorite preset load / save footswitch input
BANK - advance to the previous mode
E CH -Expression Pedal input channel selection
A B C Expression Pedal enable / disable
If the location shows as zero, the controller will not
transmit expression or looper level on that channel
If all three locations show as zero, no expression will
be sent
JACK -MultiJack input (red jack) configuration
OFF - MultiJack disabled
EXPR - MultiJack functions as Expression pedal input
TAP - MultiJack functions as tap tempo footswitch
input
OUT - MultiJack functions as tap tempo output,
connects to external devices to send tap tempo or clock
signals
MIDI - MultiJack functions as second MIDI output
jack using TRS to MIDI cable
J CH - MultiJack channel selection
A B C MultiJack enable / disable
If the location shows as zero, the controller will not
transmit expression or MIDI on that channel
If all three locations show as zero and the MultiJack is
set to EXPR, no expression will be sent
If all three locations show as zero and the MultiJack is
set to MIDI, all channels will be active but MIDI clock will not
be sent
ROLL - Optional side roller configuration
OFF - disable expression roller, this should be
selected if no roller is installed
EXPR - expression pedal
LPLV - looper volume level
SPLT - split expression, sends looper volume level in
looper modes and expression in all others
R CH - Optional side roller channel selection
A B C Side Roller enable / disable
If the location shows as zero, the controller will not
transmit expression or looper level on that channel
If all three locations show as zero, no expression will
be sent
(continues)
Disaster Area Designs DMC-3XL / DMC-4 Gen3 Beta

of 612
(continued)
4BTN - Button 4 configuration (DMC-4 only)
OFF - Button 4 is disabled, this should be selected if
using a DMC-3XL
TAP - Button 4 functions as tap tempo footswitch
LATC - Button 4 functions as latching freeze / hold
footswitch
FAVE - Button 4 loads and saves the Favorite preset
TUNE - Button 4 activates the tuner on supported
devices
BANK - Button 4 advances to the previous mode
4 CH - Button 4 channel selection
A B C Button 4 enable / disable
If the location shows as zero, the controller will not
transmit commands on that channel
If all three locations show as zero, the controller will
send no commands when Button 4 is pressed
EDSP - Expression Pedal Display
d ON - Changes to the expression pedal, side roller,
and MultiJack will be shown on the display briefly.
Expression Pedal will be prefixed with "E,"
Roller with "R," and MultiJack with “J."
d OFF - no expression values will be displayed
CLK - Tap and Clock mode configuration
Refer to Section 9 for more details
t OFF - Tap and Clock modes are disabled.
t TAP - TAP TEMPO mode.
t CLK - PRESET CLOCK mode.
t TC - GLOBAL CLOCK mode.
T CH - Tap Tempo channel selection
A B C Expression Pedal enable / disable
If the location shows as zero, the controller will not
transmit tap tempo commands to that channel from the Tap
and Clock mode.
TPOL - Tap Tempo Output configuration - only applicable
if MultiJack is set to OUT
t NO - Tap Tempo Output will activate as a Normally
Open switch, used by most manufacturers for Tap Tempo.
t NC - Tap Tempo Output will activate as a Normally
Closed switch, used by Boss for Tap Tempo.
T DP - Tap and Clock Decimal Point configuration
0.5 - Clock may be set in 0.5 bpm increments
1.0 - Clock may be set in 1.0 bpm increments
DBRT - Display Brightness setting
0 - 9 - Sets display and LED brightness
InCH - MIDI input receive channel
1-16 - Sets channel that the DMC will use to
respond to incoming MIDI commands
ccCh - CC mode channel selection
A B C channel enable / disable. If the location shows
as zero, the CC mode will be disabled.
CC L - CC mode left button type
CV L - CC mode left button value
CC R - CC mode right button type
CV R - CC mode right button value
FACT - Factory Reset
Tap left or right button until RSET is displayed, then tap
mode button to reset.
All configuration options and presets will be reset to
default values!
5. Connecting and Setting Up Your MIDI Devices - READ THIS SECTION.
The DMC Gen3 can control up to four MIDI devices, and we’ve built in support for the most popular MIDI devices on the market. Even
with our full support, many devices will need to be configured in order to accept messages and act in the way we want.
Each device controlled by the DMC Gen3 must be set to its own MIDI channel. The first step in connecting your MIDI devices is
deciding which order they should be arranged in. Once you have decided the device order, set each device to receive on the correct
channel. The A device is controlled using messages on MIDI channel 1, B is channel 2, etc.
General MIDI is our “catch-all” for devices that we don’t specifically support. We can send these devices a limited set of commands for
basic control. Set your device to receive messages on MIDI channel 1, 2, 3, or 4 for A, B, C, or D - consult your device manual for
instructions on setting its MIDI channel. We don’t have every MIDI device out there, so we might not be able to help you set it up.
Strymon devices need to be configured correctly in order to pass incoming data through to the next device in line. They also need to be
set up in order to maintain bypass “trails” and to use the Timeline looper.
Strymon Timeline: Enter the Globals menu and configure as follows:
MIDITH ON MIDIPA OFF
MIDICT OFF MIDICH 1, 2, 3, or 4 (A, B, C, D device)
MIDICL ON MC SWP OFF
LPEXIT PLAY BYPASS BUFBYP
Disaster Area Designs DMC-3XL / DMC-4 Gen3 Beta

of 712
Strymon Mobius and BigSky: Enter the Globals menu and configure as follows:
MIDITH ON MIDIPA OFF
MIDICT OFF MIDICH 1, 2, 3, 4 (A, B, C, D device)
BYPASS BUFBYP (recommended for BigSky, optional for Mobius)
MIDICL ON Mobius, OFF BigSky
Eventide devices have a robust MIDI mapping capability, but none of their functions are set from the factory. In order for these devices
to recognize the commands we send, a few parameters must be set in their MIDI menus.
If using H9 Control, navigate to Pedal -> MIDI Settings -> MIDI Channel
Set MIDI Receive Channel to 1, 2, 3, or 4 for device A, B, C, D
Navigate to Pedal -> MIDI Settings -> Assign MIDI CC Messages.
Map Tap Tempo to MIDI CC 44
Map Performance Switch to MIDI CC 46
Map Toggle Tuner to MIDI CC 69
Map Activate to MIDI CC 42
Map Set Expression Pedal Value to CC 48
If using the MIDI menu on the device itself:
Navigate to RCV CHANNEL and set to 1, 2, 3, or 4 for device A, B, C, or D
Navigate to the RCV CTL menu and set the following
TAP C42
HOTSW C46
ACTIVE C42
PEDAL C48
Line 6 devices must have their MIDI channel assignments set to 1, 2, 3 or 4 for device A-D. Autosave should be set to OFF in order to
prevent the devices from over-writing their bypass states.
Chase Bliss devices must be set to receive on the correct channel in order to operate with the DMC Gen3:
Set up the desired device A, B, C, or D to Chase Bliss / CBA in the Setup Menu, and set the Scrolling Mode for that device to
active.
Save the settings and boot the DMC normally.
Advance the DMC to the scrolling mode for the device you wish to use.
Engage the scrolling mode by holding down the mode button until the A, B, C, or LPR LED lights.
Connect the Chase Bliss pedal or pedals to the MIDI chain using the Chase Bliss modified MIDIBox using a standard MIDI
cable and TRS cable. Make sure that the MIDIBox is receiving power.
Power on the Chase Bliss pedal while holding its TAP and BYPASS footswitches down.
Tap the right footswitch on the DMC to send a program change message to the Chase Bliss pedal. The CBA pedal should
now respond to program change, bypass, and tap messages correctly.
If you are connecting to a Disaster Area DPC-8EZ, SMARTClock, or SMARTLoop, the DMC Gen3 can automatically set them to the
correct MIDI channel. Follow the instructions in the DPC or SMARTPedal manual concerning AutoConfig.
If you are connecting to one of the above Disaster Area devices please note that the DMC Gen3 sends a large number of MIDI
messages especially when the Preset and Global Clock modes are active. We recommend you connect the DPC and SMARTPedals
last in the MIDI chain, or that you use a TRS to MIDI cable from the MultiJack. If using the MultiJack, we recommend you set the Jack
Channel to J000, which will filter out MIDI clock messages and prevent them being sent to DPC or SMARTPedals.
If you are connecting to a Disaster Area SMARTClock, set the SMARTClock CHAN to 16 in its setup menu and disable the Preset and
Global Clock modes on the DMC Gen3. If the Tap Tempo mode is enabled, you can tap tempos to the SMARTClock from the DMC
Gen3.
Disaster Area Designs DMC-3XL / DMC-4 Gen3 Beta

of 812
6. Preset Mode
The DMC Gen3 Preset Mode lets the player change sounds and statuses on all connected devices simultaneously during performance.
Each connected device program number and bypass state is saved as part of a preset, as is the MIDI clock and clock subdivision
setting if the Clock mode is enabled.
Preset Mode Controls:
Tap the left button to move down one preset.
Hold the left button to enter or exit “Search.”
Tap the right button to move up one preset.
Hold the right button to enter Preset Bypass and load Preset 0.
Tap the mode button to step to the next available mode.
Hold the mode button to enter the Save dialog.
Hold the mode button while in the Save dialog to save in the selected preset location.
Tap the mode button while in the Save dialog to cancel the save.
Using Preset Mode:
We get asked about this all the time in reference to the Gen2 controllers, so now that we’re moving to the Gen3 models we really want
to explain it well. If you’re used to the Preset Mode in the Gen2, the Gen3 is exactly the same. If you’re new to our controllers, here’s
how it works:
When you tap on the left or right buttons in Preset Mode, the controller will send messages to any connected devices to tell them what
to do. By default, all your pedals will just move up or down one preset and that’s it. If you want to have them do different things, like
bypass or change to presets out of order, read on.
Search Mode:
If you hold down the left button in Preset Mode, the controller will enter Search Mode and the display will start to blink. While you’re in
Search Mode, you can select any preset on the controller but your devices won’t change until you hold down the left button again. This
is designed to allow you to move through multiple presets without engaging all the ones in between.
Preset Bypass:
If you hold down the right button in Preset Mode, the controller will enter or exit Preset Bypass. If you’re on a preset and you enter
Preset Bypass, the controller will load the contents of Preset 0. By default, this just bypasses all of your connected MIDI devices, but
you can change that by saving a new setting in Preset 0. If you change presets while in Preset Bypass, the controller won’t send any
messages until you exit Preset Bypass.
Editing and Saving Presets:
Any of the DMC Gen3 preset memory locations may be edited by the user.
1. Use the available Scrolling Modes to select your desired programs and bypass states on each effect.
2. Use the Clock Mode (if activated) to enter your desired BPM setting.
3. Return to Preset Mode and hold the Mode button to enter the Save dialog.
4. Tap the left and right buttons to select the location where you would like to save the current settings.
5. Hold the mode button to save OR tap the mode button to cancel.
Favorite Switch:
If the Expression pedal or Hot Switch is set up to be used as a Favorite Switch, it loads an additional preset when pressed. Press it
again to return to the previous preset.
To save the Favorite, select a preset or select programs on your devices using Scrolling Mode, then hold down the Favorite Switch until
the display flashes “SAVE.”
Disaster Area Designs DMC-3XL / DMC-4 Gen3 Beta

of 912
7. Scrolling Modes
The Scrolling Modes are the heart of single-device control on the DMC Gen3. Up to four Scrolling Modes may be enabled, each set to
control a separate device on its own MIDI channel.
Scrolling Mode Controls:
Tap the left button to move down one program / patch on the selected device.
Hold the left button to quickly scroll down.
Tap the right button to move up one program / patch on the selected device.
Hold the right button to quickly scroll up.
Hold the mode button to bypass or engage the selected device. The corresponding LED on the display will light to indicate the bypass
state.
Tap the mode button to move to the next mode.
Some MIDI devices (including General MIDI) do not support a dedicated “bypass” command. For these devices, entering the bypass
state in Scrolling Mode will load the first preset on that device by sending MIDI Program Change 0. It is usually possible to create a
“blank” preset on these devices with the mix or blend control set to zero, or to dial in a “neutral” sound.
8. Looper Control Modes
The DMC Gen3 may function as a remote control for the phrase looper / loop recorder on your MIDI devices. The Strymon Timeline,
Line 6 M9 and M13 have a “background looper,” that is available regardless of which program is active on those units. The Eventide
H9 must be set to a preset with the Looper algorithm activated, and the Boss DD-500 has a dedicated Looper mode that must be
enabled for remote looper control. We recommend against the use of the DMC Gen3 as a looper controller for devices without a
background looper.
Please note that if any of the Looper Control Modes are activated, the fourth (Device D) Scrolling Mode will not be available. Also note
that if multiple devices with looping support are connected, the DMC will send looper control messages to the highest numbered device.
Example: A Strymon Timeline and BigSky are connected as the A and B devices, with the Timeline being used as the looping
device. The user decides to add an Eventide H9 as the C device, causing the DMC to send looper control messages to the H9 since it
is the highest numbered looping device. To remedy this, set the H9 up as the A device with the Timeline as the B device. The BigSky
may safely be left as the C device since it does not have looper support.
Available Looper Control Modes:
L1: Looper Transport Mode.
Tap the left button while stopped to start recording - the display will show “REC.”
Tap the left button while recording or playing to set the loop length and overdub - display shows “DUB.”
The right button behavior is determined by the Setup Menu.
If Looper Play is set to “PLAY” in the Setup Menu, tap the right button to:
If the loop is playing, the looper will retrigger the loop.
If the loop is stopped, the looper will play the loop.
If the loop is recording, the looper will set the loop length and play the loop.
If the loop is overdubbing, the looper will stop overdubbing.
Hold the right button to STOP the loop.
If Looper Play is set to “STOP” in the Setup Menu:
If the loop is playing, the looper will stop.
If the loop is recording or overdubbing, the looper will play.
Hold the mode button to send the UNDO command to the looper. Hold again to send the REDO command. Please
note that all looping devices interpret the UNDO and REDO commands in different ways. Consult the documentation for your looping
device to learn how your UNDO functions.
L2: Looper FX Mode
Tap the left button to REVERSE the loop playback.
Tap the right button to set the loop playback speed to HALF
Disaster Area Designs DMC-3XL / DMC-4 Gen3 Beta

of 10 12
Hold the center button to toggle the looper position between PRE and POST. Consult your looper documentation to
learn how your PRE / POST function operates.
L3: Looper Volume Mode
Tap or hold the left button to decrease the looper volume.
Tap or hold the right button to increase the looper volume.
9. Tap and Clock Mode
The DMC Gen3 now supports a full-featured tap tempo and MIDI clock controller, integrated with the Preset Mode.
Enabling Tap and Clock Modes allows the DMC Gen3 to send MIDI clock signals to connected devices, as well as to optionally send
taps using MIDI CC messages and / or analog taps from the MultiJack.
In the Setup Menu, there are four options for Tap and Clock Mode, each with different levels of functionality so that the user can decide
the type of tempo control.
* MultiJack will only send Tap Tempo if it has been set to OUT in the Setup Menu.
Controls:
Mode
Left Button
Right Button
Center Button (hold)
t OFF
Not available
Not available
Not available
t TAP (TAP TEMPO)
Tap Tempo
Tap Tempo
Not Available
t CLK (PRESET MIDI CLOCK)
Decrease BPM by 0.5
or 1
Increase BPM by 0.5 or 1
Change Subdivision
(quarter / dot 8th / 8th / tripl)
t TC (GLOBAL MIDI CLOCK)
Start / Stop MIDI clock
Tap Tempo
Change Subdivision
(quarter / dot 8th / 8th / tripl)
Disaster Area Designs DMC-3XL / DMC-4 Gen3 Beta
Setup
Menu
Option
Description
How is the tempo set?
What kind of
messages does the
controller send?
Does the
BPM change
with each
preset?
t OFF
Clock mode is disabled
Tap tempo inputs (EXP,
MULTI, 4th button)
MIDI CC messages
Tap out from MULTI*
No
t TAP
Clock mode is set to
TAP TEMPO
Tap the controller in TAP
mode.
Tap tempo inputs (EXP,
MULTI, 4th button)
MIDI CC messages
Tap out from MULTI*
No
t CLK
Clock mode is set to
PRESET MIDI CLOCK
Tap tempo inputs (EXP,
MULTI, 4th button)
Set BPM directly on the
controller (scroll left and right
to decrease / increase BPM)
MIDI Clock
Tap out from MULTI*
Yes
t TC
Clock mode is set to
GLOBAL MIDI CLOCK
Tap the controller in TAP
mode.
Tap tempo inputs (EXP,
MULTI, 4th button)
MIDI Clock
Tap out from MULTI*
No

of 11 12
Note that if Preset or Global MIDI clock is enabled, the clock messages will be sent to all MIDI devices. Whether the devices react to or
follow the clock signal is dependent on the devices themselves. Most devices support a way to ignore MIDI clock, consult your device
manual for more details.
Tap Tempo commands are sent out to the channels selected in the relevant menu. If you are tapping from the MultiJack for example,
the J CH menu determines which devices receive taps. If you are using the Tap and Clock mode, select the devices using the T CH
menu option.
10. CC Mode (new in v1.01) ADVANCED USERS ONLY!
CC mode is our way of giving the user ultimate control. With CC mode, the player can send any MIDI CC value in a variety of
configurations on either the left or right buttons. The applications for this mode are almost limitless, but setting it up is simple.
Enter the Setup mode on the DMC Gen3 and select the “ccCH” item. Enable this for the A, B, or C channels as desired - the Gen3 will
send the same command to any active channels regardless of whether they are enabled in scrolling mode or for any other setup items.
Next, set the CC L and / or CC R items for the type of command desired.
ONE - Sends the desired CC command with a value of 127 once each time the button is pressed.
Example: Tap tempo
TOGG - Sends the desired CC command with an alternating value from 0 to 127 each time the button is pressed.
Example: Bypass an effect, engage a tuner, toggle “hold” or “freeze” with a latching action.
MOM - Sends the desired CC command with a value of 127 when the button is pressed, sends a second time with value of 0
when the button is released.
Example: Momentary bypass, activate “hold” or “freeze” with a momentary action.
BNK+ - Sends a special sequence of values that will increase the Bank on Strymon devices when pressed, sends the
command to engage the “B” preset when held.
BNK- - Sends a special sequence of values that will decrease the Bank on Strymon devices when pressed, sends the
command to engage the “A” preset when held.
NOTE - Sends a MIDI Note on and Note Off message when the button is pressed. Useful for launching scenes and clips in
Ableton Live.
Once the CC type has been set for the desired button, select the MIDI CC value you wish to send. You may need to consult the
operating manual for your device to determine useful CC messages. Please be aware that while Disaster Area Designs have many of
the more popular MIDI devices in-house for testing purposes, you’re going to be more or less on your own when configuring the CC
mode. This mode is so configurable that you can do almost anything with it, so we can’t help beyond the most basic tasks.
10. Expression Input and Side Roller
The DMC Gen3 is equipped with a dedicated input jack that may be assigned to a variety of control functions. Depending on the
configuration of the Expression Input, either an expression pedal using a 10k-100k potentiometer or a momentary normally-open
footswitch may be connected. If an expression pedal is used, the connection should be made with a tip-ring-sleeve / TRS / stereo
cable. Tip = 0-3.3V, Ring = 3.3V, Sleeve = GND.
The DMC Gen3 may also be equipped with a side roller potentiometer as a factory option. In previous versions of the DMC series, the
side roller shared an input channel with the external expression input and the two could not be used simultaneously. The Gen3
improves upon this arrangement by assigning each input its own dedicated channel, and each may be assigned separately to any
combination of destinations.
To review the Expression Input or Side Roller options please consult the EXP and ROLL options in the Setup Menu. Note that the E CH
and R CH menu options determine which MIDI channels each input will use for sending messages.
Example: The user has connected a Strymon Timeline (B) and Mobius (A.) The user wishes to have the side roller control the looper
volume level for the Timeline and for the expression input to control the expression parameters for both Timeline and Mobius.
The menu options should therefore be set to EXP = EXPR, E CH = AB0, ROLL = LPR, R CH = 0B0. This sets the expression input to
expression and allows it to send to the A and B devices, and the roller to send looper level for the B device only.
Disaster Area Designs DMC-3XL / DMC-4 Gen3 Beta

of 12 12
11. MultiJack
The MultiJack is pure magic. How else would you describe a single connector that can act as an expression pedal input, remote
footswitch input, tap tempo output, or even as a dedicated MIDI output? Magic, we say.
Inside the DMC Gen3 is a bank of three DIP switches. These switches allow the tap tempo output to be fully isolated and floating, to
prevent possible ground loops with your pedals. Switch all three to OFF if you plan to use the MultiJack to send taps to your other
pedals, leave them ON if you will use the MultiJack as an expression, footswitch, or MIDI connection.
The Setup Menu JACK and J CH options cover the assignment of the MultiJack. Please note that the MultiJack will only send MIDI
messages on the channels enabled in the J CH setting.
The connections for expression pedal and tap footswitch are the same as for the Expression Input, above.
If you’re using the MultiJack as a MIDI output, you’ll need the Disaster Area TRS to MIDI cable to make it work.
The J CH setting is a bit different for the MIDI output mode of the MultiJack: Any device whose letter is shown will receive MIDI from
the MultiJack, and any device whose letter is replaced by a zero (0) will not be sent MIDI. If all three devices are shown as zeroes
(000,) all three devices will be sent MIDI messages but MIDI Clock will be filtered out. This may be useful for certain devices which do
not tolerate MIDI clock messages.
12. Hot Switch
The DMC-4 adds a configurable extra button that may be programmed to suit a variety of uses.
OFF - Button 4 is disabled, this should be selected if using a DMC-3XL
TAP - Button 4 functions as tap tempo footswitch
LATC - Button 4 functions as latching freeze / hold footswitch
FAVE - Button 4 loads and saves the Favorite preset
TUNE - Button 4 activates the tuner on supported devices
The Setup Menu 4 and 4 CH options cover the assignment of the Hot Switch. As with the Expression input and MultiJack, the Hot
Switch will only send messages to the channel(s) configured in the 4 CH option.
Disaster Area Designs DMC-3XL / DMC-4 Gen3 Beta
Other manuals for DMC-3XL Gen3
1
This manual suits for next models
1
Table of contents
Other Disaster Area Design Recording Equipment manuals


