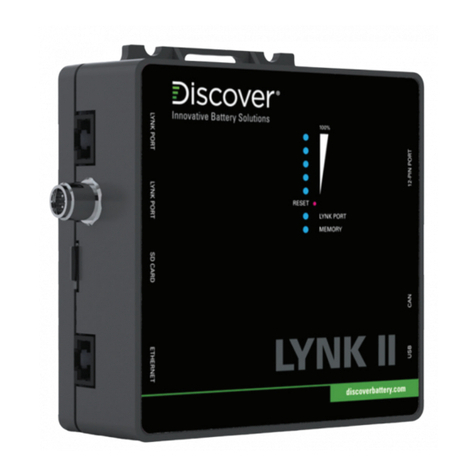
DISCOVER LYNK II User manual

1805-0053 REV A
(950-0025)
MORNINGSTAR
MANUAL
READ AND SAVETHESE INSTRUCTIONS

2
INTRODUCTION ........................................................................3
1.
AUDIENCE, WARNINGS, MESSAGES, GENERAL SAFETY, PERSONAL PROTECTIVE EQUIPMENT
...3
1.1 Audience.................................................................3
1.2 Warning, Caution, Notice, and Note Messages..................................3
1.3 General Warnings .........................................................4
1.4 Safe Handling Procedures...................................................4
1.5 Personal Protective Equipment. . . . . . . . . . . . . . . . . . . . . . . . . . . . . . . . . . . . . . . . . . . . . . .5
2. DOCUMENTATION...................................................................5
3. OVERVIEW .........................................................................6
3.1 System Overview..........................................................6
3.2 Compatibility .............................................................7
3.3 Minimum Battery System Capacity ...........................................8
4. CAN HARDWARE TERMINATION AND CAN OUT PIN CONFIGURATION.....................9
4.1 LYNK II CANTermination ....................................................9
4.2 LYNK II CAN Out - RJ45 Pin Assignments for Morningstar Integration..............10
5. INSTALLING AND CONNECTING LYNK II TO THE MORNINGSTAR NETWORK............... 11
5.1 Networking Discover Lithium Batteries with LYNK II ............................11
5.2 Connecting LYNK II to the Morningstar Network ...............................12
6. ENABLING LYNK II TO COMMUNICATE WITH MORNINGSTAR DEVICES ................... 14
6.1 Setting Morningstar as the LYNK II Communication Protocol .....................14
7. GENSTAR MPPT CONFIGURATION SETTINGS.......................................... 15
7.1 Commissioning the GenStar MPPT ..........................................15
7.2 Setting up from the Meter Interface ..........................................15
7.3 Setting up from the LiveView Web Interface ...................................16
7.4 Verifying the Connection...................................................19
7.5 Open-Loop Configuration ..................................................20

3
INTRODUCTION
This Application Note provides information about integrating LYNK and AEbus
network-enabled Discover Lithium Batteries using the LYNK II Communication
Gateway with Morningstar power conversion devices.
1. AUDIENCE, WARNINGS, MESSAGES, GENERAL SAFETY, PERSONAL
PROTECTIVE EQUIPMENT
1.1 Audience
Configuration, installations, service, and operating tasks should only be performed
by qualified personnel in consultation with local authorities having jurisdiction
and authorized dealers. Qualified personnel should have training, knowledge, and
experience in the:
• Installation of electrical equipment
• Application of electrical codes, safety, and installation standards
• Analysis and reduction of hazards involved in performing electrical work
• Installation and configuration of batteries
• Installation and configuration of systems activated by relays
1.2 Warning, Caution, Notice, and Note Messages
Messages in this manual are formatted according to this structure.
Additional information concerning important procedures and features of
the product. Read all the instructions before installation, operation, and
maintenance.
Important information regarding hazardous conditions.
WARNING
Important information regarding hazardous conditions that may result in personal
injury or death.
CAUTION
Important information regarding hazardous conditions that may result in personal
injury.
NOTICE
Important information regarding conditions that may damage the equipment but
not result in personal injury.
NOTE
Ad hoc information concerning important procedures and features unrelated to
personal injury or equipment damage.

4
1.3 General Warnings
WARNING
ELECTRIC SHOCK AND FIRE HAZARD
• This equipment must only be installed as specified.
• Do not disassemble or modify the battery.
• If the battery case has been damaged, do not touch exposed contents.
• There are no user-serviceable parts inside.
Failure to follow these instructions may result in death or serious injury.
WARNING
ELECTRIC SHOCK AND FIRE HAZARD
Do not lay tools or other metal parts on the battery or across the terminals.
Failure to follow these instructions may result in death or serious injury.
CAUTION
ELECTRIC SHOCK
• Do not touch the energized surfaces of any electrical component in the battery
system.
• Before servicing the battery, follow all procedures to fully de-energize the battery
system.
• Follow the “Safe Handling Procedures” below when working with the battery.
Failure to follow these instructions may result in injury.
1.4 Safe Handling Procedures
Before using the battery and any power electronics, read all instructions and
cautionary markings on all components and appropriate sections of their manuals.
• Use personal protective equipment when working with batteries.
• Do not dispose of the battery in a fire.
• Promptly dispose of or recycle used batteries following local regulations.
• Do not disassemble, open, crush, bend, deform, puncture, or shred.
• Do not modify, re-manufacture, or attempt to insert foreign objects into the
battery, immerse or expose the battery to water or other liquids, fire, explosion,
or other hazards. If the user suspects damage to the battery module due to water,
heat, or other reason, take it to a service center for inspection.
• Only use the battery for the system for which it is specified.
• Do not lift or carry the battery while in operation.
• When lifting a heavy battery, follow the appropriate standards.
• Only lift, move, or mount following local regulations.
• Take care when handling battery terminals and cabling.
• Only use the battery with a charging system that meets specifications. Using a
battery or charger that does not meet specifications may present a risk of fire,
explosion, leakage, or other hazards.

5
• Do not short-circuit a battery or allow metallic conductive objects to contact
battery terminals.
• Replace the battery only with another battery that has been qualified for the
system. Using an unqualified battery may present a risk of fire, explosion,
leakage, or other hazards.
• Do not drop the device or battery. If the device or battery is dropped, especially
on a hard surface, and the user suspects damage, take it to a service center for
inspection.
1.5 Personal Protective Equipment
When handling or working near a battery:
• Use Personal Protective Equipment, including clothing, glasses, insulated gloves,
and boots.
• Do not wear rings, watches, bracelets, or necklaces.
2. DOCUMENTATION
This Application Note provides information about integrating LYNK and AEbus
network-enabled Discover Lithium Batteries using the LYNK II Communication
Gateway with Morningstar power conversion devices.
Before installation and configuration, consult the relevant product documentation,
including Manuals, Application Notes, and Installation and Configuration Guides.
Morningstar Documentation
Visit https://www.morningstarcorp.com for the most recent version of published
documents.
Discover Energy Systems Documentation
Visit https://www.discoverlithium.com for the most recent version of published
documents, including Discover Lithium battery user manuals and the LYNK II
Installation and Operation Manual (805-0033).

6
3. OVERVIEW
This manual provides general settings and is not a comprehensive guide to the
programming and configuration of a specific installation. An installation may have
unique conditions or use cases that require modification or adaptations. Installers
must be capable of reviewing and adapting to the specifics of an installation and its
specific use case and optimizing settings where needed.
The key steps required to install and configure the LYNK II Communication Gateway
with compatible Discover Lithium batteries and power conversion equipment are as
follows:
• Review and confirm equipment compatibility and correct sizing.
• Configure the LYNK II CAN out pins to match the CAN in pins of the power
conversion equipment.
• Mount the LYNK II, connect the battery communication network to either the
LYNK Port or AEbus Port, and then connect the CAN Out Port to the power
conversion equipment’s communication network.
• Terminate all networks correctly.
• When commissioning the power conversion equipment, select the Discover
Energy Systems battery model and the battery’s LVD-LVR Profile.
• Set the LYNK II using LYNK ACCESS software to the correct protocol to enable
closed-loop communication between the Discover batteries and the power
conversion equipment.
• Set up the closed-loop configuration parameters on the power conversion
equipment.
• Set up user preferences and enable the use case using the power conversion
control system.
3.1 System Overview
The LYNK II Communication Gateway unlocks the full potential of a Discover
Lithium battery by enabling the internal Battery Management System (BMS)
to provide real-time data in a closed-loop configuration to other devices. This
configuration allows hybrid inverter-chargers and solar charge controller systems
to optimize control over the charging process in solar applications. LYNK II also
enables the remote monitoring of Discover Lithium battery SOC and data logging
of multiple sites using the data monitoring services offered by off-grid inverter
systems.
Discover Lithium batteries must be set up to work with power conversion and
monitoring devices in either an open-loop or closed-loop configuration.
In an open-loop configuration, charge and discharge settings are set up manually
through the controller for the power conversion device at the time of installation.
In a closed-loop configuration, the BMS of the Discover Lithium battery sends the
battery status over a network data connection with the power conversion device.
Power conversion devices use the Discover Lithium battery BMS data to fine-tune
the output of their charger as well as deliver other functional controls based on
battery voltage, temperature, and percent State-of-Charge.

7
If communication between the BMS and Morningstar power conversion device is
interrupted, the power conversion device faults after a few seconds and stops the
charging process. If communication between the BMS and the Morningstar power
conversion device is restored, the fault is cleared and charging continues.
NETWORK
TERMINATOR
NETWORK
TERMINATOR
Figure 1. LYNK II communication with GenStar MPPT using a ReadyBMS Module
3.2 Compatibility
LYNK II Communication Gateway is compatible with the following:
Discover Lithium Batteries
To communicate with a LYNK II device, a Discover Energy Systems battery must
have a compatible network port, such as a LYNK Port or AEbus Port.
• AES LiFePO4: 44-24-2800, 44-48-3000, 42-48-6650
• AES PROFESSIONAL: DLP-GC2-12V, DLP-GC2-24V, DLP-GC2-48V
• AES RACKMOUNT: 48-48-5120, 48-48-5120-H
Morningstar Products
GenStar MPPT:
• GS-MPPT-60M-200V
• GS-MPPT-80M-200V
• GS-MPPT-100M-200V

8
3.3 Minimum Battery System Capacity
The Discover Lithium Battery and Morningstar device automatically manages
battery charge and discharge rates. Configure the Discover batteries in the GenStar
MPPT so that the MPPT can resize the charge current to match the batteries to keep
within the operational limit of installed batteries.
For optimal energy usage, battery capacity should accept the maximum charge
current of the system. Derive this value by adding the charge capacities of all the
solar charge controllers in the system.
Morningstar 48V
System
Continuous
Max Amps
DC
(1)
44-48-3000
Minimum per
MPPT
(2)
42-48-6650
Minimum per
MPPT
(3)
DLP-GC2-48V
Minimum per
MPPT
(4)
48-48-5120
Minimum per
MPPT
(5)
GS-MPPT-60M-200V
60 A 2131
GS-MPPT-80M-200V
80 A 2131
GS-MPPT-100M-200V
100 A 2142
(1) Data based on max amps in GenStar MPPT datasheet, Control #MS-003676 01/30/2022.
(2) Discover 44-48-3000 Battery, Max Continuous Charge Current: 57 Adc, as published in Operating
Manual (805-0025 Rev C).
(3) Discover 42-48-6650 Battery, Max Continuous Charge Current: 130 Adc, as published in Operating
Manual For Solar Applications (805-0015 Rev C).
(4) Discover DLP-GC2-48V Battery, Max Charge Current (1 hour): 29 A, as published in AES
PROFESSIONAL Installation and Operation Manual (805-0027 Rev I).
(5) Discover AES RACKMOUNT 48-48-5120 Battery, Max Charge Current (1 hour): 95 A, as published
in AES RACKMOUNT Datasheet (885-0040 Rev D).
Morningstar 24V
System
Continuous Max Amps
DC
(1)
44-24-2800 Minimum
per MPPT
(2)
DLP-GC2-24V
Minimum per MPPT
(3)
GS-MPPT-60M-200V
60 A 2 2
GS-MPPT-80M-200V
80 A 2 2
GS-MPPT-100M-200V
100 A 2 2
(1) Data based on max amps in GenStar MPPT datasheet, Control #MS-003676 01/30/2022.
(2) Discover 44-24-2800 Battery, Max Continuous Charge Current: 57 Adc, as published in Operating
Manual (805-0025 Rev C).
(3) Discover DLP-GC2-24V Battery, Max Charge Current (1 hour): 58 A, as published in AES
PROFESSIONAL Installation and Operation Manual (805-0027 Rev I).
Morningstar 12V System
Continuous Max Amps DC
(1)
DLP-GC2-12V Minimum per
MPPT
(2)
GS-MPPT-60M-200V
60 A 1
GS-MPPT-80M-200V
80 A 1
GS-MPPT-100M-200V
100 A 1
(1) Data based on max amps in GenStar MPPT datasheet, Control #MS-003676 01/30/2022.
(2) Discover DLP-GC2-12V Battery, Max Charge Current (1 hour): 115 A, as published in AES
PROFESSIONAL Installation and Operation Manual (805-0027 Rev I).

9
4. CAN HARDWARE TERMINATION AND CAN OUT PIN CONFIGURATION
4.1 LYNK II CAN Termination
NOTICE
Disconnect power and all LYNK II Communication Gateway connections before
configuring header boards and jumpers.
Jumpers configure termination for the AEbus and LYNK Network and the CAN Out
pin assignments. Follow the LYNK II Installation and Operation Manual (805-0033) to
access and configure the header board with jumpers.
Detailed pin configurations are included in the LYNK II manual and are repeated
here for convenience.
NOTE
The LYNK II Communication Gateway terminates the AEbus and LYNK Network by
default. Do not remove the termination jumper inside the LYNK II Communication
Gateway unless instructed by Discover Energy Systems.

10
4.2 LYNK II CAN Out - RJ45 Pin Assignments for Morningstar Integration
CAN signals (CAN H, CAN L, CAN GND) can be assigned to any pin of the RJ45
connector by adjusting the jumpers on the header board.
CAN Out Header Jumper RJ45 Pin
CAN L H2 - 5-7 5
CAN H H3 - 8-10 4
CAN GND H4 - 2-4 2
8
7
6
5
4
3
2
1
JUMPER
CAN GND
CAN L
CAN H
H1
H2
H3
H4
7
8
7
8
7
8
3
4
4
3
4
3
4
1
2
2
1
2
1
2
5
6
5
6
5
6
5
9
10
9
10
9
10
LOW
HIGH
GROUND
9
10
7
86
31
Figure 2. Morningstar Pin Assignments

11
5. INSTALLING AND CONNECTING LYNK II TO THE MORNINGSTAR
NETWORK
5.1 Networking Discover Lithium Batteries with LYNK II
NOTICE
• Turn OFF all devices before connecting cables.
• Do not plug an AEbus RJ45 network cable or terminator into the 10/100 Ethernet port
of the LYNK II.
• Do not connect a CAT5 cable from the AEbus, LYNK, or Ethernet ports of the LYNK II
to a WAN or MODEM port of a network router.
• Mixing the LYNK Network with other networks may result in equipment malfunction
and damage.
NOTICE
Unless Discover Energy Systems specifies, do not connect power electronics
directly to the LYNK or AEbus network.
Refer to the LYNK II Installation and Operation Manual (805-0033) for instructions
on network layouts, connections, and terminators of compatible Discover Lithium
battery models. Some key points are repeated here for convenience.
• Connect at least one battery to the LYNK Port on the LYNK II.
• A network of batteries will communicate as one battery.
• May connect no more than one network of batteries to the LYNK II.
• Proper system function requires network termination – some batteries and
devices may auto-terminate.
• LYNK II requires power from one of three possible sources (13-90 VDC power
supply, a USB device, or an AEbus/LYNK Port-enabled Discover Lithium battery).
• Discover Lithium batteries must be set to ON to supply power and communicate
with LYNK II.
Figure 3. AES Battery
LYNK II is internally terminated. AES batteries are not internally terminated. When
using LYNK II on an AEbus network, install a terminator opposite the LYNK II at the
far end of the battery network.

12
NOTE
AES LiFePO448 V batteries sold before Jan 1, 2020, will not supply power to LYNK II
using the network cable connection. An external 13-90 VDC power source connected to
the Phoenix 12-pin connector on LYNK II is required for the AES LiFePO4battery listed
below.
• 42-48-6650 with a serial number before DET424820275xxxx
Figure 4. AES PROFESSIONAL
Both LYNK II and AES PROFESSIONAL batteries are internally terminated.
Figure 5. AES RACKMOUNT Battery Module
Both LYNK II and AES RACKMOUNT Battery Modules are internally terminated.
5.2 Connecting LYNK II to the Morningstar Network
Before connecting LYNK II to the Morningstar network, confirm that the CAN out
pins on the LYNK II are configured correctly. Refer to 4. CAN HardwareTermination
and CAN Out Pin Configuration.
1. On the GenStar MPPT’s ReadyBlock rail, install the ReadyBMS module. Refer to
Morningstar documentation for installation instructions.
133.00
90.00
465.90 459.30
497.30
38.00
440.00
482.60
A A
B B
C C
D D
E E
F F
8
8
7
7
6
6
5
5
4
4
3
3
2
2
1
1
DRAWN
CHK'D
APPV'D
MFG
Q.A
UNLESS OTHERWISE SPECIFIED:
DIMENSIONS ARE IN MILLIMETERS
SURFACE FINISH:
TOLERANCES:
LINEAR:
ANGULAR:
FINISH:
DEBURR AND
BREAK SHARP
EDGES
NAME
SIGNATURE
DATE
MATERIAL:
DO NOT SCALE DRAWING
REVISION
TITLE:
DWG NO.
SCALE:1:5
SHEET 1 OF 1
A3
WEIGHT:
0000-Element512100-0428

13
Figure 6. ReadyBMS module
installed to the GenStar MPPT
2. Insert a terminator into one of the RJ45 receptacles of the ReadyBMS module,
and in the other RJ45 receptacle, insert one end of a CAT5 communication cable,
and insert the opposite end of the CAT5 cable into the LYNK II CAN out port.
Figure 7. ReadyBMS RJ45 ports
NOTICE
• Only one LYNK Gateway device can be connected to the Morningstar network.
• The LYNK II CAN Out is internally terminated. No other termination is required for
LYNK II.

14
6. ENABLING LYNK II TO COMMUNICATE WITH MORNINGSTAR
DEVICES
When properly connected to a closed-loop network and set to use the Morningstar
protocol, LYNK II will transmit real-time parameters from the Discover Lithium
battery, including voltage, current, temperature, state of charge, and fault conditions
to the Morningstar power conversion device. LYNK II will also transmit charge
voltage and current requests from the Discover Lithium battery to Morningstar
devices.
LYNK ACCESS software for 64-bit Windows 10 is required to configure LYNK II
settings for closed-loop communication with devices on a Morningstar network.
Use Morningstar Live View 2.0 to configure the Morningstar power conversion
devices.
If communication between LYNK II and the Morningstar power conversion device
is lost for a few seconds, the Morningstar device shows the fault status on its LED,
displays a fault number, and stops. The Morningstar power conversion device
automatically continues its operation once communication with the LYNK II is re-
established.
6.1 Setting Morningstar as the LYNK II Communication Protocol
The Protocol Configuration Procedure
1. Download the current version of LYNK ACCESS software from the Discover
Energy Systems website (discoverlithium.com) to obtain the most up-to-date
suite of available protocol configurations.
2. Connect the 64-bit Windows 10 device running LYNK ACCESS software to the
USB port on LYNK II using a USB cable with a Type-B mini-plug. Ensure LYNK II
is powered and connected to the correct end of the Morningstar network.
3. Open LYNK ACCESS and select the LYNK tab. Select the blue gear icon in the
upper right area of the CAN Settings tile.
4. In the CAN Settings window, select the pre-configured Morningstar protocol
from the Closed Loop Protocol drop-down list to complete the closed-loop
configuration for LYNK II. Click Save to confirm the configuration.
5. Set up the LYNK II jumpers to specify the CANopen communication port pins.
Refer to 4.2 LYNK II CAN Out - RJ45 Pin Assignments for Morningstar Integration.
NOTICE
Saving configuration changes using LYNK ACCESS will cause the LYNK II to
automatically shut down and restart.

15
7. GENSTAR MPPT CONFIGURATION SETTINGS
7.1 Commissioning the GenStar MPPT
The following setup prepares the GenStar MPPT for operation or further
programming. Initial commissioning, including specifying the battery, is only
possible from the meter interface.
1. Connect the batteries to the GenStar MPPT through the LYNK II as per Figure 1.
LYNK II with GenStar MPPT using a ReadyBMS Module.
2. Switch on the battery to power the MPPT controller.
The Morningstar logo appears on the controller’s Meter interface and displays
the hardware and software versions. Press the arrows to navigate the menus.
3. Select and confirm the display language.
4. Next, enable or disable Ethernet Writes to control remote write operations over
Ethernet, as required by the application.
5. Select the System Voltage (12V, 24V, or 48V) to match the batteries used by the
application.
6. Set the UTCTime (UniversalTime)
• Set the LocalTime Offset for the time zone.
7. With the ReadyBMS module installed on the GenStar MPPT, select Ye s for the
Closed Loop BMS.
8. For the BMS BatteryType, select Discover.
9. Set the Battery Load Profile (low voltage disconnect / reconnect) for the
MPPT controller. Set the value in brackets if the application requires a larger
contingency reserve on the battery.
• 12 V / 13.2 V (12.5 / 13.15 V)
• 24 V / 26.2 V (25 / 26.3 V)
• 48 V / 52.8 (50 V / 52.6 V)
Consider the self consumption of equipment in the system when setting the
Battery Load Profile.
10. Reboot the MPPT and start using it with the batteries.
NOTE
Rebooting the MPPT is required to update the MPPT with the edited settings.
7.2 Setting up from the Meter Interface
After the GenStar MPPT is commissioned, use the meter interface to configure
settings that were unavailable during commissioning.
1. After the MPPT is powered up, touch the down arrow to display the Main Menu.
2. Press the arrow buttons to navigate the menus.
3. Main Menu > Setup > Installer Password
Enter the installer password defined in the GenStar Installation, Operation and
Maintenance Manual.

16
4. Main Menu > Installer Setup > Charger > Battery Info > Battery Bank Size > Edit
(Hold)
Confirm the size is correctly set as the Rated Capacity (Ah) of the battery times
the number of batteries. Change the battery bank size if required.
5. Main Menu > Installer Setup > Charger > Battery Profile > Presets
Set the battery profile if required. While you can now begin using the batteries
with the system, further configuration may be required. Refer to 7.3 Setting up
from the LiveView Web Interface.
6. Apply changes, reboot the MPPT, and use it with the batteries.
NOTE
• When editing a value, the property may show "Curr" and "Fact". Curr refers to the
current value and Fact is the factory default value.
For example:
• Curr: 130 Ah
• Fact: 200 Ah
• Rebooting the MPPT is required to update the MPPT with the edited settings.
7.3 Setting up from the LiveView Web Interface
Although the GenStar MPPT cannot be commissioned using LiveView, once
commissioned and connect to the network, use LiveView to configure settings from
a Web interface.
1. After the GenStar MPPT is commissioned, powered ON, and connected to the
network, connect to the power conversion device by typing GenStar’s IP address
into a web browser. (E.g. http://192.168.1.253, find the IP address in Main Menu >
SETTINGS > Network)
The LiveView web interface opens.
Figure 8. LiveView
2. In the Installer Access Password field, enter the installer password defined in the
GenStar Installation, Operation and Maintenance Manual.

17
3. INSTALLER SETUP > Charger > Battery Info > Battery Size
Confirm the size is correctly set as the Rated Capacity (Ah) of the battery times the
number of batteries. Change the battery size if required.
Figure 9. Battery Info
4. INSTALLER SETUP > Load > Low Voltage Disconnect/Reconnect Profile
Select Custom and Voltage only.
On this page you can set various conditions for disconnecting the batteries from
the equipment. Suggested values are shown in the tables below. Set the value in
brackets if the application requires a larger contingency reserve.
Figure 10. Low Voltage Disconnect/Reconnect Profile
48 V 44-48-3000 42-48-6650
DLP-GC2-48V
48-48-5120
Low Voltage Disconnect
48 V (50 V)
Low Voltage Reconnect
52.8 V (52.6)
Load | Compensation
0
LVD/LSoCD WarningTime
1 minute

18
Load HVD
— — — —
Load HVR
— — — —
Low SoC Disconnect
— — — —
Low SoC Reconnect
— — — —
24 V 44-24-2800
DLP-GC2-24V
Low Voltage Disconnect
24 V (25 V)
Low Voltage Reconnect
26.4 V (26.3 V)
Load | Compensation
0
LVD/LSoCD WarningTime
1 minute
Load HVD
— —
Load HVR
— —
Low SoC Disconnect
— —
Low SoC Reconnect
— —
12 V
DLP-GC2-12V
Low Voltage Disconnect 12 V (12.5 V)
Low Voltage Reconnect 13.2 V (13.15 V)
Load | Compensation
0
LVD/LSoCD WarningTime
1 minute
Load HVD
—
Load HVR
—
Low SoC Disconnect
—
Low SoC Reconnect
—
5. INSTALLER SETUP > Charger > SoC LEDTransitions
Available for use with a ReadyBMS module, configure the battery SOC values
that trigger changes in the LED on the GenStar MPPT. This could be useful for
fast troubleshooting of the system.
Figure 11. Battery SoC LED Transition Voltages and SoC Percentages

19
6. Click the Save button.
7. Reboot the MPPT and start using it with the batteries.
NOTE
Rebooting the MPPT is required to update the MPPT with the edited settings.
7.4 Verifying the Connection
Verify the operation of the batteries and the GenStar MPPT with the Morningstar
LiveView web pages.
1. After the GenStar MPPT is configured, powered ON, and connected to the
network, connect to the power conversion device from a computer web browser.
(E.g. http://192.168.1.253, find the IP address in Main Menu > SETTINGS >
Network)
Figure 12. LiveView
2. In the LIVEVIEW tab, confirm the connected charge controller, battery
measurements, and other connected devices.
3. In the SETTINGS tab, review the settings of the charge controller.
4. Additionally, look at the State-of-charge LEDs on the MPPT controller and the
COM Indication LED on the ReadyBMS module. After the MPPT controller starts,
the LEDs should display green or yellow, and the lower LED on the ReadyBMS
module should blink green.
5. If any displays indicate an issue, confirm all the connections (cables and
connectors), confirm LYNK II is configured correctly, and confirm the settings on
the GenStar MPPT.

20
7.5 Open-Loop Configuration
There may be instances when closed-loop communication is not possible, such as
when either the ReadyBMS module or LYNK II Communication Gateway has failed.
Whenever possible, use a closed-loop configuration.
When the only option is to use open loop, follow the steps below to reset the MPPT
controller and commission it to use open-loop charge settings.
Reset MPPT Controller
1. From the onboard meter display of the MPPT controller, touch the down arrow to
display the Main Menu.
2. Press the arrow buttons to navigate to Main Menu > Setup > Installer Password
Enter the installer password defined in the GenStar Installation, Operation and
Maintenance Manual.
3. Commands > Factory Reset
Reset the MPPT controller.
Set Up Open Loop
4. Follow the commissioning steps defined in 7.1 Commissioning the GenStar
MPPT to step 6.
5. Set Closed Loop BMS to No.
6. Set the Battery Charging Profile (low voltage disconnect / reconnect) to 6
LiFePO4-Low.
7. Set the Battery Load Profile. Set the value in brackets if the application requires a
larger contingency reserve on the battery.
• 12 V / 13.2 V (12.5 / 13.15 V)
• 24 V / 26.2 V (25 / 26.3 V)
• 48 V / 52.8 (50 V / 52.6 V)
8. Set RTS Required (RemoteTemperature Sensor) to No.
9. Reboot the MPPT.
Configuration
10. Power up the GenStar MPPT and confirm it's connected to the network.
11. Connect to the power conversion device by typing GenStar’s IP address into
a web browser. (E.g. http://192.168.1.253, find the IP address in Main Menu >
SETTINGS > Network)
The LiveView web interface opens.
12.In the Installer Access Password field, enter the installer password defined in the
GenStar Installation, Operation and Maintenance Manual.
13.INSTALLER SETUP > Charger > Battery Info > Battery Size
Confirm the size is correctly set as the Rated Capacity (Ah) of the battery times the
number of batteries. Change the battery size if required.
14. INSTALLER SETUP > Charger > Battery Charge Settings
Configure the battery charging profile. Select Custom and set the values as
shown in the tables for the battery.
Other manuals for LYNK II
3
This manual suits for next models
1
Table of contents
Other DISCOVER Gateway manuals