DJG Deluxe High Back 65 User manual

Child Restraint and Booster Seat
child restraint 10-30 kg (22-65 lbs) 74-132 cm (29-52 in.)
and over 1 year old
booster seat 18-45 kg (40-100 lbs) 102-132 cm (40-52 in.)
and over 4 years old
4358-6862A (6.15.18)
4358-6862A Deluxe High Back 65 ENG.indd 1-24358-6862A Deluxe High Back 65 ENG.indd 1-2 6/15/18 7:49 PM6/15/18 7:49 PM

©2015 Dorel Juvenile
A. Before You Begin................................Pages 3-7
A-1 Thank You...
A-2 DJG Consumer Relations Contact Information
A-3 Registration and Safety Notices
A-4 Understanding Your Child Restraint
B. Safety Information...........................Pages 8-10
B-1 Vehicle Seating Position
B-2 Installation in Vehicle
B-3 Child Restraint and Booster Seat Use
B-4 Transport Canada Regulations
B-5 Storing Your Child Restraint
C. Basic Use............................................Pages 11-30
C-1 Choosing Position for Your Child
C-2 Preparing Child Restraint to Fit Your Child
C-3 Securing Child in Child Restraint
C-4 Removing Child from Child Restraint
C-5 Removing Harness System
C-6 Removing Seat Pad for Cleaning
C-7 Installing Harness System
C-8 Accessories on Select Models
F. Install Forward Facing...........Pages37-45
D. General Vehicle Installation....Pages 31-35
D-1 Understanding Your Vehicle
D-2 Vehicle Seating Position
D-3 Choosing UAS or Vehicle Belts
D-4 Knowing Your Vehicle Belts
12
G-1 Prepare to Install Booster Seat
G-2 Install Using the Lap and Shoulder Belts
G. Install Booster Seat...............Pages46-48
F-1 Prepare to Install Forward Facing
F-2 Adjust the Tether Strap
F-3 Prepare UAS for Forward Facing Use
F-4 Install Forward Facing With UAS
F-5 Install Forward Facing with Vehicle Belts
Important Information......................Pages 52-54
Replacement Parts Order Form
Warranty
E. Aircraft Installation..................................Page 36
H. Using the Locking Clip................Pages 49-51
4358-6862A Deluxe High Back 65 ENG.indd 3-44358-6862A Deluxe High Back 65 ENG.indd 3-4 6/15/18 7:49 PM6/15/18 7:49 PM

A. Before You Begin
Thank you for choosing this car seat, referred to throughout
this manual as a child restraint and booster seat. Dorel
Juvenile Group, (DJG) is committed to creating convenient,
comfortable, and dependable products for children.
No one can predict if use of a child restraint will prevent injury
or death in a particular crash. However, combined with careful
driving, proper use of a child restraint can lower a child’s risk
of injury or death in most crashes.
Your child’s safety is worth the time it will take to read,
understand and follow the instructions and warnings.
After reading, if you still have questions or concerns with
the child restraint please contact our Consumer Relations
Department.
On the back of the shell there is an expiry date for use of this
child restraint. Do not use this seat after the expiry date.
Dorel Juvenile Group, Inc.
Website: www.djgusa.com
Fax: 1-800-207-8182
Mailing Address: Dorel Juvenile Group, Inc.
Attn: Consumer Relations
P.O. Box 2609
Columbus, IN 47202-2609
Telephone: 1-800-544-1108
8 A.M. to 6 P.M. EST M-TH
8 A.M. to 4:30 P.M. EST FRI
A-1 ThankYou...
34
A-2 DorelJuvenileGroupConsumer
RelationsContactInformation
4359-4117D
Consumer: Just fill in your name,address and email. Please print.
Client: Simplement inscrire votre nom,adresse et courriel. S.V.P. imprimez.
Tear Off and Mail This Part or Register Online
Your Name/Votre nom:
Your Street Address/Votre adresse:
City/Ville: Province Postal Code/Code Postal:
Email Address (optional)/Courriel (optionnel):
Détachez et postez cette partie ou enregistrez en ligne
Date of Purchase/Date d’achat:
Eddie Bauer Deluxe High Back 65
Although child restraints and booster seats are tested,
evaluated, and certified by the manufacturer and tested
by Transport Canada, it is possible that a safety-related
problem may be found. If there is ever a safety issue with
your child restraint, we use registration information to
reach owners.
If you don’t have the card or if your
address changes, you will find the
model number and manufacture
date on the label located on the side
of shell. There are three additional
ways to register your information:
A-3 RegistrationandSafetyNotices
Online: www.djgusa.com/registration/carseat/can
Telephone: 1-800-544-1108
Mail: Send your name, address and your child
restraint’s model number, manufacture
date, and date of purchase:
Dorel Juvenile Canada
2855 Argentia Road, Unit 4
Mississauga, ON L5N 8G6
Attn: Consumer Relations
Please do not send in your registration card if you have
registered your child restraint online.
Eddie Bauer Deluxe High Back 65
Maxi Cosi
For information on safety-related problems, you can also call
Transport Canada’s Road Safety Dept. at: 1-800-333-0371.
Model
Number Line
Code Manufacture
Date
4358-6862A Deluxe High Back 65 ENG.indd 5-64358-6862A Deluxe High Back 65 ENG.indd 5-6 6/15/18 7:49 PM6/15/18 7:49 PM

A. Before You Begin
5
A-4 UnderstandingYourChildRestraint
Front View Harness System Detail
A. Adjustable Headrest
B. Adjustable Shoulder
Belt Positioning Guide
C. Rotating Armrest
D. Vehicle Belt Path for
Booster Seat Use
E. Harness Adjustment
Lever
(under flap)
F. Harness Adjustment
Strap
G. Cup Holder
(on select models)
H.
I.
J.
K.
M.
O.
L.
N.
C.
D.
B.
A.
E.
F. G.
H. Upper Harness Slots
I. Harness Straps
J. Harness Covers
(on select models)
K. Chest Clip
L. Buckle Tongues
M. Buckle
N. Lower Harness
Guides
O. Buckle Strap Slots
6
Pad layout may not be the same as shown. See section C-8 for other possible
accessory options. continued on next page.
4358-6862A Deluxe High Back 65 ENG.indd 7-84358-6862A Deluxe High Back 65 ENG.indd 7-8 6/15/18 7:49 PM6/15/18 7:49 PM

B. Safety Information
8
B-1 VehicleSeatingPosition
Always check vehicle owner’s manual
for child restraint and booster seat use with
side airbags.
For vehicles with no rear seats, check
the vehicle owner’s manual for location and
installation of a child restraint and booster
seat.
B-2 InstallationinVehicle
Check the vehicle belt or UAS belt
before each use. Use only if the belt is
tightened properly and securely.
When unoccupied, the child restraint
must be firmly secured to the vehicle with
a lower universal anchorage system if
available or with a vehicle seat belt and
the tether strap.
When unoccupied, the booster seat must
be firmly secured to the vehicle with the
vehicle’s seat belt only. The lower
universal anchorage system and tether
strap must be stored as described in the
instruction manual.
7
Back View
B. C.
D.
K.
F.
I.
J.
E.
A.
L.
M.
A. UAS* Attachment
for Storage
B. Adjustable Shoulder
Belt Positioning Guide
C. Metal Bar
D. Headrest Adjustment
Handle
E. Forward-Facing Belt
Path
F. UAS* Belt
G. UAS* Adjuster
H. UAS* Hook
I. Instruction Manual
Storage (in kickstand)
J. Kickstand
K. Splitter Plate
L. Tether Strap with
Adjuster and Hook
M. Tether Attachment
for Storage
Failure to read, understand, and follow the
instructions and warnings in this instruction
manual and the warnings on the system could
result in serious injury or death to the child.
Tether Adjuster
Tether Hook
J.
G.
F.
H.
*Universal Anchorage System (UAS) continued on next page.
4358-6862A Deluxe High Back 65 ENG.indd 9-104358-6862A Deluxe High Back 65 ENG.indd 9-10 6/15/18 7:49 PM6/15/18 7:49 PM

910
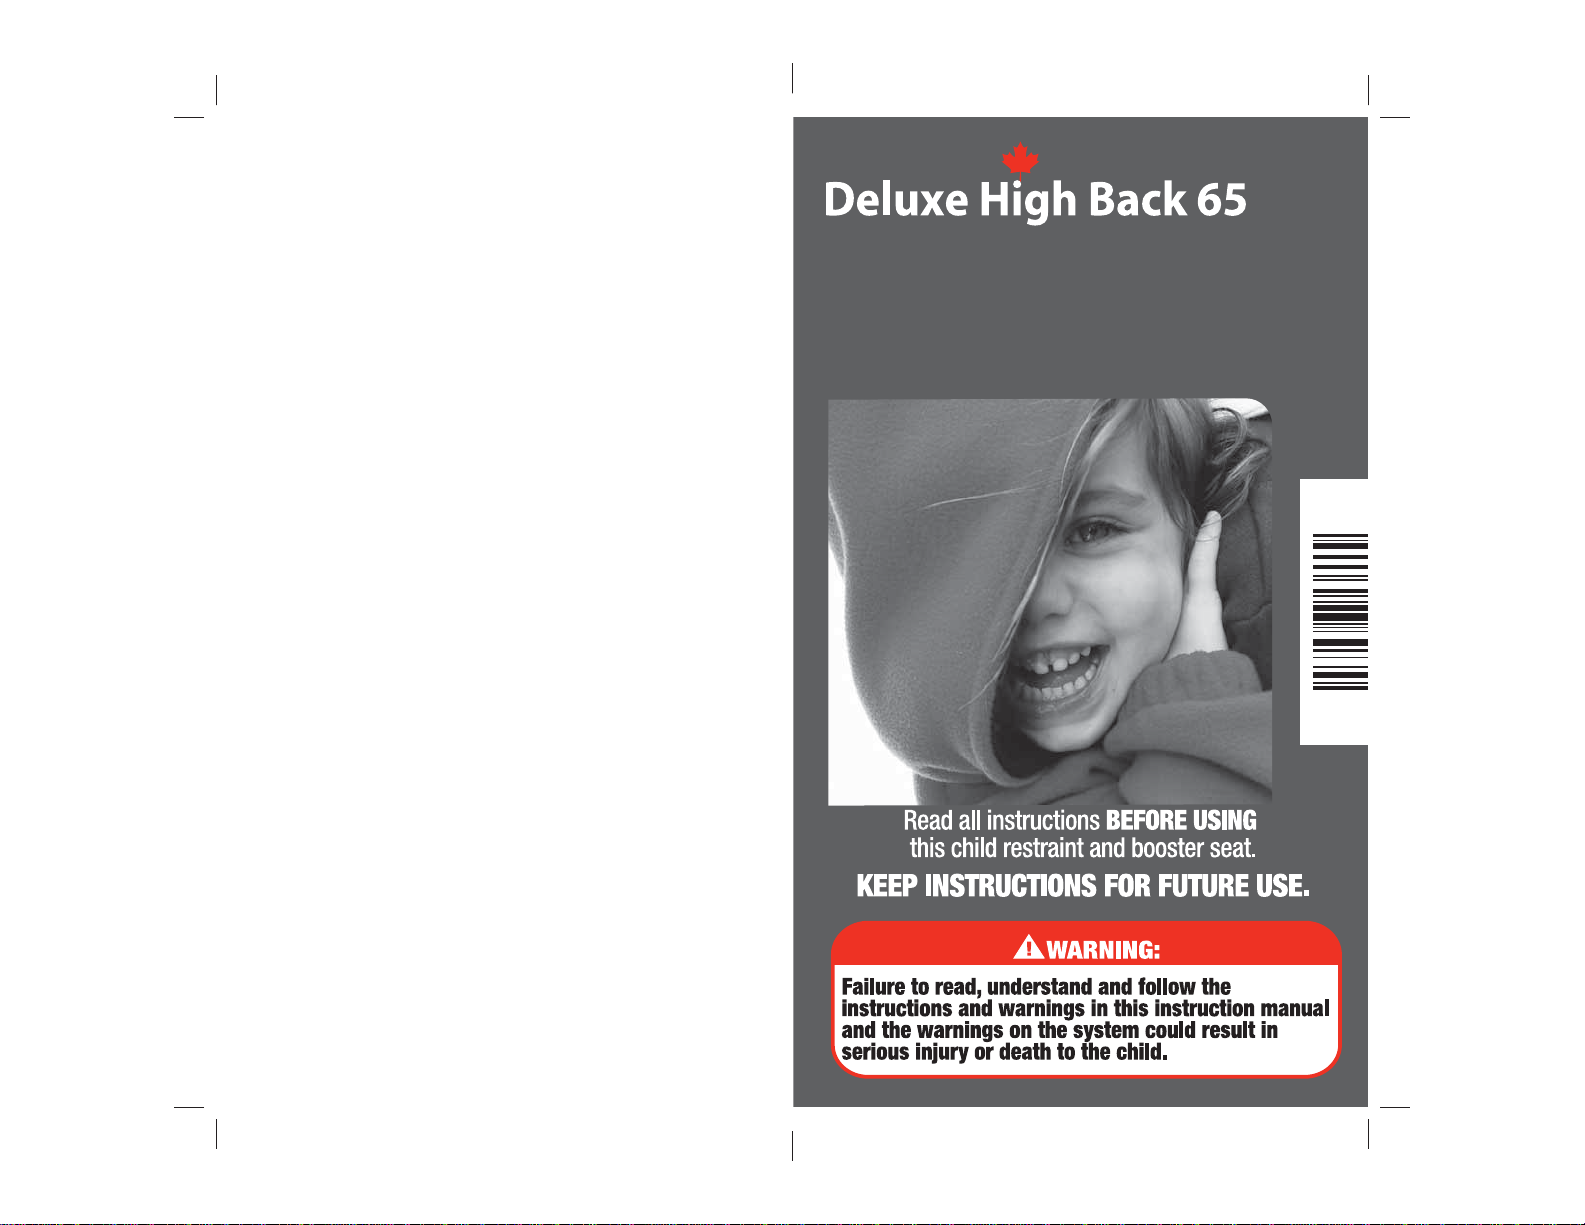
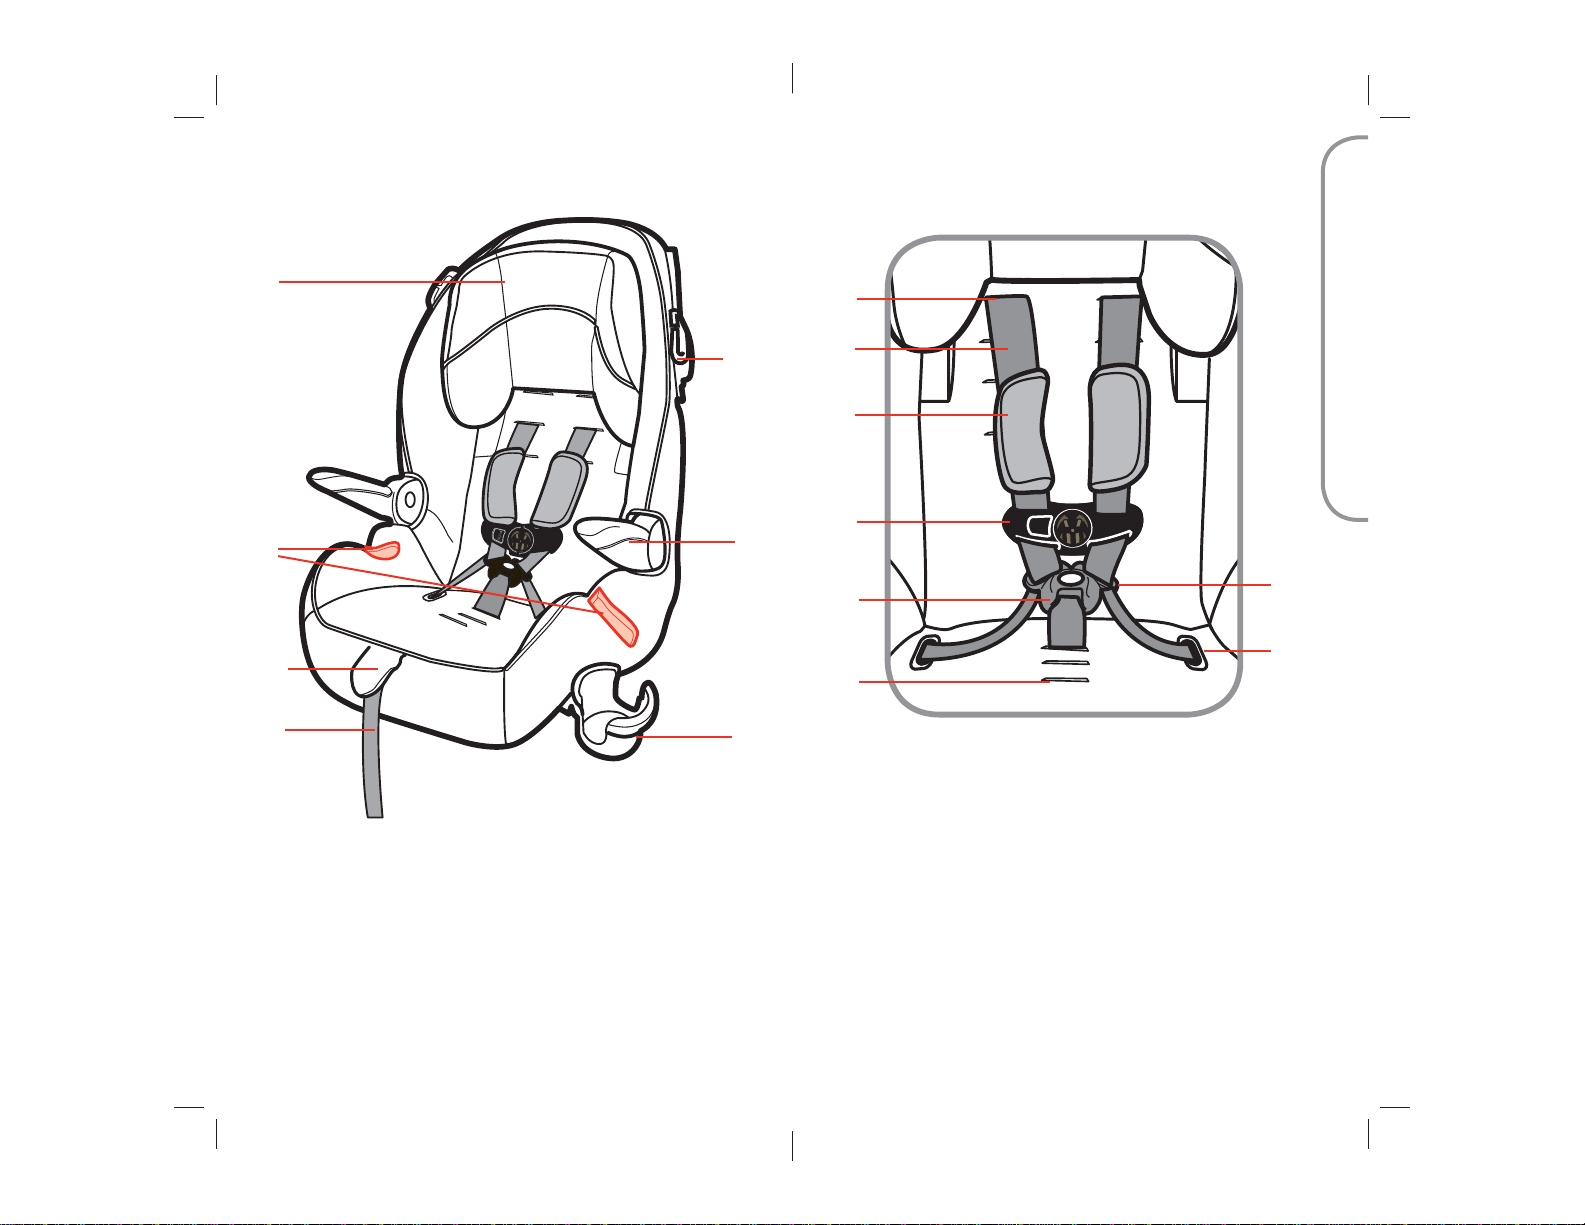
B-3 ChildRestraintandBoosterSeatUse
Do not use a child restraint or booster seat
that has been in a crash or a collision. The
system must be replaced.
Do not use a child restraint or booster seat
if you do not know the history of the
restraint.
Never take your child out of the child
restraint or booster seat or attend to the
child’s needs while the vehicle is moving.
Never leave child unattended in the child
restraint or booster seat.
To avoid the child being seriously burned,
always check for hot seat and buckles before
using this child restraint.
Do not use a child restraint or booster seat
with missing or damaged parts.
Do not lubricate the buckles, harness
system or fasteners for any reason.
In a crash or sudden stop, an unsecured
child restraint or booster seat could injure
the driver or other occupants in the vehicle.
Always check vehicle owner’s manual for
proper use of vehicle seat belts and the
universal anchorage system (UAS) with your
child restraint.
In very few vehicles, the child restraint
and booster seat cannot be properly
installed because of the type of seat belt
system, airbag system and/or lack of
location to anchor the tether strap. Always
read and follow the vehicle owner’s manual
instructions for child restraint use.
DJG does not recommend the use of
accessories or add-ons that have not been
certified with this child restraint or booster
seat at original purchase date.
Never allow any child to play with this
child restraint or booster seat. It is not a
toy.
Do not remove the warning labels.
This child restraint has been certified for
use in passenger vehicles and aircraft. This
booster seat has been certified for use in
passenger vehicles only. Do not use in a
boat, on a motorcycle or in a cargo van or
bus where there are no seat belts or tether
anchors. Do not modify for use as a crib or
a swing. Do not leave on stove top or any
other hot surface.
Read all instructions and warning labels
for additional warnings.
Transport Canada Road Safety Directorate regulates
children’s restraint systems under the Motor Vehicle
Restraint Systems Safety Regulations (RSSR). The
regulations require the manufacturer and/or importer to
certify the child restraint to the applicable safety standards
and place specified warnings and information on the labels
fastened to each child restraint and in this instruction
manual.
B-4 TransportCanadaRegulations
To protect your child restraint, store in the house, not in the
garage or attic. The hot and cold temperatures can harm
the shell and/or the harness system if stored for a long
period of time.
B-5 Storing Your Child Restraint
B. Safety Information
4358-6862A Deluxe High Back 65 ENG.indd 11-124358-6862A Deluxe High Back 65 ENG.indd 11-12 6/15/18 7:49 PM6/15/18 7:49 PM

C. Basic Use
C-1 ChoosingPositionforYourChild
11
Your child’s height, weight, and age determine how your child
restraint or booster seat should be placed in the vehicle and
which restraint should be used.
18-45 kg (40-100 lbs) and
102-1
32
cm (40-52 in.) and
at least 4 years old
Booster Seat using
vehicle lap/shoulder belt
combination
Child and booster seat are
placed in the back seat,
facing the front of the vehicle.
5-point harness is removed.
10-30 kg (22-65 lbs)
and 74-132 cm
(29-52 in.) and
at least 1 year old AND are
able to walk unassisted
Forward-Facing using
5-point harness
Child and child restraint are
placed in the back seat and
face the front of the vehicle.
12
Pull UAS Belt
Packaging Out from
theShell
Remove UAS from any
packaging. Discard the
packaging.
Fold Out Kickstand
Rotate kickstand down
and out.
Kickstand MUST be
folded out in order to
use this seat.
SecureUAS
You MUST attach the
UAS hooks to the UAS
attachments as shown
when not in use.
2.
1.
3.
C-2 PreparingChildRestrainttoFit
YourChild
You MUST make these adjustments with your child before
you install the child restraint in the vehicle.
Verify your child’s weight and height (do not
guess) before choosing the child restraint’s
position.
LoosenHarnessStrap
Push in on the harness
adjustment lever under the
flap.
Pull out on harness strap
just above buckle tongues.
4.
continued on next page.
4358-6862A Deluxe High Back 65 ENG.indd 13-144358-6862A Deluxe High Back 65 ENG.indd 13-14 6/15/18 7:49 PM6/15/18 7:49 PM

C. Basic Use
continued on next page.
ReleaseChestClip
Press on chest clip release
button and pull apart.
5.
Unbuckle Harness
Straps
Press down on the red
buckle release button to
release the buckle tongues.
Place harness straps over
sides of child restraint.
6.
Place Child in Child
Restraint
Place the child’s bottom
and back flat against the
child restraint.
This will allow the harness
straps to be properly
tightened.
7.
13
Check Buckle
Position
Determine which of the
three slots is closest to the
child and will provide a
snug fit.
8.
To Change Buckle
Position
Remove child from child
restraint.
Turn the child restraint over
and locate buckle strap’s
metal retainer.
9.
Rotate the metal retainer,
then insert retainer up
through the shell and pad.
a.
From the front, pull buckle
strap free from shell and
pad.
b.
14
Insert the buckle’s metal
retainer through the
desired slot.
Make sure that the buckle
is facing out.
c.
1
2
3
4358-6862A Deluxe High Back 65 ENG.indd 15-164358-6862A Deluxe High Back 65 ENG.indd 15-16 6/15/18 7:49 PM6/15/18 7:49 PM

C. Basic Use
15
Pull buckle’s metal
retainer completely
through pad and shell.
d.
Pull up on buckle strap to
make sure it is secured.
The buckle must not pull
out.
e.
Failure to place buckle strap’s metal retainer
completely through pad and shell can result
in serious injury or death.
continued on next page.
16
Check Headrest/
HarnessHeight
With child in the child
restraint, check the location
of the upper harness slots.
Follow the guidelines on
next page to determine the
correct headrest/harness
height.
Forward-Facing Position
Upper harness slots must be even
with or just above the shoulders.
If the upper harness slots are below
the child’s shoulders with the headrest
in the highest position and the child
weighs at least 18 kg (40 lbs) and is at least 4 years old, you
must convert the child restraint to a booster seat.
To Change Harness
StrapLocation
With harness system
loosened, from the back,
unhook harness strap loops
from the splitter plate.
From the front of child
restraint, pull harness
straps out of the upper
harness slots.
11.
a.
10. Squeeze the metal
bar against headrest
adjustment handle on the
back of the seat. Move
headrest adjustment
handle up or down to
adjust to proper height.
Release metal bar into
slot to lock. Make sure
metal bar locks into place
securely.
b.
4358-6862A Deluxe High Back 65 ENG.indd 17-184358-6862A Deluxe High Back 65 ENG.indd 17-18 6/15/18 7:49 PM6/15/18 7:49 PM

C. Basic Use
Rethread harness straps
into new upper harness slot
location.
NOTE: DO NOT twist the
harness straps.
c.
17
Thread Harness Strap
OverMetalBar
From the back, pull harness
straps through the back.
Harness straps MUST
go OVER the metal bar,
BETWEEN the metal bar and
plastic headrest adjustment
handle.
Make sure metal
bar is locked into
position. Failure to
do this can result
in serious injury or
death.
Do not use this child restraint
if the midpoint of your child’s
ears are above the top of the
child restraint’s headrest.
Make sure the harness height is correct
for your child’s size.
Incorrect use of the harness system is
the most common mistake people make.
Verify frequently that the harness height
is correct for your child’s size. It is very
important to read, understand and follow
all instructions and warnings.
Failure to follow these steps can result in
serious injury or death.
18
Attach Harness Strapsto
Splitter Plate
From the back of the child
restraint, fit the harness strap
loops onto the splitter plate.
NOTE: Make sure sewn end of the harness strap loops
face towards you. DO NOT twist harness straps or
harness adjustment strap and make sure the harness
straps are COMPLETELY ON the splitter plate.
13.
The chosen harness slot
height and the headrest
position MUST match
locations.
d.
4
4
3
3
2
2
1
1
12.
4358-6862A Deluxe High Back 65 ENG.indd 19-204358-6862A Deluxe High Back 65 ENG.indd 19-20 6/15/18 7:49 PM6/15/18 7:49 PM

C. Basic Use
TightenHarnessStraps
Pull on harness adjustment
strap to tighten harness
snugly.
NOTE: A snug harness
is not loose and lies flat
against the child without
sagging. It does not press on the child’s flesh or push the
child’s body into an unnatural position.
19
C-3 SecuringChildinChildRestraint
Position Harness
Straps Over the
Child’sShoulders
Place the child’s bottom
and back flat against the
child restraint. This will
allow the harness straps to
be properly tightened.
1.
Buckle Harness Straps
Push each buckle tongue
into buckle until you hear
a “click.” Remember to
always pull up on harness
straps to make sure buckle
is locked.
2.
Close Chest Clip
Insert right half of chest
clip into left half and
snap together.
3.
4.
20
Position Chest Clip
Slide chest clip up or down
so that it is at mid-chest
(even with armpits) and
away from the child’s neck.
6.
Failure to fasten and tighten the harness
system correctly may allow the child to
be ejected from the child restraint in a
crash or sudden stop causing serious
injury or death.
Do not mistake comfort for safety.
Harness system must be snugly
adjusted.
Check Harness
Tightness
Try to pinch the harness
straps at the shoulders.
If you can pinch the
harness strap, tighten
more.
If your fingers slip off, the
harness is tight enough.
5.
4358-6862A Deluxe High Back 65 ENG.indd 21-224358-6862A Deluxe High Back 65 ENG.indd 21-22 6/15/18 7:49 PM6/15/18 7:49 PM

C. Basic Use
21
C-4 RemovingChildFromChildRestraint
Loosen Harness Straps
Push in on the harness
adjustment lever under the
flap. Pull out on harness
straps just above buckle
tongues.
1.
ReleaseChestClip
Press on chest clip release
button and pull apart.
2.
Unbuckle Harness
Straps
Press down on the red
buckle release button to
release the buckle tongues.
Place harness straps over
sides of child restraint and
remove the child.
3.
22
Harness system MUST be removed to use this
child restraint as a Booster Seat.
Unhook Harness Straps
from Splitter Plate
Fully loosen harness
straps. Starting in the
back of the child restraint,
unhook harness strap
loops from splitter plate.
1.
Secure Splitter Plate
Pull out on harness
adjustment strap so that
the splitter plate is flush
against the bottom of the
shell.
2.
Remove Harness
Straps
(1) From the front, pull
harness straps through the
upper harness slots and
harness covers.
(2) Unthread harness straps
from the chest clip.
(3) Do not unbuckle the
buckle. Unthread harness
straps from the buckle
tongues.
(4) Holding one harness strap, pull harness strap completely
out of lower harness guides.
C-5 RemovingHarnessSystem
1
2
3
4
3.
continued on next page.
4358-6862A Deluxe High Back 65 ENG.indd 23-244358-6862A Deluxe High Back 65 ENG.indd 23-24 6/15/18 7:49 PM6/15/18 7:49 PM

23
Insert Metal Retainer
Through Shell and Pad
Rotate metal retainer, then
insert metal retainer up
through the shell and pad.
Remove Buckle from
ChildRestraint
From the front, pull buckle
strap free from shell and
pad.
5.
6.
Store the harness straps, chest clip, buckle
tongues and buckle for future use.
Locate Buckle Strap’s
MetalRetainer
Turn the child restraint over
and locate buckle strap’s
metal retainer.
4.
24
C-6 RemovingSeatPadforCleaning
You must remove the harness system to remove the
pad from the shell. See section C-5.
ReleasetheElastic
Straps
(onselect models)
NOTE: The positions of
the elastic straps may
vary by model.
From the back of
the shell, release the
elastic straps at the top
and sides of the child
restraint.
2.
RemoveHeadrestPad
Place headrest in the
highest position. Starting
from the top, gently pull
pad off of headrest.
Release elastic straps
from bottom of child
restraint.
a.
1.
continued on next page.
C. Basic Use
4358-6862A Deluxe High Back 65 ENG.indd 25-264358-6862A Deluxe High Back 65 ENG.indd 25-26 6/15/18 7:49 PM6/15/18 7:49 PM

25
Locate Lower Harness
Guides (onselectmodels)
3.
Lower Harness Guides
Pull Seat Pad Out
from Behind Headrest
Pull rest of pad off of
shell.
4. UndoFasteningStrip
(onselectmodels)
Lower headrest to lowest
position and undo the
fastening strip behind the
headrest.
5.
26
InstallPad
Replace seat pad by reversing order for your particular
model.
Lower headrest.
Starting from bottom of child restraint, slip pad on shell.
Pull harness adjustment strap through pad.
Make sure pad is behind headrest. Attach fastening strip.
Attach all of the elastic straps.
Place headrest in highest position. Gently pull headrest pad
on headrest.
Install lower harness guides.
Install harness system (see section C-7).
Do not use this child restraint or booster
seat without the seat pad. Failure to do this
can result in serious injury.
CleaningPad
Machine wash separately with cold water on a gentle
cycle. Do not use bleach. Tumble dry separately for 10-12
minutes on low heat. Remove immediately.
Harness Straps: Spot clean only. Do not machine or hand
wash.
C. Basic Use
Remove both lower harness
guides in bottom of seat by
using a screwdriver to press
in on the lip of lower harness
guides.
Remove by pushing harness
guide lip toward outside of
shell with one hand while
pulling harness guide from the
top with the other.
a.
4358-6862A Deluxe High Back 65 ENG.indd 27-284358-6862A Deluxe High Back 65 ENG.indd 27-28 6/15/18 7:49 PM6/15/18 7:49 PM

C. Basic Use
27
C-7 InstallingHarnessSystem
InstallBuckle Strap
Choose one of the three slots
that is closest to child.
From the front of child restraint,
push buckle strap’s metal
retainer and buckle cover
through pad and shell. Make sure that buckle is facing out.
From bottom of child
restraint, pull buckle strap’s
metal retainer completely
through pad and shell.
Check Buckle
Pull up on buckle strap to
make sure it is secured.
The buckle must not pull
out.
Failure to place buckle strap’s metal retainer
completely through pad and shell can result
in serious injury or death to the child.
2.
3.
continued on next page.
Thread Harness Strap
(1) With sewn end of the
harness strap loop facing
the buckle, thread the harness
strap down through lower
harness guide on left side of
shell.
(2) Pull across bottom of shell
and up through lower harness
guide on right side of shell.
NOTE: For easier assembly,
remove the harness guides. See section C-6, step 3. 28
(3) Thread left harness
strap through the back of
the left buckle tongue
and the right harness strap
through the back of the
right buckle tongue.
(4) Thread the chest clip
from front to back as
shown.
(5) Push left harness strap
through harness cover and
left upper harness slot and
right harness strap through
harness cover and right
upper harness slot at the same height.
DO NOT twist harness straps.
5
4
3
4.
1
2
5.
12
3
6.
4
Take both ends of the
harness strap and make
them even in length.
The sewn ends of the
harness strap loops MUST
face each other as shown.
Failure to place the harness
adjustment strap between shell
and the harness straps as shown
can result in serious injury or
death.
1.
4358-6862A Deluxe High Back 65 ENG.indd 29-304358-6862A Deluxe High Back 65 ENG.indd 29-30 6/15/18 7:49 PM6/15/18 7:49 PM

29
Thread Harness Strap
OverMetalBar
From the back, pull harness
straps through the back.
Harness straps MUST
go OVER the metal bar,
BETWEEN the metal bar and
plastic headrest adjustment
handle.
7.
Attach Harness Strapsto
Splitter Plate
From the back of the child
restraint, fit the harness strap
loops onto the splitter plate.
Make sure sewn ends of the
harness strap loops face
towards you. DO NOT twist
harness straps or harness
adjustment strap and make sure the harness straps are
COMPLETELY ON the splitter plate.
Failure to place harness straps over the metal
bar, between metal bar and plastic headrest
adjustment handle, can result in serious injury
or death to your child.
You must install the harness system properly.
Failure to follow these warnings can result in
serious injury or death.
8.
C. Basic Use
30
C-8 AccessoriesonSelectModels
CupHolder
Pull pad off corner at child’s
left side. Hook bottom
of cup holder on bottom
edge of child restraint and
rotate cup holder up.
Snap top of cup holder on
top edge of child restraint.
Make certain cup holder is
flush on the top and sides
of child restraint.
Replace pad.
Harness Covers
The harness covers help
to provide comfort to the
child’s neck. For harness
covers to fit correctly you
may have to push the ends
of the covers through the
upper harness slots.
To remove, unhook the
harness straps from
splitter plate, pull harness
straps out of the upper
harness slots and remove
harness covers.
Rethread harness straps
and re-hook the harness
strap loops onto the splitter
plate (see section C-7).
4358-6862A Deluxe High Back 65 ENG.indd 31-324358-6862A Deluxe High Back 65 ENG.indd 31-32 6/15/18 7:49 PM6/15/18 7:49 PM

D. General Vehicle Installation
31
Your vehicle’s features may be considerably different than
those pictured here. Consult your vehicle owner’s manual to
help identify your vehicle’s specific features and locations.
D-1 UnderstandingYourVehicle
Safety Tip:
To avoid your child being seriously burned,
take the following precautions:
1. Park in the shade or where sun does not directly
hit the child restraint or booster seat.
2. Cover the child restraint or booster seat with a
sheet or blanket when not in use.
3. Check for hot seat and buckles before placing
child in child restraint or booster seat.
To help protect your vehicle seat’s upholstery from damage, use
a car seat mat or a single layered towel underneath and behind
child restraint.
D-2 VehicleSeatingPosition
Safety Tip:
Children are safer
when properly
restrained in a rear
seating position
than in the front seating position.
According to accident statistics,
children in rear seating positions are
statistically safer, whether you have
airbags, advanced airbags, or no
airbags at all.
32
In very few vehicles, the child restraint or
booster seat cannot be properly installed
because of the type of seat belt system,
airbag system and/or lack of location
to anchor the tether strap. Always read
and follow the vehicle owner’s manual
instructions for child restraint and booster
seat use.
Use the child restraint
or booster seat only on
vehicle seats that face
forward. Do not use on
seats that face the sides
or rear of the vehicle. For
vehicles with an airbag,
but without a back seat,
refer to your vehicle
owner’s manual.
AnchorBrackets
For Tether Strap
(Forward Facing Only)
UASAnchor Bars
Located in the seat
bight.
SeatBight
VehicleSeatBelts
Consult your vehicle
owner’s manual for
vehicle belt use.
4358-6862A Deluxe High Back 65 ENG.indd 33-344358-6862A Deluxe High Back 65 ENG.indd 33-34 6/15/18 7:49 PM6/15/18 7:49 PM

33 34
D-3 ChoosingUASorVehicleBelts
When installed properly, either the UAS or Vehicle Belts will
secure the child restraint equally.
The UAS
The Universal Anchorage
System (UAS) is for
installing child restraints
without using vehicle seat
belts.
The UAS can ONLY be
used in vehicles that have
the UAS anchor bars
installed and designated
UAS seating positions. Most vehicles manufactured after
September 2002 are equipped with UAS.
Check your vehicle owner’s manual to see which seating
positions may be equipped with UAS.
UASAnchor Bars
Vehicle Belts
If UAS is not an option, you
must use the vehicle seat
belt system to install the
child restraint. There are
some vehicle belts that
will not work with a child
restraint or will require special attention.
See next page and check your vehicle owner’s manual for
specific instructions.
Do not use both the UAS belt and vehicle
belt at the same time.
Review your vehicle owner’s manual for vehicle seat belt use
with child restraints. This is your best source for information
concerning your vehicle.
Not all vehicle belts will work with this child restraint. This
child restraint must be tightly locked in place at all times,
during travel. You must determine if your vehicle’s belts are
compatible with this child restraint.
VehicleBelts
•Automatic/Passivevehicle seatbelts
You MUST have a lap belt to install any child restraint. An
automatic (passive) shoulder belt may or may not have a
separate lap belt. Consult your vehicle owner’s manual.
•Vehicle beltsin centerof thedoor
orsidepanel
You must move the child restraint to
another seating location. Consult your
vehicle owner’s manual.
•Vehicle beltsthat arein frontof
theseatbight
You may need to move the child restraint
to another seating location. Consult your
vehicle owner’s manual.
•DoNot Usewithinflatableseatbelts
You may need to move the child restraint to another seating
location or use UAS belts only.
•ELR(Emergency LockingRetractor)vehiclebelts
These lap and shoulder belts only lock
in a sudden stop or crash, and do not
properly secure a child restraint alone.
Consult your vehicle owner’s manual.
To learn if you have this type of belt,
gently pull the belt all the way out of the retractor (spool), let it
return several inches, then pull on it again. If it moves freely, it
is an ELR belt. If it is locked and will not allow any more belt
to come out, it is a switchable retractor. If you have an ELR lap
and shoulder belt, review the “Vehicle Latch Plate” section to
see if you need a locking clip.
D-4 KnowingYourVehicleBelts
D. General Vehicle Installation
4358-6862A Deluxe High Back 65 ENG.indd 35-364358-6862A Deluxe High Back 65 ENG.indd 35-36 6/15/18 7:49 PM6/15/18 7:49 PM

35 36
ELR lap-only belts MUST NOT be used with
this child restraint.
•Switchableretractor
These belts switch from ELR to ALR (Automatic Locking
Retractor). You must have the vehicle belts in the locking
mode to use them. Follow the instructions in the installation
sections.
•ALR(AutomaticLockingRetractor)
These belts lock after pulling the webbing out and letting the
belt go back into the retractor an inch or two. Follow the
instructions in the installation sections.
Vehicle Latch Plates •ChecktheLatchPlates
Buckle the lap/shoulder belt.
Pull on the lap belt portion.
If the vehicle belt does not
loosen or slip, you have
a locking latch plate. You
should not need to use a
locking clip. Consult your
vehicle owner’s manual.
If the belt loosens or slips,
you have a sliding latch
plate. If you have an ELR retractor and a sliding latch plate,
you MUST use a locking clip to install the child restraint or
move to another seating location. You may not need to use
the locking clip with a switchable or ALR retractor. Consult
your vehicle owner’s manual.
Locking
Latch
Plate
Sliding
Latch
Plate
This child restraint is certified
for aircraft use only when used
with the internal harness.
Use only on forward-facing
seats and in a position where
the seat belt can be tightened
securely. The installation is the same as in your vehicle. Use
only with F.A.A. certified equipment. Contact the airline before
taking the child restraint on an aircraft in order to comply with
their regulations.
E. AircraftInstallation
Store UAS belts and tether strap when using
the aircraft belts.
Forward-Facing
AircraftInstallation
For forward-facing
installation follow, section
F-5 Install Forward Facing
with Vehicle Belts.
This booster seat is
NOT certified for use in
aircraft when used as a
booster seat, because
aircraft seats do not have
shoulder belts.
NOTE: Install the child restraint in a window seat to avoid
blocking the aisle. If the aircraft lap belt is too short, ask the
flight attendant for a belt extender.
E. Aircraft Installation
4358-6862A Deluxe High Back 65 ENG.indd 37-384358-6862A Deluxe High Back 65 ENG.indd 37-38 6/15/18 7:49 PM6/15/18 7:49 PM

F. Install Forward Facing
37
F-1 PreparetoInstallForwardFacing
Lap Belt
with Tether
UAS Belt
with Tether
Lap/Shoulder
Belt with
Tether
10-30 kg (22-65 lbs) and 74-132 cm (29-52 in.) and
at least 1 year old AND are able to walk unassisted.
Forward Facing using 5-point harness
Never place a child less than one-year old or
weighing less than 10 kg (22 lbs.) forward
facing.
38
The tether strap is used for the forward-facing position
only. Vehicles manufactured today already have the
tether anchor hardware installed in the vehicle.
Refer to your vehicle owner’s manual for locations.
If your vehicle does not have a tether anchor bracket,
please see your dealer or a qualified mechanic and have
one installed.
F-2 AdjusttheTetherStrap
Lift up to
loosen To loosen: Lift up on
tether adjuster and push
lock toward the tether
hook.
To tighten: After the
child restraint is locked
into place with UAS or
vehicle belt, put knee in
child restraint, push down
on the child restraint and
attach the tether hook
to the vehicle’s anchor
bracket. Pull on free end
of the tether strap.
Pull loose
end to
tighten
To Adjust Tether Strap:
Tether straps are required in Canada.
Using this child restraint without the
tether strap anchored as recommended
by the manufacturer would be a misuse
of the child restraint and, in a sudden
stop or crash, could cause serious injury
or death.
4358-6862A Deluxe High Back 65 ENG.indd 39-404358-6862A Deluxe High Back 65 ENG.indd 39-40 6/15/18 7:49 PM6/15/18 7:49 PM
Table of contents
Other DJG Car Seat manuals

DJG
DJG enRoute User manual

DJG
DJG Alpha Omega User manual

DJG
DJG Vantage Point Surveyor User manual

DJG
DJG Alpha Omega 65 User manual

DJG
DJG Alpha Omega User manual

DJG
DJG Scenera Versa-Fit Overhead Barrier User manual

DJG
DJG Alpha Omega All in One User manual

DJG
DJG Enspira User manual

DJG
DJG First Ride User manual

DJG
DJG Intera Base Only User manual