DMC 25470-00 User manual
REMOVAL PROCEDURE
1. Be sure that engine and exhaust are cool to the touch before
beginning.
2. Loosen, remove, and keep all the mounting bolts that secure your
stock muffler as they will be used in installation of your new DMC
system.
KEEP ALL HARDWARE LOOSE UNTIL THE INSTALLATION IS
INSTALLATION PROCEDURE
1. Loosely
install the
DMC muffler
mount to the
stock bracket
using the two
10x20mm Hex
Head bolts.
2. When looking
at the YXZ from
the driver’s
side, the
exhaust ports
are numbered
from left to
right (front
to rear) as
Exhaust Port
#1 (front) , #2
(middle) and
#3 (rear).
3. Install DMC
Header #3 (rear) first and loosely attach exhaust flange nuts.
4. Slide the 3:1 merge collector on to the DMC Header #3, making
sure that the merge collector spring clip is located to the outside as
shown
5. Install DMC
Header # 2
(middle) into
exhaust port #2
and also into
the 3:1 merge
collector and
loosely attach
exhaust flange
nuts.
6. Install DMC
Header # 1
(front) into
the exhaust
port and the
3:1 merge
collector,
loosely attach
exhaust flange
nuts.
7. Attach the
DMC supplied
exhaust spring
from DMC
Header#1 to
the 3:1merge collector.
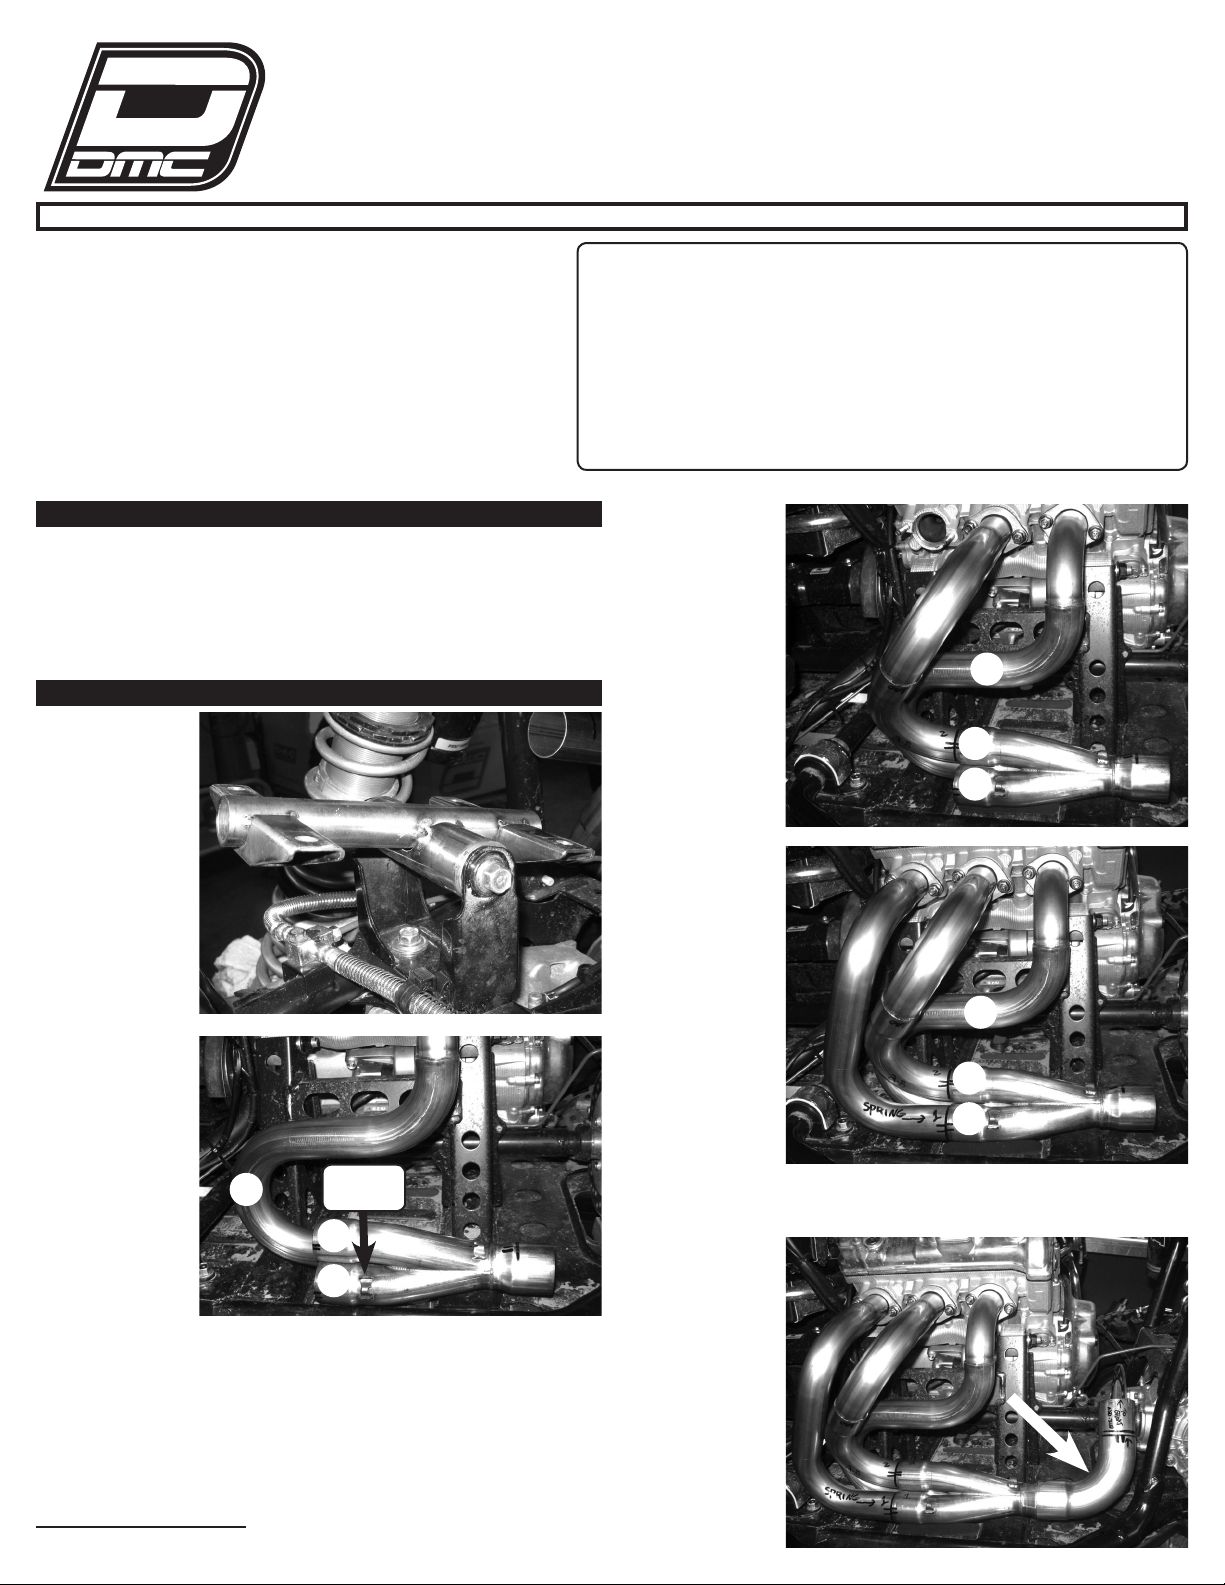
8. Install the
L-shaped 2”
diameter mid-
pipe to the
3:1 merge
collector.
Thank you for choosing to install the finest exhaust system
available. DMC uses only the latest technology to deliver big
gains in acceleration, horsepower and torque, while capturing
additional strength and critical weight savings. To prevent
exhaust leaks, we recommend inspection and replacement of
the exhaust gasket if necessary upon installation.
PLEASE READ ALL INSTRUCTIONS CAREFULLY AND
THOROUGHLY BEFORE INSTALLING THIS SYSTEM.
YXZ1000R 20016
installation
instructions
(1) Header #1 Front
(1) Header #2 Middle
(1) Header #3 Rear
(1) 3:1 Merge Collector
(1) 2” Mid Pipe
(1) 1:2 Splitter Assembly
(1) Tail Pipe Right
(1) Tail Pipe Left
TOOLS REQUIRED
Pipe Spring Puller
10, 14mm box wrenches
12mm socket
4mm allen wrench (included)
DMC Exhaust
930 Columbia Ave.
Riverside, CA 92507
WWW.DMC-ON-LINE.COM
VISIT US ONLINE AT WWW.DMC-ON-LINE.COM FOR MORE INFORMATION
ITEM #25470-00
1
2
PARTS INCLUDED
(2) Muffers
(1) Muffler Bracket
(3) 63mm Swivel Spring DMC Sleeve
(2) M10x20 Hex Flange Bolt
(4) M8x16 Hex Flange Bolt
3
1
2
3
1
2
3
Spring
Clip
9. Install the 1:2
splitter to the
mid-pipe as
shown.
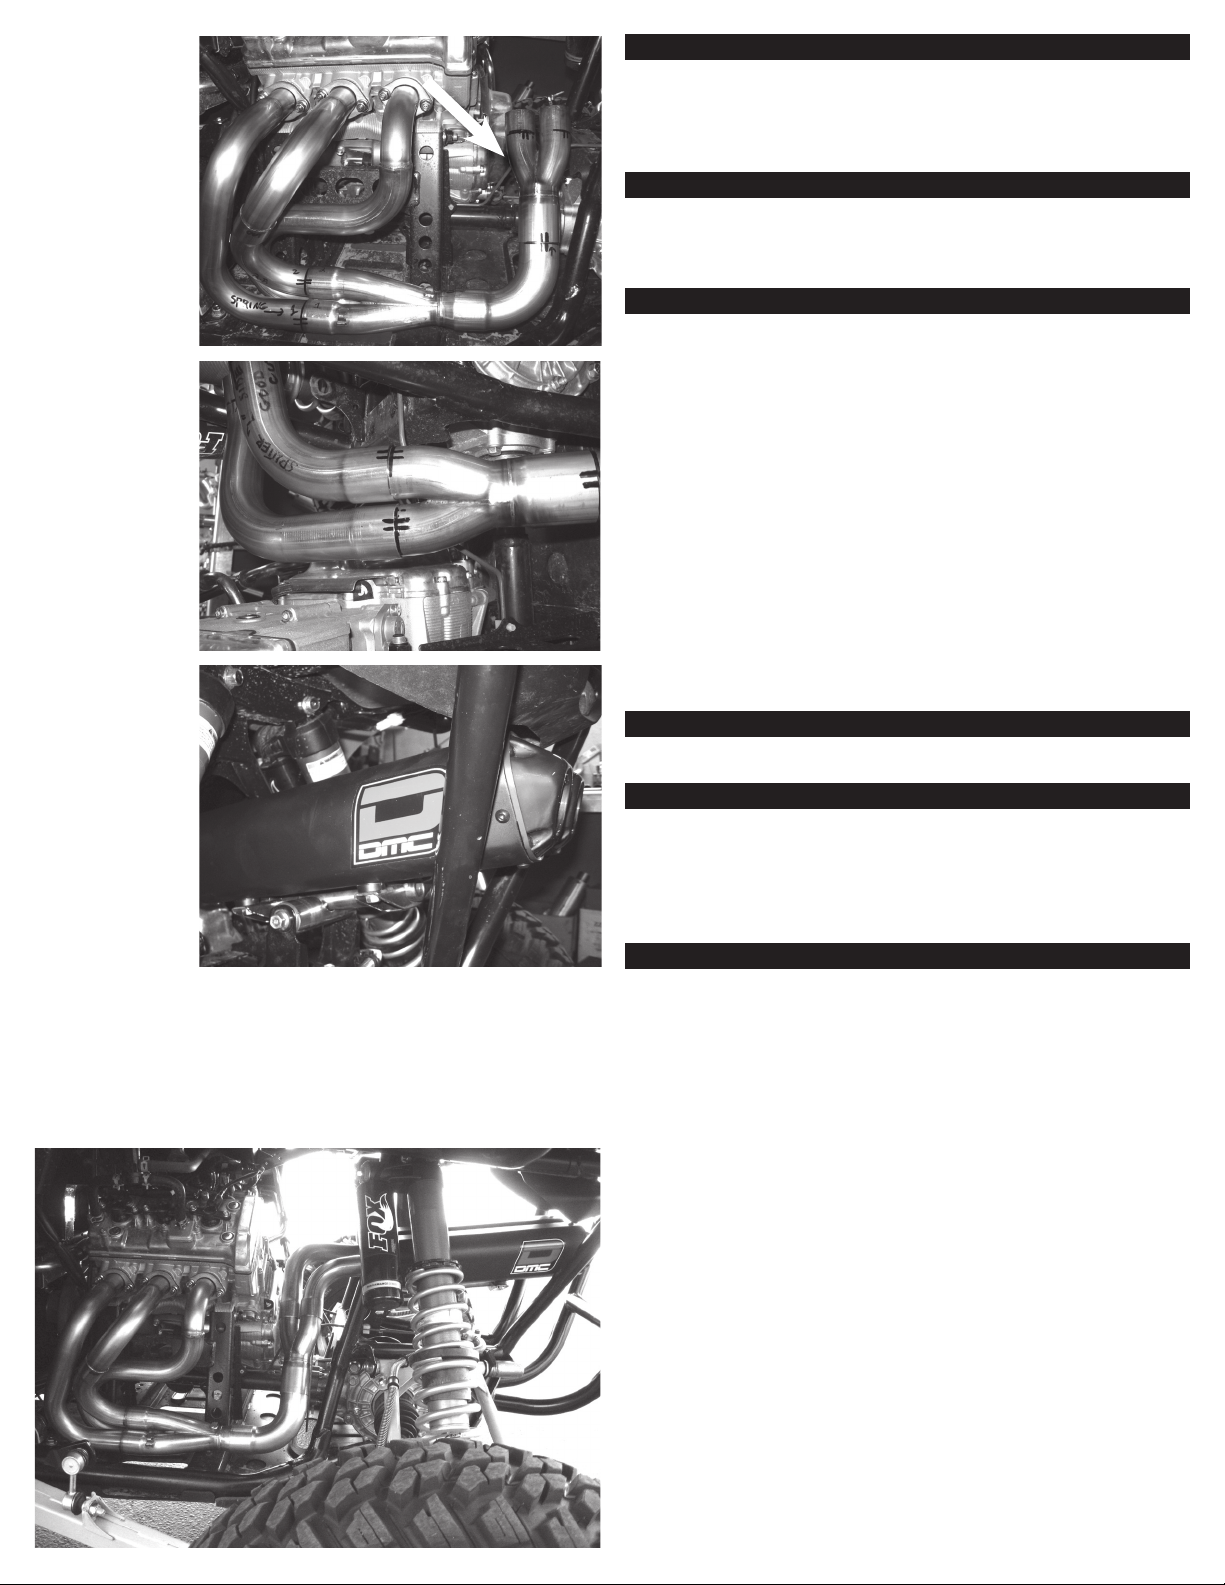
10. Install right
and left tail
pipes into the
1:2 splitter.
11. Install left side
muffler and
spring to the
mid-pipe.
12. Install right side muffler and spring to mid-pipe.
13. NOTE: Both mufflers are identical; there is no right or left side.
14. Loosely install two 8x16mm Hex Head bolts into to secure each
muffler to the earlier installed DMC muffler mount.
15. Tighten all hardware beginning with the headers: First the
Headers, then mufflers and muffler bracket last.
START UP PROCEDURE
1. After completing installation, start your engine in a well-
ventilated area and check for any exhaust leaks.
2. We recommend riding for 30 minutes to allow components
to properly seat.
3. Allow engine to cool down and recheck all fasteners.
SPARK ARRESTOR
1. USFS Approved Spark arrestors are included inside the
mufflers of every DMC Afterburner Exhaust.
2. To access your Spark Arrestor, simply remove the 4 screws
from the endcap.
MAINTENANCE
Please allow exhaust system to cool prior to washing or repair.
DMC recommends using a mild soap such as dish detergent
and water to wash your exhaust system. Also, you should
not allow water to enter the muffler outlet while washing your
vehicle. As we all know, sound is a major issue, which can
effect whether or not we continue to enjoy our sport without
offending others. Also, your system performs best and will last
longer when the mufflers are properly maintained. Repacking
your silencer depends on the type of driving and the amount of
hours on the engine. Your ears are the best guide to knowing
when to repack, but as a rule, every 20-30 hours of hard
driving is a good guideline for inspection and a Muffler Repack
kit if necessary. If and when it is time to repack, please use
DMC Afterburner Repack Kits as they were designed and tested
to provide the ease of installation and top performance. To keep
your spark arrestor clean, you can clean it out by using a soft
bristled brush and soapy water. Spark arrestors only need to be
replaced if the screen is blocked or torn.
DMC EXHAUST ACCESSORIES
• USFS Approved Spark Arrestor: Item #25911-10
• DMC Afterburner Repack Kit: Item #25911-41
TECHNICAL SUPPORT
If you ever lose your instructions or need additional information,
simply visit the DMC website where we offer all the installation
information that came with your DMC exhaust. If, at any time,
there is further news regarding modifications, the DMC website
www.dmcexhaust.com is a great source for obtaining the latest
news.
WARRANTY
Since we have designed, developed and manufactured your
DMC Exhaust to provide reliable performance, we guarantee
your system for one year against defects in materials and
workmanship. We are proud of our attention to the quality
of manufacturing your DMC product and we stand behind
our products. In the unlikely event a problem arises with your
system, please contact the dealer from whom it was purchased.
They can contact DMC and get your system to us for a warranty
determination. We will make every attempt for a prompt repair
or replacement at our determination and expense. It is important
to note that our warranty is not unconditional. Although your
DMC product was made with the finest materials and hand
crafted to strict stands, it is not indestructible. Therefore, our
warranty does not cover product damage as a result from
abuse, misuse, improper installation, modifications or lack of
maintenance. We also do not cover any damages whether
consequential, incidental, special, contingent or otherwise: or
expenses or injury arising directly or indirectly form the use
the use of the exhaust system. As with any product, your DMC
system should be expected to experience normal wear, which
is not covered by any warranty. The duration of any and all
implied warranties are limited to the duration of the express
warranty.


