【Type Y attachment】If the power supply cord is damaged, it must be replaced by the manufacturer or its service agent or a similar qualified person in order to avoid a hazard. Means for disconnection must be incorporated in the fixed wiring in accordance with the wiring rules. This appliance is not intended for use by persons (including children) with reduced physical, sensory or mental capabilities, or lack of experience and knowledge, unless they have been given supervision or instruction concerning use of the appliance by a person responsible for their safety. Children should be supervised to ensure that they do not play with the appliance. Circuit DiagramCircuit Board ModuleTransistor Power SwitchMO2HE2NMO1HE1LTransistor Power SwitchVRGNLRed(110-120V)/Brown (208-240~277V)BlackBlackG/Y
BlueBrownMotor With Thermal Switch 2AHeater With Thermo-fuse
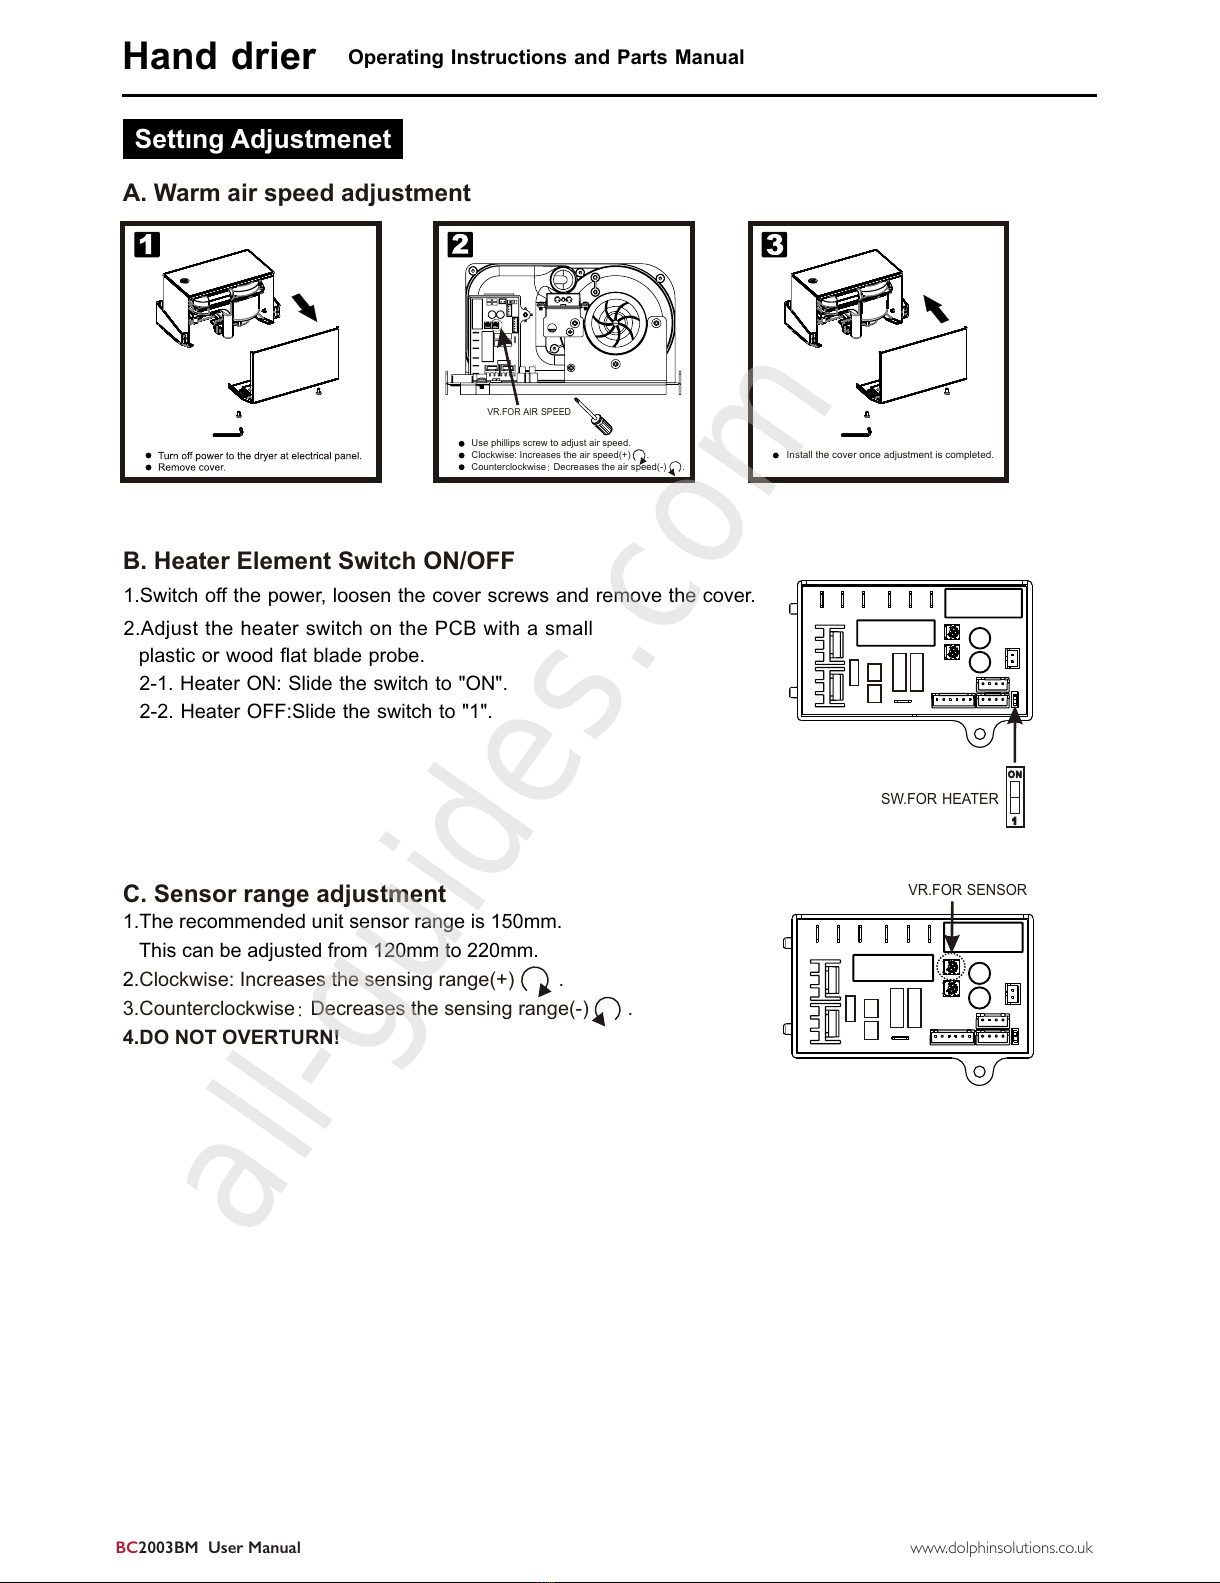
FOR SENSORSW.FOR HEATER White(110-120V)/Blue (208-240~277V)Sensor moduleON1VRFOR MOTORGG/YY2 Filter(ONLY 208~240V)
(ONLY 208~240V)
General safety informationNOTE: We do not recommend that this dryer is installed above a basin. If you are installing this dryer above a basin you need to satisfy yourself that reflection won’t occur. Disconnect power at the service breaker beforeinstalling or servicing. Not for household usemay cause burns. This product is intended for installation by a qualified service person. Use 1.2mm² solid conductor for wiring. All units must be supplied with a 3-wire service.The ground wire must be connected to the dryer's backplate. Failure to properly ground unit could result insevere electrical shock and/or death.WARNINGWARNINGDANGERWARNING
Thermostat
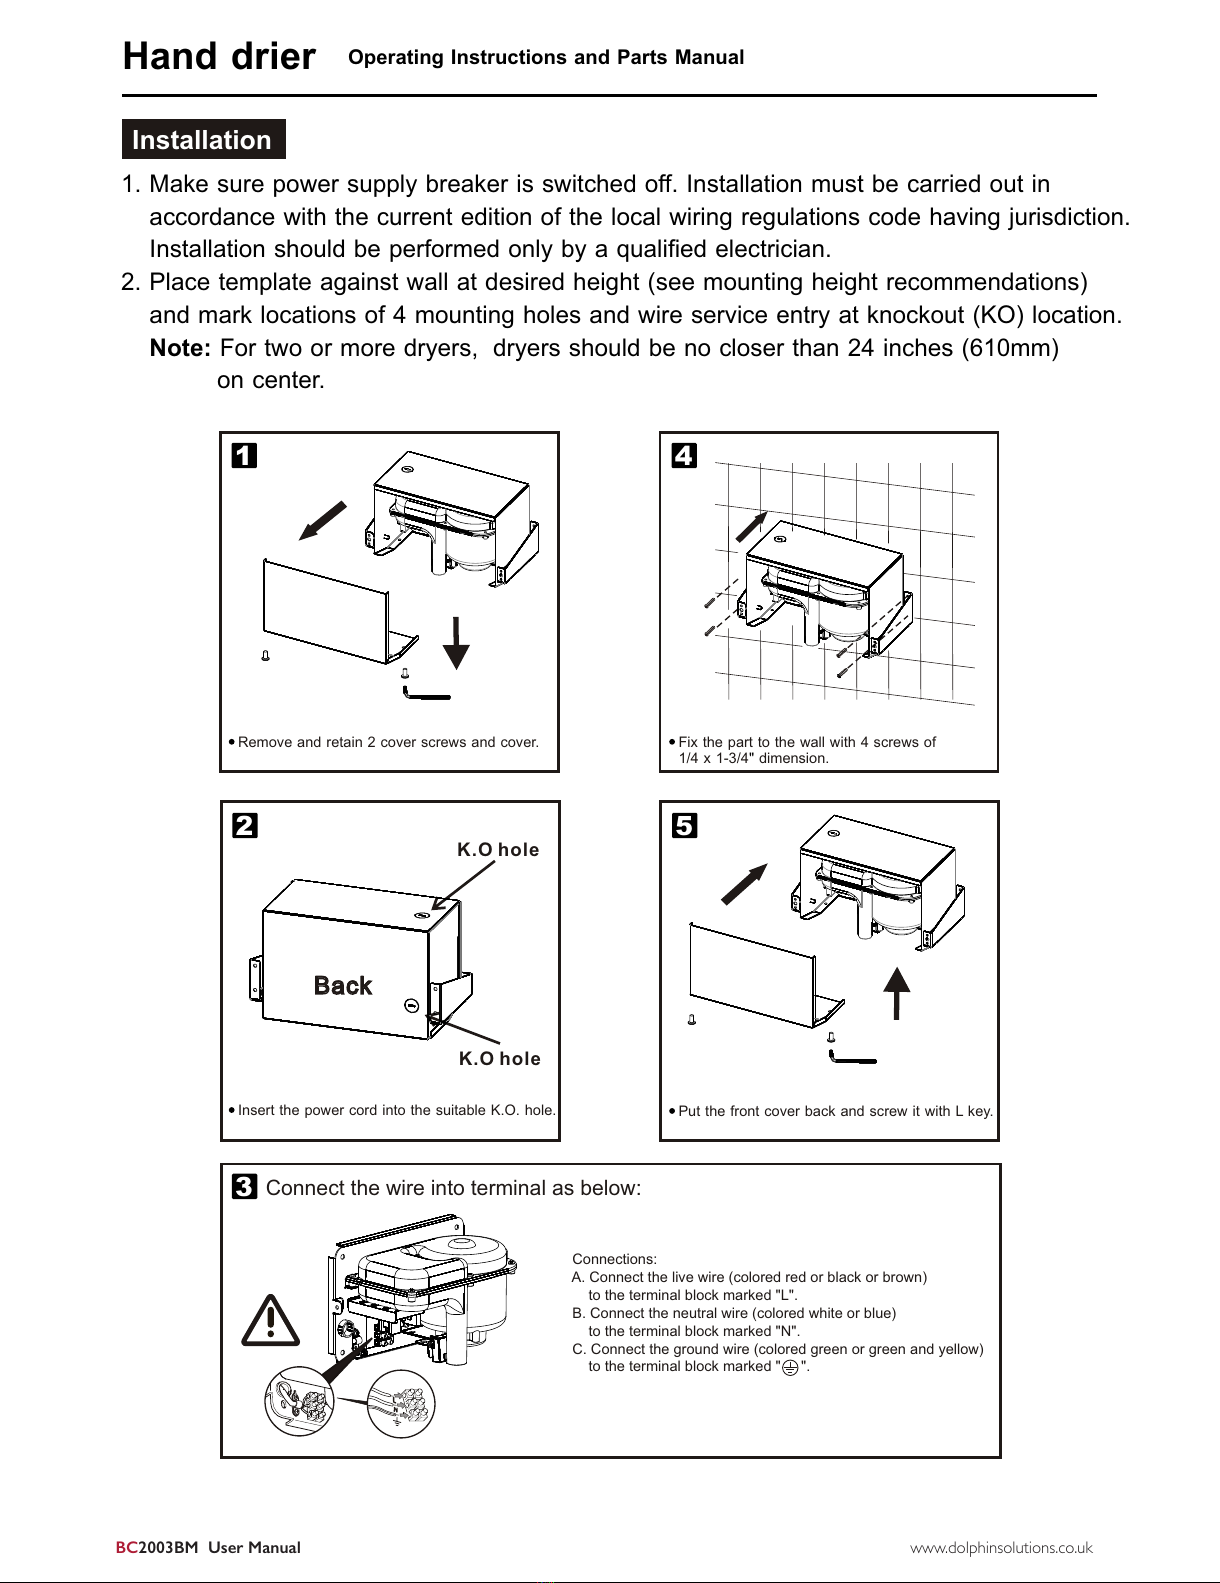
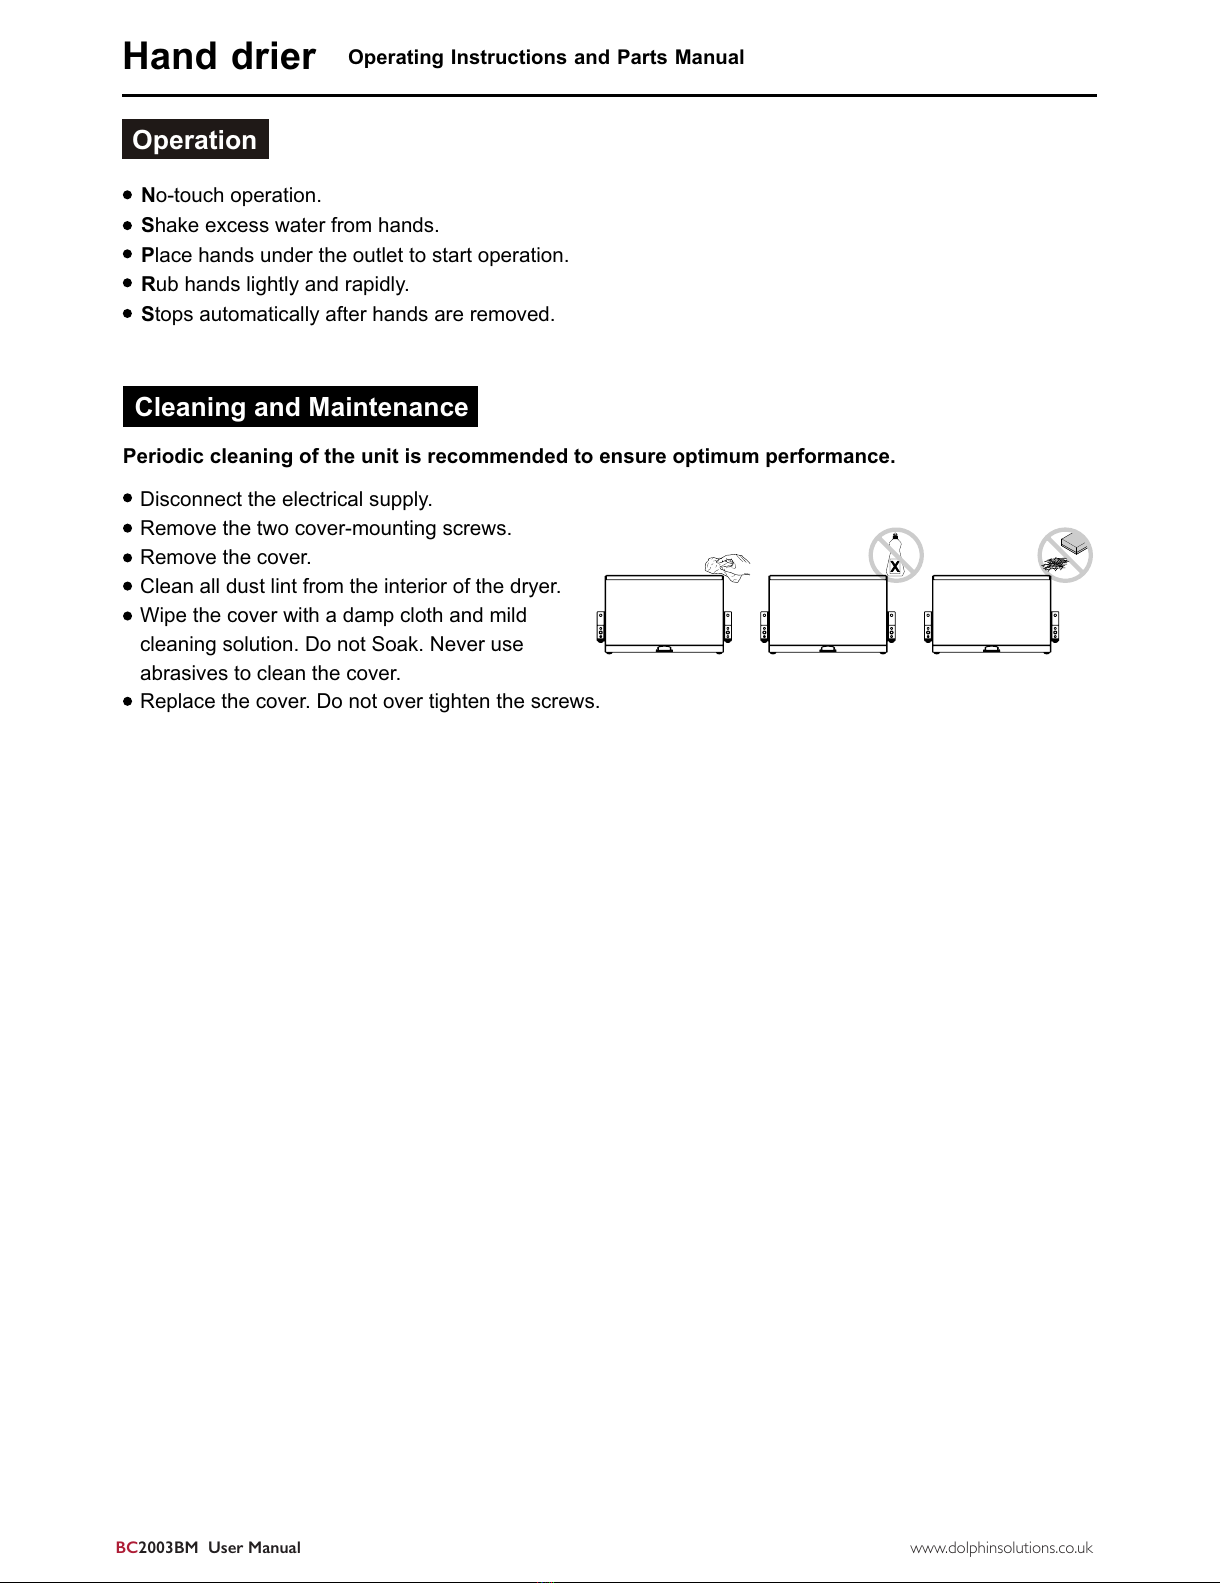
Operating Instructions and Parts Manual Hand drier