Domain DM-DV6768NVS User manual

INSTRUCTION MANUAL
DM-DV6768NVS
6.75 inch DVD/VCD/CD/MP3/USB/SD PLAYER
with built in BLUETOOTH/GPS
and FM/AM TUNER
SMARTPHONE LINK
SD MAP
DM-DV6768NVS

1
Safety Precautions
Never expose this unit, amplifier,
and speakers to moisture or water to
prevent electric sparks or re.
Do not change the fuse on the power
cord without professional guidance,
using improper fuse may cause damage
to this unit or even cause re.
Please contact your nearest dealer if
one of the following is experienced:
(a). Water or other objects enter the unit.
(b). There is smoke.
(c). Peculiar smell.
Only connect the unit to a 12-volt power
supply with negative grounding.
Never install this unit where operating it
may impair safe driving conditions.
Never use the front video display
function when driving, so as to prevent
violating traffic regulations or causing
an accident.
Thank you for purchasing this product.
Please read through these operating
instructions so you will know how to
operate your model properly.Please
keep this manual in a safe place for
future reference.
To ensure safe driving, please adjust the
volume to a safe and comfortable level
in case of emergency situations.

2
1. Never disassemble or adjust the unit without professional guidance.
For details, please consult an authorised service provider or dealer.
2. If the front panel or TFT monitor is dirty, please use a clean silicone cloth and neutral detergent
to clean. Using a rough cloth and non-neutral detergent such as alcohol for cleaning may
scratch or discolour the monitor.
3. If the unit does not function normally , please refer to the troubleshooting guide of this manual.
If no relevant information is found, please press the [RESET] key on the front panel to resume
factory default.
4. If you have parked the car in hot or cold weather for a long time, please wait until the
temperature in the car becomes normal before operating the unit.
5. Using the car heater in a low temperature environment may result in moisture collecting inside
the unit, DO NOT use the unit in this situation. Eject the disc and wipe off the moisture on the
disc. If the unit does not work after a few hours, please contact the service center.
6. Do not drop or bang the LCD monitor as this will damage it.
7. To prevent damage to the screen, avoid touching it with sharp objects.
8. Graphic illustrations are used to provide a clear demonstration and an easy way to understand
how to operate this unit.
However, some illustrations are different from the actual images displayed on the screen.
9. Only operate the unit as described in this manual . Inappropriate operation will void the
guarantee.
Safety Precautions
Smartphone Link
Note:
The items listed outside of the frame are the commercial products generally sold.
Expanding Systems

3
Contents
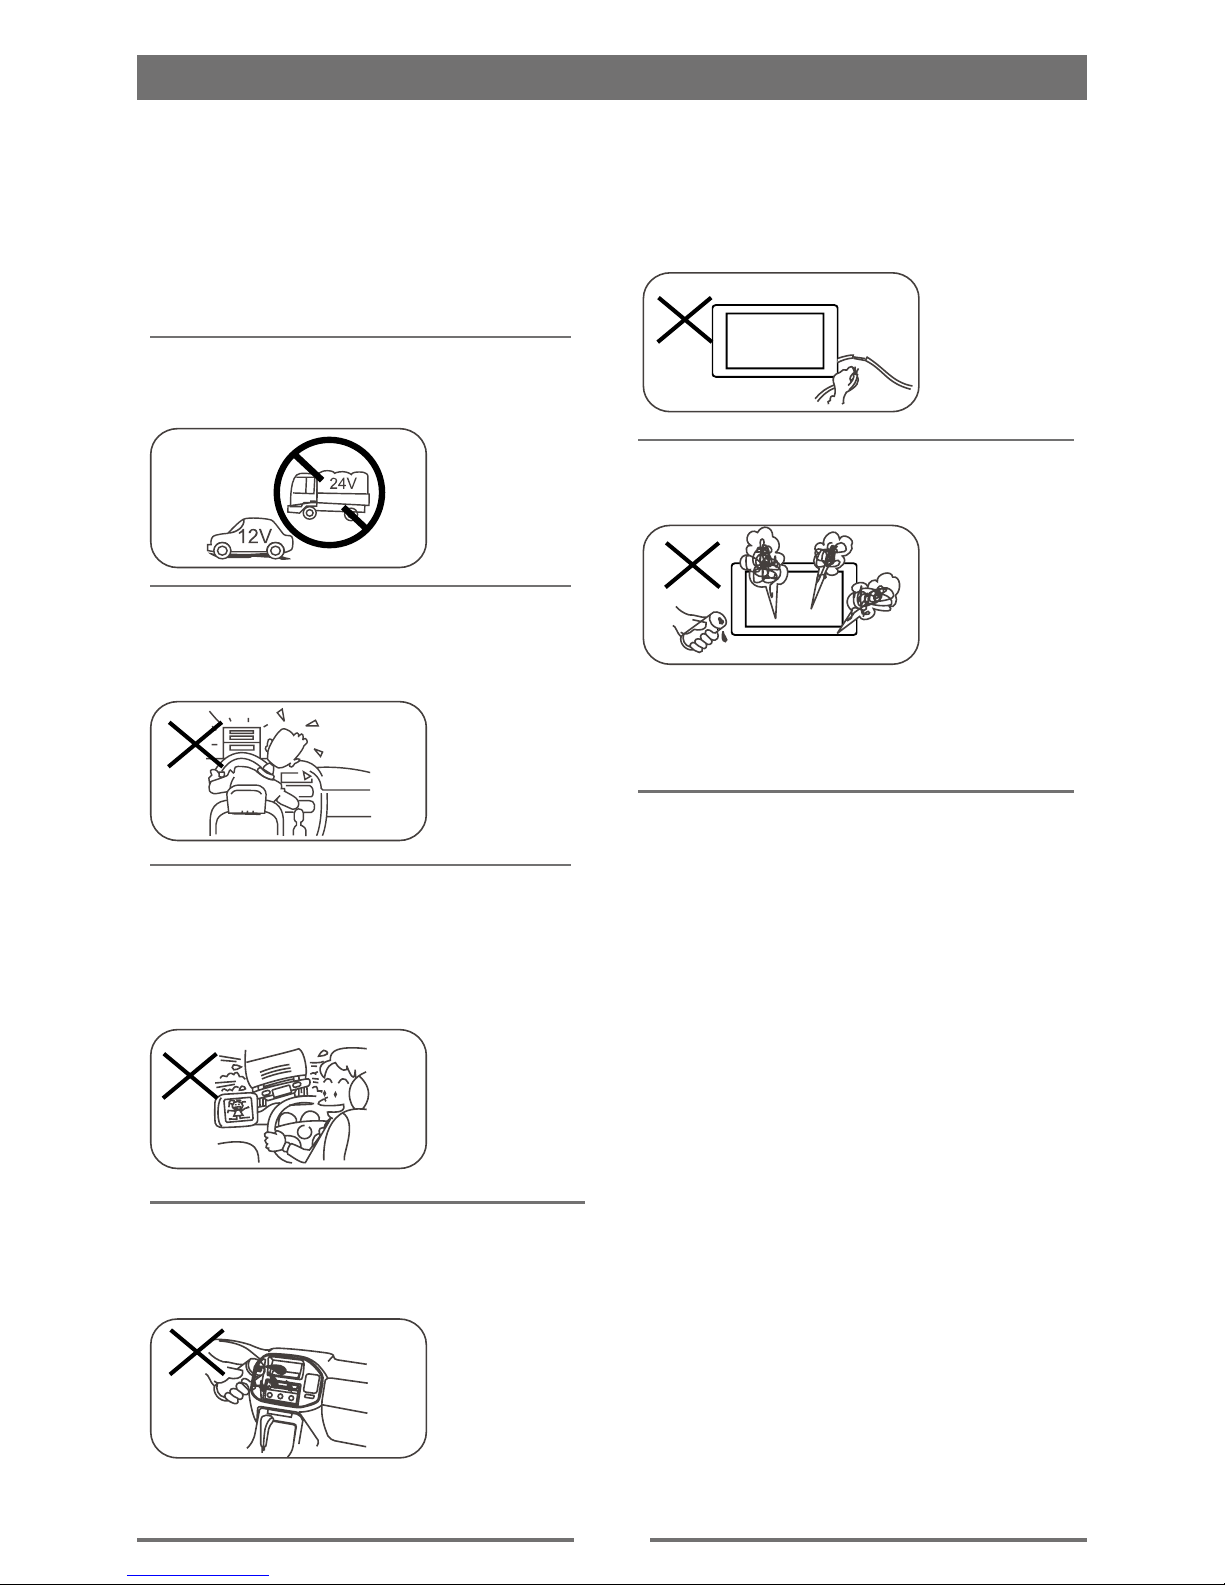
Safety Precautions ...................................1
Expanding Systems ................................2
Before Using .............................................4
Front Panel .............................................4
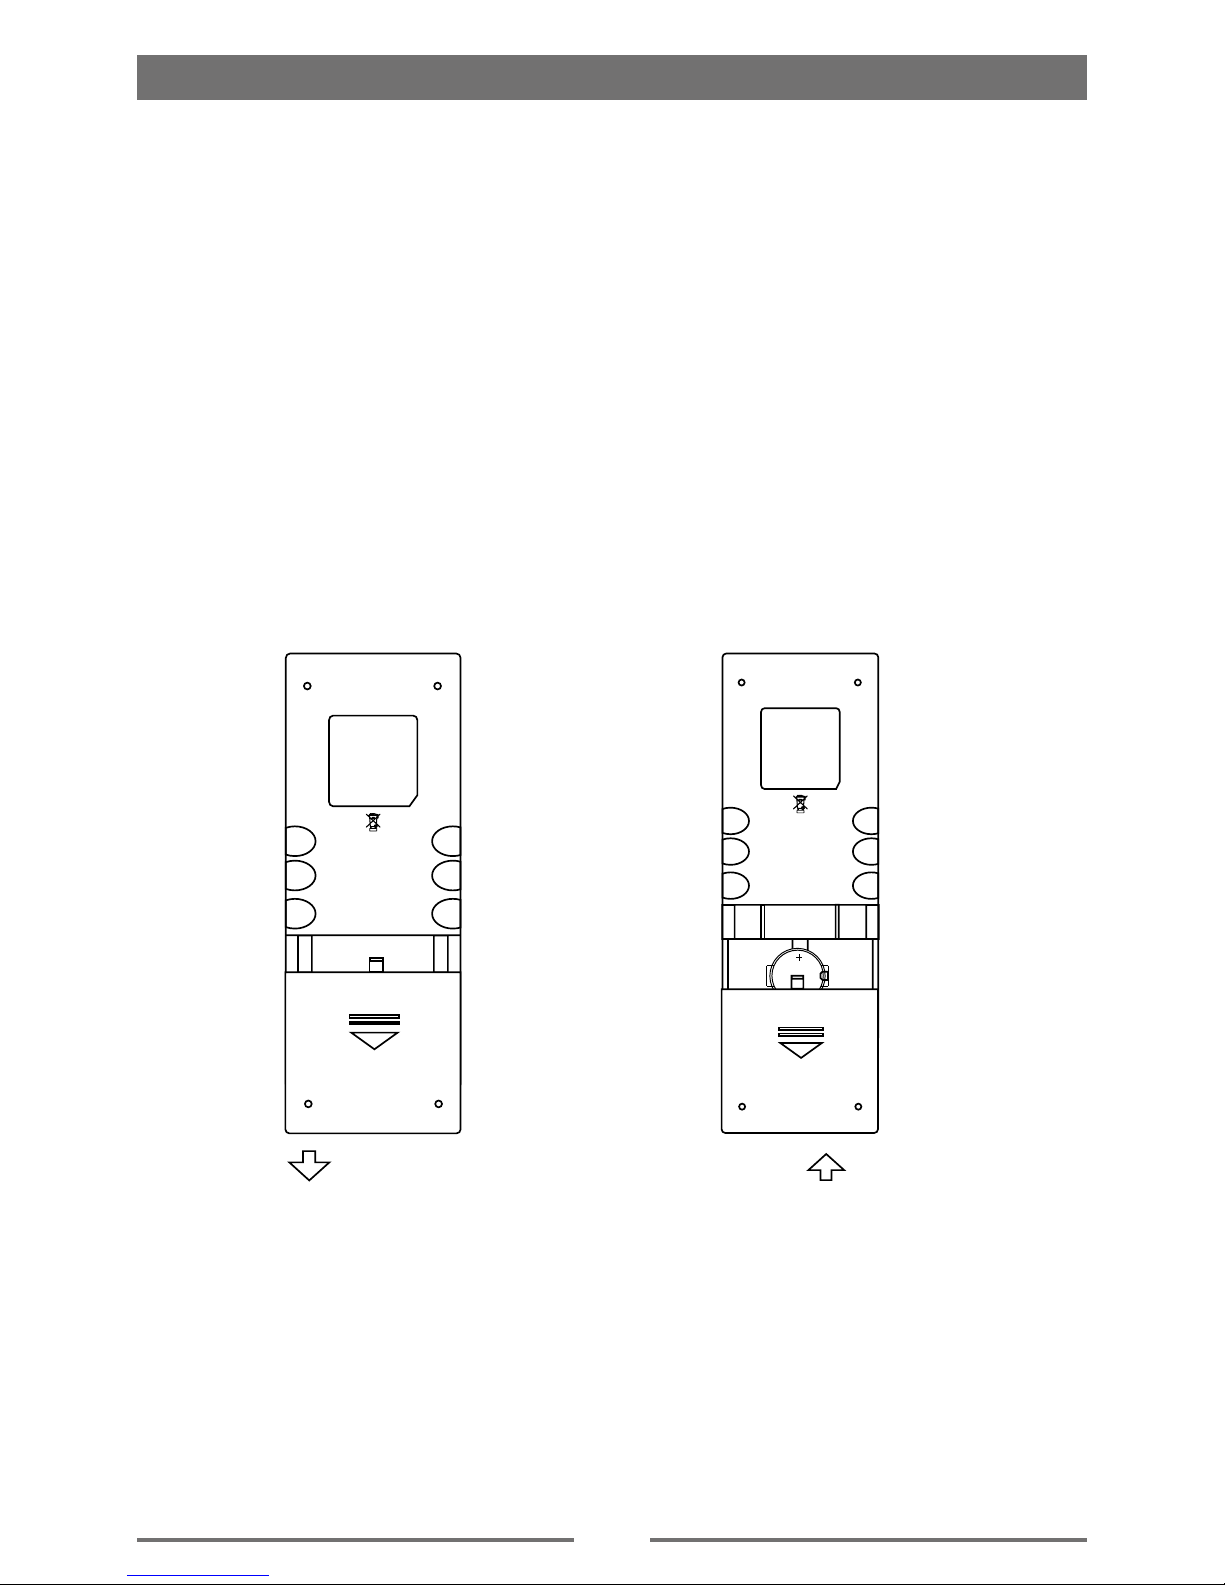
Remote Control.......................................5
Notes on Remote Control Usage ............6
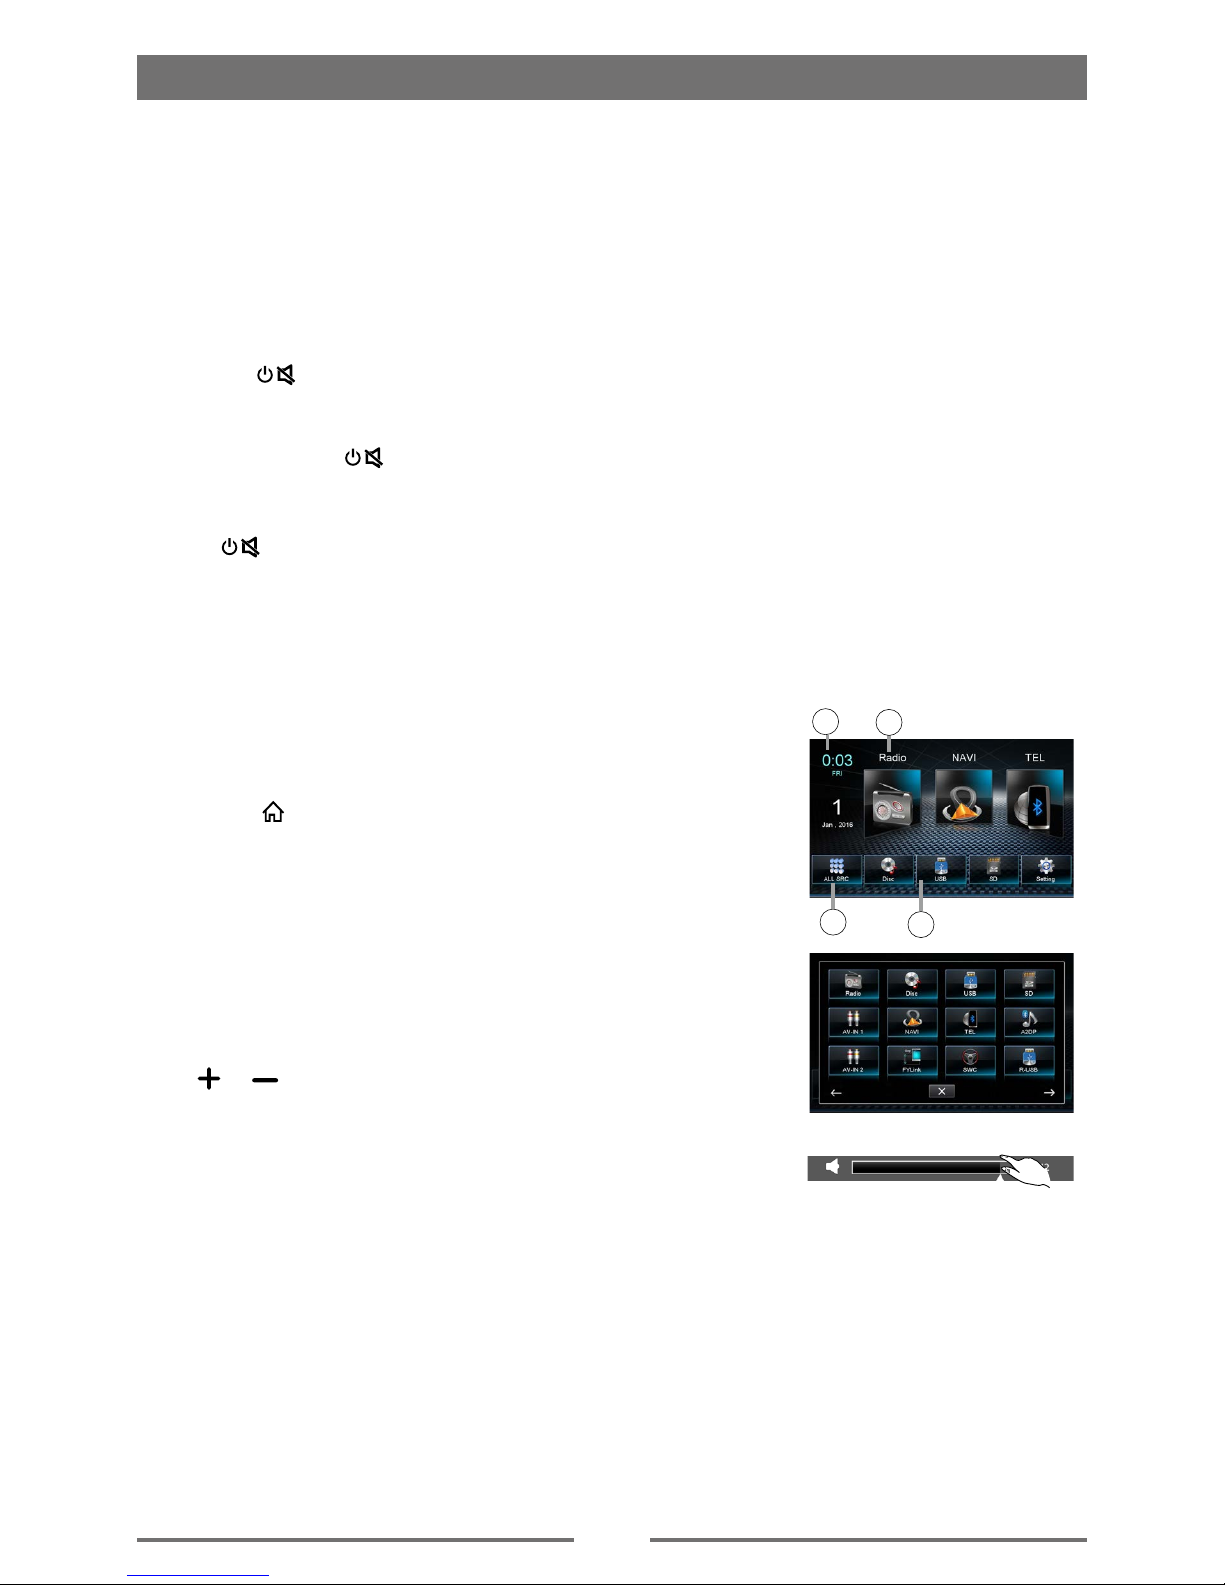
Basic Operations......................................7
Parking Brake Inhibit...............................7
Power On / Off ........................................7
Mute ........................................................7
Audible Beep Conrmation .....................7
Playing Source Selection ........................7
Volume Adjustment.................................7
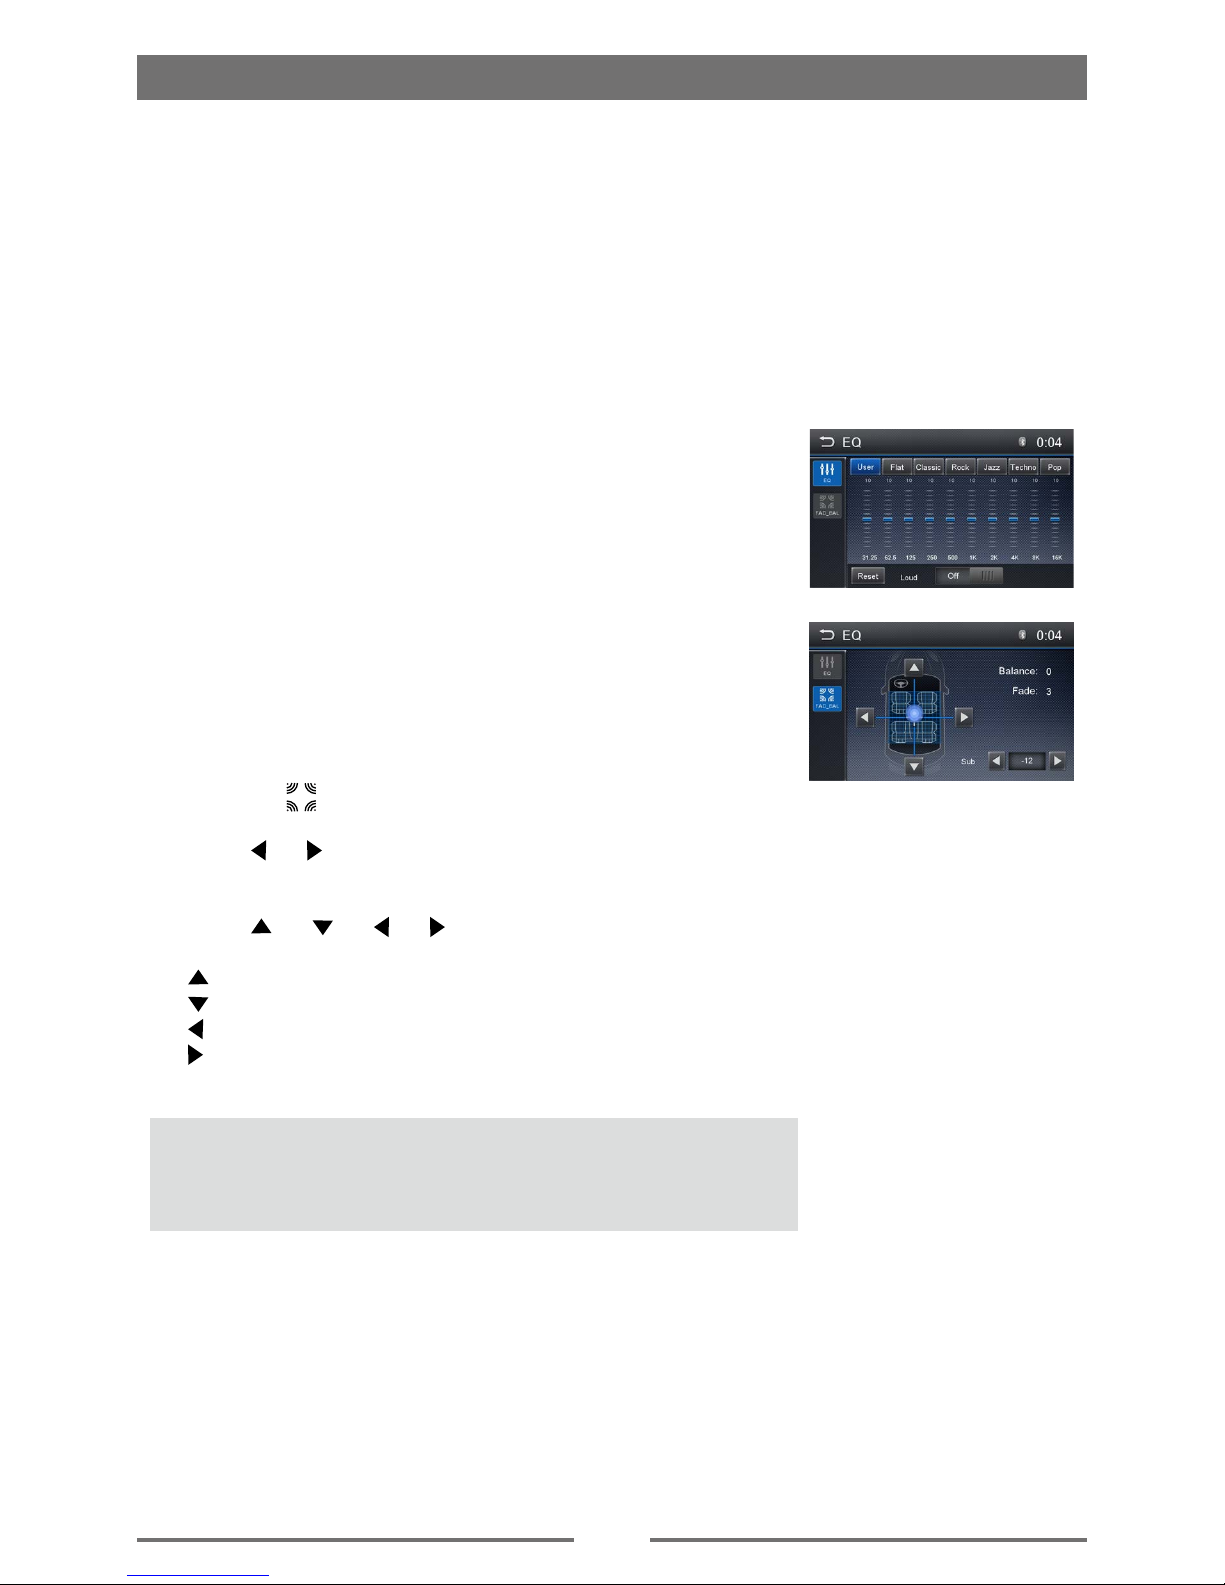
EQ Menu.................................................7
Select Preset Equalizer ..........................8
Adjust EQ Parameters ............................8
Adjust FAD BAL .....................................8
Set Date /Time ........................................9
Radio Mode .............................................10
Tuner Menu ..........................................10
Select Radio as Playing Source ...........10
Select One Radio Band ........................10
Tune......................................................10
Preset Station .......................................11
Local Seeking .......................................11
EQ Selection .........................................11
Playback Mode........................................12
Load a Disc ...........................................12
Eject a Disc ...........................................12
Touch Screen Controls .........................12
Controlling Playback .............................12
Connect a USB Device .........................12
Remove a USB Device .........................12
Insert a SD Card ...................................12
Remove a SD Card...............................12
Play/Pause............................................12
Previous/Next .......................................13
Search for a Folder ...............................13
Repeat ..................................................13
Repeat A-B ...........................................14
Shufe (Random) Play..........................14
Select Audio Mode................................14
Select Subtitle Language ......................14
Change Viewing Angle .........................14
Video Setup ..........................................15
Playback Information ............................15
Direct Track Entry .................................15
Rotate Pictures .....................................15
Zoom.....................................................15
Bluetooth Mode ......................................16
Pair the Bluetooth-enabled Devices .....16
Disconnect Bluetooth Device ................16
Make a Call ...........................................16
Receive a Call.......................................17
Adjust Bluetooth Settings......................17
Music Mode ..........................................17
FYLink......................................................18
Overview of SmartLink..........................18
Connect with Android phone ................18
Connect with iPhone .............................19
Pop-up function menu...........................19
Settings ...................................................20
Display System .....................................20
Adjust General Settings ........................20
Adjust Video Settings............................20
Adjust Time Settings .............................21
Adjust sound settings............................21
Adjust Language Settings .....................21
Adjust Bluetooth Settings......................21
Adjust DVD Rating ................................22
Adjust Volume Settings.........................22
Other Modes............................................23
Listen to Other Devices ........................23
Reset ....................................................23
Replace a Fuse.....................................23
GPS ......................................................23
Steering Wheel Control Programming . . 23
Specications .........................................24
Troubleshooting .....................................26
Installation...............................................27
Disconnecting the Battery ....................27
Remove Transport Screws ...................27
Replacing the Fuse ...............................27
Wire Connections...................................28

4
Front Panel
Before Using
Notice:
The graphics in this manual are for reference purposes only and may differ somewhat from the
actual unit.
1. [NAV] Button: Press to switch to navigation mode.
2. [ ] knob:
Press to turn the unit ON. Press and hold to turn the unit OFF.
When on, press momentarily to activate the MUTE function. Press again to resume
normal listening.
3. [ ]/[ ] Button:Press to increase/decrease the volume.
4. [ ] Button: Press to switch between the main menu and current source.
5. Internal Microphone
6. A/V Input
Accepts a 3.5mm jack through which signals from various audio/video devices can
be applied to the unit.
7. Reset Button:
Press to reset system settings to factory default (except password and parental lock
settings).
8. USB Connector
Connect a USB device for playback of music/video/picture les.
9. Map Slot
The SD card is used for the Navigation Map only, not for music or other les. This
may be used for rmware updates if required.
10. SD card slot: Insert an SD card for playback of music/video/picture les.
11. Disc slot
12. [ ] Button: Press to eject the disc.

5
Before Using
Remote Control
1. Return to the home menu
2. Eject the disc
3. Access to tuner source
4. Access to disc source
5. - Search an available radio station by
decreasing tuning frequency
- Select the previous chapter/track for
playback
6. Select radio band
7. - Zoom in (Picture menu of CD/USB/SD)
- Access to music list (Audio menu of
music playing)
8. Adjust screen settings
9. Open EQ menu
10. Menu cursor
11. Enter
12. - Open route menu (DVD)
- Turns on/off PBC (VCD)
13. Digit area
14. Repeat playback
15. Change to next source
16. Power on/off
17. Access to Bluetooth source
18. Access to navigation source
19. Pause playback/Start playback
20. - Search an available radio station by
increasing tuning frequency
- Select the next chapter/track for
playback
21. - Playback disc in different angle for a
scene (DVD)
- Rotate (photo playing)
- Access to video list
22. - Language selection for subtitle (DVD)
- Access to photo list
23. Change the audio language for disc
playback (DVD)
24. Increase/Decrease volume
25. Access to settings source
26. Mute On/Off Audio Output
27. Activate direct access mode
28. Dial/Receive a call
29. Hang up
30. Play all chapter/tracks in random order
31. - Press to clear the number one by one
- Hold to clear all the numbers

6
Notes on Remote Control Usage
1. Aim the remote control at the remote sensor on the unit.
2. Replace the battery from the remote control or insert a battery insulator if the battery has not
been used for a month or longer.
3. DO NOT store the remote control in direct sunlight or in high temperature environment, or it
may not function properly.
4. The battery can work for 6 months under normal condition. If the remote control doesn’t work,
please change the battery.
5. Use“button shaped” lithium battery“CR2025”(3V) only.
6. DO NOT recharge, disassemble, heat or expose the battery in fire.
7. Insert the battery in proper direction according to the ( + ) and ( - ) poles.
8. Store the battery in a place where children cannot reach to avoid the risk of accident.
Uninstall Battery
Slide out the battery compartment tray
at the bottom on the back of the remote
control.
Install Battery
Use button-shaped lithium battery
CR2025 (3V)” only. Insert the battery
to the battery tray with proper direction
according to the (+) and (-) poles.
Before Using
PULL OUTPUSH IN

7
Parking Brake Inhibit
• When the “BRAKE” cable is connected to the brake switch, the video playback will be controlled
by driving status, system setup and input video sources.
• Parking brake function is overridden when the video source is set to REVERSE.
• When the car is moving ahead, if video is played, WARNING will appear on the screen
and then it will go blank. The warning screen will prevent the driver watching images. The
passengers in the rear seats can watch normally, if an additional monitor connects to the unit.
Power On / Off
Press the [ ] button on the unit (or the [ POWER ] button on the remote control) to turn the unit
on. The buttons on the front of the unit light up for a moment and the last working mode appears
on the screen.
Press and hold the [ ] button to turn off the unit.
Mute
Press [ ] button to mute the volume from the unit. Press again to restore the volume. Adjusting
the volume or using any of the audio setup features cancels the mute function.
Audible Beep Conrmation
An audible beep tone conrms each function selection. The Beep tone can be disabled through
the Setup menu.
Playing Source Selection
Press the [ ] button on the front panel or the [ SRC ] button on
the remote to change between available playing sources. The
playing mode is displayed on the screen.
1. Date and Time display.
2. Function icons.
3. All SRC.
Volume Adjustment
To increase or decrease the volume level, Press
the [ ]/[ ] button on the front panel or press the [ VOL+ ] /
[ VOL- ] button on the remote control. The volume ranges from
“0”to “50”. The LCD or TFT screen displays the volume level for 3
seconds.
.
EQ Menu
The Audio Control feature allows you to easily adjust your audio
system to meet the acoustic characteristics of your vehicle, which
vary depending on the type of vehicle and its measurements.
Proper setting of the Fader and Balance boosts the effects of the
cabin equalizer.
Basic Operations
2
1
32

8
Select Preset Equalizer
1. Enter the EQ setup menu
Touch the EQ icon in the user interface and the EQ setup
interface will display on the screen.
2. Select EQ mode
Touch the desired EQ selection: [ User ] / [ Flat ] / [ Classic ]
/ [ Rock ] / [ Jazz ] / [ Techno ] / [ Pop ], and the EQ mode will
change.
Adjust EQ Parameters
To adjust EQ parameters, touch and drag the parameters
adjustment bar.
[ User ]: Set the desired audio effect.
[ Reset ]: Cancel the equalizer function settings.
[ Loud: On/Off ]: When listening to music at low volumes, this
feature will selectively boost certain bass and
treble frequencies.
Adjust FAD BAL
You can adjust front/back/left/right balance of the speaker and the
subwoofer volume to get balanced listening effect according to the
surroundings and your interest.
1. Enter the EQ setup mode
Touch the [ ] icon in the EQ interface.
2. Adjust subwoofer volume
Touch [ ] / [ ] right to "Sub" to adjust subwoofer volume from
-12 to +12.
3. Adjust fader / balance value
Touch [ ] / [ ] / [ ] / [ ] to adjust fader / balance value
from -20 to +20.
[ ]: Front speaker
[ ]: Rear speaker
[ ]: Left speaker
[ ]: Right speaker
Notes:
1. The EQ mode will change to ‘User’ automatically when you adjust
the frequency value in all modes except ‘User’.
2. The value of Sub is independent of EQ mode and can be
adjusted separately.
Basic Operations

9
Basic Operations
Set Date /Time
1. Touch [ ] on the playing source menu.
2. Touch [ Clock ].
The date/time setup menu is displayed.
Set Date
1. Touch [ Date ].
2. Touch the date information on the screen .
A submenu is displayed.
3. Touch [ ] or [ ] to set year, month and day.
Set Clock Mode
1. Touch [Clock mode].
2. Touch [12Hr] or [24Hr] to switch to clock mode.
Set Time
1. Touch [ Clock ].
2. Touch the time on the screen, a submenu is displayed.
3. Touch [ ] or [ ] to set hour and minute.
Set Time Zone
1. Touch [Time Zone].
2. A submenu will be displayed.
3. Touch to select the time zone you desire.
Tip:
When date/time is set, touch [ Save ] to conrm or [ Cancel ] to exit.

10
Select Radio as Playing Source
Open the Source Menu and then touch [Radio].
Select One Radio Band
Press the [ BAND ] button on the remote or touch the [ ] icon on the user interface to select one
radio band among FM1, FM2, FM3, AM1 and AM2.
Tune
Auto Tuning
Hold [ ] / [ ] icon on the user interface for more than 1 second to seek a higher / lower station.
To stop searching, repeat the operation above or press other keys having radio functions.
Note:
When a station is received, searching stops and the station is played.
Manual Tuning
Method 1:
During manual tuning, the frequency will be changed in steps.
Touch the [ ] / [ ] icon on the user interface to tune in a higher / lower station.
Method 2:
1. Touch the numeric keypad icon [ ]. Numeric keyboard is displayed, touch numbers to input
frequency.
2. Touch [ ] to delete the input numbers step by step.
3. Touch [ OK ] to enter.
Radio Mode
Tuner Menu
1. Touch to view the SOURCE MENU.
2. To view all the stored stations
3. Preset stations list of current band
4. Clock
5. Current station frequency
6. Current radio band
7. Touch to view more buttons
8. Tune backward(short press)
Seek backward(long press, then short press briey)
9. Search stations automatically
10. Tune forward(short press)
Seek forward(long press, then short press briey)
11. Touch to change band
12. Save the desired radio station
13. Touch to receive Local or Distant stations
14. Enter frequency directly
15. Touch to access Equalizer settings menu
13 14 1512
1
3
2
87 9 10 11
4
5
6

11
Local Seeking
Touch the [ ] icon and choose the Radio Local or Distance.
When the [ ] icon turns bright, only stations with a strong signal
strength will be detected . Default is “Distance”.
EQ Selection
Press the [ ] icon to enter the EQ setup menu.
Radio Mode
Preset Station
The unit has 5 bands, such as FM1, FM2, FM3, AM1, AM2, and
each band can store 6 stations; hence the unit can store 30
stations in total.
Search Stations Automatically
Touch [ ] to search and store the 6 strongest stations in the
current band automatically.
Manual Store
1. Tune to a station manually.
2. Touch [ ].
3. Touch one of the channels P1 to P6 to save the selected
station.
Tune to a Preset Station
1. Touch [ ].
2. Select the desired band.
3. Touch one of the preset channels (P1 to P6) on the screen.

12
Load a Disc
You can play video, audio or images stored on the following discs:
• DVD Video, DVD-R, DVD-RW
• VCD
• Audio CD, CD-R, CD-RW
Note:
Ensure that the disc contains playable content.
Eject a Disc
Press the [ ] key on the front panel to eject the disc. When the
disc is ejected, the unit switches to the previous source.
Touch Screen Controls
The touch key areas for DVD playback are outlined below:
A: Return to the main menu
B: Play the video and display playback information
C: Display onscreen control menu
D: Time display
Controlling Playback
To access the on-screen controls, touch the screen anywhere
except for the upper left corner and touch again to cancel display.
Touch [ ] to view all function icons.
Connect a USB Device
1. Open the USB door.
2. Insert the USB device to the USB socket.
Play starts automatically.
Remove a USB Device
1. Select another source in the main menu.
2. Remove the USB device.
Insert a SD Card
1. Open SD card cover.
2. Insert the SD card into the SD card slot.
Play starts automatically.
Remove a SD Card
1. Select another source in the main menu.
2. Press the card until you hear a click sound.
3. Remove the SD card.
Play/Pause
1. Once a disc, USB or SD card is inserted, play starts
automatically.
For DVD movie, if a menu appears, press [ ] to start play.
2. To pause, touch [ ].
Playback Mode
B
C
A

13
To resume play, touch [ ].
3. Skip to previous / next track / chapter, press [ ] / [ ] key.
Previous/Next
Touch [ ] / [ ] key on the screen to skip to previous / next
track / chapter.
Search for a Folder
For Video Files
1. Touch [ ] to display all available video folders.
2. Touch a folder, then touch the desired le.
3. Touch the le again to start play.
For Audio Files
1. Touch [ ] to display all available audio folders.
2. Touch a folder, then touch the desired le.
3. Touch the le again to start play.
For Picture Files
1. Touch [ ] to display all available picture folders.
2. Touch a folder, then touch the desired le.
3. Touch the le again to start play.
For Folder Control
1. Touch [ ] to display all available folders.
2. Touch a folder, then touch the desired le.
3. Touch the le again to start play.
Repeat
For DVD/VCD movie disc:
1. Touch bottom half of the screen to display menu on the screen,
if necessary.
2. Touch [ ] to display the 2nd menu.
3. Touch [ ] repeatedly to select:
DVD
[ ] Repeat chapter: Play the current chapter repeatedly.
[ ] Repeat title: Play all chapters in the title repeatedly.
[ ] Repeat all: Play all in the disc repeatedly.
[ ] Repeat off: Cancel repeat play.
VCD
[ ] Repeat single: Play the current single repeatedly.
[ ] Repeat all: Play all in the disc repeatedly.
[ ] Repeat off: Cancel repeat play.
Playback Mode

14
For CD/MP3 les:
1. Touch anywhere except the upper left corner to display menu on the screen, if necessary.
2. Touch [ ] repeatedly:
[ ] Repeat single: Play the current single repeatedly.
[ ] Repeat folder: Play all in the current folder.
[ ] Repeat all: Play all in the disc or storage repeatedly.
[ ] Repeat off: Cancel repeat play.
Repeat A-B
You can repeat a specic of video le (repeat A-B).
1. Touch the screen to display control menu, if necessary.
2. Touch [ ] to display the 2nd menu, if necessary.
3. Touch [ A-B ] repeatedly to mark:
Repeat A-: the start of the section to repeat.
Repeat A-B: the end of the section to repeat.
The selected section plays repeatedly.
4. To exit A-B repeat mode, touch A-B repeatedly, [Repeat A-B off] is displayed.
Shufe (Random) Play
You can play audio tracks/les in random order.
1. Touch the screen to display control menu, if necessary.
2. Touch [ ] to display the 2nd menu, if necessary.
3. Touch [ ] on the screen repeatedly to turn random play on or off.
Select Audio Mode
When you play VCDs, you can select an audio mode (R/L/Stereo).
1. During play, touch bottom half of the screen to display menu on the screen, if necessary.
2. Touch [ ] to display the 2nd menu.
Touch [ ] repeatedly until the audio mode is selected.
Select Subtitle Language
For DVD discs that contain two or more subtitle languages.
1. During play, touch the screen to display menu on the screen, if necessary.
2. Touch [ ] to display the 2nd menu.
3. Touch [ ] repeatedly to select a language.
The selected language is displayed.
Change Viewing Angle
Some DVDs contain alternate scenes,such as scenes recorded from different camera angles.
For such DVDs, you can select from the available alternate scenes.
1. During play, touch the screen to display menu on the screen, if necessary.
2. Press [ Angle ] repeatedly on the remote control.
The viewing angle is changed.
Playback Mode

15
Video Setup
Touch [ ] to access video setup mode, touch [ ] or [ ] to
set the desired effect.
You may set the brightness,contrast, saturation, and hue of the
video output from 1 to 20.
Playback Information
Touch the screen when playing back DVD and VCD discs and the
playback information will be displayed on the top area of the TFT.
For DVD
1. Disc type.
2. DVD Title information. “01/08” indicates that this DVD has
8 titles and the title playing back now is the rst title.
3. DVD Chapter information. “005/012” indicates that current title
has 12 chapters and the chapter playing back now is the fifth
chapter.
For VCD
1. Disc type.
2. VCD Track information. “01/08” indicates that this VCD has
8 tracks and the track playing back now is the rst title.
Elapsed Time
1. Elapsed time of the current track.
2. Total time of the current track.
Direct Track Entry
To select a track directly, touch the [ ] icon on screen control to
display the direct entry menu. Enter the desired track using the on-
screen number pad. Press [ OK ] to the selected track.
Rotate Pictures
1. When you view pictures, touch the screen to display menu on
the screen, if necessary.
2. Touch [ ] to display the 2nd menu.
3. Touch [ ] repeatedly to rotate the picture.
Zoom
You can zoom in pictures for a close view.
1. When you view pictures, touch the screen to display menu on
the screen, if necessary.
2. Touch [ ] to display the 2nd menu.
3. Touch [ ] repeatedly to zoom in the picture.
Playback Mode
12 3
DVD T:01/08 C:005/012
12
VCD Track:01/08
12
00:01:20 00:30:17

16
You can make or receive phone calls with Bluetooth-enabled phones
through the unit. You can also listen to music from a Bluetooth-
enabled device.
Pair the Bluetooth-enabled Devices
To connect your Bluetooth device to the unit, you need to pair the
device to the unit. Pairing needs only to be done once. You can pair
up to five devices. You also can search for Bluetooth devices by
mobile phone.
1. Turn on the Bluetooth function on the device.
2. Touch [Bluetooth] on the main source menu.
3. Touch [ ] to search for Bluetooth device with the unit.
4. Select the Bluetooth device ID in the pairing list.
5. The password displays on the right of the screen.
Tip:
• The operational range between this unit and a Bluetooth device
is approximately 5 meters .
• Before you connect a Bluetooth device to this unit, familiarize
yourself with the Bluetooth capabilities of the device.
• Compatibility with all Bluetooth devices is not guaranteed.
• Any obstacle between this unit and a Bluetooth device can
reduce the operational range.
• Keep this unit away from any other electronic device that may
cause interference.
Disconnect Bluetooth Device
To disconnect one device, touch [ ] .
Tip:
• The device will also be disconnected when the device is moved
beyond the operational range.
• If you want to reconnect the device to the unit, place it within the
operational range.
• If you do not want to reconnect the device to the unit
automatically, touch [ ], then set [ Auto connect ] to [ Off ].
For details, see the “Adjust Bluetooth Settings” section.
Make a Call
1. Select Bluetooth function in the home menu.
2. Pair the phone with the unit.
3. Search for phone number from the following list:
[Phone Book]
[Call Log]
[Missed calls]
[Received calls]
[Dialed calls]
Or touch the number pad directly, then touch [ ] to dial.
Bluetooth Mode

17
Receive a Call
1. If there is an incoming call, the screen will appear “Incoming”.
2. You may touch the screen to select [ Hang up ] or [ Answer ].
Tip
• You can select to receive calls automatically by set [Auto answer]
to [On] status.
Adjust Bluetooth Settings
1. In Bluetooth menu, touch [ ].
The option menu is displayed.
2. Touch on the selected option to change the setting.
∙ [Bluetooth]: To turn on or off “Bluetooth” function.
∙ [Auto connect]: To turn on or off “Auto connect” function.
∙ [Auto answer]: To turn on or off “Auto answer” function.
∙ [Pairing code]: To set paring code.
∙ [Phone sync]: To synchronize phone book, touch [ OK ] on the
sub-menu popped out.
Phonebook sync may take several minutes to load on initial setup.
Tip
• You can also adjust Bluetooth settings in the “Settings” menu.
Music Mode
1. Pair your mobile phone to the unit.
2. Touch [Bluetooth Audio] on the main menu.
3. Touch the [ ] to start playback.
Touch [ ] / [ ] to select track.
A2DP
A2DP is short for Advanced Audio Distribution Prole. The mobile
phones supporting this function can transmit stereo audio, whereas
the ones not supporting this function can transmit mono audio only.
AVRCP
AVRCP is short for Audio/Video Remote Control Prole. The mobile
phones supporting this function can control the playback of a
Bluetooth audio player.
In the mode of the music player working, if you want to make a
phone call, you can press the number keys on the mobile phone.
At the same time the music player will stop. The TFT screen will
display “Calling”, after the call received, the voice will be transferred
to the unit. When the call ends, the screen will display music playing
menu.
If there is an incoming phone call, the music player will stop, and the
screen will display “Incoming”. When the call ends, the screen will
display music playing menu.
Bluetooth Mode

18
FYLink
Connect with Android phone
1. Start Android phone [USB debugging].
The operations of Android phone’s entering [Setting] are as follows
(since the Android phone versions are not the same, it roughly has
two conditions):
1) Existence of [Developer options]: Click [Additional settings]-Click
[Developer options]-click to open [Start developer options]-click to
open [USB debugging]-determine to allow.
2) Inexistence of [Developer options]: Click system version number
(interior version number) for 7 times, then back to setting and click
[Developer options]-click to open “Start developer options”-click to
open [USB debugging]-determine to allow.
2. Bluetooth connection.
Scan for Bluetooth devices and select this system for connection.
3. Correctly connect USB wire.
4. Auto install APP.
For the rst connection with SmartLink, if the Android phone is not
installed with interconnection APP, the SmartLink will push to install
to Android phone.
5. Finish connection.
(If it is not connected successfully, please replace USB cable or
vehicle USB interface, or re-insert USB wire or restart Android
phone and re-try).
6. After connection, operate according to the screen software.
Tip:
• For your driving safety, please do not use the function during
driving.
• For normal use, Android 4.0 version is recommended. Since
Android 2.3X and below version system lacks relevant support,
when using the version system to connect the product, some
functions (such as: mobile video play, etc.) may not display
normally.
Overview of SmartLink
The system of the car device is WinCE version, which supports
the connection between the car device and Smart phone, and the
connection way is standard USB interface connection.
And you can also control your phone by the car device, such as
receiving calls, dialing calls, listening to the music and watching
movies or pictures from your phone, as well using navigation from
the Smart phone to the screen of the car device.
Note:
You can't control your iPhone by the unit. (iPhone mirrors
display on screen)
1) Existence of [Developer options]:
2) Inexistence of [Developer options]:

19
• According to the different mobile phone” Media library” and
“Video” program support formats, it is not all the video les copied
to mobile phone can be identified and played. According to the
different equipment function, not all video les of all formats can be
played in vehicle terminal smoothly.
• Since the mobile phone data cable performance difference in the
market, it is strongly recommended using the original USB data
line to connect so as to guarantee the connection stability.
• Due to the difference of mobile phone performance, when using
different mobile phones to connect, the performance may be
different.
Connect with iPhone
1. Open the Personal Hotspot on the settings menu of your
iPhone.
2. Connect your iPhone to the USB port of the unit.
3. Open the control center of your iPhone and touch [AirPlay].
4. Select [EC-Mirror], and turn on the "Mirroring" function.
5. After connecting successfully, the desktop of you iPhone will
display on the screen of the unit.
(If it is not connected successfully, please replace USB cable or
vehicle USB interface, or re-insert USB wire or restart iPhone and re-
try).
Note:
Support iPhone 5 and IOS 8.0, or above version.
Pop-up function menu
Pop up functional menu by clicking the floating icon ( ) at left
corner of screen, and the denition of functional key is as follows:
FYLink
Interface icon Name Function
Return key Back to previous level, which is the same as the back key
on Android mobile phone
Option key Pop up the options menu of current software, which is
equal to the option key on Android mobile phone
APP screen key Back to APP screen, which is the same as the APP
screen key on Android mobile phone
Main menu key Back to main menu, which is the same as the main menu
on the unit.
OFF key Close the software and disconnect the double-screen
interaction with mobile phone.
Table of contents
Other Domain Car Video System manuals
Popular Car Video System manuals by other brands

Directed Electronics
Directed Electronics OHD1202 owner's guide

Kenwood
Kenwood SK-SYTL1 instruction manual

Audiovox
Audiovox VOD10 - Car - Overhead LCD Monitor installation guide

Winnebago
Winnebago View Profile Basic operation guide

Winnebago
Winnebago OUTLOOK 2007 Operation guide

Boss Audio Systems
Boss Audio Systems Road Show RS70DVDT user manual

Panasonic
Panasonic CXDV700U - CAR DVD PLAYER operating instructions

Alpine
Alpine PKG-RSE3DVD installation manual

Blaupunkt
Blaupunkt San Andres 970 operating instructions

Movies 2 go
Movies 2 go AVXMTGHR1D Operation manual / installation guide

r.LiNK
r.LiNK 3008 NAC manual

Audiovox
Audiovox AVXMTG10U Operation manual