Charging lead gel batteries DT24
10
5.1 Connections and controls
6 Charging lead gel batteries
!
➤Connect the refrigerated container to an external power supply.
✓The lead gel batteries are charged automatically via the charger.
➤Replace the lead gel batteries after approx. 600 charging cycles (see chapter
“Replacing lead gel batteries” on page 10).
7 Replacing lead gel batteries
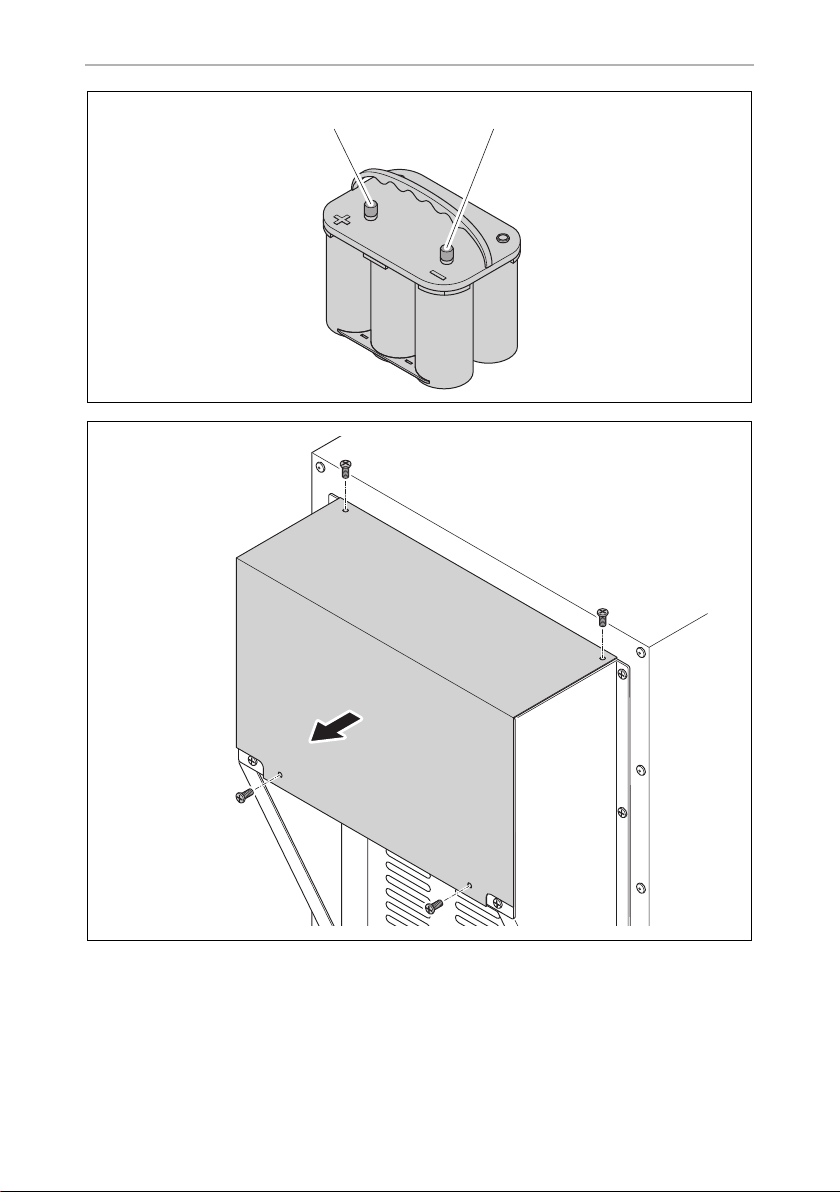
➤Remove the four screws of the battery compartment (fig. 2, page 3).
➤Remove the battery compartment lid and put it safely to one side.
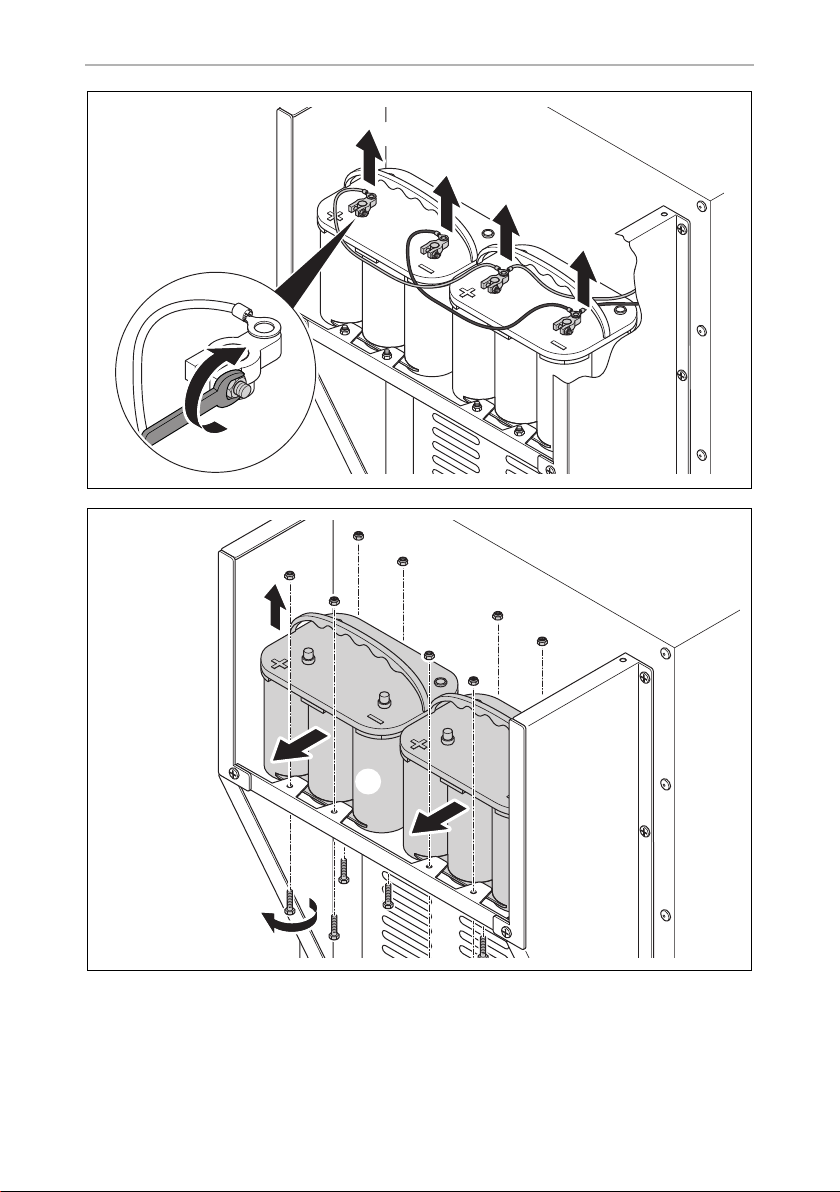
➤Loosen the terminal clamps on both lead gel batteries (fig. 3A, page 4).
➤Remove the terminal clamps from the negative terminals of both lead gel batter-
ies at the same time to avoid a short circuit (fig. 3B, page 4).
➤Remove the terminal clamps from the positive terminals of both lead gel batteries
at the same time to avoid a short circuit (fig. 3C, page 4).
➤Undo the four screws and nuts of the battery mount on each lead gel battery. Two
of the four screws and nuts are located on the opposite side (fig. 4A and
fig. 4B, page 4).
➤Loosen and remove the lead gel batteries from the bracket (fig. 4C, page 4).
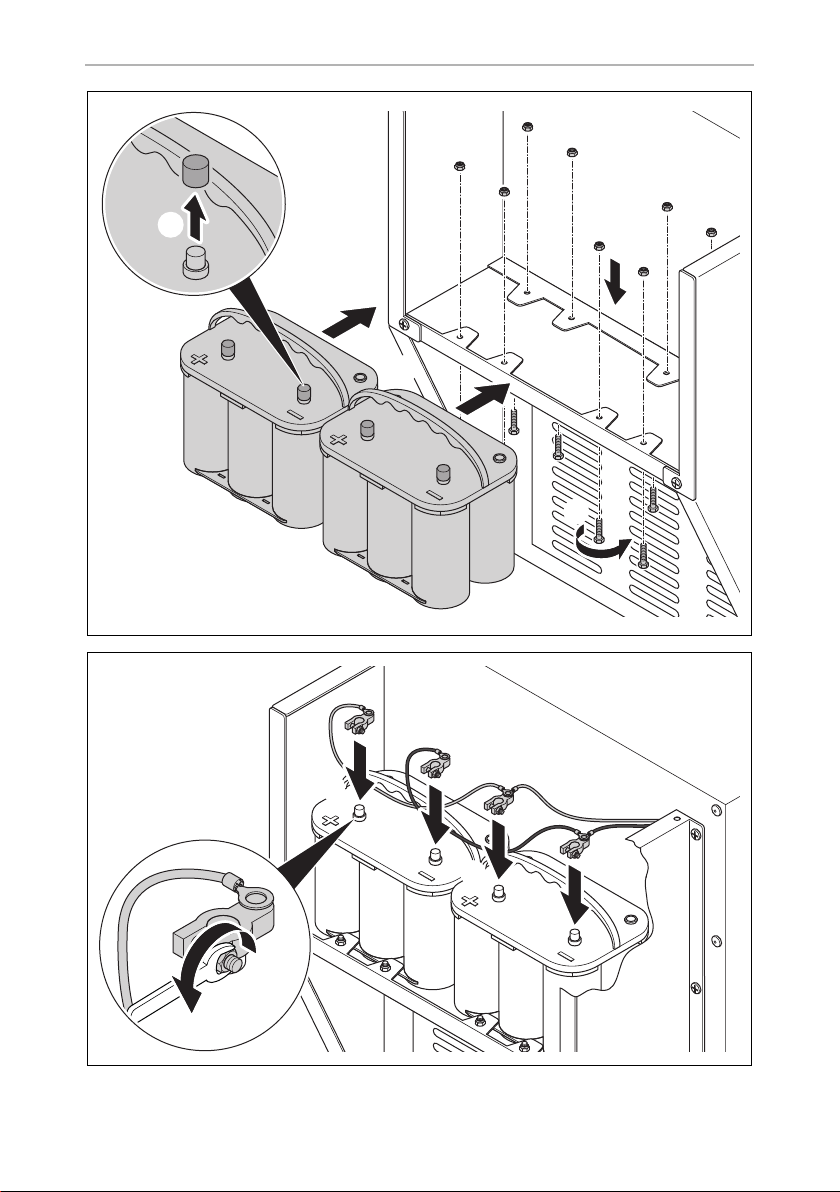
➤Insert the new lead gel batteries in the bracket (fig. 5A, page 5).
No. in
fig. 1, page 3 Description
1 Positive terminal connection
2 Negative terminal connection
WARNING!
If batteries are overcharged they may catch fire. Only use the charger
supplied. Read and observe the assembly and operating manual of the
charger.
DT-24-O-16s.book Seite 10 Mittwoch, 23. November 2016 4:33 16