Dometic CV1004 User manual

Central vacuum cleaner
Installation and Operating Manual. . . 8
Zentralstaubsauger
Montage- und Bedienungsanleitung 19
Aspirateur central
Instructions de montage
et de service . . . . . . . . . . . . . . . . . . 32
Aspirador central
Instrucciones de montaje y de uso . 44
Aspirapolvere centralizzato
Istruzioni di montaggio e d’uso . . . . 56
Centrale stofzuiger
Montagehandleiding en gebruiks-
aanwijzing . . . . . . . . . . . . . . . . . . . . 68
Centralstøvsuger
Monterings- og betjeningsvejledning 80
Centraldammsugare
Monterings- och bruksanvisning . . . 91
Sentralstøvsuger
Monterings- og bruksanvisning . . . 102
Keskuspölynimuri
Asennus- ja käyttöohje . . . . . . . . . 113
Aspirador central
Instruções de montagem e manual de
instruções . . . . . . . . . . . . . . . . . . . 124
Центральный пылесос
Инструкция по монтажу и
эксплуатации . . . . . . . . . . . . . . . . 136
EN
DE
FR
ES
IT
NL
DA
SV
NO
FI
PT
RU
Odkurzacz centralny
Instrukcja montażu i obsługi . . . . . 148
Centrální vysavač
Návod k montáži a obsluze. . . . . . 159
Centrálny vysávač
Návod na montáž a uvedenie do
prevádzky . . . . . . . . . . . . . . . . . . . 170
Központi porszívó
Szerelési és használati útmutató . 181
PL
CS
SK
HU
CV1004


CV1004
3
12
3
4
5
6
7
12
8
11
9
10
1
3
1
2
4
2

CV1004
4
3
2
1 1
2
min. 10 mm
max. 25 mm
280 mm
153 mm
4
2.
1.
5
6
7

CV1004
5
8
9
0
Ø 60 mm
a
b

CV1004
6
c
d
e
f
1.
2.
g
h

CV1004
7
i
j
k
l
m
n

EN
Explanation of symbols CV1004
8
Please read this instruction manual carefully before installation and
first use, and store it in a safe place. If you pass on the product to
another person, hand over this instruction manual along with it.
Table of contents
1 Explanation of symbols . . . . . . . . . . . . . . . . . . . . . . . . . . . . . . . . . . . 8
2 Safety instructions . . . . . . . . . . . . . . . . . . . . . . . . . . . . . . . . . . . . . . . 9
3 Scope of delivery . . . . . . . . . . . . . . . . . . . . . . . . . . . . . . . . . . . . . . . 11
4 Accessories . . . . . . . . . . . . . . . . . . . . . . . . . . . . . . . . . . . . . . . . . . . 11
5 Intended use . . . . . . . . . . . . . . . . . . . . . . . . . . . . . . . . . . . . . . . . . . 12
7 Installing the vacuum cleaner . . . . . . . . . . . . . . . . . . . . . . . . . . . . . 13
8 Using the vacuum cleaner . . . . . . . . . . . . . . . . . . . . . . . . . . . . . . . . 14
9 Maintaining and cleaning the vacuum cleaner. . . . . . . . . . . . . . . . . 16
10 Troubleshooting . . . . . . . . . . . . . . . . . . . . . . . . . . . . . . . . . . . . . . . . 16
11 Warranty . . . . . . . . . . . . . . . . . . . . . . . . . . . . . . . . . . . . . . . . . . . . . 17
12 Disposal . . . . . . . . . . . . . . . . . . . . . . . . . . . . . . . . . . . . . . . . . . . . . . 18
13 Technical data . . . . . . . . . . . . . . . . . . . . . . . . . . . . . . . . . . . . . . . . . 18
1 Explanation of symbols
!
!
A
WARNING!
Safety instruction: Failure to observe this instruction can cause
fatal or serious injury.
CAUTION!
Safety instruction: Failure to observe this instruction can lead to
injury.
NOTICE!
Failure to observe this instruction can cause material damage and
impair the function of the product.

EN
CV1004 Safety instructions
9
I
➤Action: This symbol indicates that action is required on your part. The
required action is described step-by-step.
✓This symbol describes the result of an action.
Fig. 15, page 3: This refers to an element in an illustration. In this case,
item 5 in figure 1 on page 3.
2 Safety instructions
The manufacturer accepts no liability for damage in the following cases:
Damage to the product resulting from mechanical influences and excess
voltage
Alterations to the product without express permission from the manu-
facturer
Use for purposes other than those described in the operating manual
2.1 General safety
!WARNING!
Before you use the device for the first time, check that the oper-
ating voltage matches the mains voltage (see type plate).
Do not operate the appliance if it is visibly damaged.
This device may only be repaired by qualified personnel. Inade-
quate repairs may cause serious hazards.
Should your appliance need to be repaired, please contact cus-
tomer service.
This appliance can be used by children aged 8 years or over, as
well as by persons with diminished physical, sensory or mental
capacities or a lack of experience and knowledge, providing
they are supervised, or have been taught how to use the appli-
ance safely and are aware of the resulting risks.
Cleaning and user maintenance must not carried out by unsu-
pervised children.
Children must not play with the device.
NOTE
Supplementary information for operating the product.

EN
Safety instructions CV1004
10
Children must be supervised to ensure that they do not play with
the device.
Always keep and use the device out of the reach of children
under 8 years of age.
Never expose the device to moisture.
Do not use accessories that have not been recommended by
the manufacturer. This can lead to injury and material damage.
Only use accessories recommended by the manufacturer.
Do not lean any objects against the vacuum cleaner.
2.2 Operating the device safely
!CAUTION!
Never pull the plug out of the socket by the connection cable.
Remove the power plug from the socket if you plan to carry out
maintenance work.
Never use the device in rooms where flammable materials are
stored or flammable gases have built up. Sparks from the motor
could ignite them.
Keep the nozzles away from eyes, ears and face while operat-
ing. Ensure that hair, loose clothing and fingers do not get in the
outlets or moving parts.
Keep children and animals at a safe distance when operating
the device.
Do not use the device with wet hands.
ANOTICE!
Do not vacuum any
– wet objects
– solvents or caustic liquids
– hot, glowing, hard or sharp objects
– poisonous materials
These could damage the device or the filter.
Do not vacuum any large objects, such as waste paper or
cloths. These could block the hose.
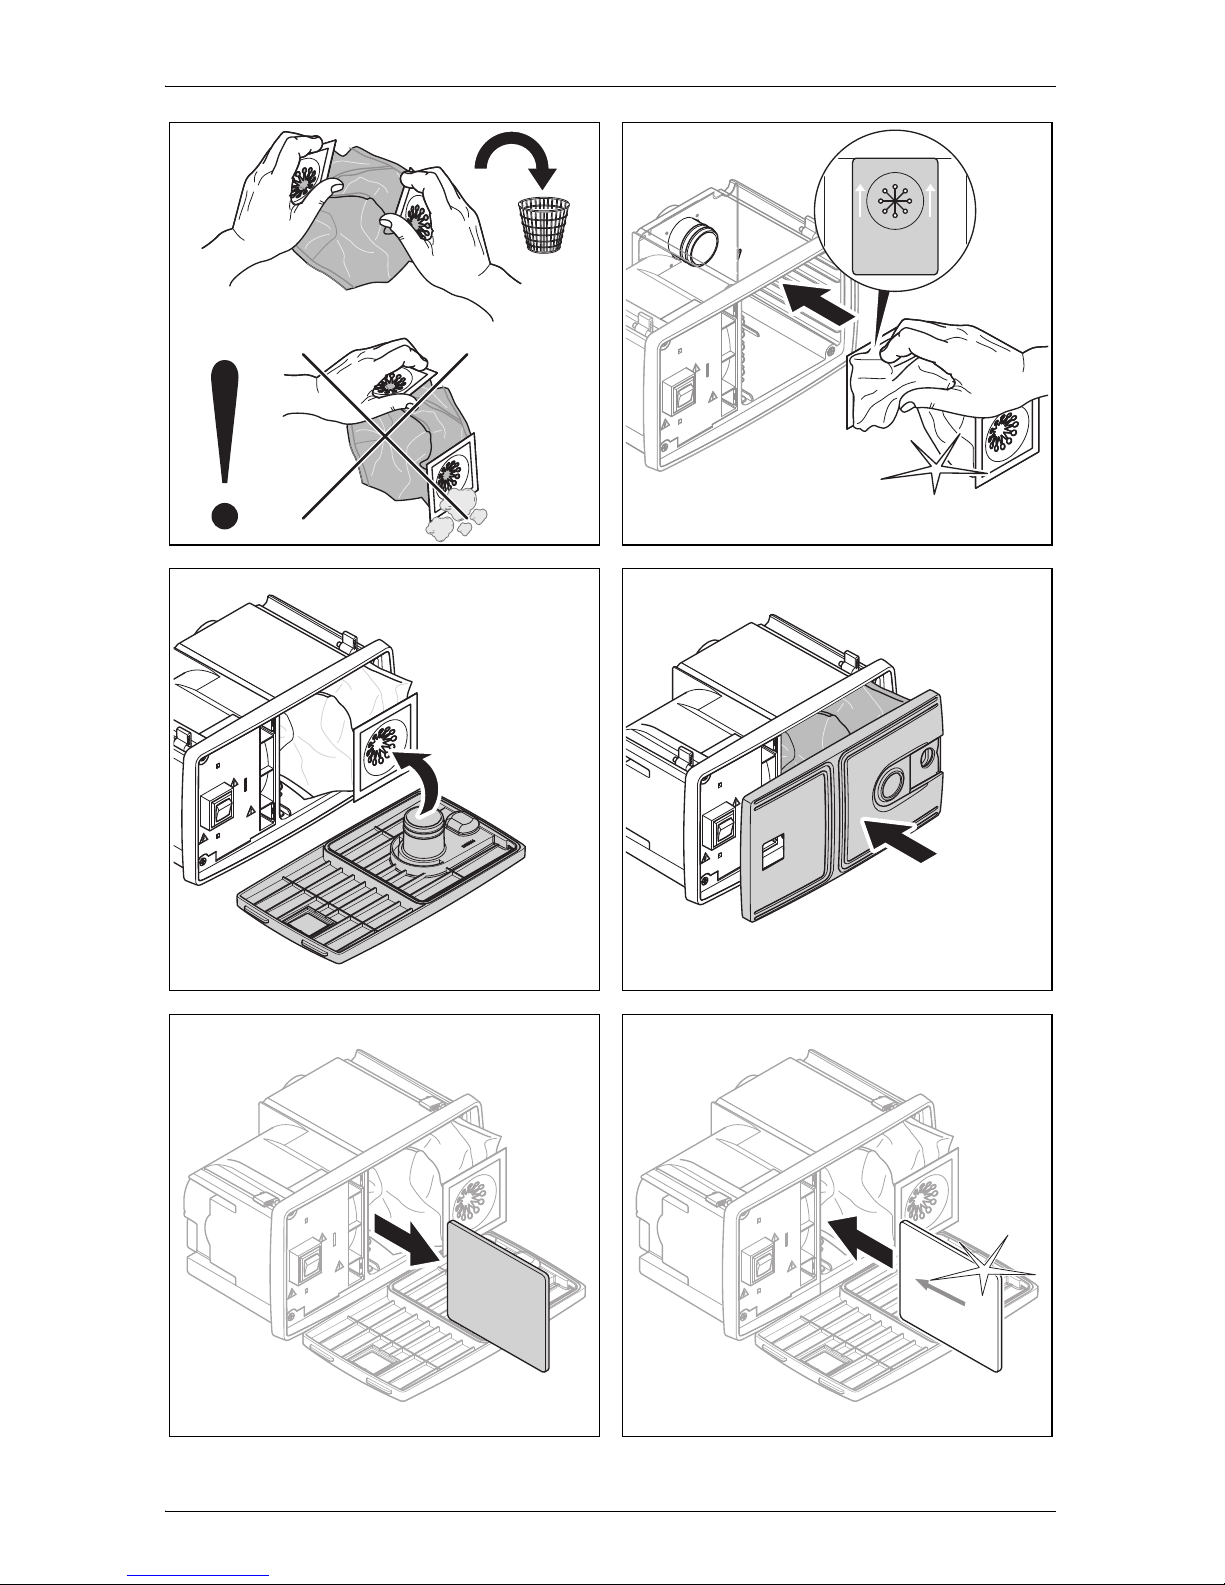
If the motor filter is dirty, rinse it in warm water or insert a new
filter. Only insert filters that are completely dry.
Only use the device indoors, never outside.

EN
CV1004 Scope of delivery
11
Make sure that none of the vents are blocked. If necessary,
clean the vents before you use the device.
Do not use the device without a filter or a dust bag.
Do not tread on the hose and do not pull too tightly on it.
3 Scope of delivery
4 Accessories
Available as accessories (not included in the scope of delivery):
No. in
fig. 1, page 3 Quantity Designation
1 1 Central vacuum cleaner
2 1 Floor nozzle
3 1 Attachment brush
4 1 Dust nozzle
5 1 Crevice nozzle
6 1 Telescopic tube
7 1 Suction hose
8 1 Hose socket
9 2 Screw connector (black)
10 2 Mounting connector (white)
11 1 Connection hose (2 m)
12 2 Dust bag
Designation Item no.
New dust bag (pack of 5 incl a motor filter) 9103501128
Dometic VacPort automatic dust pan 9103501127

EN
Intended use CV1004
12
5 Intended use
The CV1004 central vacuum cleaner (item no. 9103501126) is a vacuum
cleaner for installation in a suitable cavity wall or in existing fixtures in cara-
vans, motorhomes or boats. This device is not intended for commercial use.
It may not be used outdoors.
6 Technical description
The central vacuum cleaner's suction hose can be connected directly to the
device or to an external hose socket.
The suction hose must be turned on and off using the switch when using it
while connected to the central vacuum cleaner. The device has automatic
suction which is activated when the suction hose is inserted into the hose
socket.
The vacuum cleaner system can be extended using the Dometic VacPort
(not included in the scope of delivery). This automatic dust pan can be fitted,
for example, in the entrance or kitchen area in order to suck away dirt which
has been swept up there using the permanently installed nozzle.
6.1 Control elements
No. in
fig. 2, page 3 Description Explanation
1 I/O switch Switches the vacuum cleaner on or off
whenever the suction hose is con-
nected to the central vacuum cleaner.
2 Sliding cover Closes up the hose connection on the
device. Closing increases the suction
when working from an external hose
socket.
3 Slider Opens the front of the device (e.g. for
changing the dust bag)
4 Motor filter Protects the motor from contamination

EN
CV1004 Installing the vacuum cleaner
13
7 Installing the vacuum cleaner
!
A
➤Ensure that the dust bag and the motor filter are in place.
➤Check the vacuum cleaner works prior to installation.
A
➤Mount the vacuum cleaner (fig. 4, page 4 to fig. 0, page 5).
I
➤Mount the hose socket and route the connection hose (fig. a, page 5,
and fig. b, page 5).
WARNING! Danger of electrocution and serious injury.
Beware of electrical cables in the wall when drilling and sawing.
NOTICE!
Mount the vacuum cleaner in a dry place.
Do not mount the vacuum cleaner in an area which is subject
to high temperatures.
Do not bend the connection cable round sharp edges or cor-
ners. Keep the connection cable away from heated surfaces.
To install the vacuum cleaner, the wall thickness must be a
minimum of 10 mm and a maximum of 25 mm.
Ensure there is a socket nearby which can be used to supply
the vacuum cleaner with power. Do not use extension cables.
If the vacuum cleaner is being installed in small spaces with
poor ventilation (e.g. cabinet), then an air outlet and an air out-
let grille with a cross-section of 70 mm must be installed in
order to transport warm air generated by the device outside.
NOTICE!
The bolts on the housing must not be screwed out completely
because they are fitted with a spring mechanism.
NOTE
The mounting connectors (fig. 31, page 4) need to be glued on
the device-side using a standard adhesive. The screw connectors
(fig. 32, page 4) are screwed into the connection hose and
inserted into the mounting connectors.

EN
Using the vacuum cleaner CV1004
14
Connecting electrical power to the vacuum cleaner
➤Connect the orange-coloured 24 Vgcables on the rear of the device to
the contacts on the hose socket (fig. c, page 6).
!
➤Connect the 230 V connection cable to a suitable socket (fig. d, page 6).
8 Using the vacuum cleaner
A
8.1 Vacuuming using the central vacuum cleaner
➤Open the sliding cover (fig. 22, page 3) by sliding it to the right.
➤Insert the hose into the hose connection on the device.
➤Set the switch to position “I” (fig. 21, page 3) to switch on the device.
✓The vacuum cleaner switches on.
➤Set the switch to position “O” (fig. 21, page 3) to switch off the device.
➤Disconnect the hose from the hose connection on the device.
➤Close the sliding cover (fig. 22, page 3) by sliding it to the left.
WARNING!
Danger of electrocution and serious injury.
Only use the 230 V connection cable supplied.
NOTICE!
Do not use the vacuum cleaner without a dust bag or motor
filter.
Only use spare parts and accessories recommended by the
manufacturer.

EN
CV1004 Using the vacuum cleaner
15
8.2 Vacuuming using the hose socket
I
➤To switch on, connect the hose to the external hose socket.
✓The vacuum cleaner switches on automatically.
➤To switch off, disconnect the hose from the external hose socket.
✓The vacuum cleaner switches off automatically.
8.3 Changing the dust bag
A
I
➤Change the dust bag (fig. e, page 6, to fig. l, page 7).
NOTE
Use the sliding cover to close up the hose connection on the front
of the device if you are vacuuming from the external hose socket.
This increases the level of suction.
NOTICE!
It is important for vacuum cleaner suction that the dust bag is fitted
correctly. Please follow the instructions carefully, see fig. e,
page 6 to fig. l, page 7.
NOTE
The dust bag has two openings. One of the two ends has two
arrows. This end must be attached on the device with the
arrows pointing upwards (fig. j, page 7). Make sure the dust
bag is fitted in the correct position.
Firstly remove the opening from the connecting nozzle in the
device and then remove the other opening from the connecting
nozzle on the front of the device. Hold the openings upwards
to prevent any dust falling out.
Replace or clean the motor filter after you have changed the
dust bag five times.

EN
Maintaining and cleaning the vacuum cleaner CV1004
16
8.4 Replacing and cleaning the motor filter
I
➤Remove the motor filter and insert a new one or reinsert the cleaned
motor filter (fig. m, page 7 and fig. n, page 7).
9 Maintaining and cleaning the vacuum
cleaner
A
➤Occasionally clean the product with a damp cloth.
10 Troubleshooting
I
NOTE
Replace or clean the motor filter after you have changed the dust
bag five times or if it is heavily soiled.
You can wash the motor filter by hand in mild soapy water. Do not
wash it in a washing machine or with hard objects. Leave it to dry
before fitting it in the vacuum cleaner in the direction of the
arrows.
NOTICE!
Do not use sharp or hard objects or cleaning agents for cleaning
as these may damage the product.
NOTE
The vacuum cleaner is equipped with a thermal overload protec-
tion which prevents the motor from overheating.
If the motor stops, switch the device off by setting the switch to
position “O” or disconnecting the suction hose from the external
hose socket.
Let the device cool down for around 1 hour. If this fault still occurs
following the troubleshooting measures described below, then
please contact the manufacturer or your dealer.

EN
CV1004 Warranty
17
If the motor stops, switch off the vacuum cleaner and proceed as follows:
➤Check whether the suction hose is blocked.
Hold the suction hose up and drop a small coin in from above. If the coin
does not fall through the hose, it is blocked. Push the dirt ball through the
hose using a long rod.
➤Check the dust bag.
If a large amount of dirt which is not household dust (plasterboard dust,
fine sawdust etc.) is vacuumed up, the pores in the dust bag can get
blocked.
Insert a new dust bag.
➤Clean the suction hose if it is heavily soiled.
– Hold the ends of the suction hose up high.
– Pour liquid detergent into both ends.
– Fill up with water while holding both ends up.
– Shake the suction hose to and fro to loosen the dirt.
– Pull the suction hose apart as far as possible.
– Rinse out the dirt.
– Repeat this procedure until the suction hose is clean.
– Hang the suction hose up from the middle and leave it to dry before
using it again.
➤Check whether the floor nozzle is blocked.
Clean the floor nozzle.
➤Check the motor filter.
Clean or replace the motor filter.
11 Warranty
The statutory warranty period applies. If the product is defective, please
contact the manufacturer's branch in your country (see the back of the
instruction manual for the addresses) or your retailer.
For repair and guarantee processing, please include the following docu-
ments when you send in the device:
A copy of the receipt with purchasing date
A reason for the claim or description of the fault

EN
Disposal CV1004
18
12 Disposal
➤Place the packaging material in the appropriate recycling waste bins
wherever possible.
MIf you wish to finally dispose of the product, ask your local recycling
centre or specialist dealer for details about how to do this in
accordance with the applicable disposal regulations.
13 Technical data
CV1004
Item no.: 9103501126
Input voltage: 220 - 240 Vw
Power consumption: 950 W
Current: 4.5 A
Suction power: 2500 mm water column
Operating temperature: –15 °C to +40 °C
Dimensions W x H x D: 298 x 171 x 175 mm
Weight: 2.7 kg
Certificate:

DE
CV1004 Erklärung der Symbole
19
Bitte lesen Sie diese Anleitung vor Einbau und Inbetriebnahme sorg-
fältig durch und bewahren Sie sie auf. Geben Sie sie im Falle einer
Weitergabe des Produktes an den Nutzer weiter.
Inhaltsverzeichnis
1 Erklärung der Symbole . . . . . . . . . . . . . . . . . . . . . . . . . . . . . . . . . . 19
2 Sicherheitshinweise . . . . . . . . . . . . . . . . . . . . . . . . . . . . . . . . . . . . . 20
3 Lieferumfang . . . . . . . . . . . . . . . . . . . . . . . . . . . . . . . . . . . . . . . . . . 22
4 Zubehör . . . . . . . . . . . . . . . . . . . . . . . . . . . . . . . . . . . . . . . . . . . . . . 23
5 Bestimmungsgemäßer Gebrauch . . . . . . . . . . . . . . . . . . . . . . . . . . 23
7 Staubsauger montieren . . . . . . . . . . . . . . . . . . . . . . . . . . . . . . . . . . 25
8 Staubsauger benutzen. . . . . . . . . . . . . . . . . . . . . . . . . . . . . . . . . . . 26
9 Staubsauger pflegen und reinigen . . . . . . . . . . . . . . . . . . . . . . . . . . 28
10 Störungsbeseitigung . . . . . . . . . . . . . . . . . . . . . . . . . . . . . . . . . . . . 29
11 Gewährleistung . . . . . . . . . . . . . . . . . . . . . . . . . . . . . . . . . . . . . . . . 30
12 Entsorgung. . . . . . . . . . . . . . . . . . . . . . . . . . . . . . . . . . . . . . . . . . . . 30
13 Technische Daten . . . . . . . . . . . . . . . . . . . . . . . . . . . . . . . . . . . . . . 31
1 Erklärung der Symbole
!
!
A
WARNUNG!
Sicherheitshinweis: Nichtbeachtung kann zu Tod oder schwerer
Verletzung führen.
VORSICHT!
Sicherheitshinweis: Nichtbeachtung kann zu Verletzungen
führen.
ACHTUNG!
Nichtbeachtung kann zu Materialschäden führen und die
Funktion des Produktes beeinträchtigen.

DE
Sicherheitshinweise CV1004
20
I
➤Handlung: Dieses Symbol zeigt Ihnen, dass Sie etwas tun müssen. Die
erforderlichen Handlungen werden Schritt für Schritt beschrieben.
✓Dieses Symbol beschreibt das Ergebnis einer Handlung.
Abb. 15, Seite 3: Diese Angabe weist Sie auf ein Element in einer Abbil-
dung hin, in diesem Beispiel auf „Position 5 in Abbildung 1 auf Seite 3“.
2 Sicherheitshinweise
Der Hersteller übernimmt in folgenden Fällen keine Haftung für Schäden:
Beschädigungen am Produkt durch mechanische Einflüsse und Über-
spannungen
Veränderungen am Produkt ohne ausdrückliche Genehmigung vom
Hersteller
Verwendung für andere als die in der Anleitung beschriebenen Zwecke
2.1 Allgemeine Sicherheit
!WARNUNG!
Kontrollieren Sie vor Inbetriebnahme des Gerätes, ob Betriebs-
spannung und Netzspannung übereinstimmen (siehe Typen-
schild).
Wenn das Gerät sichtbare Beschädigungen aufweist, dürfen
Sie es nicht in Betrieb nehmen.
Reparaturen an diesem Gerät dürfen nur von Fachkräften
durchgeführt werden. Durch unsachgemäße Reparaturen
können erhebliche Gefahren entstehen.
Wenden Sie sich im Reparaturfall an den Kundendienst.
Dieses Gerät kann von Kindern ab 8 Jahren und darüber sowie
von Personen mit verringerten physischen, sensorischen oder
mentalen Fähigkeiten oder Mangel an Erfahrung und Wissen
benutzt werden, wenn sie beaufsichtigt oder bezüglich des
sicheren Gebrauchs des Gerätes unterwiesen wurden und die
daraus resultierenden Gefahren verstehen.
Reinigung und Benutzer-Wartung dürfen nicht von Kindern
ohne Beaufsichtigung durchgeführt werden.
HINWEIS
Ergänzende Informationen zur Bedienung des Produktes.
Other manuals for CV1004
1
Table of contents
Languages:
Other Dometic Vacuum Cleaner manuals