PORTUGUÊS ENGLISH
INSTALAÇÃO E MONTAGEM
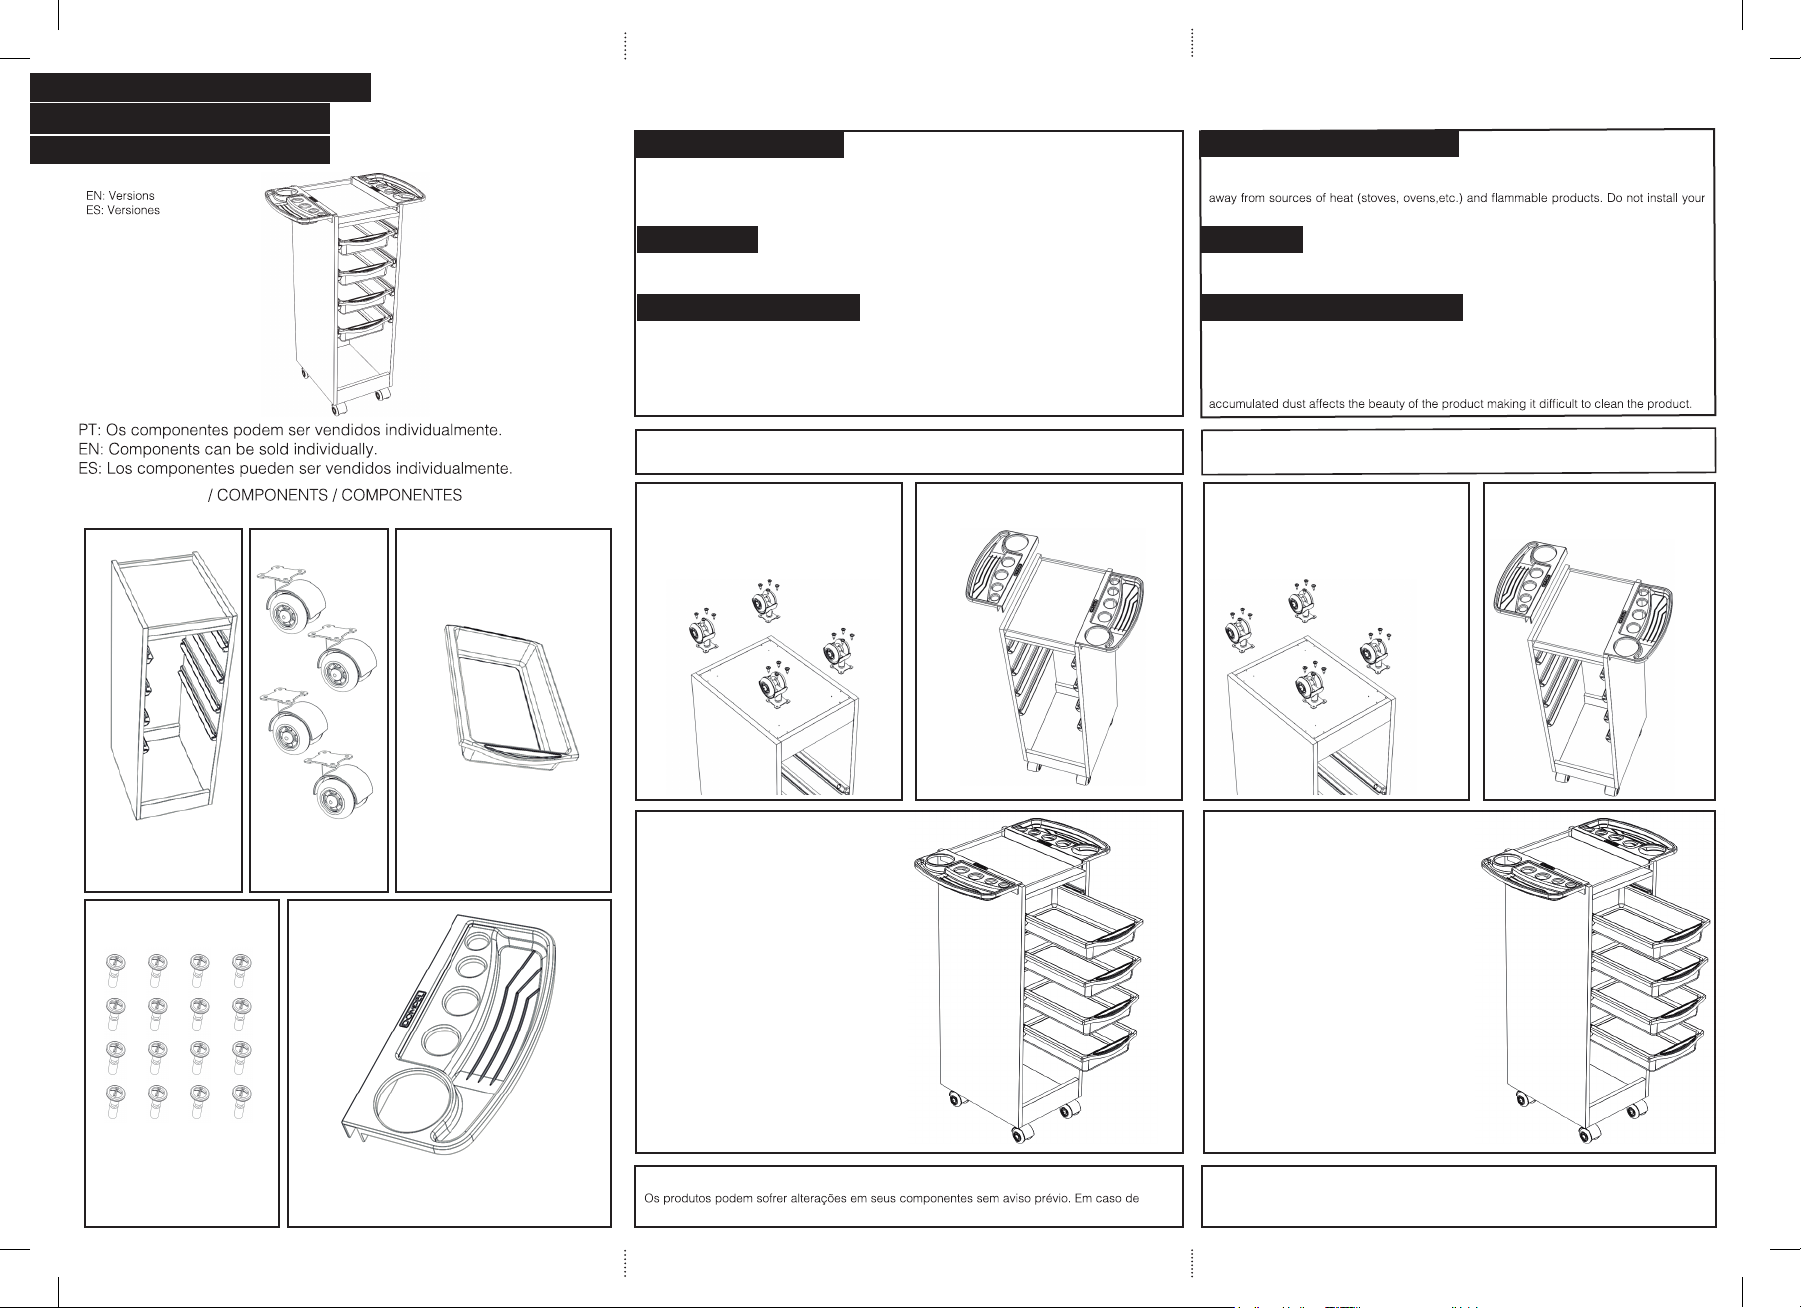
Retire todos os componentes da embalagem e siga os seguintes passos:
MERELY ILLUSTRATIVE IMAGES.
Products may suffer changes in its components without prior warning. If any questions,
contact Dompel.
IMAGENS MERAMENTE ILUSTRATIVAS.
dúvidas contate a Dompel.
LOCAL DE INSTALAÇÃO
SEGURANÇA
Evite acidentes. Após desembalar o produto, mantenha o material de embalagem fora do alcance
de crianças.
LIMPEZA E MANUTENÇÃO
Install your Dompel product in a level place with no grooves or splices, preventing rocking
and vibration. The location must be airy and it must not allow straight sunlight and it must be
product outdoors.
Avoid accidents. After unpacking the product, keep all the pack material out of children’s
reach.
Do not use metal spatulas, brushes and cleaning agents such as alcohol, acetone, kerosene,
gasoline, bleach, thinner, solvents, varsol, vinegar or other chemicals or abrasives not
recommended in this manual.
To easily clean it, use a solution of warm water with a neutral soap and then wipe dry
carefully. The plastic parts can not be washed with boiling water. Perform periodic cleaning,
LOCATION OF INSTALLATION
CLEANING AND MAINTENANCE
SECURITY
CARRINHO AUXILIAR ROMA
SALON TROLLEY ROMA
CARRO AUXILAR ROMA
Caixa / Carton / Caja (01)
PT: Versões:
COMPONENTES
A B C
D E
1 2
3
INSTALLATION AND ASSEMBLY
Remove all the components from the package and follow the steps below.
Fixe os rodízios (B) na base inferior da estrutura
montada (A) (há pré-furos para posicionamento
dos parafusos), utilizando chave philips comum.
(São 04 rodízios e 04 parafusos para cada
rodízio, acomodados dentro da caixa,
embaladas em um saco plástico).
Encaixe manualmente os suportes laterais (E)
no tampo superior da estrutura montada (A).
Acomode manualmente as gavetas (C) nos trilhos
da estrutura (A). O encaixe, movimentação e
acesso das gavetas se darão por ambos os lados
do carrinho.
Instale seu produto Dompel em um lugar nivelado e sem ranhuras ou emendas, evitando o
movimento de balanço e vibração. O local deve ser arejado, que não permita a incidência direta
de raios solares e que esteja distante de fontes de calor (fogão, fornos, etc.) e produtos
inflamáveis. Não instale seu produto ao ar livre.
Não utilize espátulas metálicas, escovas e agentes de limpeza como álcool, acetona, querosene,
gasolina, água sanitária, tíner, solventes, varsol, vinagres ou outros produtos químicos ou abrasivos
não recomendados neste manual.
Para limpar facilmente, utilize uma solução de água morna com sabão neutro e depois seque
cuidadosamente. As partes plásticas não podem ser lavadas com água fervente. Efetue uma limpeza
periódica uma vez que a sujeira acumulada afeta a beleza do produto e dificulta a próxima limpeza.
PT – Estrutura montada (x 01)
EN – Assembled structure (x 01)
ES – Estructura montada (x 01)
PT – Rodízios (x 04)
EN – Casters (x 04)
ES – Ruedas (x 04)
PT – Gavetas (x 04)
EN – Drawers (x 04)
ES – Cajones (x 04)
PT – Parafusos (x 16)
EN – Screws (x 16)
ES – Tornillos (x 16)
PT – Suportes laterais do tampo (x02)
EN – Side top supports (x02)
ES – Soportes laterales de la tapa (x02)
1 2
3
Fix the casters (B) on the bottom base of the
assembled structure (A) (there are pre-holes for
positioning the screws), using a common philips
wrench. (There are 04 casters and 04 screws
for each caster. They are accommodated inside
the box and packed in a plastic bag).
Manually fit the side supports (E) on the
top of the assembled structure (A).
Manually accommodate the drawers (C) on the
structure rails (A). The drawers will fit, move and
access on both sides of the trolley.


