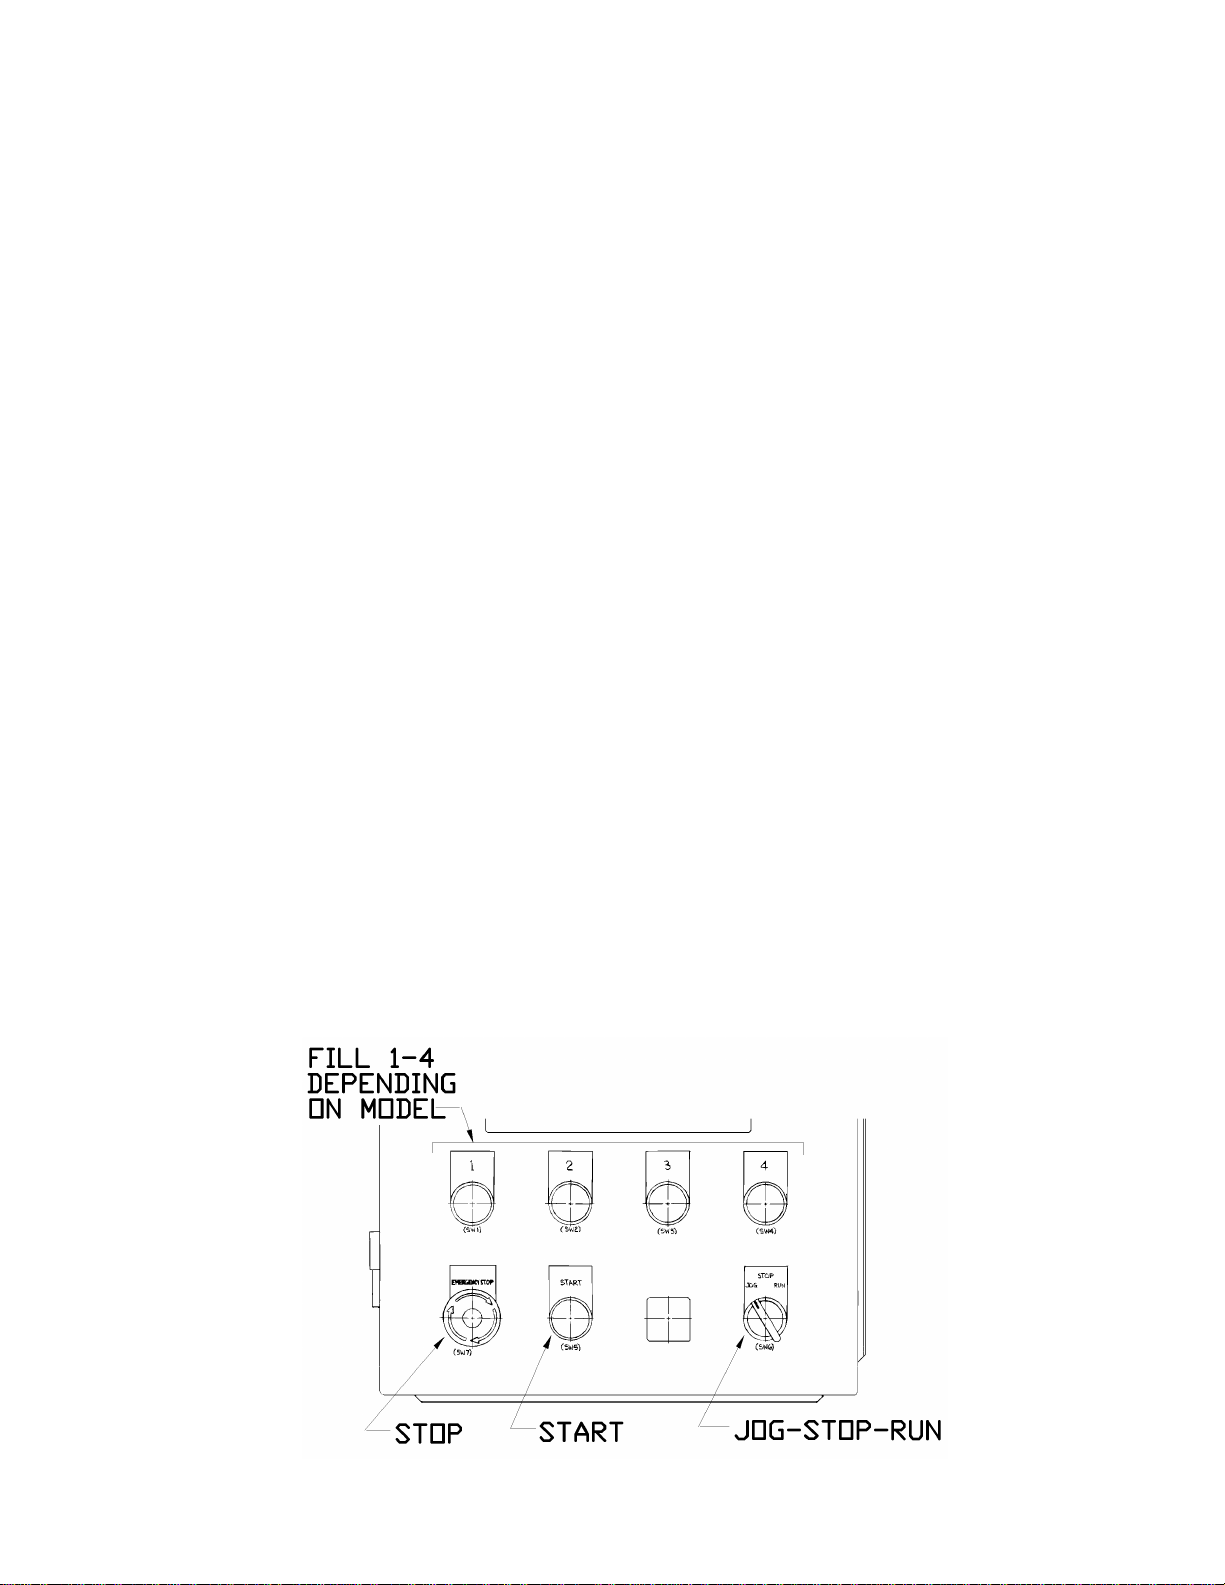
Operating Instructions For 8600 FCS
Fill Control System
MN151R12 6/26/98 9
SETPOINTS
The SP0 - SP9 commands initialize the specified setpoints as batching setpoints. All
setpoints will be inactive until they are called within the batching program. When execution of
the batch sequence reaches a SP0 - SP9 command, the specified setpoint becomes active, and
stays that way until the trip criteria is met. The batching sequence will remain at that step in the
sequence until the setpoint trips. Once the setpoint trips, the output is disabled and the next
step in the batch sequence is executed.
The DEFSP command selects the default setpoint, i.e. the currently selected setpoint, as a
batching setpoint. This allows the user to use different setpoints within a batch sequence
without changing the command list.
When a setpoint is set for a state type output (COZ, NET MODE, GROSS MODE,
PAUSED, etc.) the output will always be continuously true for the validity of the state type
selected. For example, for as long as the indicator is within the center of zero and setpoint 0 is
selected to output the state of the COZ, the output of setpoint 0 will be active until the indicator
goes beyond the center of zero.
When a setpoint is designated as a DUMP setpoint, when the DUMP command is issued as a
command in the batching sequence, the setpoint will become active until the gross weight
returns to below the setpoint value entered. This is useful for when a dump operation is required
to empty a vessel until a threshold or an empty point is met. Once the setpoint is achieved and
the dump is completed, the next command will be executed.
The SETS0 - SETS9 and CLRS0 - CLRS9 commands set or clear the specified setpoint,
respectively. For example, a SETS0 command will cause setpoint 0 to be active, while a CLRS0
command will cause it to be inactive. In order to use these commands, the specified setpoints
must be set as 'BAT SET' in 8.0 tyPE in the setup menu.
Note: Only those setpoints called out in the batch program will act as batching setpoints; all
others will operate as if the indicator is in the normal mode of operation.
REVIEW/CHANGE BATCH COMMAND LIST
When selecting the batching command list, you can specify any one of 93 commands in up to
76 steps. To enter a command, select main menu 9.bAtLSt. Once selected, press ACCUM and
the first step (00) in the list will be displayed with the current command for that step. To select
the step to review or change, press ACCUM to increment to the next step or press NET/GROSS
to decrement to the previous step.
There are two ways to select a command for a given step. The easiest way is to enter the 3-
digit command number followed by ENTER (the command list is at the end of this section under
BATLST). The second way to change the command is to press RCL to increment through the