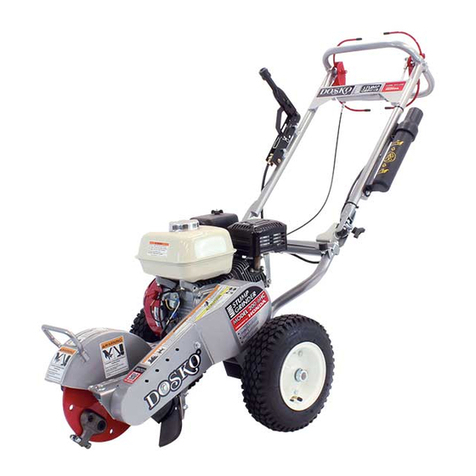
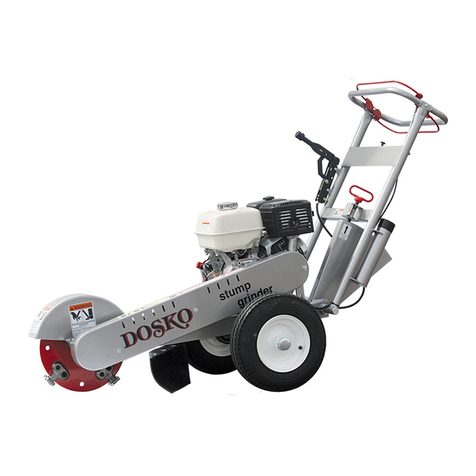
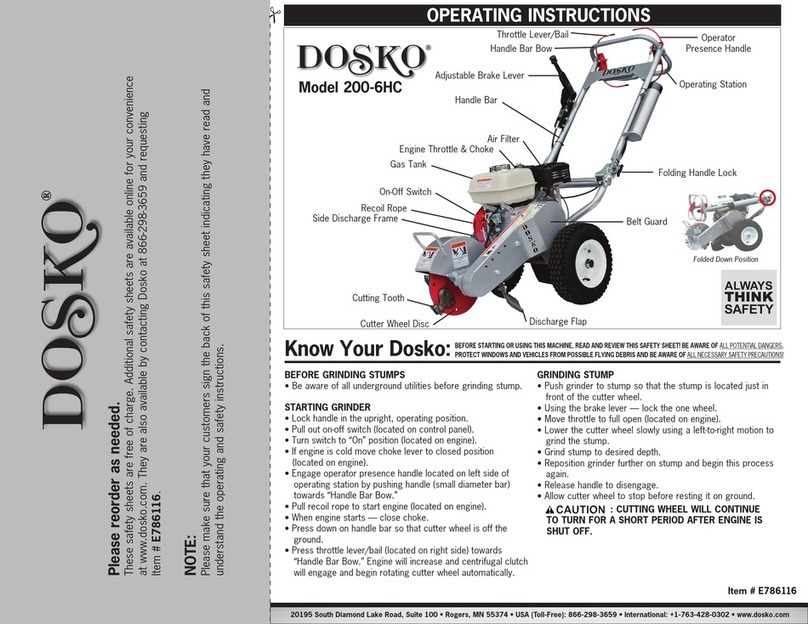
DOSKO M2961090A User manual

1
Owner's Manual
Instructions for Operation, Maintenance
Compact Stump and Root Grinder
2961090 (200-6H)
Your Dosko grinder is intended for outdoor-use only and can be used to remove many tree stumps and
exposed root systems close to ground level. By moving the blade in sweeping movements laterally over
the top and front of the stump, you can gradually grind it away. Make sure you completely read and
understand this manual before using the grinder for the first time.
WARNING
READ and UNDERSTAND this manual completely before using the grinder! Failure to properly operate,
and maintain this grinder could result in serious injury or death to the operator or bystanders.
All machines have hazards associated with their operation. This stump grinder has certain special hazards,
which you must be aware of. As an operator or owner you have a duty to be aware of these hazards and know
preventive measures to take to avoid them. When reading this manual pay particular attention to avoiding these
hazards.
In particular, be aware of the following:
Know location of buried electrical and other utility lines.
Do not allow children or untrained adults to operate.
Wear eye protection and other personal protection against flying rocks and debris.
Check that cutter wheel teeth are secured, sharp and not missing.
Do not operate if operator presence bar fails to stop engine upon release.
Make sure no children or bystanders are within 75 feet of stump grinding operation.
Protect cars, windows and other objects within 75 feet from flying debris.
Be prepared for machine "kickback" when initially contacting the stump.
Be aware of potential for carbon monoxide (CO) poisoning.
Prevent fires/explosions from fueling.
Do not attempt to perform adjustments, declog or clean unit while engine is running.
Avoid burns from engine or hot exhaust.
Avoid using in wet or icy conditions where falls may occur.
Details about these hazards are found throughout the manual and are summarized at the end of the manual under
"Important Safety Information."
STOP!
ADD ENGINE OIL:Your stump grinder comes fully assembled and requires only that you add engine oil to crankcase
and fuel to tank.
INSPECT COMPONENTS:Closely inspect to make sure no components are missing or damaged. See the "Receiving
Your Unit" section for instructions on whom to contact to report missing or damaged parts.
Any Questions, Comments, Problems, or Parts Orders
Call your dealer or Dosko Customer Service 1-800-822-0295
MODEL NUMBER: 2961090
SERIAL NUMBER: _____________

M2961090A

Maintenance & Repair
18
WARNING
ALWAYS shut off the engine, make sure the engine is cool, and disconnect the spark plug
before cleaning, adjusting, or servicing the grinder. Make sure all guards and shields are
replaced before using.
Maintenance
Perform regular
maintenance
Perform periodic maintenance as directed in this manual to keep the
grinder in safe working condition.
Follow safety rules
Read and follow these safety rules whenever you will be servicing the
grinder:
Turn off grinder. Always turn off grinder and remove spark plug or spark plug
wire before working on the engine or grinder to prevent accidental starting.
Replace guards/shields. Make sure all guards and shields are replaced after
servicing the grinder.
Burns. Muffler will be hot even after unit is stopped. Allow unit to cool before
servicing.
Repair. Major service, including the installation or replacement of parts, should
be performed only by a qualified electrical service technician. Obtain factory
approved parts from Dosko Service at 1-800-822-0295.
Replacement parts. If a part needs replacement, only use factory approved
repair parts. Replacement parts that do not meet specifications may result in a
safety hazard or poor operation of the grinder and will void the warranty.
Perform engine
maintenance
Perform engine maintenance as specified in the engine owner's manual.
Engine maintenance items include:
1. Oil and oil filter changing
2. Air filter check/replacement
3. Spark plug cleaning and replacement
4. Fuel filter check/replacement
5. Fuel tank cleaning.
Inspect fuel system
/ check for leaks
Inspect the fuel system and check for leaks on a regular basis.
Look for: signs of leaks or deterioration, chafed or spongy fuel hose, loose
connections, loose or missing fuel hose clamps, damaged gasoline tank, or
defective gasoline shut-off valve.

Maintenance & Repair (cont’d)
19
Lubricate
Cutter shaft bearings should be greased.
The cutter shaft bearing is greased by pumping grease into zerks located on
the housing of the bearing. Lubricate after every 20 hours of use.
Grease Specification
Soap Type
Lithium Complex
NLGI Grade
#2
Dropping Point
230°C (446°F)
Additives
Corrosion and Oxidation inhibitors, EP
optional
Viscosity Index
80 Minimum
Check and adjust
brake
Check that the brake is functioning properly.
-Lock the brake, push down on handle bar so that cutter wheel is
off the ground.
-Push or pull the grinder- if the brake is loose, the wheel will
rotate.
To adjust braking tension:
-Unscrew set screw.
-Turn knob clockwise to increase
tension or counter-clockwise to
decrease tension.
-Once you have set the brake to the
proper tension, tighten set screw to
lock adjustment knob.
Grease zerks
Cutting wheel
Bearing
Set screw
Knob

Maintenance & Repair (cont’d)
20
Belt Tension Adjustment
Note: Belt tension and alignment are inter-related. Do not adjust one without checking the
other.
1. Remove belt guard.
2. Loosen (4) engine base (mount) bolts.
3. Loosen lock nuts on tension bolt and alignment bolt.
4. Turn tension bolt clockwise to increase belt tension and counterclockwise to decrease belt
tension.
5. Check that the pulleys are aligned using a straight edge. To achieve proper pulley alignment
you may need to adjust the alignment bolt. This bolt will serve as an adjustment point to
counter the tension in the belts, which may cause the engine pulley to be misaligned with the
cutter wheel pulley. Note: Set screws in pulley have a torque specification of 17 ft/lbs.
6. Belt tension is proper when a 5 to 7lbs force will deflect the belt 1/4" at the midpoint.
7. Retighten all loosened nuts and bolts.
8. Reassemble belt guard.
Note: New belts require a "break-in" period of approximately 10 hours. Readjustment may be
necessary after "break-in."
Note: Use only factory recommended belts. Contact your Dosko dealer.
Lock nut
Tension bolt
Alignment bolt
Lock nut

Maintenance & Repair (cont’d)
21
Stop-Switch Adjustment
WARNING:
Never attempt to alter, modify or override this switch.
If Stop-switch ever needs to be replaced or adjusted follow the below directions.
1. Loosen Hex Nut.
2. Turn the Linkage Bolt clockwise to lower or
counter-clockwise to raise the point of
interaction with Stop Switch. To set the proper
interaction distance, grip the Operator Presence
Bar & Handle Bar together and lower the
Linkage Bolt onto the Switch Button until the
switch button cannot be depressed any further.
Then raise the linkage bolt one turn
(counterclockwise).
3. Tighten Hex Nut.
4. Verify operability of stop switch before
operating machine by releasing the operator
presence bar next to the handle bar. You
should hear a “CLICK”, signifying that the
Linkage Bolt has been adjusted properly.
Installing Teeth
Among the most critical elements of the stump grinder is the cutting wheel. It is also the most subject
to damage and wear. In the course of grinding stumps it not only makes contact with the wood, but
also encounters numerous abrasives and objects in the stump's environment, such as dirt, stones, large
rocks and buried scrap.
The loss and wear of cutting teeth can significantly impair the efficiency and performance of the
stump grinder. Therefore, it is important to make frequent inspections of the condition of all the
cutting teeth and to replace any damaged or worn teeth.
Installing Teeth
Thread in the bolt with the lock washer through the wheel and into the tooth as
shown, then tighten. Bolt should be torqued to 60 ft/lbs.
0.31"- 0.25"
Hex nut
Lower
Raise
Linkage bolt
Stop
switch
Operator
presence bar
Handle bar
Tooth
Bolt
Lock washer
Wheel

Maintenance & Repair (cont’d)
22
Index Teeth
You should index teeth when:
They look like this:
To index: Loosen bolt and rotate tooth 1/3 turn. Retighten bolt to 60 ft/lbs.
M1® Blueshark™cutting teeth are tipped with heavy-duty carbide. Carbide retains its
sharpness longer; cuts faster and smoother, and can withstand heat better. Though
carbide is tremendously hard, it is also reasonably brittle.
Contact your dealer or Dosko Customer Service
@ 1-800-822-0295 for replacements.
Top View
Side View
Rounding
Normal Wear

Maintenance & Repair (cont’d)
23
Maintenance Schedule
CAUTION:
Before attempting any maintenance, be sure that the engine is shut off,
and spark plug wire is removed, and the engine is cool to the touch!
Item
(What to check or action req'd)
Daily
Each
Use
10 hours
20 hours
40 hours
Bearings, Shaft - Grease
X
Belt Tension - Tension
X
Bolts - Tightness
X
Engine –See manual
Gasoline –Amount
X
Safety Switches –Operation
X
Warning Decals –Legible
X
Tires, Flaps –Condition
X
Wires, Cables –Condition
X
Cutter Teeth - Sharpness
X
IMPORTANT:
If a part needs replacement, only use parts that meet the manufacturer's specifications. Replacement
parts that do not meet specifications may result in a safety hazard or poor operation of the grinder.
Contact Dosko Customer Service at 1-800-822-0295
for any questions, problems, or parts orders.
Table of contents
Other DOSKO Grinder manuals

DOSKO
DOSKO 200-6H-CE User manual

DOSKO
DOSKO M2961090D User manual

DOSKO
DOSKO M2961040A User manual

DOSKO
DOSKO M2961040K User manual

DOSKO
DOSKO 2961000 User manual

DOSKO
DOSKO M2961090B User manual

DOSKO
DOSKO 200-6H User manual

DOSKO
DOSKO 337S-13HC User manual

DOSKO
DOSKO M2961000B User manual

DOSKO
DOSKO M2961040E User manual