Produktbeschreibung / Ausstattungsvarianten / Technische Daten
2
Vielen Dank
dass Sie sich für den dot-spot clar LED Hochleistungsstrahler entschieden haben!
dot-spot Produkte werden nach sehr hohen Qualitätsrichtlinien entwickelt und gefertigt.
Die hohe Qualität und lange Lebensdauer der Produkte sind ein aktiver Beitrag zur
Ressourcenschonung und zum Umweltschutz.
Lesen Sie diese Bedienungsanleitung vollständig durch, bevor Sie den Strahler verwen-
den. Bewahren Sie die Anleitung gut auf. Falls Sie den Strahler an Dritte weitergeben,
geben Sie auch die Bedienungsanleitung mit. Die Nichtbeachtung dieser Anleitung kann
zu Gefahren für Personen und Schäden an Gegenständen führen. Für Personen- und
Sachschäden, die aufgrund der Nichtbeachtung dieser Bedienungsanleitung entstehen,
übernehmen wir keine Haftung.
Produktbeschreibung, bestimmungsgemäßer Betrieb
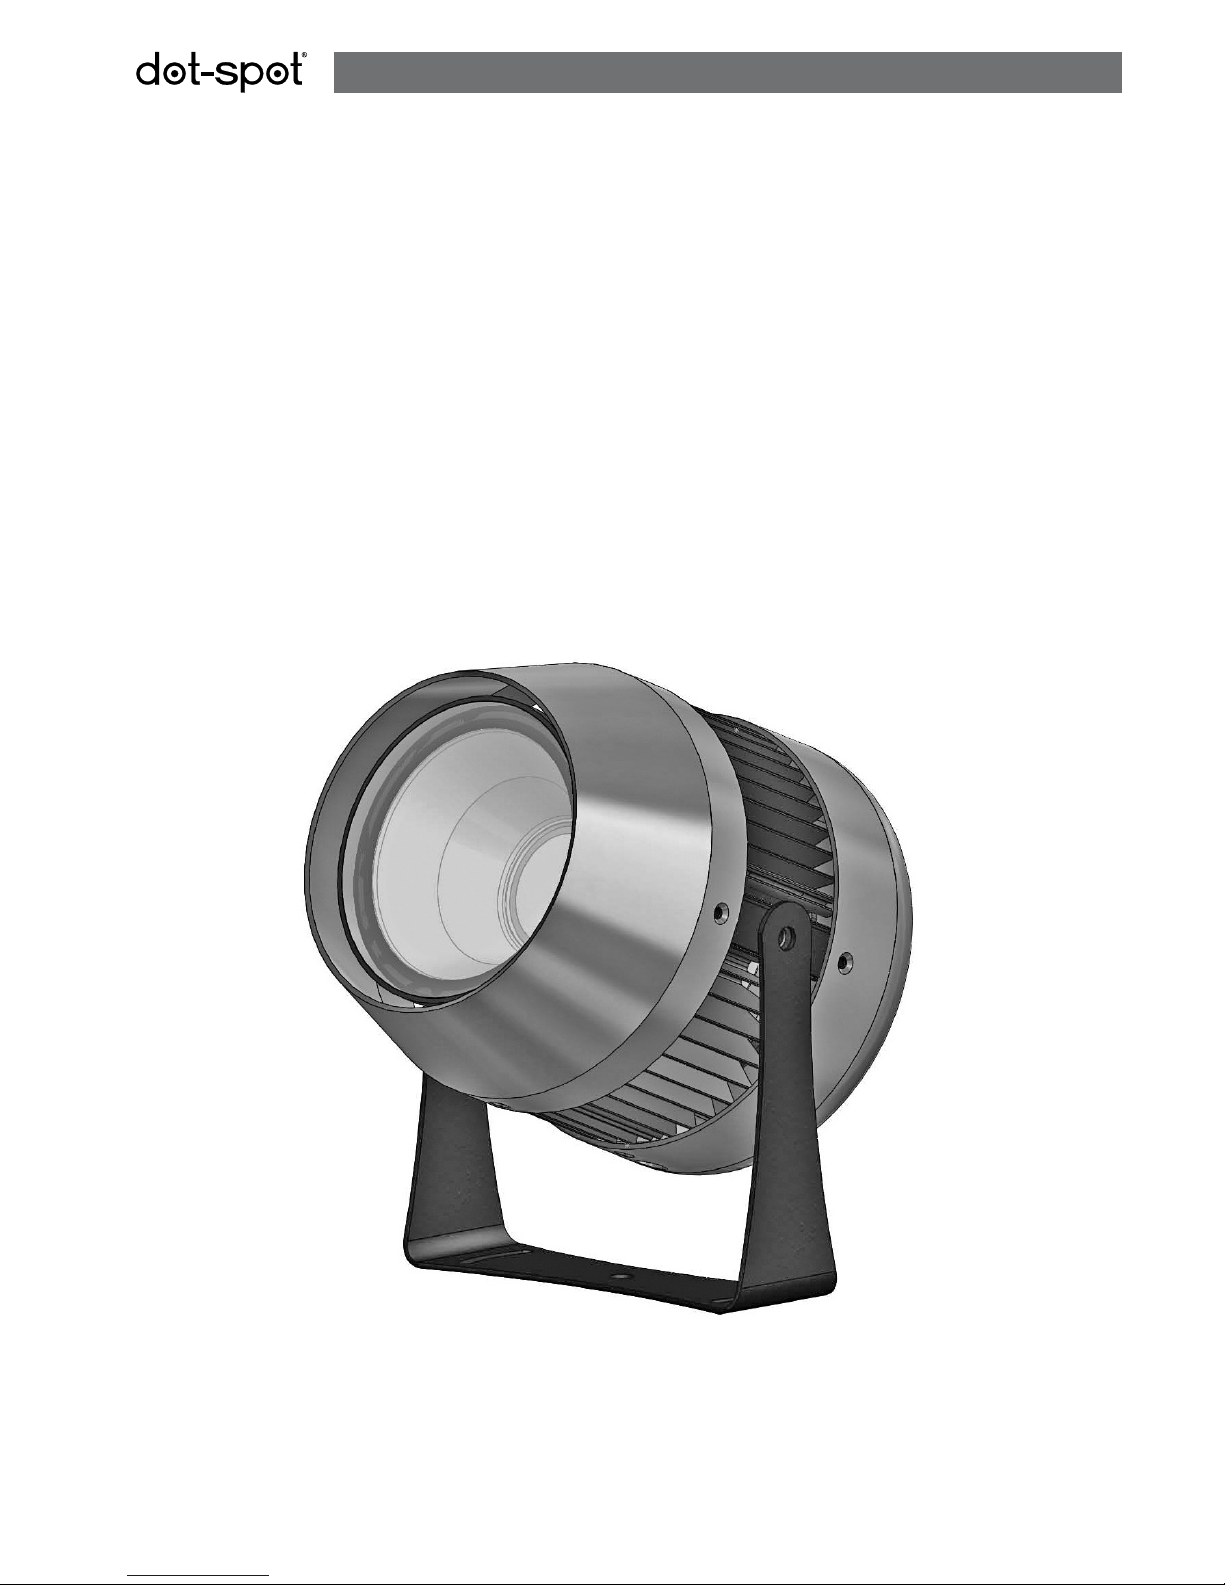
clar 50, clar 100
Der dot-spot clar 50/100 ist ein sehr kompakter LED Hochleistungsstrahler mit fest
eingebauter 50, bzw. 100 W COB LED. Der clar 50 hat eine Anschlussleistung von 50 W
und ist mit passiver Kühlung ausgestattet. Der clar 100 hat eine Anschlussleistung von
100 W und ist mit einem sehr leisen Membranlüfter zur aktiven Kühlung ausgestattet.
Der clar besitzt ein eloxiertes Aluminiumgehäuse mit integriertem Kühlkörper und Trei-
berelektronik. Beide clar Modelle sind mit verschiedenen Abstrahlwinkeln erhältlich.
Der clar besitzt die Schutzart IP 56 und kann im Innen- und Außenbereich eingesetzt
werden. Mit dem Montagebügel kann der clar dreh- und schwenkbar auf festen Unter-
gründen montiert werden. Der clar besitzt ein Anschlusskabel mit ca. 1 m Länge mit
einem wasserdichten (IP67) Steckverbinder, an den das externe, im Lieferumfang
enthaltene Netzteil IP 67, angeschlossen wird. Beide clar Modelle verfügen über die
dot-spot THERMOPROTECT Schutzschaltung, welche die Leistung automatisch reduziert,
sobald die LED zu überhitzen droht, wodurch die maximale Lebensdauer der LED
erreicht wird. Der clar dient zur effektvollen Architekturbeleuchtung und zur Beleuchtung
von Gärten und Panzen.
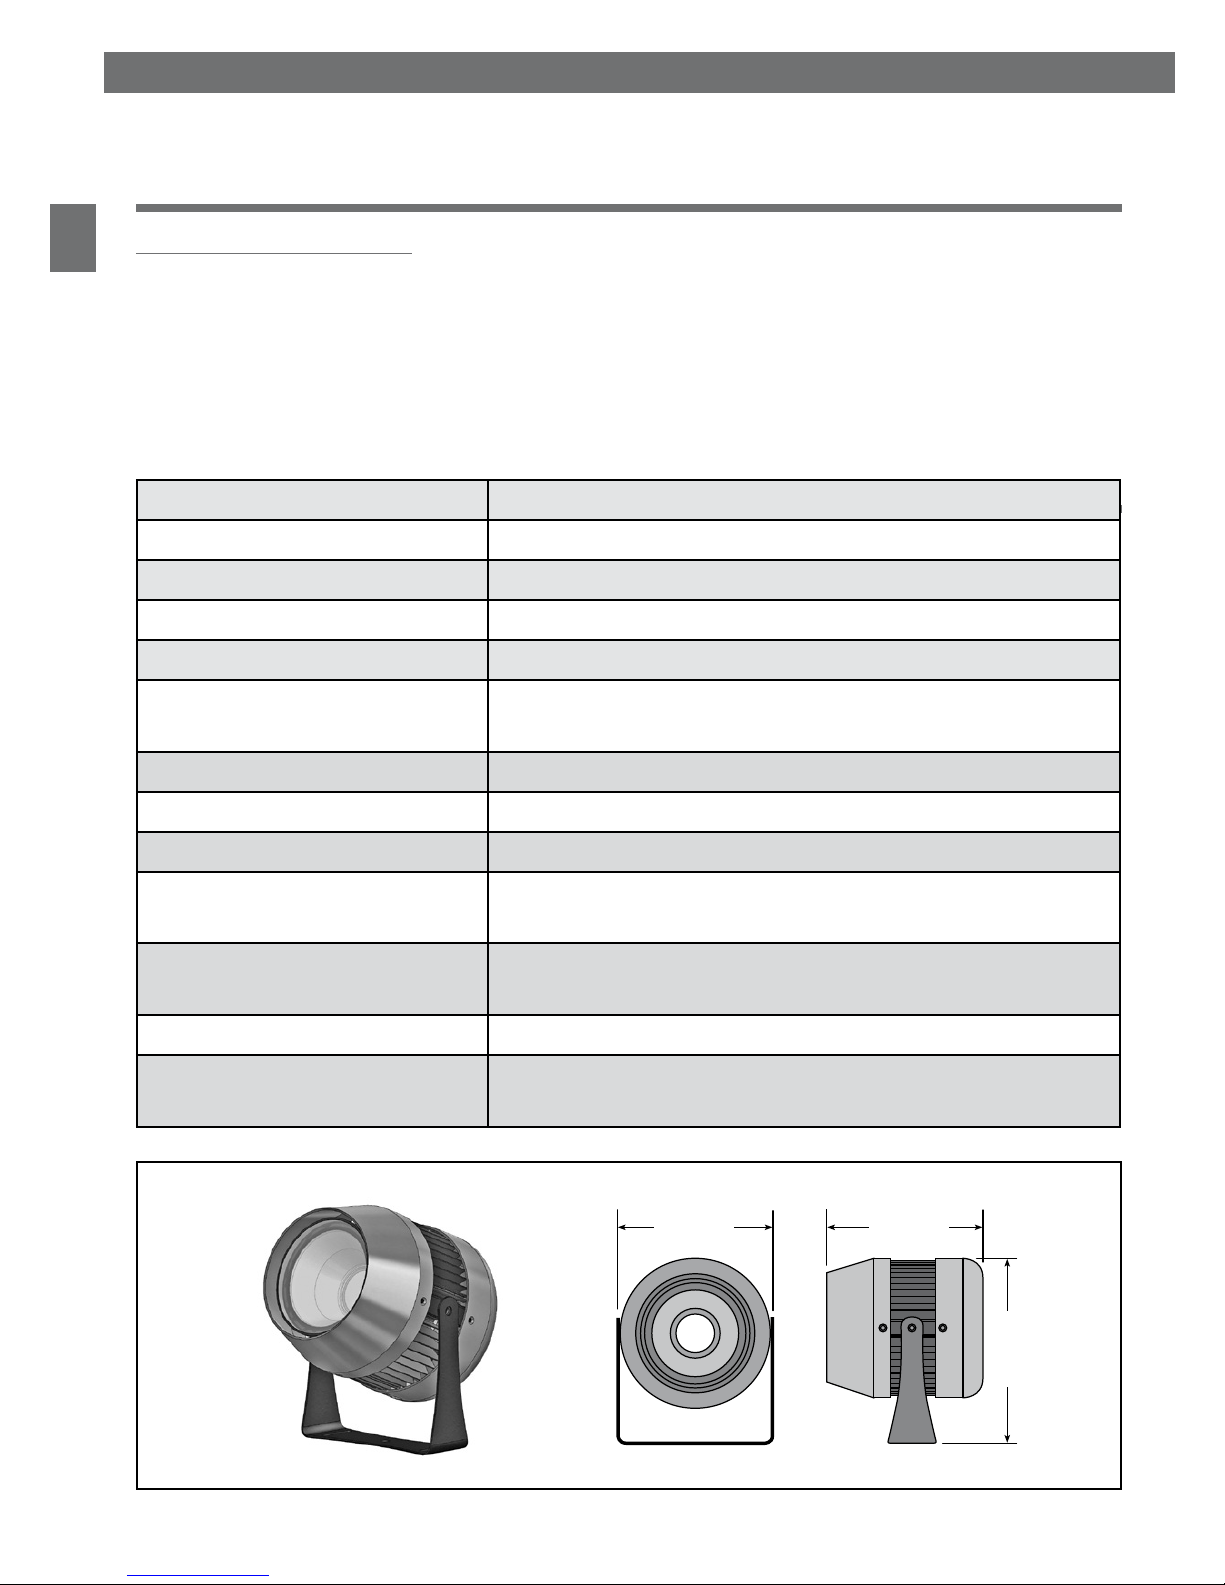
Ausstattungsvarianten / Technische Daten
Lichtaustritt
■ lieferbar mit Reektor 30°, 45° und 60°
Leuchtfarben, Leuchtstärke
■ warmweiß 3000 K, 4230 lm, 50 W / 6580 lm, 100 W
weiß 5000 K, 5370 lm, 50 W / 8560 lm 100 W
Weitere Leuchtfarben sowie dimmbare Varianten auf Anfrage lieferbar.