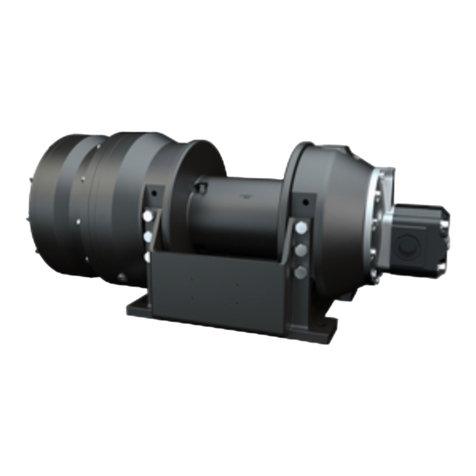
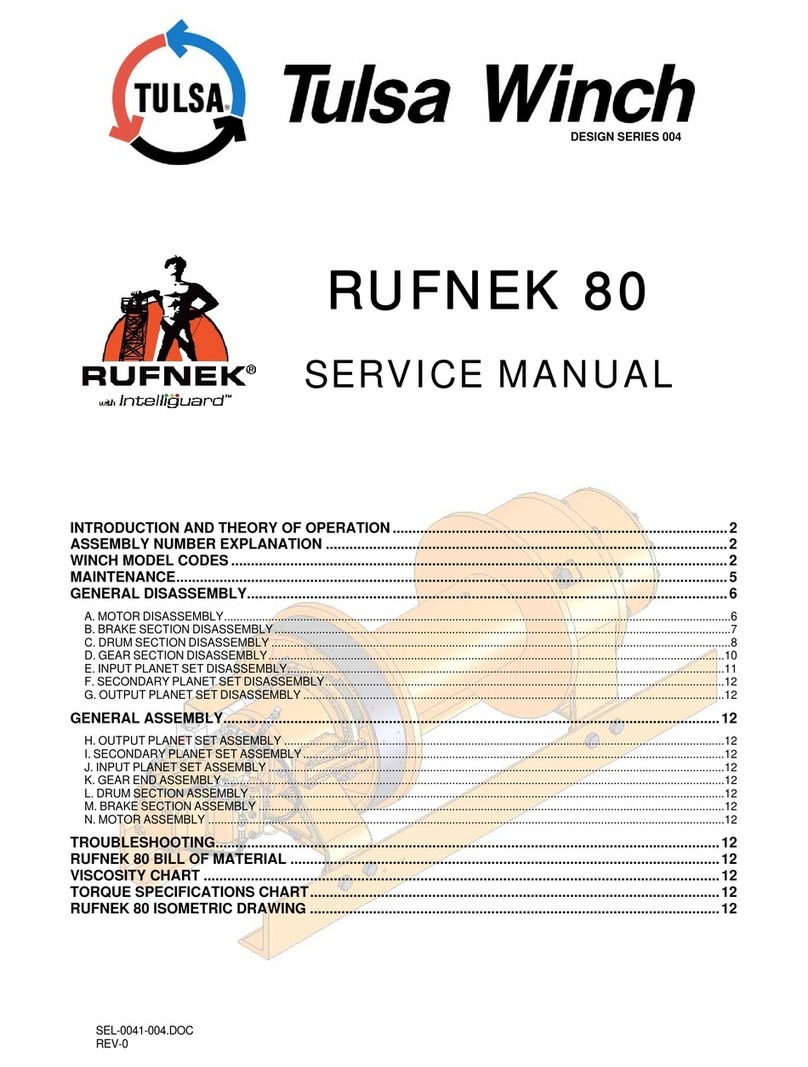
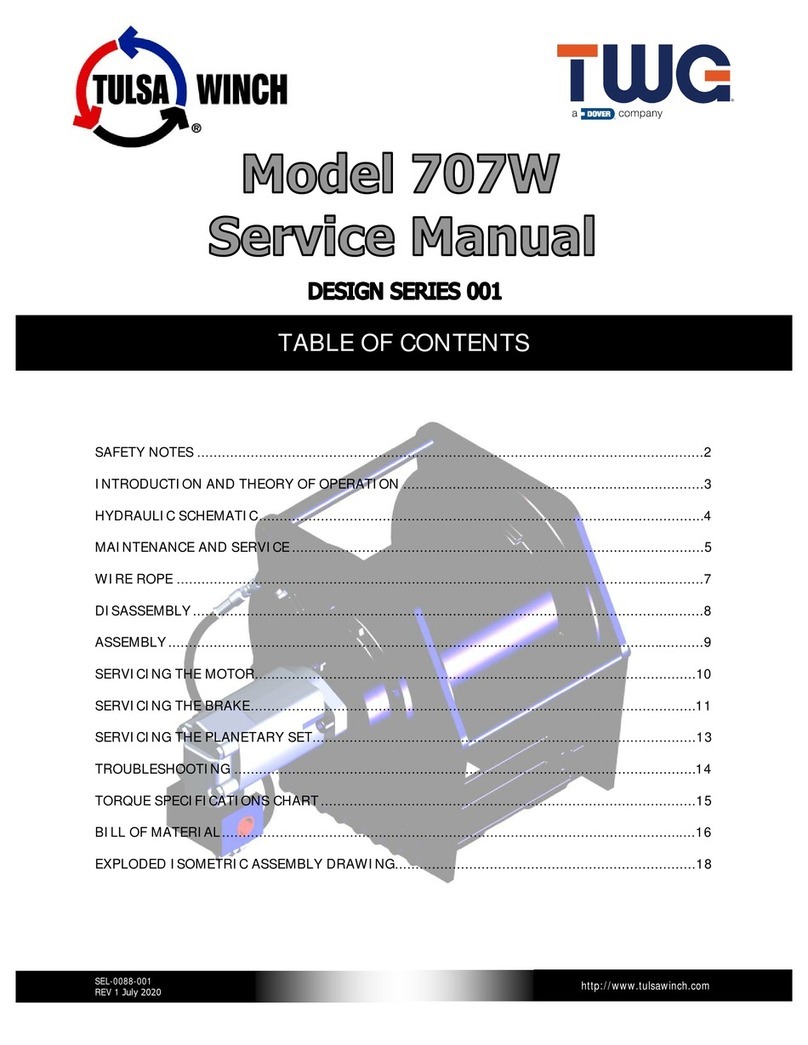
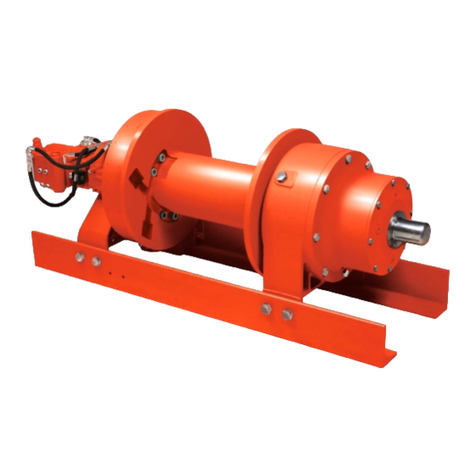
Dover TWG design 004 Series User manual

SEL-0040-004.DOC
REV-0
RUFNEK 100
SERVICE MANUAL
INTRODUCTION AND THEORY OF OPERATION.....................................................................................2
ASSEMBLY NUMBER EXPLANATION ......................................................................................................2
WINCH MODEL CODE.................................................................................................................................2
MAINTENANCE............................................................................................................................................5
GENERAL DISASSEMBLY..........................................................................................................................6
A. MOTOR DISASSEMBLY................................................................................................................................................................6
B. BRAKE SECTION DISASSEMBLY................................................................................................................................................7
C. DRUM SECTION DISASSEMBLY .................................................................................................................................................9
D. GEAR SECTION DISASSEMBLY................................................................................................................................................11
E. INPUT PLANET SET DISASSEMBLY..........................................................................................................................................12
F. SECONDARY PLANET SET DISASSEMBLY..............................................................................................................................13
G. OUTPUT PLANET SET DISASSEMBLY.....................................................................................................................................14
GENERAL ASSEMBLY..............................................................................................................................15
H. OUTPUT PLANET SET ASSEMBLY ...........................................................................................................................................15
I. SECONDARY PLANET SET ASSEMBLY.....................................................................................................................................16
J. INPUT PLANET SET ASSEMBLY ................................................................................................................................................17
K. GEAR END ASSEMBLY ..............................................................................................................................................................18
L. DRUM SECTION ASSEMBLY......................................................................................................................................................19
M. BRAKE SECTION ASSEMBLY ...................................................................................................................................................21
N. MOTOR ASSEMBLY ...................................................................................................................................................................22
TROUBLESHOOTING................................................................................................................................23
RUFNEK 100 BILL OF MATERIAL ...........................................................................................................24
VISCOSITY CHART ...................................................................................................................................27
TORQUE SPECIFICATIONS CHART........................................................................................................28
RUFNEK 100 ISOMETRIC DRAWING ......................................................................................................29
DESIGN SERIES 004

2
ASSEMBLY # SERIES
DESIGN
81867 004
INTRODUCTION AND THEORY OF OPERATION
The Rufnek series planetary winch is designed to use a high-speed gear motor,
driving through a multiple disc brake, through three planet sets to the cable drum.
The multiple disc brake is spring applied and hydraulically released through a port in
the brake housing. During inhaul, the brake is not released since the load is driven
through the one-way cam clutch, bypassing the brake. When the load comes to a stop,
the cam clutch locks up and the load is prevented from moving by the brake.
The brake and brake valve receives its signal any time the winch is in pay out. With
the brake fully open at about 340 PSI the brake valve will open and dynamically control
the lowering of the load.
ASSEMBLY NUMBER EXPLANATION
This manual is for design series 004. In the case of a major design change
implementation, a new design specification number will be issued for the winch. A new
manual will also be created for that specific design series.
WINCH MODEL CODE
Gear Type
W=Worm
P=Planetary
Drive Type
H=Hydraulic
M=Mechanical
Gearbox Position
L=Left
R=Right
(viewed from rear of truck)
Input Shaft Location
F=Front
R=Rear
X=Does not apply
(viewed from rear of truck)
Cable Spooling
O=Over Drum
U=Under Drum
(viewed from rear of truck)
Clutch Device
M=Mechanical
A=Air
Motor Type
1. Single Speed Gear Motor
2. Two Speed Gear Motor
3. Single Speed Geroler Motor
4. Two Speed Geroler Motor
5. Piston
6. Vane
X. No Motor
RN100 P HLXOA1

3
FAILURE TO HEED THE FOLLOWING WARNINGS
MAY RESULT IN SERIOUS INJURY OR DEATH.
The safety of the winch operator and ground personnel should always be of great
concern, and all necessary precautions to insure their safety must be taken. The
primary mover and the winch must be operated with care and concern for the
equipment and the environment and with a thorough knowledge of the equipment and
its performance capabilities must be understood. These general safety guidelines are
offered, however local rules and regulations or national standards may also apply.
Recommended references are, but not limited to, ANSI B30, OSHA 1910, AWS D 14.3,
and SAE J706.
Additional information can be found at http://www.team-twg.com/TulsaWinch/
Mounting:
Winch mounting must be secure and able to withstand the applied loads.
•The stability of the mounting system must be approved by a qualified person.
•All welding should also be done by a qualified person.
•Winch mount must be flat so as not to induce binding.
•The flatness must not exceed 1/16 inch across the mounting surface of the winch
itself.
Insure that all hydraulic hoses, valves and fittings are rated to winch manufacturer’s
operating pressures.
Relief valves should be set to winch manufacturer’s specifications.
Indicates an imminently hazardous situation
which, if not avoided, will result in death or serious
injury.
Indicates a potentially hazardous situation which,
if not avoided, could result in death or serious
injury.
Indicates a potentially hazardous situation which,
if not avoided, may result in minor or moderate
injury or property damage.
Indicates information or a company policy that
relates directly or indirectly to the safety of
personnel or protection of property.

4
Operator:
Must read and understand the operating and service manual.
Both the SERVICE MANUAL and OPERATING AND MAINTENANCE MANUAL
are available online at http://www.team-twg.com/TulsaWinch/
Must never lift or move people with this winch.
This winch is not designed or intended for any use that involves moving people.
Must stay clear of the load at all times.
Ground personnel should remain a safe distance from the load and winch cable
at least 1 ½ times the length of cable measured from the winch to the load.
Must stay clear of the cable at all times.
A broken cable can cause serious injury or death.
Must avoid shock loads.
Shock loads can impose a strain on the winch that can be many times the design
rating.
Must be aware of the fleet angle of the winch.
All loads should only be pulled with the load line perpendicular to the drum shaft,
this is to avoid excessive stresses on the winch and will help prevent the cable
from building on one side of the drum flange.
Must wear personnel protective equipment (PPE) if required.
Check the local, state and federal regulations for compliance.
Must insure that the drum clutch is fully engaged before hoisting.
A visual inspection of the drum clutch engagement is required before each
winching operation.
Must rig all loads secure before winching.
Pull the load line taut and inspect the condition of load for stability.
Must inspect the drum brake if equipped.
The drum brake is not a load holding device it is design to prevent over spooling
of the drum and causing bird nesting of the cable on the drum. Inspect the brake
for wear of the lining and the actuation method.
Must inspect the load control brake.
These winches are equipped with two (2) forms of dynamic braking. The spring-
applied/hydraulically-released multi-disc oil brake is one method. Before a load is
handled the load should be pulled tight and stopped to check this brake. The
second method is a hydraulic lowering control. The same method should be used
to check this brake.
Operation:
•All winch controls must be well marked for function to avoid confusion.
•All winch controls must be located to provide the operator with a clear view of the
load.
•The clutch must be inspected daily for proper operation.
•The winch cable should be inspected daily for serviceability.
•A minimum of five wraps of tightly wound cable must remain on the drum.

5
Tulsa Rufnek series planetary winches, like any other piece of machinery, need to be
periodically serviced and well maintained to insure proper operation.
Good maintenance consists of four steps.
1. A daily inspection to insure that there are no oil leaks present and that all mounting
bolts and other fasteners are tight, and that the wire rope is in good condition.
2. Changing the oil in both the gearbox and the brake section. (Severity of use will
determine the need for oil changes but it should be checked at a minimum of every
500 hours. Factors such as extremely dirty conditions or widely varying temperature
changes may dictate even more frequent servicing).
3. Lubing drum bushings and sliding clutch with grease. The drum bushings are lubed
thru two grease zerks located on drum barrel.
4. Complete teardowns and component inspections. (Again, severity and frequency of
use will determine how often this should be done). If the equipment that this winch
is mounted to is subject to standards for this type of inspection, then those standards
must be followed. If oil changes reveal significant metallic particles then a teardown
and inspection must be made to determine the source of wear.
Rufnek series planetary winches are designed with a common oil reservoir for the
gearbox and brake. The winches are shipped from the factory filled with Mobilube SHC
SAE 75W-90 synthetic gear oil which is satisfactory for operation in ambient
temperatures from -40°F to +110°F. If winch will be operated in temperatures outside
this range, contact Tulsa Winch for recommendations.
The oil is drained by removing the drain plugs (18 & 85) located at bottom of gear
housing (10) & bottom of brake cover (3), then remove the fill plugs (39 & 81) located at
the top of the gear housing (10) & the top of the brake cover (3). Inspect the oil for signs
of metallic particles and/or burning and dispose of in a proper manner. Then re-install
the drain plugs.
Fill the brake end with Mobilube SHC SAE 75W-90 (1/2 quart), then fill the gear end
with of Mobilube SHC SAE 75W-90 oil (17-1/2 quarts) and replace both of the fill plugs.
OIL CAPACITY_=_18 QUARTS
MAINTENANCE

6
94
METERING
HOLE
OIL LEVEL
HOLES
1
83
82
80
82
87
81
30
2
60
80
88
78
26
63
4
62
29
75
26
5
18
79
94
28
25
2
86
28
GENERAL DISASSEMBLY
A. MOTOR DISASSEMBLY
1. Drain the oil from the brake assembly by
removing the plug (94) from the brake cover
(18).
2. Remove hoses (1, 4, 81, 87, & 88).
3. Remove the counterbalance block (79) and
the manifold block (78) from the motor by
removing the four capscrews (25).
4. Remove the motor (63) from the winch by
removing four capscrews (30).
5. Remove the counterbalance valve (28) from
the counterbalance block (79) and inspect
the metering hole to make sure it is not
obstructed. Also, inspect the o-rings on
valve to insure that they are not flat or cut.
Replace if necessary.
6. Motors and counterbalance valves are not
serviceable in the field. Return them to an
authorized dealer for service.
7. Inspect o-rings (26) & (62) for damage.

7
60
BRAKE
PORT
81
59
55 66
62
94
61
54 57 56
58
67 64
95
69 66
67
52
53
50
68
16
65
16
If a complete tear down is not
necessar
y
, make sure the
input shaft (21
)
does not
move durin
g
removal of the
drum. If the shaft is allowed
to move, the input spacer
(104) will fall into the
g
ear set
ultimatel
y
causin
g
failure to
the
g
ear section of the winch.
The gear cover (3
)
will have to
be removed to re-position the
spacer on the input shaft.
B. BRAKE SECTION DISASSEMBLY
1. Evenly remove the four cap screws (60)
that hold the brake cover (18) in place.
Spring pressure will raise the cover up as
the cap screws are loosened. Carefully
remove the cover (18) from the brake
housing (16). Inspect the o-ring (61) for
damage.
2. Remove the springs (59) from the piston
(54) and check the free height. Each
spring should measure at least 1.240
inches with no force on them.
3. Remove the piston (54) by installing two
pieces of 3/8”-16NC all thread into the two
holes in the top of the piston and run in
evenly until the piston is clear of the
housing. An alternate way of removing the
piston is to use shop air to slowly
pressurize the brake port to remove the
piston from the brake housing (16).
4. Inspect o-rings (55, 57) and back up rings
(56, 58) on the piston. Grasp the brake
driver/clutch assembly (assembled items
64, 65, 66, 67, 69) and remove it from the
brake housing.
(Continued on page 8)

8
60
BRAKE
PORT
81
59
55 66
62
94
61
54 57 56
58
67 64
95
69 66
67
52
53
50
68
16
65
16
If a complete tear down is not
necessar
y
, make sure the
input shaft (21
)
does not
move durin
g
removal of the
drum. If the shaft is allowed
to move, the input spacer
(104
)
will fall into the
g
ear set
ultimatel
y
causin
g
failure to
the
g
ear section of the winch.
The gear cover (3
)
will have to
be removed to re-position the
spacer on the input shaft.
BRAKE SECTION DISASSEMBLY CONTINUED
5. Remove the stator plates (52) and friction
discs (53) from the brake housing and
check them for excessive wear, and
replace if necessary. Be sure to check the
top stator plate for scoring caused by the
removal of the piston and polish if
necessary. Friction discs should measure
no less than .055-in. thick and stator plates
should measure no less than .068-in thick.
6. To disassemble the brake driver/clutch
assembly, remove the retaining ring (66)
from either end of the driver. Then, remove
the brake driver (69) and bearing (67) from
the input driver. Next, remove the sprag
clutch (95). Finally, remove the retaining
ring (66) from the other end of the driver.
Then, remove the second bearing (67) from
the input driver.
Notice the direction of lock-up
on the clutch for re-assembly.
7. Remove the bearing housing (68) and
inspect the bearing (50).
8. If the bushing or seal in the brake housing
needs to be replaced,follow the drum
section disassembly and reassembly
sections of this manual prior to reassembly
of the brake.

9
16 110 106 108 99
40 41 48
17
12
13
92
47
46
19
103
97
51
15 108
99
96 89
80
91 86 108
90 85 107
76
11
43
44
21
20
45 77
73 71
72
74
70
19 41
40 39
93
10
3
14
If a complete tear down is not
necessar
y
, make sure the
input shaft (21
)
does not
move during removal of the
drum. If the shaft is allowed
to move, the input spacer
(104
)
will fall into the
g
ear set
ultimatel
y
causin
g
failure to
the
g
ear section of the winch.
The gear cover (3
)
will have to
be removed to re-position the
spacer on the input shaft.
C. DRUM SECTION DISASSEMBLY
1. To remove the drum, first disconnect the
cable from the U-bolt (43) and lay aside. If
removing the drum from the motor end with
the motor and brake disassembled, first
remove the cotter keys (108) and clevis pins
(99) connecting the yoke (17) to the bracket
(110) & air cylinder (15).
You may need to remove the
air lines, so it’s a good idea to
mark them for re-assembly.
2. Support the weight of the drum with a hoist.
Remove the four cap screws (70) and the
nuts and washers (71, 72) on the bottom of
the brake housing (16). Disconnect the
airline running from the air cylinder (15) to
the brake housing (16). Remove the brake
housing by sliding it off of the output shaft
(20). At this time you will need to remove
two cap screws (70), nuts and washers (71,
72) from the frames (73 or 74). Do not
remove air cylinder (76) yet. Disconnect the
air line from the backside of the brake
housing (16) that goes to the brake band air
cylinder. You can now remove the brake
band assembly (77). Note which frame the
mounting bolts are on for re-assembly.
Inspect and replace, if needed.
3. Remove the outer thrust collar (48) by
loosening three set screws (89).
4. Remove the yoke (17), sliding clutch (13),
and coupler (12). Remove the three keys
(47) and the inner thrust collar (46).
Remove the drum using a hoist. Inspect the
bushings (9) in both ends of the drum.
You should also inspect the bushing
and seal (40, 41) that are located
in the end of the brake housing.
5. If necessary, replace the drum clutch (14) at
this time by removing six capscrews (45). If
you replace the clutch, make sure to torque
the capscrews to the specified torque upon
re-assembly. (See torque specifications
chart on page 28 of this manual.)
10
CLUTCH INSPECTION

11
38
24
36
9
23
35 22 33 330 31
104
8
34 7
24-8 24-7
39
93
10
37
74
73
20
21 111
6
D. GEAR SECTION DISASSEMBLY
1. Drain the oil by removing the plug (86)
located on the bottom of the end cover (3).
2. To disassemble the gear section, remove
the Intelliguard™ sensor (21) from the end
cover (3) by removing three capscrews (6).
Inspect the gear teeth on the Intelliguard™
(21) for wear. The Intelliguard™ system is
not serivceable in the field. Return to an
authorized dealer for service.
3. Remove the end cover (3) by removing the
six capscrews (30).
4. Inspect the o-rings (33 & 104) for wear and
replace if necessary.
5. Remove the input gear set (22) and thrust
washers (34 & 37). Inspect and replace if
necessary.
6. Remove secondary gear set (23) and sun
gear (7). Inspect and replace if necessary.
7. Remove the secondary gear housing (9) by
removing eight cap screws (35). Inspect the
o-ring (36) and replace if necessary.
The housing is very heavy.
Use caution when removing it.
8. Remove the sun gear (8).
9. Rotate the thrust plate (24-7) into alignment
with the snap ring (24-8). Remove the snap
ring from the groove on the output shaft
(20).
10. Remove the output gear set (24) and thrust
washer (38). Inspect and replace if
necessary.

12
22-2
22-3
22-6
22-5
22-4
22-7
22-1
22-6
E. INPUT PLANET SET DISASSEMBLY
1. Remove the retaining rings (22-4) from the
planet pins (22-5).
2. Remove the pins (22-5) from the carrier
(22-1) by carefully tapping them out.
3. Remove the planet gears (22-2), thrust
washers (22-6) and bearings (22-3) from the
carrier.
4. Inspect the parts for wear or damage and
replace if necessary.

13
23-6
23-3
23-2
23-3
23-6
23-7
23-1
23-5
23-4
F. SECONDARY PLANET SET DISASSEMBLY
1. Remove the retaining rings (23-4) from the
planet pins (23-5).
2. Remove the pins (23-5) from the carrier
(23-1) by carefully tapping them out.
3. Remove the planet gears (23-2), thrust
washers (23-6) and bearings (23-3) from the
carrier.
4. Inspect the parts for wear or damage and
replace if necessary.

14
24-2
24-6
24-3
24-3
24-7
24-1
24-8
24-3
24-6
24-5
24-4
G. OUTPUT PLANET SET DISASSEMBLY
1. Remove the retaining rings (24-4) from the
planet pins (24-5).
2. Remove the pins (24-5) from the carrier
(24-1) by carefully tapping them out
3. Remove the planet gears (24-2), thrust
washers (24-6), and bearings (24-3) from
the carrier.
4. Remove the thrust plate (24-7) and the
retaining ring (24-8) from the carrier.
5. Inspect the parts for wear or damage and
replace if necessary.

15
24-2
24-6
24-3
24-3
24-7
24-1
24-8
24-3
24-6
24-5
24-4
GENERAL ASSEMBLY
H. OUTPUT PLANET SET ASSEMBLY
1. Insert the retaining ring (24-8) and the thrust
plate (24-7) into the carrier (24-1) along with
the gears (24-2), bearings (24-3), and thrust
washers (24-6).
2. Being careful to line up the thrust washers
(24-6) and bearings (24-3) with the planet
pins (24-5), press the pins into the carrier.
3. Replace the retaining rings (24-4).
If the pins are not lined up
properly, the thrust washer
can be shattered during the
pressing operation.

16
23-6
23-3
23-2
23-3
23-6
23-7
23-1
23-5
23-4
I. SECONDARY PLANET SET ASSEMBLY
1. Insert the thrust plate (23-6) into the carrier
(23-1) along with the gears (23-2), bearings
(23-3), and thrust washers (23-6).
2. Being careful to line up the thrust washers
(23-6) and bearings (23-3) with the planet
pins (23-5), press the pins into the carrier.
3. Replace the retaining rings (23-4).
If the pins are not lined up
properly, the thrust washer
can be shattered during
the pressing operation.

17
22-2
22-3
22-6
22-5
22-4
22-7
22-1
22-6
J. INPUT PLANET SET ASSEMBLY
1. Insert the thrust plate (22-7) into the carrier
(22-1) along with the gears (22-2), bearings
(22-3), and thrust washers (22-6).
2. Being careful to line up the thrust washers
(22-6) and bearings (22-3) with the planet
pins (22-5), press the pins into the carrier.
3. Replace the retaining rings (22-4).
If the pins are not lined up
properly, the thrust washer
can be shattered during
the pressing operation.

18
38
24
36
9
23
35 22 33 330 31
104
8
34 7
24-8 24-7
39
93
10
37
74
73
20
21 111
6
K. GEAR END ASSEMBLY
1. Bolt the gear housing (10) loosely into
both frames (73, 74). Slide the output
shaft (20) halfway into the gear housing
(10).
2. When reassembling apply grease to
parts such as thrust washers, o-rings,
and seals. Slide the thrust washer (38)
onto the output shaft (20). Next install
the output gear set (24). Rotate the
thrust plate (24-7) in position and install
the retaining ring (24-8) onto the shaft.
Push the gear set and shaft back into
the housing until it stops against the
thrust washer (38).
Make sure to line up all
three planet gears in the
output gear set with the
gear housing as it starts
into the housing.
3. Install the secondary gear housing (9)
onto the gear housing (10) making sure
not to damage the o-ring (36). Use eight
capscrews (35) and torque them to
specification (see torque specifications
chart on page 28 of this manual).
4. Install the output sun gear (8) then
install the thrust washer (37) onto the
secondary gear set (23). Next, install
the secondary gear set (23) into the
gear housing (10).
Make sure to line up all three
planet gears in the secondary
gear set with the gear housing
and sun gear as it starts into
the housing.
5. Install the secondary sun gear (7). Making
sure it’s against the washer in the secondary
gear set (23).
6. Install the thrust washer (34) onto the input
gear set (22). Insert the input gear set (22)
into the gear housing (10), making sure it is
against the thrust washer. Put the outer
thrust washer (34) in place and slide the
input shaft (21) all the way through the
output shaft (20). Let the input shaft protrude
out on the gear end so that all of the spline
is showing. Make sure the correct end is
towards the gear end. It will not work if it is
backwards.
7. Put the cover (3) on and secure it with six
capscrews (30), being careful not to damage
the o-ring (33). Install the Intelliguard™
sensor (21) into the cover, again making
sure not to damage the o-ring (104), add
loctite and secure it with three capscrews
(6).
Make sure the input shaft
engages the gear in the
Intelliguard™ correctly.

19
16 110 106 108 99
40 41 48
17
12
13
92
47
46
19
103
97
51
15 108
99
96 89
80
91 86 108
90 85 107
76
11
43
44
21
20
45 77
73 71
72
74
70
19 41
40 39
93
10
3
14
L. DRUM SECTION ASSEMBLY
1. After inspecting and replacing the necessary
parts, such as the drum bushings (19),
install the drum (11) onto the output shaft
(20). This part is very heavy and you will
need the assistance of a hoist. With the
weight of the drum supported, install the
brake band assembly (77) along with the
bracket (90), capscrews (91), nuts (85), and
washers (86).
You may need to lower
the drum to align the holes
in the brake band with
the holes in the frame.
2. Install the brake band air cylinder (76),
making sure the rod of the air cylinder is
going through the bracket on the brake band
(77). Secure it to the bracket (90) with the
clevis pin (107) and cotter key (108).
Tighten the adjusting nut on the air cylinder
shaft until there is not space between the
drum (11) and the brake band (77). Then,
tighten the jam nut to secure the adjusting
nut.
3. Install the inner thrust collar (46), making
sure the half-moon slots are lined up with
the key slots in the output shaft (20). Tap
the three keys (47) into their slots in the
output shaft.
4. If necessary, install the new drum clutch (14)
using six capscrews (45). Torque to
specified torque (see page 28 of this
manual). Next, align the coupler (12) with
the keys (47) and slide it onto the output
shaft (20). Install the sliding clutch (13) and
yoke (17) onto the coupler (12).
(Continued on Page 20)

20
16 110 106 108 99
40 41 48
17
12
13
92
47
46
19
103
97
51
15 108
99
96 89
80
91 86 108
90 85 107
76
11
43
44
21
20
45 77
73 71
72
74
70
19 41
40 39
93
10
3
14
DRUM SECTION ASSEMBLY CONTINUED
5. Install the outer thrust collar (48), aligning
the half moon slots with the keys (47).
Tightly hold the thrust collar against the keys
and lock down the three set screws (89).
6. Slide the brake housing (10) onto the output
shaft.
7. Bolt the brake housing (10) loosely into both
frames (73, 74). Lower the drum so the
weight of drum is supported by both the
brake and gear housings. The air line from
the brake band air cylinder can be attached
at this time.
8. Disengage the sliding clutch (13) so you can
turn the drum freely and tighten all bolts
through the frames to the proper torque
specification (see page 28 of this manual).
9. Turn the drum to make sure it is not binding.
10. If necessary, install the air cylinder (15) and
the air cylinder cover (97) to the brake
housing with four capscrews (51) and
spacers (103).
11. Install the bracket (110) to the brake housing
using four capscrews (106).
12. Attach the yoke (17) by installing clevis pins
(99) into the bracket (110) and clevis (96).
Install the cotter keys (108) into the clevis
pins (99) to secure their positions. Connect
shop air to the cylinder and apply air both
directions. With the clutch fully engaged (air
applied), there should be slight movement
on the clutch plate in both directions. Adjust
clevis (96) and air cylinder jam nut
accordingly.
This manual suits for next models
2
Table of contents
Other Dover Winch manuals

Dover
Dover TWG TULSA WINCH 707W User manual

Dover
Dover TWG Tulsa 18G Operating and installation instructions

Dover
Dover TWG TULSA WINCH 1200W User manual

Dover
Dover TWG RUFNEK 50P Operating instructions

Dover
Dover Pull MASTER H8 Technical reference manual

Dover
Dover TWG Tulsa 12-SLLRO Series Owner's manual

Dover
Dover TWG TULSA RUFNEK Series User manual

Dover
Dover PULL MASTER H12 Technical reference manual

Dover
Dover TWG Tulsa RUFNEK Series User manual

Dover
Dover TWG PULLMASTER M12 Technical reference manual