4.5’’
3.5’’
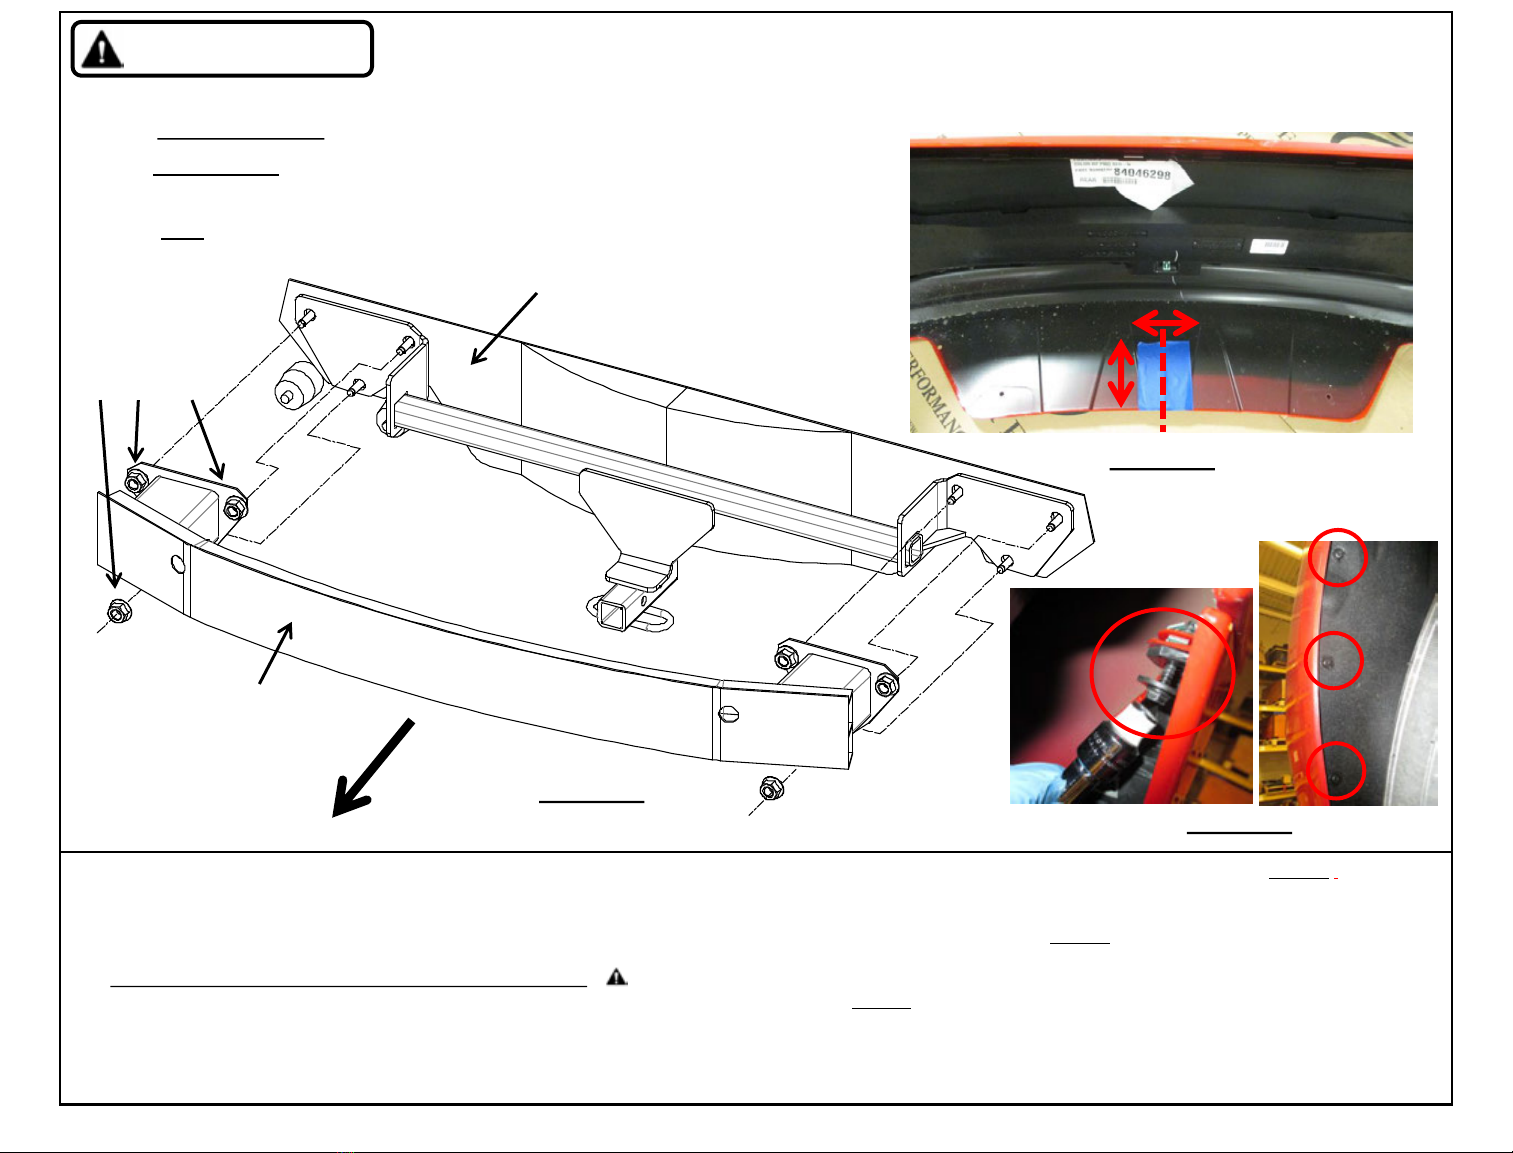
1. Fascia removal –use 7 mm socket to remove (4) bolts from bottom fascia. Use T15 driver and 7 mm socket to remove (4) bolts from wheel well each side, see Figure 2. Open the
trunk and gently remove the fascia. Carefully set the bumper fascia aside.
2. Bumper beam removal –use 15mm socket to remove (3) flange nuts from bumper plate each side. Gently remove bumper beam and set it aside.
3. Hitch installation –raise the hitch and hang it on the studs on the end panel. Raise the bumper beam to sandwich the hitch, see Figure 1. Reuse the bumper flange nuts and loosely
fasten them.
4. Tighten all fasteners with torque wrench to 53 Lb.-Ft. (72 N*M).
5. Bottom fascia trimming –locate the center of bottom panel and trim 4.5’’ tall by 3.5’’ wide area, see Figure 3.
6. Reinstall all fasteners and fascia removed in Step 1.
Note: check hitch frequently, making sure all fasteners and ball are properly tightened. If hitch is removed, plug all holes in trunk pan or other body panels to prevent entry of water and exhaust fumes. A hitch or ball which has been
damaged should be removed and replaced. Observe safety precautions when working beneath a vehicle and wear eye protection. Do not cut access or attachment holes with a torch.
This product complies with safety specifications and requirements for connecting devices and towing systems of the state of New York, V.E.S.C. Regulation V-5 and SAE J684.
Installation Instructions
PART NUMBERS: 24943, 77330, CQT24943
Proper torque is needed to keep the hitch secure to the vehicle when towing.
Always wear SAFETY GLASSES
when installing hitch
Rear Figure 1 Figure 2
Figure 3
Reuse all
fasteners
from bumper
attachments
Drawbar must be used in
the RISE position only.
Drawbar Kit: 3593
(Sold separately)
Bumper
beam
Bumper
end panel
Existing
bumper
flange nuts


