1.0 INSTALLATION
4R699825 - BEST 3D passive Kit
1.0 INSTALLATION
1.1 The optional BEST 3D passive Kit
Dreamvision projectors are now available with a 3D passive modulator for 3D enthusiasts and spectators how are
3D sensitive. Thanks to the use of the passive 3D technology and the lightweight, flicker-free glasses, the
stereoscopic picture is 50% brighter than with the active sets but also smoother and more natural to the eyes. The
BEST 3D passive Kit is installed in front of the projector. Avoid direct sun light and make sure to install it in a place
with a good ventillation.
Make sure to have a passive 3D compatible screen installed before proceeding to the BEST 3D passive Kit install.
To make the installation easier, use this guide together with the original Dreamvision Passive 3D Test Patterns
package available on www.dreamvision.net.
1.2 Download the BEST 3D passive Kit setup TEST PATTERNs
This manual refers to TEST PATTERNs that can be downloaded directly from the official BEST 3D passive Kit web
page, in the download section. These patterns are in PNG format and they may be used in addition to this document
to make easier and faster the install.
If you choose to use these TEST PATTERNs, you will need to display them at 1920x1080 pixels resolution on the
projector. To do so, you probably can load them on a USB key directly inserted into your Blu-Ray player or simply by
connecting a computer to the projector, using a DVI to HDMI cable.
1.3 Passive 3D screen that maintains light polarization
In order to enjoy the best quality 3D images, you need a polarization preserving screen. Such a screen is generally
called “silver screen” and it is specially designed for 3D projection. Dreamvision has developed and optimized a
special screen fabric for both 2D projection and passive 3D projection: the “Passive 5D screen”. It is a low gain and
high extinction ratio fabric that you can order together with your BEST 3D passive Kit.
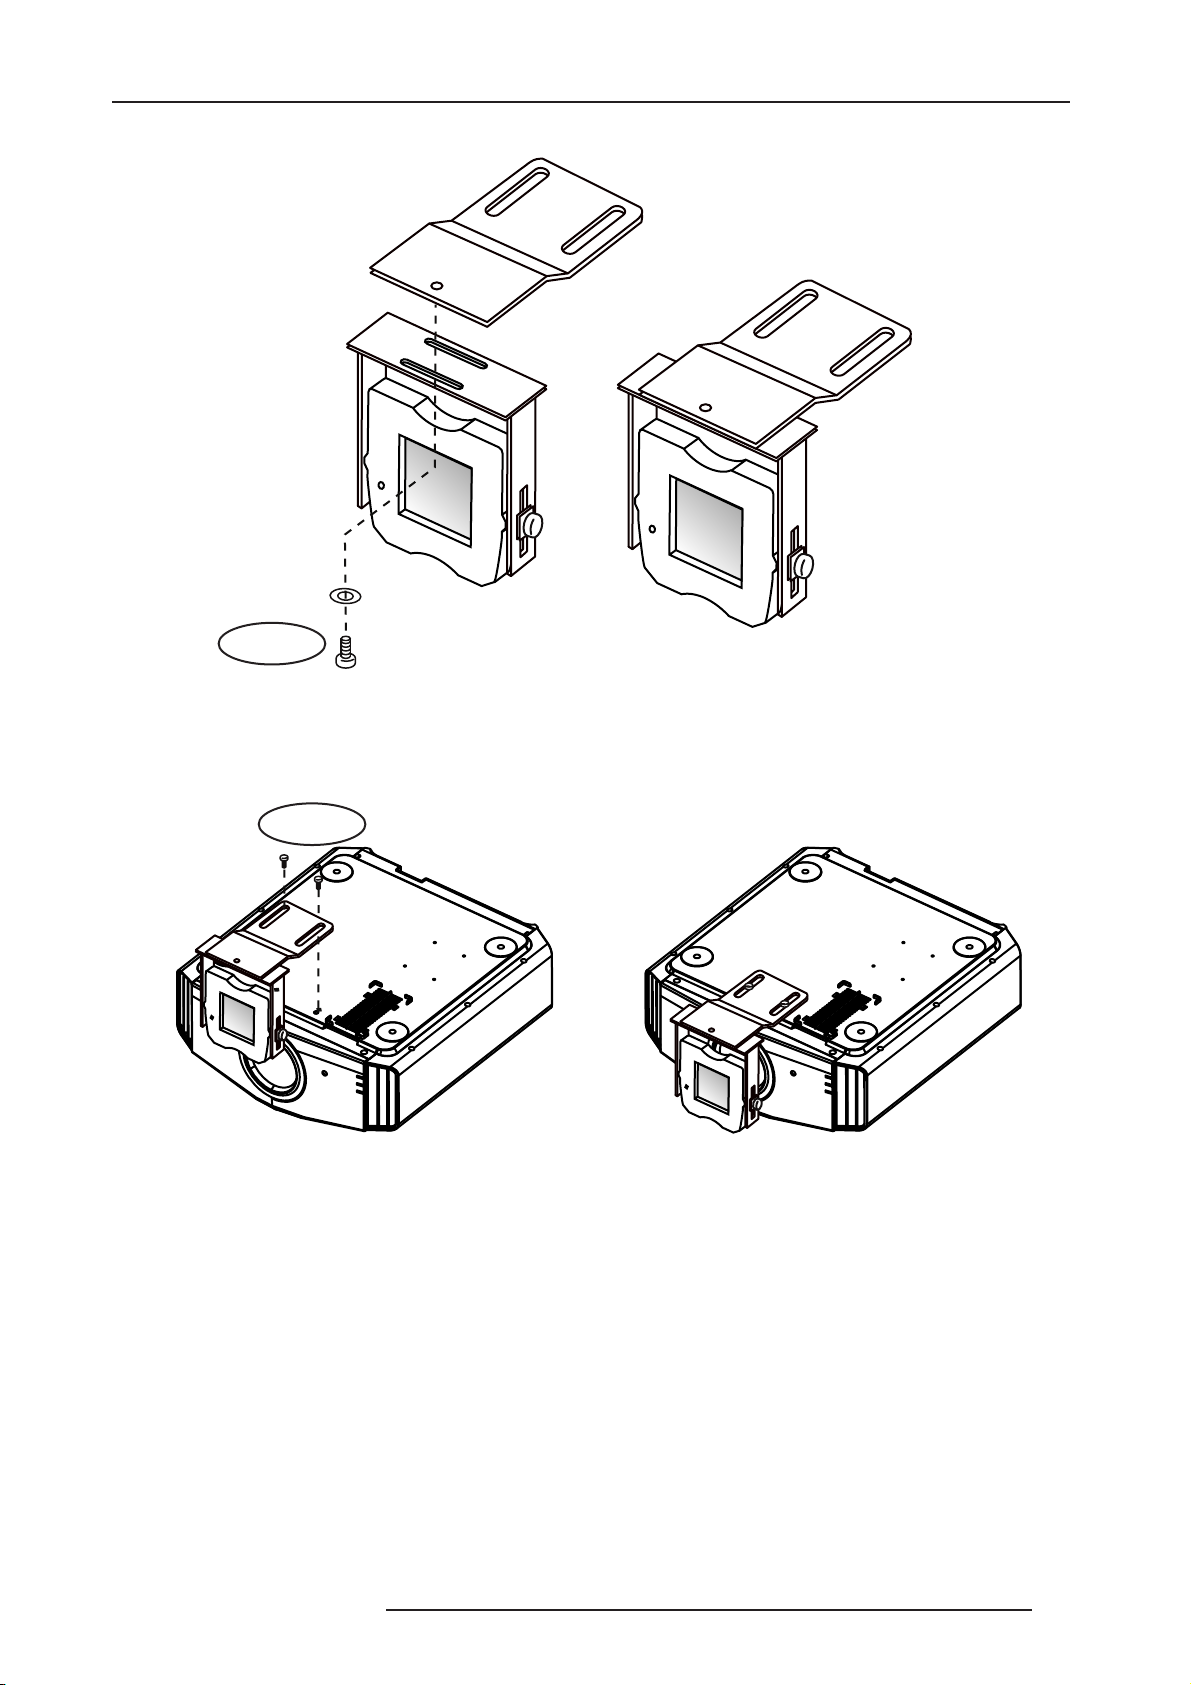
1.4 Attach the BEST 3D passive Kit to the projector
a) Use the 2 wheels to attach the Modulator to the U-shape support.
Fix the Modulator to the U-shape support using the 2 wheels.
Visit Dreamvision’s web site: http://www.dreamvision.net to download the TEST PATTERNs.
If your screen is not manufactured and tested for passive 3D use, you might experience uncomfortable and
blurry 3D images with a high level of crosstalk, which will greatly impact on the perception of the
stereoscopic effects.