7. Wire in your slow and/or stop limits or jumper them out with control power.
The slow and/or stop limit inputs the drive will look for will vary depending on the control mode that has been
selected in parameter 1.1.11 “Input Set”.
If you are using limit switches:
•Wire them into the appropriate digital inputs.
See the “Control Mode Signal Assignments” table and wiring diagram in the back of this
manual.
•Jumper control power to any unused limit switch inputs.
See “Control Mode Signal Assignments” & “Signal Descriptions” tables in the back of this
manual.
If you are not using any limit switches:
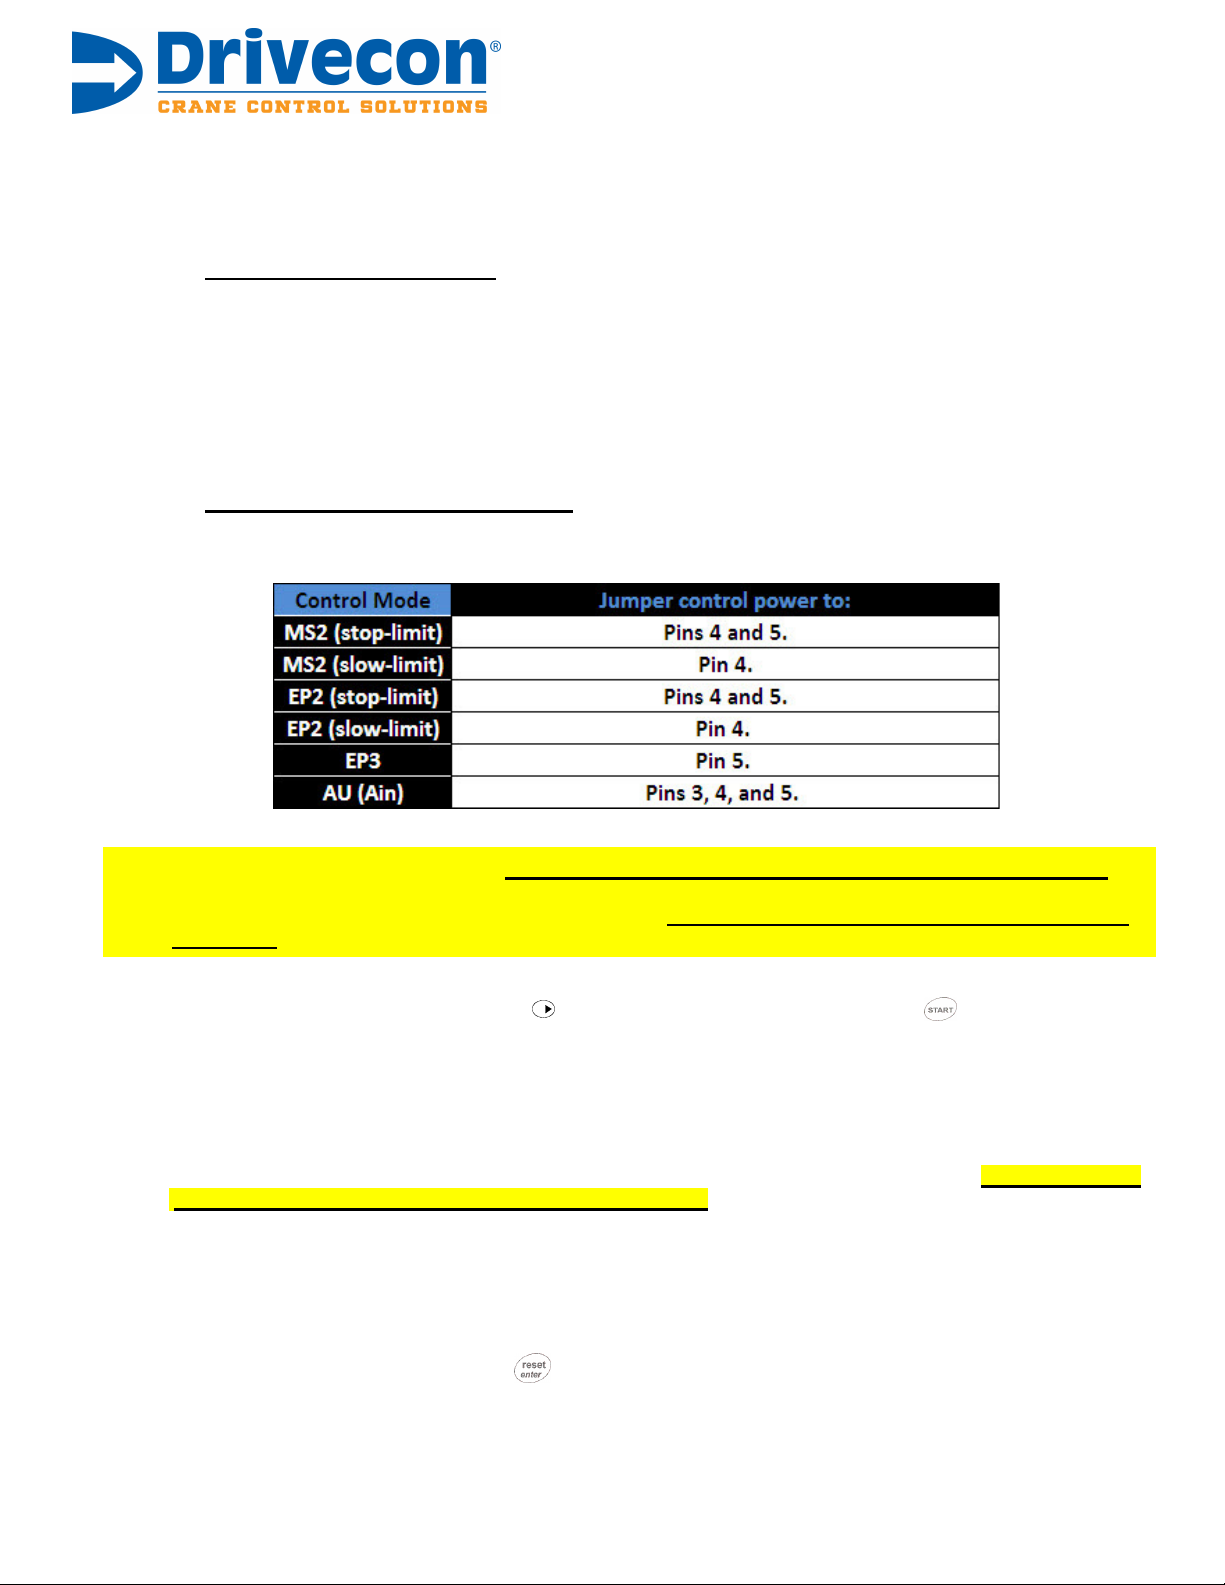
•Jumper control power to the following pins depending on the control mode selected.
8. Jumper out external stop circuit. [ Only in EP2 (slow-limit) or MS2 (slow-limit) control modes ]
If parameter 1.1.11 is set for a value of 1 or 3, you must have a maintained control voltage jumper connected
to digital input DID5 on pin 5 of the control connections. The drive will not run until this control voltage is
connected.
9. Perform the Autotuning Process.
Navigate to parameter 1.2.4.6 and press to view its current value. Press and hold until the display
reads “1”. This indicates that the drive has started the autotuning process.
(Note: The tuning process will not turn the motor or open the brake. It will only magnetize the motor.)
Completed tuning will be confirmed with a displayed value of “3”.
10. Verify Current Limit parameter 1.2.4.4 is set for 120% of your motor nominal current value.
After autotuning, ensure that parameter 1.2.4.4 is set for 120% of your motor nominal current value. In some
situations, the autotuning process can set the current limit value much higher than desired. Be sure to check
this to prevent damage to motor and other components!
11. Test run the drive.
Make sure it operates as desired. Double check the motor parameters, and verify correct operating speeds.
12. Store your “user parameters” in the drive’s control unit.
Once the drive has been programmed, autotuned, and is functioning as desired, navigate to
parameter 3.3.1. Select “1” and press to store your “user parameters” into the control unit. Doing this
will allow you to reload your custom saved parameters back into the drive, should you ever need to.
CAE Drivecon 5318 S Emmer Drive, New Berlin, WI 53151 1-800-727-8774 www.drivecon.com