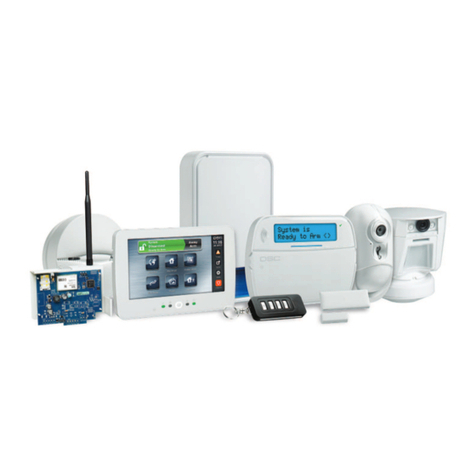
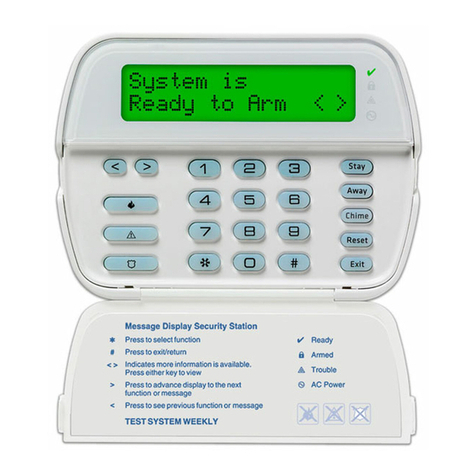
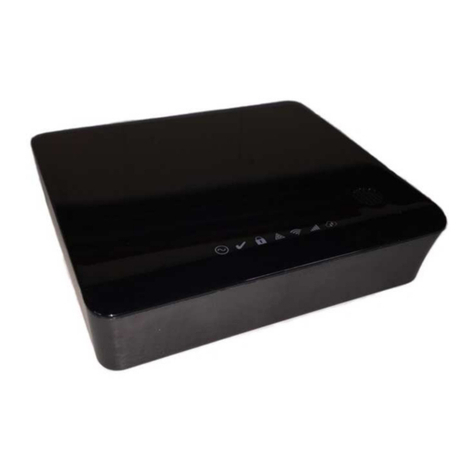
DSC WLS920 User manual

WLS920
Wireless Security System
Installation Manual
• W A R N I N G •
This manual contains information on limitations regarding product use and function and information
on the limitations as to liability of the manufacturer. The entire manual should be carefully read.

NOTICE:TheIndustryCanadalabelidentifiescertifiedequipment.Thiscertificationmeansthattheequipmentmeetscertaintelecommunicationsnetwork
protective, operational and safety requirements. Industry Canada does not guarantee the equipment will operate to the user’s satisfaction.
Before installing this equipment, users should ensure that it is permissible to be connected to the facilities of the local telecommunications company. The
equipment must also be installed using an acceptable method of connection. The customer should be aware that compliance with the above conditions may
not prevent degradation of service in some situations.
Repairs to certified equipment should be made by an authorized Canadian maintenance facility designated by the supplier. Any repairs or alterations made
by the user to this equipment, or equipment malfunctions, may give the telecommunications company cause to request the user to disconnect the equipment.
Usershouldensurefortheirownprotectionthattheelectricalgroundconnectionsofthepowerutility,telephonelinesandinternalmetallicwaterpipesystem,
if present, are connected together. This precaution may be particularly important in rural areas.
CAUTION: Users should not attempt to make such connections themselves, but should contact the appropriate electric inspection authority, or electrician,
as appropriate.
NOTICE: The Ringer Equivalence Number (REN) assigned to each terminal device provides an indication of the maximum number of terminals allowed
to be connected to a telephone interface. The termination on an interface may consist of any combination of devices subject only to the requirement that the
sum of the Ringer Equivalence Number of all the devices does not exceed 5.
The REN of this unit is 0.25.
AVIS: L’étiquettedel’IndustrieCanadaidentifielematérielhomologué.Cetteétiquettecertifiequelematérielestconformeàcertainesnormesdeprotection,
d’exploitation et de sécurité des réseaux de télécommunications. Industrie Canada n’assure toutefois pas que le matériel fonctionnera à la satisfaction de
l’utilisateur.
Avant d’installer ce matériel, l’utilisateur doit s’assurer qu’il est permis de le raccorder aux installations de l’entreprise locale de télécommunication. Le
matériel doit également être installé en suivant une méthode acceptée de raccordement. L’abonné ne doit pas oublier qu’il est possible que la conformité aux
conditions énoncées ci-dessus n’empêchent pas la dégradation du service dans certaines situations.
Les réparations de matériel homologué doivent être effectuées par un centre d’entretien canadien autorisé désigné par le fournisseur. La compagnie de
télécommunicationspeutdemanderàl’utilisateurdedébrancherunappareilàlasuitederéparationsoudemodificationseffectuéesparl’utilisateurouàcause
de mauvais fonctionnement.
Pour sa propre protection, l’utilisateur doit s’assurer que tous les fils de mise à la terre de la source d’énergie électrique, les lignes téléphoniques et les
canalisations d’eau métalliques, s’il y en a, sont raccordés ensemble. Cette précaution est particulièrement importante dans les régions rurales.
AVERTISSEMENT: L’utilisateur ne doit pas tenter de faire ces raccordements lui-même; il doit avoir recours à un service d’inspection des installations
électriques, ou à un électricien, selon le cas.
AVIS:L’indice d’équivalence de la sonnerie (IES) assigné à chaque dispositif terminal indique le nombre maximal de terminaux qui peuvent être raccordés
à une interface. La terminaison d’une interface téléphonique peut consister en une combinaison de quelques dispositifs, à la seule condition que la somme
d’indices d’équivalence de la sonnerie de tous les dispositifs n’excède pas 5.
L’indice d’équivalence de la sonnerie (IES) de ce produit est 0.25.

Table of Contents
Section 1: Introduction 1
1.1 Specifications and Features................................................................................................................................1
Section 2: How to Program 2
2.1 Installer’s Programming.......................................................................................................................................2
2.2 Programming Decimal Data ................................................................................................................................2
2.3 Programming HEX Data ......................................................................................................................................2
2.4 Programming Toggle (ON/OFF) Option Sections ...............................................................................................3
2.5 Reviewing Programming .....................................................................................................................................3
Section 3: Installation Steps 4
3.1 Hardwire Connections (Power and Telephone) ..................................................................................................4
3.2 Adding Wireless Devices ....................................................................................................................................4
3.3 Deleting Wireless Devices ..................................................................................................................................4
3.4 Module Placement Test .......................................................................................................................................5
3.5 Supervision ..........................................................................................................................................................5
Section 4: Communications Programming 6
4.1 Dialing..................................................................................................................................................................6
4.2 Account Numbers................................................................................................................................................6
4.3 Phone Numbers ...................................................................................................................................................6
4.4 Reporting Codes .................................................................................................................................................6
4.5 Reporting Formats ...............................................................................................................................................9
Section 5: Zone Programming 11
5.1 Zone Definitions.................................................................................................................................................11
Section 6: System Programming 12
6.1 Programming Access Codes ............................................................................................................................12
6.2 Telephone Line Monitor (TLM) ..........................................................................................................................12
6.3 Bell Cut-off .........................................................................................................................................................12
6.4 Test Transmission ..............................................................................................................................................12
6.5 Transmission Delay............................................................................................................................................12

T A B L E O F C O N T E N C T S
6.6 Arming/Disarming Options ................................................................................................................................13
6.7 Entry/Exit Delay Options....................................................................................................................................13
6.8 Lockout ..............................................................................................................................................................14
6.9 Swinger Shutdown.............................................................................................................................................14
6.10 International Programming Options ..................................................................................................................14
6.11 [✱] Commands ..................................................................................................................................................14
6.12 Wireless Key Programming ...............................................................................................................................16
Programming Worksheets 18
Basic Programming ....................................................................................................................................................18
Communicator Programming .....................................................................................................................................19
International Programming .........................................................................................................................................23
Wireless Programming ...............................................................................................................................................24
Special Installer Functions .........................................................................................................................................25
Limited Warranty 26

1
Introduction
section1
1.1 Specifications and Features
WLS920 Wireless Desktop Alarm Control Unit
• Frequency: 922 to 926 MHz, Spread Spectrum
• Zones - receiver can receive signals from up to 8 wireless zones
• Supervisory - programmable supervisory window, 1 to 12 hours
• Easy enrollment process for all wireless devices
Device operating temperature ranges from 0°C to 50°C / 32°F to 122°F
• 9 Access Codes: 8 User, 1 System Master
• 6V, 1.2Ah gel-cell backup battery
Please refer to the Installation Instruction sheets of the following devices for more information.
WLS904 Motion Detector
• Standard alkaline batteries, four ‘AAA’ batteries, 30 to 36 month life
• Fully supervised for communication integrity
• 12 minute supervisory time
• Tamper condition is monitored
• Walk test LED
• 3 minute ‘High Traffic Shutdown’ mode
WLS906 Smoke Detector
• Standard alkaline batteries, six ‘AA’ batteries, 30 to 36 month life
• Fully supervised for communication integrity
• 12 minute supervisory time
• Tamper condition is monitored
• Photoelectric detection technology (Patent pending)
• Internal diagnostic every 40 seconds
WLS907 Universal Transmitter
• Standard alkaline batteries, three ‘AAA’ batteries, 30 to 36 month life
• Fully supervised for communication integrity
• 12 minute supervisory time
• Tamper condition is monitored
• Built-in reed switch or terminals for external contacts
• Normally open/Normally closed models available
WLS908 Panic Pendant
• 5 year battery life
• Water resistant
• To initiate an alarm, press and hold both colored buttons for two seconds.
• To initiate a test, press and hold the center button for two seconds and release.
WLS909 Wireless Key
• Standard alkaline batteries, three ‘A76’ batteries, 12 to 24 month life
• Compact, convenient size for pocket or purse
• Easy to use pushbuttons to arm and disarm in Stay / Away modes, or other programmable options
Batteries
The wireless devices are designed to use Eveready Alkaline Energizer batteries (AA: E91; AAA: E92; A76).

2
2.1 Installer’s Programming
Installer’s Programming is used to program all communicator and panel options. The Installer’s Code is
[5010] by default but may be changed to prevent unauthorized access to programming.
Installer’s programming steps are as follows:
1. Enter [✱] [8] [Installer’s Code].
The Armed light will turn ON and the System light will flash to indicate that the panel is waiting for the 3-
digit programming section number.
2. Enter the 3-digit section number corresponding to the section you wish to program.
The Armed light will turn OFF. The Ready light will turn ON and the System light will flash to indicate that
the panel is waiting for the information required to complete programming the selected section. For
example, enter [006] to change the Installer’s Code. If the 3-digit section number entered is invalid, the
control unit will sound a two second error tone.
3. Enter the information required to complete section programming (ie: numbers, HEX data, or ON/OFF
options). For example, enter [4 digits] for the new Installer’s Code.
If you enter information into a section and make a mistake, press the [#] key to exit the section. Select that
section again and re-enter the information correctly.
○○○○○○○○○○○○○○○○○○○○○○○○○○○○○○○○○○○○○○○○
○○○○○○○○○○○○○○○○○○○○○○○○○○○○○○○○○○○○○○○○
Installer’s Code .............................................................................. Section [006]
2.2 Programming Decimal Data
A set number of programming boxes are allotted for each section requiring decimal data (e.g.: codes,
telephone numbers). If a digit is entered for each program box, the panel will automatically exit from the
selected programming section. The Ready light will turn OFF, the Armed light will turn ON and the System light
will continue to flash.
You can also press the [#] key to exit a programming section without entering data for every box. This is handy
if you only need to change digits in the first few programming boxes. All other digits in the programming
section will remain unchanged.
2.3 Programming HEX Data
On occasion, hexadecimal (HEX) digits may be required. To program a HEX digit press the [✱] key. The panel
will enter HEX programming and Ready and System lights will begin to flash.
The following are the numbers which should be pressed to enter the appropriate HEX digit:
1 = A 2 = B 3 = C 4 = D 5 = E 6 = F
Once the correct HEX digit has been entered, the Ready light will continue to flash. If another HEX digit is
required, press the corresponding number. If a decimal digit is required, press the [✱] key again. The Ready
light will turn ON, the System light will flash, and the panel will return to regular decimal programming.
Example:
To enter ‘C1’ for a closing by user 1, you would enter:
[✱] [3] [✱], [1]:
•[✱] to enter Hexadecimal mode (Ready light flashes)
• [3] to enter C
•[✱] to return to decimal mode (Ready light is solid)
• [1] to enter digit 1
If Ready light is flashing, any number you enter will be programmed as the HEX equivalent.
If you are using a pulse format, a decimal zero [0] does not transmit. Programming a zero [0] tells the panel not to
send any pulses for that digit. Decimal zero [0] is a filler digit. To transmit a zero [0], it must be programmed as a
Hexadecimal ‘A’.
Example:
For the three digit account number ‘403’, you would enter:
[4], [✱] [1] [✱] [3], [0]:
• [4] to enter the digit 4
•[✱] to enter Hexadecimal mode (Ready light flashes)
• [1] to enter A; [✱] to return to decimal mode (Ready light is solid)
• [3] to enter the digit 3
• [0] to enter the digit 0 as a filler digit.
How to Program
Section2

3
H o w t o p r o g r a m
2.4 Programming Toggle (ON/OFF) Option Sections
Some programming sections contain several toggle options. The panel will use zone lights 1 through 8 to
indicate if the different options are enabled or disabled. Press the number corresponding to the option to turn
it ON or OFF. Once all the toggle options have been selected correctly, press the [#] key to exit the section
and save the changes. The Ready light will turn OFF and the Armed light will turn ON.
Refer to Section 5 in this manual to determine what each option represents and whether the light should be ON
or OFF for your application.
2.5 Reviewing Programming
Programming sections can be reviewed from the desktop control unit. After you have programmed a section,
when that programming section is entered, the control unit will immediately display the first digit of information
programmed in that section.
The control unit will display the information using a binary format, where:
Zone Light 1 = 1 Zone Light 2 = 2 Zone Light 3 = 4 Zone Light 4 = 8
Add up the values for the zone lights to determine the digit being displayed (for example, no zone lights = 0,
all 4 zone lights = 15 HEX ‘F’).
To view the next digit without changing the programming, simply enter the same digit as is being displayed
(example: control unit displays zone lights 1 and 2, representing the digit 3. Enter 3 and the next digit will be
displayed.).
When all the digits in a section have been viewed, the panel will exit the section; the Ready Light will turn OFF
and the Armed light will turn ON, waiting for the next two digit programming section number to be entered.
Press the [#] key to exit the section.

4
3.1 Hardwire Connections (Power and Telephone)
There are four jacks located at the back of the unit: one TYPE jack for the AC connector, two telephone jacks
(one Telephone In; one Telephone Out) and one RJ-38A jack for a hardwired telephone connection.
To connect the power, plug one end of the AC power adaptor to the round jack at the back of the unit. Plug the
other end into a wall. This connection will provide power to the unit.
To connect the telephone line, run a telephone cable from the wall to the Telephone In jack on the unit. To
connect a telephone to the unit, run another telephone cable from the Telephone Out jack to the telephone.
Consult the connection diagram below for further instruction.
3.2 Adding Wireless Devices
The following is the procedure for adding wireless transmitters:
1. Enter Installer’s Programming and enter Section [804]
2. Enter the 2-digit zone number for the device ([01] to [08]).
3. Enter the five digit electronic serial number located on the back of the wireless device.
The device is now added to the panel. Continue with steps 2 and 3 until all of the wireless devices are added.
Press [#] twice to exit Installer Programming.
You must also program how the zone will operate.
See Section 5.1 “Zone Definitions” for more information.
Adding WLS909 Wireless Keys
Wireless keys are assigned in programming section [804], subsections [41]-[56]. Enroll each wireless key by
entering the serial numbers on the back of each unit as indicated in steps 2 and 3 above.
3.3 Deleting Wireless Devices
To remove a wireless device from the panel, follow the guideline for adding a wireless device. Program
the serial number as [00000]. The wireless device for the zone will be removed.
You may need to power down the panel to clear troubles caused by deleted zones.
Installation Steps
Section3

5
i n s t a l l a t i o n s t e p s
3.4 Module Placement Test
You must test the placement of each wireless device before you permanently mount them. The module
placement test will determine whether the location you have selected is Good, Fair or Bad. If you get a Bad
result, relocate the device and perform the test again. To test each wireless device, perform the following:
1. Enter Installer’s Programming and enter programming section [904].
2. Enter the two digit zone number for the device to be tested
3. Test each device according to their type:
Door Contact. Open and close the contact by moving the magnet or by operating the external device
connected to the contact. The control unit will display the test result after the zone is restored.
Motion Detectors and Smoke Detectors. Remove the Detector from its backplate, wait for 5 seconds,
then reattach the Detector to its backplate. The control unit will display the test result after the Detector is
reattached to its backplate.
4. Verify the results of the test using the following table:
Good ...............Light 1 On Steady...........1 Beep
Fair ..................Light 2 On Steady........... 2 Beeps
Bad..................Light 3 On Steady ...........3 Beeps
5. Continue Steps 3 through 5 until each device has been tested.
Wireless devices can be mounted where results were Good or Fair. No device should be mounted
where a Bad test result was indicated. If multiple tests on the same device are performed you
must wait at least 10 seconds between tests.
WLS908 Panic Pendant Test
The panic pendant cannot be tested in the module placement test, so follow these steps:
1. Begin testing when your system is in the ready state and the Ready light is ON.
2. Press and hold the small middle button on the pendant marked “Test” for two seconds. Once the test is
complete and if the pendant’s battery condition is normal, the Ready light will turn off for four to five
seconds.
3. If the pendant’s battery is low, the Trouble light will turn ON and a series of continuous beeps will be heard.
This test should also be performed by the user when they perform a weekly system test.
If a low battery condition is detected, you must immediately replace the unit. Once you have obtained the new
unit, perform the following:
1. Enter Installer’s Programming and enter programming section [804].
3. Enter the two digit number for the pendant to be replaced.
4. Enter serial number [00000].
5. Enter the two digit number for the pendant being replaced.
6. Enter the serial number of the new pendant. Press [#] twice to exit Installer Programming.
3.5 Supervision
Wireless zones are supervised so that a trouble is generated when a device ceases to operate or is removed
from the system. To enable zone supervision, enter the following:
1. Enter Installer’s Programming and enter programming section [804].
2. Enter section [82] to enable or disable wireless zone supervision (see Section 2.4 “Programming Toggle
(ON/OFF) Option Sections” for how to program these options).
The supervisory option for any WLS908 panic pendants enrolled on the system must be OFF.

6
Communications Programming
section4
4.1 Dialing
If the Communicator Disable option is selected, the panel will not attempt to call central station. If
communication is enabled, the panel will attempt to call central station when an event with a valid Reporting
Code occurs (See Section 4.4 “Reporting Codes”).
The Communicator Call Direction Options are used to select which phone number the panel will dial when an
event occurs.
If the DTMF Dialing option is enabled, the panel will dial using DTMF (touch tone). If the Switch to Pulse Dial
option is enabled, the panel will switch to pulse dialing on the fifth attempt to call the central station. When this
option is disabled, the panel will always dial using DTMF. If DTMF Dialing is disabled, the panel will always
pulse dial.
The panel will attempt to send a signal to central station eight times before indicating a Failure to
Communicate (FTC) trouble condition. The Third Phone Number can be used as a back up for the first number
in this situation (see Section 4.3 “Phone Numbers”).
○○○○○○○○○○○○○○○○○○○○○○○○○○○○○○○○○○○○○○○○
DTMF or Pulse Dialing .................................................Section [380], Option [3]
Switch to Pulse Dialing on Fifth Attempt......................Section [380], Option [4]
Communicator Enable/Disable.....................................Section [380], Option [1]
○○○○○○○○○○○○○○○○○○○○○○○○○○○○○○○○○○○○○○○○
Communicator Call Direction Options.................................. Section [361]-[368]
4.2 Account Numbers
The account number is used by the central station to distinguish between panels. There is one account
number programmable for the WLS920.
○○○○○○○○○○○○○○○○○○○○○○○○○○○○○○○○○○○○○○○○
○○○○○○○○○○○○○○○○○○○○○○○○○○○○○○○○○○○○○○○○
Account Code (4 digits)..................................................................Section [310]
4.3 Phone Numbers
The panel can use three different phone numbers for communicating with the central station. The First Phone
Number is the primary number, the Second Phone Number is the secondary number and the Third Phone
Number will back up the First phone number if enabled.
TheThird Phone Number will NOT back up the Second Phone Number.
If the Alternate Dial option is enabled, the panel will alternate between the first and third phone numbers when
attempting to call the central station. If the option is disabled, the panel will only attempt to call the Third phone
number after failing to communicate with the first phone number.
In order for Alternate Dialing to work properly, theThird Phone Number must be enabled.
Phone numbers can be up to 32 digits which will allow you to add special digits if required. To program the
phone number, enter the numbers 0 through 9 as required. The following is a list of programmable HEX digits
and the function they perform:
HEX (B) - simulates the [✱] key on a touch tone phone HEX (E) - forces the panel to pause for 2 seconds
HEX (C) - simulates the [#] key on a touch tone phone HEX (F) - marks the end of the phone number
HEX (D) - forces the panel to search for dial tone
○○○○○○○○○○○○○○○○○○○○○○○○○○○○○○○○○○○○○○○○
First Telephone Number .................................................................Section [301]
Second Telephone Number............................................................Section [302]
Third Telephone Number ................................................................Section [303]
Third Telephone Number Enable .................................Section [380], Option [5]
○○○○○○○○○○○○○○○○○○○○○○○○○○○○○○○○○○○○○○○○
Alternate Dial ................................................................Section [380], Option [6]
If no DialTone Detect (HEX D) is used in the phone number, a 2-second pause (HEX E) should be
inserted.
4.4 Reporting Codes
The panel can be programmed to report an event to the central station by sending the Reporting Code
programmed for that event.
Reporting codes can be one or two digits and can use HEX digits (A through F). The following is a description of
the different Reporting Codes that can be programmed and when the events will be reported to central station.
7
c o m m u n i c a t i o n s p r o g r a m m i n g
Zone Alarm
The panel will transmit the Zone Alarm Reporting Code when a zone goes into alarm. 24 hour type zones will
go into alarm whether the panel is armed or disarmed and report to the central station. All other types of zones
will only go into alarm if the panel is armed.
○○○○○○○○○○○○○○○○○○○○○○○○○○○○○○○○○○○○○○○○
○○○○○○○○○○○○○○○○○○○○○○○○○○○○○○○○○○○○○○○○
Zone Alarm Reporting Codes ........................................................Section [320]
Zone Restoral
If the Restoral on Bell Time-out option is selected, the panel will send the Zone Restoral Reporting Code for
the zone if the bell cut-off time has expired
and
the zone is secured. If the zone is not secured when the alarm
output times out, the panel will send the restoral immediately once the zone is secured.
If the Restoral on Bell Time-out option is not selected, the panel will immediately send the Zone Restoral
Reporting Code when the zone is secured, regardless of whether or not the alarm output is active.
24 Hour type zones will report the restoral immediately once the zone is secured.
○○○○○○○○○○○○○○○○○○○○○○○○○○○○○○○○○○○○○○○○
Zone Restoral Reporting Codes ....................................................Section [324]
○○○○○○○○○○○○○○○○○○○○○○○○○○○○○○○○○○○○○○○○
Restoral on Bell Time-out.............................................Section [380], Option [2]
Closings (Arming Codes)
The panel will transmit a Closing Reporting Code to indicate that the system is armed. A different Reporting
Code can be transmitted for each User Code and Master Code to identify who has armed the system.
A Special Closing Reporting Code will be transmitted if the system is armed using any of the following
methods:
• Quick Arming
• Arming via wireless key
If programmed, a Partial Closing Reporting Code will be sent along with the closing reporting code if one or
more zones were manually bypassed when the system was armed to warn the monitoring station of a security
compromise.
If the Closing Confirmation option is enabled, the control unit will sound a series of eight beeps to confirm to
the user that the closing code was sent and received by the central station.
○○○○○○○○○○○○○○○○○○○○○○○○○○○○○○○○○○○○○○○○
Closing (Arming) Reporting Codes ...................................... Section [339]-[342]
Special Closing Reporting Code....................................................Section [343]
Partial Closing Reporting Code .....................................................Section [343]
○○○○○○○○○○○○○○○○○○○○○○○○○○○○○○○○○○○○○○○○
Closing Confirmation....................................................Section [381], Option [4]
Openings (Disarming Codes)
The panel will transmit an Opening Reporting Code to indicate that the system has been disarmed. A different
Reporting Code can be transmitted for each User Code and the Master Code to identify who has disarmed the
system.
A Special Opening reporting code will be transmitted if the system is disarmed using any of the following
methods:
• Disarming via keyswitch
If an alarm occurred while the system was armed, an Opening After AlarmOpening After Alarm
Opening After AlarmOpening After Alarm
Opening After Alarm reporting code will be sent along
with an opening reporting code when the user disarms the system.
If Transmission Delay is being used, the Opening After Alarm code must be programmed. See
Section 6.5 “Transmission Delay.”
○○○○○○○○○○○○○○○○○○○○○○○○○○○○○○○○○○○○○○○○
Opening (Disarming) Reporting Codes ............................... Section [344]-[348]
○○○○○○○○○○○○○○○○○○○○○○○○○○○○○○○○○○○○○○○○
Opening After Alarm.......................................................................Section [328]
Tampers
The panel will report a Zone Tamper Alarm Reporting Code if an open condition is present on any zone. A
different Reporting Code can be programmed to identify each zone. The Zone Tamper Restoral Reporting
Code will be transmitted immediately when the tamper condition is restored.

8
c o m m u n i c a t i o n s p r o g r a m m i n g
A General System Tamper Reporting Code will be transmitted when the tamper zone on any module is violated.
The General System Tamper Restoral Reporting Code will be transmitted when the tamper zone on the module
is restored.
○○○○○○○○○○○○○○○○○○○○○○○○○○○○○○○○○○○○○○○○
Tamper Reporting Codes ...............................................................Section [330]
Tamper Restoral Reporting Codes ................................................Section [334]
○○○○○○○○○○○○○○○○○○○○○○○○○○○○○○○○○○○○○○○○
General System Tamper and Restoral...........................................Section [338]
Priority/Emergency
The panel will transmit a Keypad Fire Alarm Reporting Code
and
the Keypad Fire Restoral Reporting Code
when the Fire Key on any wireless key is pressed for two seconds.
The panel will transmit a Keypad Auxiliary Alarm Reporting Code
and
the Keypad Auxiliary Restoral
Reporting Code when the Auxiliary Key on any wireless key is pressed for two seconds.
The panel will transmit a Keypad Panic Alarm Reporting Code
and
the Keypad Panic Restoral Reporting Code
when the Panic Key on any wireless key is pressed for two seconds.
○○○○○○○○○○○○○○○○○○○○○○○○○○○○○○○○○○○○○○○○
○○○○○○○○○○○○○○○○○○○○○○○○○○○○○○○○○○○○○○○○
Priority Alarm and Restoral Reporting Codes ...............................Section [329]
Maintenance
The panel will transmit a Battery Trouble Alarm Reporting Code when the backup battery charge drops
below 5.75 VDC. The Battery Trouble Restoral Reporting Code will not be transmitted until the battery has
been charged to over 6.0 VDC.
To prevent the panel from transmitting an AC Failure Trouble Alarm Reporting Code during short power outages,
the panel will not send the signal unless AC power is lost for the amount of minutes programmed for the AC Failure
Communication Delay. The AC Failure Trouble Restoral Reporting Code follows the AC failure communication
delay as well.
If AC Failure Communications Delay is programmed as “000,” then the AC failure transmission will
be disabled.
A Fire Trouble Alarm Reporting Code will be immediately transmitted when an open condition is measured on
any Fire type zone (see Section 5.2 – “Zone Definitions”). The Fire Trouble Restoral Reporting Code will be
transmitted as soon as the problem is corrected.
The TLM Restoral Reporting Code will be transmitted within 10 seconds after a telephone line monitoring
problem is corrected.
○○○○○○○○○○○○○○○○○○○○○○○○○○○○○○○○○○○○○○○○
Maintenance Alarm Reporting Codes............................................Section [349]
Maintenance Restoral Reporting Codes........................................Section [350]
○○○○○○○○○○○○○○○○○○○○○○○○○○○○○○○○○○○○○○○○
AC Failure Communication Delay ..................................................Section [370]
Test Transmissions
The panel can be programmed to transmit a Periodic Test Transmission Reporting Code (see Section 6.4 –
“Test Transmissions”), and a System Test Reporting Code when the end user performs a system test.
○○○○○○○○○○○○○○○○○○○○○○○○○○○○○○○○○○○○○○○○
○○○○○○○○○○○○○○○○○○○○○○○○○○○○○○○○○○○○○○○○
Test Transmission Reporting Codes ..............................................Section [352]
Wireless Maintenance
The panel will transmit a General Zone Low Battery Alarm reporting code if a low battery condition is
indicated by a detector. The transmission of the trouble will be delayed by the number of days programmed
for Zone Low Battery Transmission Delay. The General Zone Low Battery Restoral Reporting Code will be
transmitted when the problem is corrected. The specific zone that caused the trouble will be recorded in the
event buffer.
The restoral will not be transmitted until all detectors indicate good battery conditions.
○○○○○○○○○○○○○○○○○○○○○○○○○○○○○○○○○○○○○○○○
Wireless Maintenance Reporting Codes .......................................Section [353]
○○○○○○○○○○○○○○○○○○○○○○○○○○○○○○○○○○○○○○○○
Zone Low Battery Transmission Delay...........................................Section [370]

9
c o m m u n i c a t i o n s p r o g r a m m i n g
Miscellaneous
If the panel fails to transmit information to the central station, it will display a Failure To Communicate (FTC)
trouble condition. The panel will transmit a Phone Number 1 Failure to Communicate Reporting Code or a
Phone Number 2 Failure to Communicate Reporting Code the next time it calls the central station. The panel
will transmit the old events, followed by the FTC message, followed by the new events. This will allow central
station to determine which events are old or new.
○○○○○○○○○○○○○○○○○○○○○○○○○○○○○○○○○○○○○○○○
○○○○○○○○○○○○○○○○○○○○○○○○○○○○○○○○○○○○○○○○
Miscellaneous Maintenance Reporting Codes..............................Section [351]
If the DelinquencyTransmission Delay is set for one day, there must be 24 hours of no arming or
disarming before the Delinquency Code will be sent.
After a Delinquency Code has been transmitted, it will not send again until the system has been
armed and disarmed.
4.5 Reporting Formats
Each central station communication phone number can be programmed to report using any one of the 4
formats available. A 20 BPS pulse format is supported in addition to Contact ID, SIA and a Pager format.
○○○○○○○○○○○○○○○○○○○○○○○○○○○○○○○○○○○○○○○○
Communicator Format Options ......................................................Section [360]
○○○○○○○○○○○○○○○○○○○○○○○○○○○○○○○○○○○○○○○○
Communicator Call Directions ......................................... Section [361] to [368]
The following is a description of each reporting format:
Pulse Formats
Depending on which pulse format is selected, the panel will communicate using the following specifications:
• 3/1, 3/2, 4/1 or 4/2
• 1400 or 2300 Hz handshake
• 20 bits per second
• non-extended
Additional Notes on Pulse Formats
1. The digit ‘0’ will send no pulses and is used as a filler digit.
2. When programming account numbers, enter four digits. When programming a three digit account number,
the fourth digit must be programmed as ‘0’.
• 3 digit account number [123] - program [1230]
3. If an account number has a ‘0’ in it, substitute a HEX digit ‘A’ for the ‘0’. For example:
• 3 digit account number [502] - program [5A20]
• 4 digit account number [4079] - program [4A79]
4. Reporting codes are two digits. When programming single-digit Reporting Codes, the second digit must be
programmed as a ‘0’. If a ‘0’ is to be transmitted, substitute HEX digit ‘A’. For example:
• 1 digit Reporting Code [3] - program [30]
• 2 digit Reporting Code [30] - program [3A]
5. To prevent the panel from reporting an event, the Reporting Code should be programmed as [00] or [FF].
Contact ID
Contact ID is a specialized format that will communicate information using tones rather than pulses. This
format allows more information to be sent faster than other formats. For example, in addition to reporting an
alarm in zone one, the Contact ID format will also report the type of alarm, such as an Entry/Exit alarm.
To program Contact ID, a two digit number from Appendix A must be entered in order for every event to be
transmitted. The two digit number determines the type of alarm. The panel will automatically generate all other
information, including the zone number.
Additional Notes on Contact ID
1. Account Numbers must be four digits.
2. All Reporting Codes must be two digits.
3. Substitute the HEX digit ‘A’ for the ‘0’.
4. To prevent the panel from reporting an event, the Reporting Code should be programmed as [00] or [FF].
Please refer to Appendix A for a list of Contact ID Identifiers.
SIA
SIA is a specialized format that will communicate information quickly using Frequency Shift Keying (FSK) rather
than pulses. The SIA format will automatically generate the type of signal being transmitted, such as Burglary,
Fire, Panic etc. The two digit Reporting Code is used to identify the zone or user code number.

10
c o m m u n i c a t i o n s p r o g r a m m i n g
If the SIA format is selected, the panel can be programmed to automatically generate all zone and
user code numbers, thus eliminating the need to program these items.
If the SIA Sends Automatic Reporting Codes option is enabled, the panel will operate as follows:
1. If an event’s Reporting Code is programmed as [00], the panel will not attempt to call the central station.
2. If the Reporting Code for an event is programmed as anything from [01] to [FF], the panel will
automatically
generate the zone or user code number.
The Communicator Call Direction options can be used to disable the reporting of events such as Openings
and Closings. If all of the Opening and Closing Reporting Codes are programmed as [00], the panel will not
report.
If the SIA Sends Automatic Reporting Codes option is disabled, the panel will operate as follows:
1. If an event’s Reporting Code is programmed as [00] or [FF], the panel will not attempt to call central
station.
2. If the Reporting Code for an event is programmed as anything from [01] to [FE], the panel will send the
programmed Reporting Code.
Please refer to Appendix B for a list of SIA identifiers.
○○○○○○○○○○○○○○○○○○○○○○○○○○○○○○○○○○○○○○○○
○○○○○○○○○○○○○○○○○○○○○○○○○○○○○○○○○○○○○○○○
SIA Sends Automatic Reporting Codes...................................Section [381]: [3]
Pager Format
The Communicator Format option for either phone number can be programmed as the Pager Format. If an
event occurs and the Communicator Call Direction options direct the call to a phone number with the Pager
Format selected, the panel will attempt to page.
When calling a pager, extra digits will be required in order for the format to function properly. The following is a
list of Hex digits and the functions they perform:
• Hex [B] - simulates the [✱] key on a touch tone phone
• Hex [E] - two second pause
• Hex [C] - simulates the [#] key on a touch tone phone
• Hex [F] - marks the end of the phone number
• Hex [D] - forces the panel to search for dial tone
The panel will attempt to call the pager once. Once the appropriate phone number is dialed, the panel will
send the account number and Reporting Code followed by the [#] key (Hex [C]).
The panel has no way of confirming if the pager was called successfully; a Failure To Communicate trouble will
thus never be generated.
The pager format will not cause any form of ringback.
Do not use the digit C in a reporting code when using Pager Format. In most cases, the digit C will
be interpreted as a [#], which will terminate the page before it has finished.
Pager Format will not force dial, but will check for busy tone.

11
Zone Programming
section5
5.1 Zone Definitions
Program section [001] to select how each of the zones will operate. Each zone requires a two digit entry. In
addition to zone definitions, six different attributes may be programmed by zone (see Section 5.2 – “Zone
Attributes”).
[00] Null Zone
The zone is vacant. Unused zones should be programmed as Null zones.
[01] Delay 1
This zone type, normally used for entry/exit doors, can be violated during the exit delay time without causing
an alarm. Once the exit delay has expired, opening the zone will start the entry delay timer. During the entry
delay time, the buzzer will sound steadily to advise the user that the system should be disarmed. If the panel is
disarmed before the entry time expires, no alarm will be generated.
[02] Delay 2
The Delay 2 entry delay time can be set independent of Delay 1 in programming section [005] (System Times).
[03] Instant Zone
This zone type will cause an instant alarm if it is violated when the panel is armed. Typically, this zone is used
for windows, patio doors or other perimeter zones.
[04] Interior Zone
This zone will not cause an alarm if violated during the entry delay. If the zone is violated before the entry
delay has begun, it will cause an instant alarm. Typically, this zone is used for interior protection devices, such
as motion detectors.
[05] Interior Stay/Away Zone
This zone type works similar to the Interior zone type except that it will be automatically bypassed under the
following conditions:
• When the panel is armed in the Stay Mode, i.e. when the panel is armed with a user code and a Delay type
zone is NOT tripped during the exit delay.
• When the panel is armed without entry delay, see section 6.11 “[✱] Commands”.
The automatic bypass prevents the user from having to manually bypass interior type zones when arming at
home. This zone is typically used for interior protection devices, such as motion detectors.
[06] Delay Stay/Away Zone
This zone type will operate similar to Interior Stay/Away zones except that it will always provide an entry delay.
Typically, this zone is used for interior protection devices, such as motion detectors. This zone option will help
prevent false alarms since it always provides an entry delay time for the user to turn off the panel.
[07] - [09] Not used
[10] 24 Hour Supervisory Buzzer Zone
If this zone is violated when the system is either armed or disarmed, the panel will immediately latch the
buzzer until a valid user code is entered and will immediately communicate to the central station.
[11] 24 Hour Burglary Zone
If this zone is violated when the system is either armed or disarmed, the panel will immediately latch the alarm
output and communicate to the central station. The alarm will sound for the Bell Cutoff time programmed in
Section [005] (“System Times”) or until a valid user code is entered.
[12] 24 Hour Holdup/Panic Zone
This zone is similar to the 24 Hour Burglary zone type, except for the SIA identifier.
[13] - [24] Not used
[87] Not used
[88] Standard 24 Hour Fire Zone
When this zone is violated, the panel will immediately latch the alarm output and communicate to the central
station. The alarm will sound for the Bell Cutoff time programmed in Section [005] (“System Times”).
A violated Fire zone will be displayed.
○○○○○○○○○○○○○○○○○○○○○○○○○○○○○○○○○○○○○○○○
○○○○○○○○○○○○○○○○○○○○○○○○○○○○○○○○○○○○○○○○
Zone Definitions .............................................................................Section [001]

12
System Programming
section6
6.1 Programming Access Codes
There are 9 access codes programmable by the end user. All codes have the ability to arm and disarm the
system. Instructions for programming access codes are located in the WLS920 Instruction Manual.
The user-programmed codes are as follows:
Master Code – Access Code (40)
By default, the Master Code is enabled to perform any keypad function. This code can be used to program all
User Codes. This code can also be programmed by the installer in programming section [007].The Master
Code can only be changed by the Installer.
General Access Codes – Access Codes (01) to (08)
General access codes can arm and disarm the system. By selecting the No Code Required for Bypassing
option, each user can also have the ability to bypass zones without entering an access code. To limit the
bypassing ability for a user, disable the bypassing attribute for that user code (see “Programming Access
Codes” in the WLS920 Instruction Manual).
The Master code and the Installer’s code are programmed in Installer’s programming.
○○○○○○○○○○○○○○○○○○○○○○○○○○○○○○○○○○○○○○○○
No Code Required For Bypassing ...............................Section [015], Option [5]
Installer’s Code...............................................................................Section [006]
○○○○○○○○○○○○○○○○○○○○○○○○○○○○○○○○○○○○○○○○
Master Code ...................................................................................Section [007]
6.2 Telephone Line Monitor (TLM)
The panel will supervise the presence of the phone line and will indicate a trouble condition if the phone line is
disconnected. If the TLM Enabled option is selected, the panel will wait for the TLM Trouble Delay time
period before indicating the trouble so that a momentary interruption of the phone line will not cause a trouble
condition.
If the TLM Trouble Only When Armed option is enabled, the panel will indicate a TLM trouble only at the
control unit if the system is armed. To activate the bell output in the case of a TLM trouble while the system is
armed, the TLM Audible When Armed option must be selected.
When the trouble condition is restored, the panel can send a TLM Restoral Reporting Code. Any events which
occur while the phone line is down will also be communicated.
○○○○○○○○○○○○○○○○○○○○○○○○○○○○○○○○○○○○○○○○
TLM Enable/Disable .....................................................Section [015], Option [7]
TLM Trouble Only When Armed or
TLM Audible When Armed ...........................................Section [015], Option [8]
TLM Trouble Reporting Code .........................................................Section [349]
TLM Restoral Reporting Code .......................................................Section [350]
○○○○○○○○○○○○○○○○○○○○○○○○○○○○○○○○○○○○○○○○
TLM Trouble Delay..........................................................................Section [370]
6.3 Bell Cut-off
The siren will silence after the number of seconds programmed for the Bell Cut-off time have passed.
○○○○○○○○○○○○○○○○○○○○○○○○○○○○○○○○○○○○○○○○
○○○○○○○○○○○○○○○○○○○○○○○○○○○○○○○○○○○○○○○○
Bell Cut-off......................................................................................Section [005]
6.4 Test Transmission
To ensure that the communication link with the central station is functioning properly, the panel can be
programmed to send a test transmission signal on a regular basis.
The panel can send a Periodic Test Transmission Reporting Code at the programmed Test Transmission
Time of Day. The Test Transmission Cycle determines the number of days (001 to 255) between tests. If the
test transmission cycle being programmed is of a lesser value than the previous value, the system will wait the
original period before the next test transmission is sent, and then begin reporting with the new interval.
The end user can generate a communicator test. If the System Test Reporting Code is programmed, the
panel will send the signal when the System Test command is entered (see the WLS920 Instruction Manual for
information on performing a System Test).
○○○○○○○○○○○○○○○○○○○○○○○○○○○○○○○○○○○○○○○○
Test Transmission Reporting Codes ..............................................Section [352]
Test Transmission Time of Day.......................................................Section [371]
○○○○○○○○○○○○○○○○○○○○○○○○○○○○○○○○○○○○○○○○
Test Transmission Cycle .................................................................Section [370]

13
s y s t e m p r o g r a m m i n g
6.5 Transmission Delay
If Transmission Delay is being used, the Opening After Alarm code must be programmed. See
Section 4.4 “Reporting Codes”
If the transmission delay zone attribute is selected for a given zone, the panel will delay reporting an alarm for
that zone for the number of seconds programmed for the Transmission Delay Time. If the panel is disarmed
before the delay time expires, the panel will not report the event.
○○○○○○○○○○○○○○○○○○○○○○○○○○○○○○○○○○○○○○○○
○○○○○○○○○○○○○○○○○○○○○○○○○○○○○○○○○○○○○○○○
Transmission Delay Times..............................................................Section [370]
6.6 Arming /Disarming Options
If the Quick Arm option is enabled, the panel can be armed without a user code by entering [✱]
[0] or by
pressing the Stay or Away function key.
The Quick Exit option, if enabled, will allow someone to leave an armed premises through a Delay type zone
without having to disarm and rearm the system.
If the Arm/Disarm Bell Squawk option is enabled, the panel will squawk the alarm output once upon arming
and twice upon disarming. The Opening After Alarm Keypad Ringback option will give you the ability to
beep the keypad 10 times rapidly if the panel is disarmed after an alarm occurred. The Opening After Alarm
Bell Squawk
option will give you the ability to squawk the bell output 10 times rapidly if the panel is disarmed
after an alarm occurred.
Closing Confirmation, if enabled, will cause the keypad to beep 10 times rapidly after the closing Reporting
Code has been transmitted to central station.
If the Bypass Status Displayed While Armed is chosen, the System light will be ON while the system is
armed to indicate any bypassed zones.
To prevent false alarms on exit, use the built-in feature Audible Exit Fault. A fault will be indicated when the
user has failed to secure the system once they have exited the premises (see the WLS920 Instruction Manual
for a full description of this feature).
○○○○○○○○○○○○○○○○○○○○○○○○○○○○○○○○○○○○○○○○
Quick Arm Enable.........................................................Section [015], Option [4]
Quick Exit Enable .........................................................Section [015], Option [3]
Arm/Disarm Bell Squawk .............................................Section [014], Option [1]
Closing Confirmation....................................................Section [381], Option [4]
Opening After Alarm Keypad Ringback .......................Section [381], Option [1]
Opening After Alarm Bell Ringback .............................Section [381], Option [2]
○○○○○○○○○○○○○○○○○○○○○○○○○○○○○○○○○○○○○○○○
Bypass Status Displayed While Armed........................Section [016], Option [7]
6.7 Entry/Exit Delay Options
Two different entrydelays can be programmed: the first entry delay will be enabled for Delay 1 type zones and
the second for Delay 2 type zones. Only one exit delay can be programmed.
Since two Delay zones – and therefore two different Entry Delays – are programmable, when the
panel is armed, the Entry Delay will begin when the first delay zone violated.
Upon arming, the panel will begin the exit delay. If the Audible Exit Delay with Urgency option is enabled,
the control unit will beep at one second intervals until the exit delay expires. The control unit will beep rapidly
for the last 10 seconds of exit delay to warn the user that the system is about to arm.
The Audible Exit Fault will notify the user if they failed to secure the premises upon arming.
For commercial applications, the Bell Squawk on Exit Delay option may be enabled. The panel will squawk
the alarm output once every second when the exit delay is initiated and three times per second for the last 10
seconds until the exit delay expires.
Upon entry, if a Delay type zone is violated, the panel will begin the entry delay. The control unit will emit a
steady tone. The control unit will pulse the sounder during the last 10 seconds to warn the user the system is
about to go into alarm. If there was an alarm during the armed period, the control unit will pulse for the entire
entry delay to warn the user of the previous alarm.
For commercial applications Bell Squawk on Entry Delay may be enabled. The panel will squawk the alarm
output once every second until the entry delay expires or the system is disarmed.
If the Bell Squawk During Auto Arm option is enabled, the bell will squawk when the system is auto-armed in
order to notify anyone on the premises that the system is being armed.
If the Exit Delay Termination option is enabled, the panel will monitor the Delay zones during exit delay.
During the exit delay, if a Delay type zone is violated and then secured, the exit delay will be terminated and
the panel will be armed immediately.

14
s y s t e m p r o g r a m m i n g
○○○○○○○○○○○○○○○○○○○○○○○○○○○○○○○○○○○○○○○○
Entry Delay 1 and 2 (System Times) .............................................Section [005]
Exit Delay (System Times) .............................................................Section [005]
Audible Exit Delay with Urgency ..................................Section [014], Option [6]
Bell Squawk Options ......................................................................Section [014]
○○○○○○○○○○○○○○○○○○○○○○○○○○○○○○○○○○○○○○○○
Exit Delay Termination..................................................Section [014], Option [7]
6.8 Lockout
The panel can be programmed to ‘lockout’ if a number of incorrect user code entries are made. After the
Number of Invalid Codes Before Lockout has been reached the panel will lock out the keys for the Lockout
Duration and log the event to the event buffer. For the duration of the lockout the panel will sound an error
tone when any key is pressed.
Lockout will reset every hour.
To disable Lockout program the Number of Invalid Codes Before Lockout as [000].
○○○○○○○○○○○○○○○○○○○○○○○○○○○○○○○○○○○○○○○○
Number of Invalid Codes Before Lockout ......................................Section [012]
Lockout Duration ............................................................................Section [012]
○○○○○○○○○○○○○○○○○○○○○○○○○○○○○○○○○○○○○○○○
Lockout Reporting Code ................................................................Section [338]
6.9 Swinger Shutdown
The swinger shutdown feature is designed to prevent a “runaway” communicator from tying up the central
station. After the panel has communicated the programmed number of transmissions for an event, it will no
longer report that event until the swinger shutdown is reset. Different swinger shutdown levels can be set for
zone alarms, zone tampers and maintenance signals.
By default, each Swinger Shutdown limit is set to [003]. The panel will not send more than three signals for
each zone until the swinger shutdown is reset.
Swinger shutdown will be reset every day at midnight or when the panel is armed. Once reset, the panel will
again communicate normally.
○○○○○○○○○○○○○○○○○○○○○○○○○○○○○○○○○○○○○○○○
○○○○○○○○○○○○○○○○○○○○○○○○○○○○○○○○○○○○○○○○
Swinger Shutdown..........................................................................Section [370]
6.10 International Programming Options
[701] First International Option Code
1. Power Line Frequency: 50Hz/60Hz
2 - 8 For Future Use
[702] Second International Option Code
1. International Dialing Parameters: The pulse dialing Make/Break ratio is 33/67.
North American Dialing Parameters: The pulse dialing Make/Break ratio is 40/60.
Contact your local telephone company to confirm which setting should be used.
2. Force Dialing Enabled: If the panel fails to call the monitoring station on the first dialing attempt, on every
attempt thereafter the panel will dial out with or without the presence of dial tone.
Force Dialing Disabled: The panel will not dial out if dial tone is not detected.
3. Land Line Test Transmission in Minutes/Days: This option allows you to select whether the Land Line
Test Transmission cycle will be counted in minutes or days. The Test Transmission cycle is programmed in
Section [370].
4 - 8 For Future Use
6.11 [✱] Commands
[✱]+[1] Zone Bypass/Reactivate Stay/Away Zones
The [✱] [1] command can be used to bypass individual zones. It can be used if the user wants to have access
to an area while the system is armed or to bypass a defective zone (bad contact, damaged wiring) until
service can be provided.
The system can be armed with a bypassed zone. A bypassed zone will not cause an alarm.
If Code Required for Bypass is enabled an access code will be required to enter the Bypass mode. Only user
codes with the Bypass attribute enabled will be able to bypass zones.
Zones can only be bypassed when the system is disarmed.

15
s y s t e m p r o g r a m m i n g
To bypass a zone:
1. Enter [✱] [1] (access code if required).
2. The control unit will turn on the zone lights for any zones already bypassed.
3. Enter the 2 digit zone number to bypass the zone.
4. The control unit will turn on the zone light.
5. Press [#].
All zones that were lit when the [#] key was pressed are now bypassed.
To un-bypass a zone:
1. Enter [✱] [1] (access code if required).
2. The control unit will turn on the zone lights for any zones already bypassed.
3. Enter the 2 digit zone number to un-bypass the zone.
4. The control unit will turn off the zone light.
5. Press [#].
All zones that were lit when the [#] key was pressed are now bypassed.
When the system is disarmed all manually bypassed zones will be un-bypassed.
Reactivate Interior
If the system is armed in the Stay mode
(See Section 6.6 “Arming/Disarming”),
the [✱] [1] command can be
used to reactivate the Stay/Away zones.
Please ensure all force-armed zones are restored before reactivating the Stay/Away zones.
○○○○○○○○○○○○○○○○○○○○○○○○○○
○○○○○○○○○○○○○○○○○○○○○○○○○○
Code required for bypass - section [015], option [5]
[✱]+[2] Trouble Display
The panel constantly monitors itself for several different trouble conditions. If a trouble condition is present the
‘System’ light will be on steady and the control unit will beep twice every 10 seconds.
The trouble beep can be silenced by pressing any key on the control unit.
Troubles can only be viewed when the system is in the disarmed state. If a trouble occurs while the system is
armed, enter your access code to disarm the system, then follow the procedure outlined below to determine
the specific trouble.
To view the type of trouble condition, press [✱][2]. The System light will flash and one or more zone lights will
turn ON, indicating the various trouble conditions:
Trouble [1] - Low Battery
The main panel backup battery is low. The trouble will be generated if the battery drops below 5.8 volts under
load and will restore when the battery charges over 6.1 volts.
Trouble [2] - AC Failure
This trouble indicates that AC power is no longer being supplied to the control unit. If it is required to
communicate this to a monitoring station, program reporting codes in sections [349] and [350]. To inhibit
reporting of short duration power outages, a delay can be programmed in section [370].
Trouble [3] - Telephone Line Trouble
The telephone connection to the control unit is continuously monitored. If there is a problem with the telephone
connection, a trouble will be indicated after the delay programmed in section [370].
Trouble [4] - Failure to Communicate (FTC)
If the communicator fails in an attempt to communicate with any of the programmed telephone numbers, this
trouble will be generated. If a later attempt is successful, the FTC reporting code(s) programmed in section
[351] will be transmitted along with any other unreported events that occurred while the panel was not able to
communicate.
Trouble [5] - Zone Fault (including Fire Zone)
This trouble will be indicated if any zone on the system is in a trouble condition, i.e. it could not provide an
alarm to the panel if required to do so. When a trouble condition occurs, the control unit will start to beep.
Press [5], while in Trouble mode, to view which zones have a trouble condition.
Trouble [6] - Zone Tamper
This trouble is generated when a tamper condition is present. When a tamper condition occurs, the control unit
will start to beep.
Press [6], while in Trouble mode, to view which zones have a tamper condition.
16
s y s t e m p r o g r a m m i n g
Trouble [7] - Zone Low Battery
This trouble is generated when an wireless device reports a low battery condition to the control unit. Press [7]
while in Trouble mode to view which zones have a low battery.
Trouble [8] - Loss of System Time
This trouble occurs when the control unit is powered up and the internal clock has not been set. Setting the
time with User Function [✱][6][Master Code][1] will clear this trouble.
[✱✱
✱✱
✱] [3] Alarm Memory
The ‘System’ light will turn on if any alarm occurred during the last armed period or – in the case of 24 hour
zones – if an alarm occurred while the panel was disarmed.
To view alarm memory, press [✱]
[3]. The keypad will flash the System light and light up the zone indicator lights
corresponding to the alarm or tamper conditions which occurred during or since the last armed period. To clear the
System light, arm and disarm the system.
[✱]+[4] Door Chime On/Off
If enabled the control unit will beep 5 times rapidly when a zone is tripped and restored. The panel will only do
this for zones with the Door Chime attribute enabled and if the door chime feature is enabled
(See Section 5.2
“Zone Attributes”)
.
To turn Door Chime on/off:
1.Press [✱] [4].
2.The control unit will beep 3 times rapidly when the Door Chime feature is enabled and one long beep when
the feature is disabled.
[✱]+[5] Programming Access Codes
Refer to the WLS920 Instruction Manual section “Programming Access Codes” for information on
programming access codes.
[✱]+[6] Setting the System Date and Time
To set the system time, enter [✱] [6] followed by the Master Code. Press [1]. The control unit will now accept
10 consecutive digits:
• Enter the Time in Hours and Minutes using the 24 Hour format (00:00 to 23:59).
• Enter the Date in Months, Days and Years (MM DD YY).
[✱]+[9] Arming Without Entry Delay
When the system is armed with the [✱][9] command the panel will remove the entry delay. After the exit delay,
Delay 1 and Delay 2 type zones will be instant and Stay/Away zones will remain bypassed.
(See Section 5.1
“Zone Definitions”).
A valid access code must be entered after pressing [✱] [9].
[✱]+[0] Quick Arm/Quick Exit
Quick Arm
If the Quick Arm Enable option is enabled the panel can be armed by entering [✱][0]. This is a useful method
of arming the system when someone without a User Code will be required to arm.
Quick Exit
Quick Exit will allow someone to leave an armed premise through a Delay type zone without having to disarm
and rearm the system.
When [✱][0] is entered, if the Quick Exit Enabled option is enabled, the panel will provide a two minute window
to exit. During this time the panel will ignore the first activation of a Delay type zone. When the Delay zone is
secured the panel will end the two minute time period.
If a second Delay zone is tripped, or if the zone is not restored after two minutes, the panel will start entry delay.
○○○○○○○○○○○○○○○○○○○○○○○○○○○○○○○○○○○○○○○○
Code Required for Bypass ...........................................Section [015], Option [5]
Master Code Not Changeable option ..........................Section [015], Option [6]
Quick Arm Enable.........................................................Section [015], Option [4]
○○○○○○○○○○○○○○○○○○○○○○○○○○○○○○○○○○○○○○○○
Quick Exit Enable .........................................................Section [015], Option [3]
6.12 Wireless Key Programming
The function keys for all wireless keys are programmed in section [804], subsections [65], [66], [67] and [68].
For example, if section [65] is programmed as Stay arming, then pressing the first key on all wireless keys will
Stay arm the system.
Function Key Options
The following is a list of Function Key options available. Each option is listed according to their programming
code, followed by their corresponding [✱] key command.
Table of contents
Other DSC Security System manuals

DSC
DSC Voice Assisted Security Control Escort 4580 User manual

DSC
DSC TL260 User manual

DSC
DSC LCD4500 User manual

DSC
DSC IMPASSA User manual

DSC
DSC TL260GS User manual

DSC
DSC MAXSYS PC4020 User manual

DSC
DSC LE4000 User manual

DSC
DSC PC 2500 User manual

DSC
DSC iotega WS900UL User manual

DSC
DSC PC1616; PC1832; PC186 User manual

DSC
DSC Envoy NT9010 User manual

DSC
DSC Neo Power Series User manual

DSC
DSC PC3000 User manual

DSC
DSC Power Series User manual

DSC
DSC PC1616; PC1832; PC1864 User manual

DSC
DSC PowerSeries Neo User manual

DSC
DSC Power 832 PC5010 User manual

DSC
DSC Envoy NT9005 User manual

DSC
DSC Power 832 User manual

DSC
DSC Power8 PC5OO5 User manual