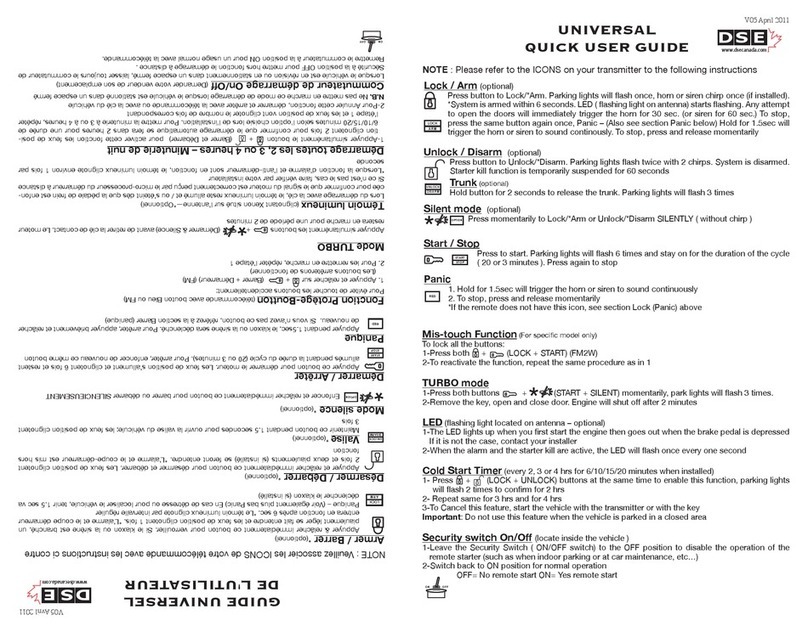
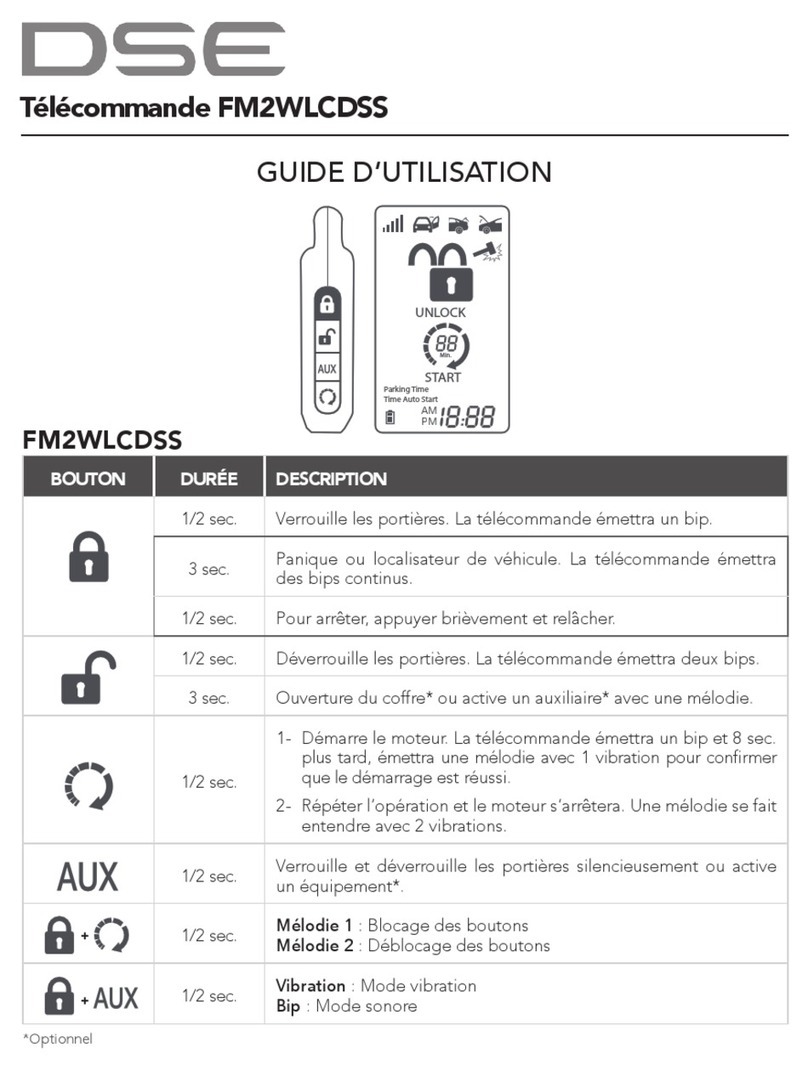
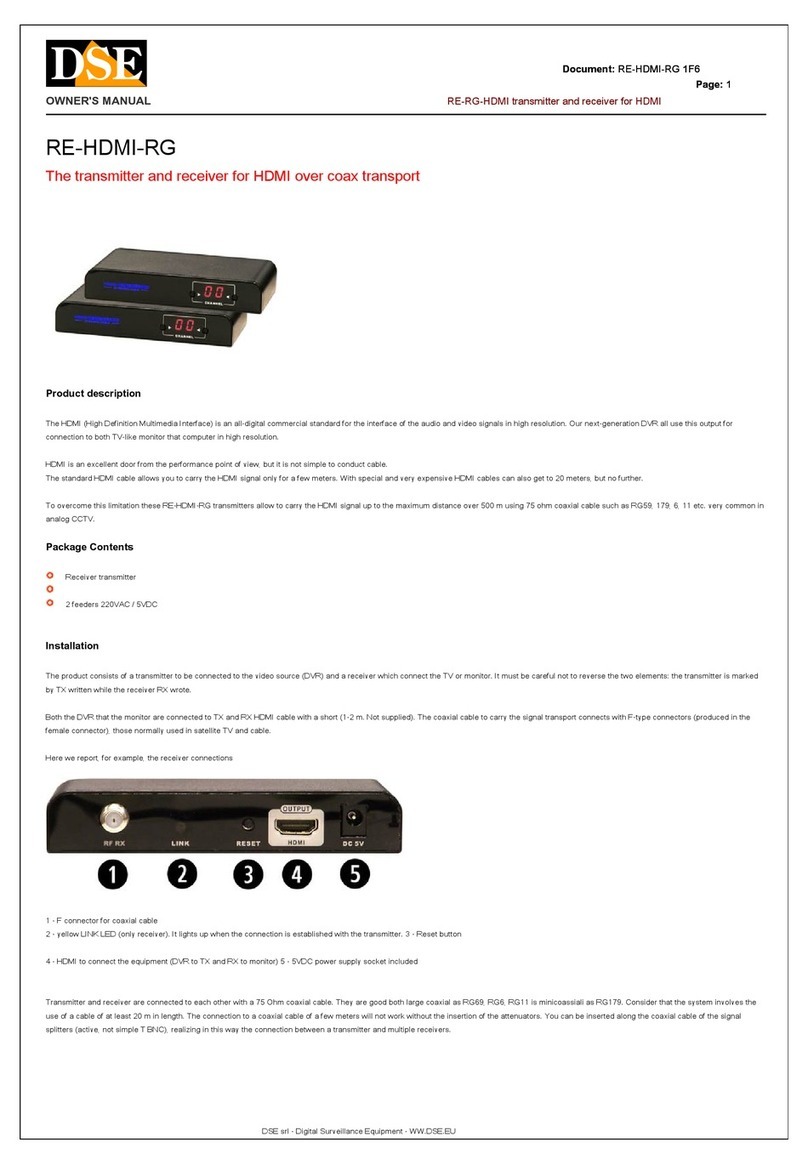
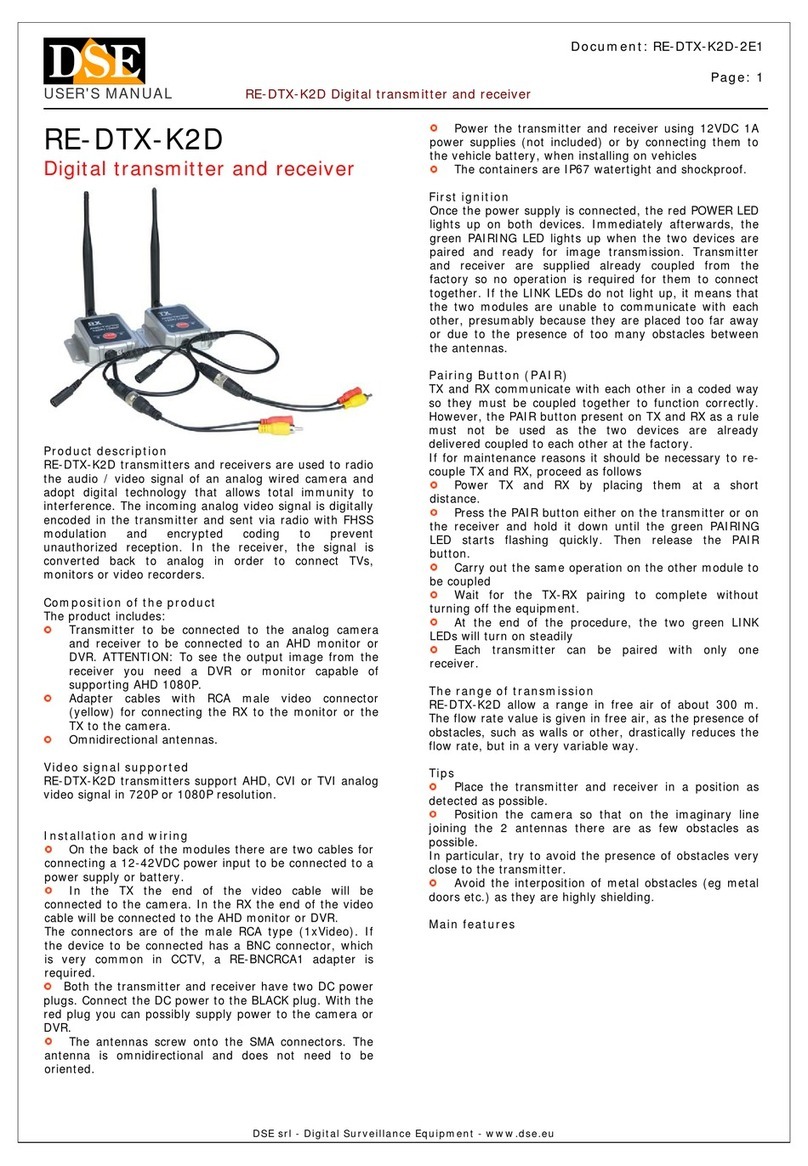
DSE ISTART 3 AM / FM User manual

iSTART 3 AM / FM
Version AI3-F
GUIDE D’INSTALLATION
ÉTAPE 1 - CODER LES MANETTES
Le module peut accepter jusqu’à 3 télécommandes en mémoire.
Dès que le module est alimenté
(branché), les DEL sur le module et
sur l’antenne (optionel) commencent
à clignoter. Mettre l’Ignition à On, appuyer 1 fois sur
le bouton de programmation, un clignote-
ment et un coup de klaxon se manifestent.
Mettre l’Ignition à Off.
Mettre l’Ignition à On, appuyer 1 fois
sur le bouton de programmation,
2 clignotements et 2 coups de klaxon
se manifestent. Mettre l’Ignition à Off.
À l’intérieur d’une minute, mettre
l’Ignition à On, appuyer et relâcher
3 fois la pédale de frein, les DEL
conrment en clignotant rapidement.
Immédiatement appuyer sur le bouton Lock
(Barrer) de chacune des télécommandes
(max 3), les feux de position ou le klaxon*
se manifestent pour conrmer chacune des
programmations.
Mettre l’Ignition à Off.
ÉTAPE 2 - CODER DES MANETTES ADDITIONNELLES
Appuyer une fois sur le bouton Débarrer de
la manette existante.
Répéter les points 4, 5 et 6 de l’étape 1
ci-dessus.
NOTE :
Lorsqu’une nouvelle manette est codée,
toutes les manettes existantes devront être
codées en même temps.
APPRENTISSAGE DU SIGNAL DE TACH **OBLIGATOIRE **
Démarrer avec la clé, laisser
tourner le moteur au ralenti.
• Appuyer et tenir les boutons
Barrer et Débarrer.
• Relâcher les dès que les feux
de positions commencent à
clignoter.
Ceux-ci vont clignoter 6 fois, faire
une pause et clignoter une
dernière fois pour conrmer que le
signal de tach est perçu
correctement avec 1 coup de
klaxon* (mode automatique).
NOTE : Dans le cas d’une
transmission manuelle, ce
seront 6 coups de klaxon.
Mettre l’Ignition à Off.
IGN IGN
IGN
OFF OFF
OFF
OFF
1
1
1 2 3 4
4 5 6
2
2
3
3
x1 x1
1 min
x3
*Optionel
*Optionel
x1
AUTODIAGNOSTIQUE
DÉMARREUR
FEUX DE POSITION Rester allumer
2 sec et Off 2 Flash 4 Flash 5 Flash 6 Flash 7 Flash 8 Flash
Pousser START Commutateur
est a Off Valet Pas prêt* Capot Pédale à frein Frein à main RS-232 Erreur module bypass
*AUTOMATIQUE a)démarreaveclacléchaquefoisquelemoduleestrebranché
b)vérierlabouclenoire
c)nepasbrancherleldufreinàmain
* TRANSMISSION MANUELLE a)démarreaveclacléchaquefoisquelemoduleestrebranché,
b)vérierlabouclenoire
c)séquencesdesortiepourtransmissionmanuellenonexécutées
d)ldufreinàmaindoitêtrebranché
e)mettrelefreinàmainenpositionOffetdenouveauàOn

GUIDE D’INSTALLATION iSTART 3 AM / FM
ALARME
KLAXON/SIRÈNE 1 piaulement 4 piaulements 5 piaulements Silence
Pousser BARRER Normal Porte Capot, frein à pédale ou à main Ignition
NOTE:Si4piaulementssefontentendrelorsduverrouillageaveclatélécommandeetquelesportessontbeletbienfermées,il
estprobablequeleplafonnierestàretardementdeplusque6sec(domedelay).Pourévitercettesituation,référeràl’option4.04
(diagnosticplafonnier)etlamettrehorsfonction.
INFRACTION 2 piaulements 4 piaulements 5 piaulements 6 piaulements
Pousser DÉBARRER Normal Porte Capot, frein à pédale ou à main Ignition
CONTOURNEMENT DE L’ALARME / MODE VOITURIER (VALET)
Tourner la clé de contact à la position On
et en moins de 6 sec. Tenir le bouton de programmation.
L’alarme et l’anti-démarreur seront mis
hors-fonction (advenant la perte ou
le mauvais fonctionnement de la
télécommande). La sirène ou le klaxon
arrêtera de sonner.
Le DEL restera allumé pendant
5 sec et s’éteindra pendant 5 sec et
ainsi de suite.
Pourremettreenfonction, répéter lesétapes1 et 2précédentes. Deux piaulements et
deux clignotements conrmeront que l’opération est réussie.
POUR PROGRAMMER LES OPTIONS
Appuyer une fois sur le bouton Unlock
(Débarrer) de la manette déjà codée. Mettre l’Ignition à On et à Off.
Tenir sur le bouton de programmation
jusqu’à ce que les feux de positions et
le klaxon se manifestent, puis relâcher
(approximativement 5 secondes).
Appuyer sur le bouton Lock
pour choisir la table 1, Unlock
pour la 2, Mute (Silence), Aux ou
Option pour la 3 et Start pour la 4.
Une fois que la table est choisie, appuyer le
bouton de programmation le nombre de
fois équivalent à l’option choisie. Les feux de
position et le klaxon* se manifestent à chaque
fois que le bouton est appuyé.
Appuyer sur les boutons de la manette
selon l’option choisie.
POUR PASSER D’UNE TABLE À UNE AUTRE
Répéter les points 3, 4, 5 & 6 ci-haut
POUR SORTIR DU MODE DE PROGRAMMATION **OBLIGATOIRE**
Répéter les points 2 & 3 ci-haut.Les feux de stationnement vont clignoter 5 fois pour n de conrmation.
IGN
IGN
OFF
1
1
4
4
2
2
5
5 6
3
3
Version AI3-F
TABLE 1 FONCTIONS DÉFAUT
APPUYER SUR LOCK APPUYER SUR UNLOCK APPUYER SUR
3eBOUTON APPUYER SUR START
1.01 Réinitialisation Dernièrespréférences Préférencespardéfaut
1.02 Tempsdemarche 20minutes 15minutes 10minutes 3minutes
1.03 Démarragedenuit 6minutes 10minutes 15minutes 20minutes
1.04 Verrouillageparign/frein Désactivé Activé Unlockseulement Lockseulement
1.05 Impulsiondéverrouillage 1 fois 2foisUnlock 4secUnlock 4secLock&Unlock
1.06 Modeantidémarreur Actif(IGNdétectée) Passif(IGNdétecté) Actif(sansIGNdétectée) Passif(sansIGNdétectée)
1.07 Modealarme Désactivé Activé
1.08 Passif(automatique) Désactivé Activé Toujoursactivé
1.09 Avecousansverrouillage Sans Avec
1.10 Programmation4erelai Antidémarreur 2eIgnition 2eAccessoire 2eStart
1.11 ClignotementduDel Activé Désactivé
1.12 Choixducontournement ADS - iDataLink Fortin
1.13 Diagnostiquealarme Sélectionné Relevédes6derniersévénements,voirannexes
1.14 Diagnostiquedémarreur Sélectionné Relevédes6derniersévénements,voirannexes
1.15 Modededémarrage Tach Quickstart*(voir4.08) PTS(voir4.08) Tachvirtuel(voir4.09)
1.16 Télématique Désactivé MyStart2 MyStart 1 + Interface
Tach FONCTIONS DEFAULT
PRESS LOCK PRESS UNLOCK PRESS 3RD BUTTON PRESS START
1.01 Reset mode Go to last setting Go to defeault setting
1.02 Running time mode 20 min 15 min 10 min 3 min
1.03 Cold start timer mode 6 min 10 min 15 min 20 min
1.04 Ignition Lock (foot brake) Disable Enable Unlock only Lock only
1.05 Door lock / Unlock Pulse Single pulse Double pulse unlock 4 sec Unlock 4 sec Lock & Unlock
1.06 Starter kill mode Active (Detect IGN.) Passive (Detect IGN.) Active (w/o Detect IGN.) Passive (w/o Detect IGN.)
1.07 Alarm mode Disable Enable
1.08 Last door arming Disable Enable All Time Enable
1.09 Last door arming Without door lock With door lock
1.10 Fourth Relay Programmation Starter Kill 2nd Ignition or Anti Grind 2nd Accessory 2nd Start
1.11 LED ash Enable Disable
1.12 Bypass Selection ADS - iDataLink Fortin
1.13 Diagnostic mode for alarm Select This will reproduce the last 6 triggered zone events
1.14 Diagnostic mode for remote starter Select This will reproduce the last 6 start failure events
1.15 Starter Tach Quick START* (set 4.08) PTS (set 4.08) Tachless (set 4.09)
1.16 Telematic Disable MyStart2 MyStart 1 + Interface
AUTODIAGNOSTIQUE

GUIDE D’INSTALLATION iSTART 3 AM / FM
TABLE 2 FONCTIONS DÉFAUT
APPUYER SUR LOCK APPUYER SUR UNLOCK APPUYER SUR
3eBOUTON APPUYER SUR START
2.01 Impulsiondevalise Impulsionstandard Constantsiretenu Constant Impulsion5sec
2.02 Portecoulissanteaux2 Impulsionstandard Constantsiretenu Constant Impulsion5sec
2.03 Portecoulissanteaux1 Impulsionstandard Constantsiretenu Constant Impulsion5sec
2.04 Enclenchement Valise Démarrage
2.05 Valet/contournement Parboutonpoussoir 6foispédaledefrein
2.06 Typedecarburant Gaz Diesel(voir2.06)
2.07 SélectionModediesel MinuterieDiesel Bougie de préchauffage*
2.08 Duréederetardement 8sec 12sec 15 sec 20sec
2.09 Verrouillagedesportesaprès
démarrage Désactivé Activé Activéaprèsdémarrage
seulement
2.10 Tentativededémarrage 1 essai 2 essais* 3 essais*
2.11 Mode Turbo* 45 sec* 60 sec* 90 sec* 120 sec*
2.12 SélectionsortiesAUX Valise Portescoulissantesetvalise
2.13 Supervisionplafonnier 45 sec 20sec Feuxdestationnement Klaxon
2.14 Détection entrée de valise pour
transmission manuelle* Hors fonction* En fonction*
2.15 Télématiqueavecbouton
Start/Stopséparé Désactivé Activé
2.16 Réarmeraprèsn
ducyclededémarrage Activé Désactivé
TABLE 3 FONCTIONS DÉFAUT
APPUYER SUR LOCK APPUYER SUR UNLOCK APPUYER SUR
3eBOUTON APPUYER SUR START
3.01 SélectionKlaxon/Sirène Klaxon Sirène
3.02 DuréeKlaxon Défaut Allongé Allongé-3ms Allongé+3ms
3.03 ConrmationKlaxon/Sirène Activé Activéau2eLock Muetcomplet Muetseulementsur
UNLOCK
3.04 Conrmationsonoreaudémarrage Désactivé Activé
3.05 ChoixduboutonStart Standard AppuyerLocketaprèsStart Appuyer2foisStart
3.06 Rebarragesécuritaire ActivéavecmodeAlarme DésactivéavecmodeAlarme Activésansalarme
(entréedeportedoit
êtreconnecté)
3.07 Impulsionavantignition 1.5sec 0.5sec
3.08
Modevoiturierparignition
Seulementquandsystème
estdésarmé
DésactivéIgnitionOn5Fois ActivéIgnitionOn5Fois
3.09 *Réglage du mode transmission
manuelle. Voir option 3.15 & 3.16
*Moteur arrêté à la
fermeture de porte
*Moteur arrêté par
télécommande avec délai
de 2 min
Pédale frein/ frein à
main/ Relâcher pédale
frein /Enlever clé/ Sortir/
Arrêt moteur après 10 sec
3.10 Réglage du mode
transmission manuelle*
Avec verrouillage des
portes* Sans verrouillage*
3.11 Débarrerprioritaireporteconducteur Désactivé Activé UtiliséseulementavecRS232DataPort
3.12 ChoixsortiePasskey Sécuritaire Nonsécuritaire UtiliséseulementavecRS232DataPort
3.13 Débarrerportièredémarrageàdist. Hors fonction En fonction UtiliséseulementavecRS232DataPort
3.14 Réglage manuel d’activation
du démarrage* Démarrage standard* Surdémarrage +2 sec*
3.15 Réglagemodetransmissionmanuelle Débarreravantlasortie Sansdébarreravantlasortie
3.16 Réglagemodetransmissionmanuelle Audible Silence
TABLE 4 FONCTIONS DÉFAUT
APPUYER SUR LOCK APPUYER SUR UNLOCK APPUYER SUR
3eBOUTON APPUYER SUR START
4.01 SélectiondelasortieduPasskey Passkeystandard Passkeynégatifenconduisant 3eIgnition(-) 3eStart(-)
4.02 Sélectionsortieréarmement 2003GMHorsfonction Téléverrouillageaveclemoteur
enmarche
4.03 Ignorerleplafonnier60sec Désactivé Activé
4.04 Diagnostiqueduplafonnier4coups Activé Désactivé
4.05 Choix du temps de crankage* Minimum .07 sec* Minimum 0.9 sec*
4.06 Choix du temps de crankage* Maximum 10 sec* Maximum 3.5 sec*
4.07 N/D N/D N/D
4.08 Moteurs’arrêtequandvoltageestenbasde 13.25V 13V 12.75V 12.5V
4.09 Tachvirtuel-ajustementdutemps
dedémarrage Standard - 5% +5% +10%
4.10 Sélectiondesfonctions
duboutonAux Muet Valise Arrêt
4.11 EntréeAuxBlanc/Vert Détecteurdecléinsére Sondedetempérature
4.12 Sélectiondetempérature Désactivé -20degréC -25degréC
4.13 SélectionrelaiACC ACC(+)/ACC(-) IGN(+)/IGN(-) START(+)/(-) PASSKEY(+)/(-)
4.14 ImpulsionARMER Standard Avantimpulsiondéverrouillage
4.15 Désarmer/Déverrouiller Standard Passkey+Ign Passkey+Acc+Ign Passkey+Acc
4.16 Arrêtdesfeuxdestationnement
après3minutes Désactivé Activé
Version AI3-F
Note. Avec Option 1.15 QuickStart, les options avec * ne sont pas disponibles.

GUIDE D’INSTALLATION iSTART 3 AM / FM
SCHÉMA D’INSTALLATION
Version AI3-F
H1
H2
H3
H4
H5
5
H6
H8H7
1
2
3
4
H9
A
B C
H1
Rouge ................... 12 (+) V
Vert – (#87)............ 2e Aux (+) ou (-)
Jaune – (#30) ........ 2e Aux (+) ou (-)
OU
Jaune – (#30) ........ Anti-démarreur côté moteur
Mauve – (#87a) ..... Anti-démarreur côté clé
Bleu ...................... Ignition (+)
Brun ...................... Chaufferette/AC (+)
Orange ................. Démarreur (+)
Rouge ................... 12 (+) V
*Ignorer le l mauvie si l’option anti-démarreur n’est pas utilisée
H2
Noir....................... Masse (-)
Vert/Blanc ............. Aux feux de position (-) ou (+)
Blanc..................... Polarité pour feux de position (-) ou (+)
H5
Blanc..................... Barrer Sortie (-)
Rouge ................... Sortie +12V
Vert ....................... Débarrer Sortie (-)
H6
Prise pour le module de contournement RS-232
Blanc..................... Tx
Bleu ...................... Rx
Noir....................... Masse
Rouge ................... +12V
H4
SORTIE
Jaune.................... Ouverture de Valise (-)
Jaune/blanc.......... Désarmement d’alarme d’origine (-)
Blanc/Rouge......... Aux 1 (-)
Vert/Noir............... Aux 2 (-)
Orange ................. Start (-)
Brun ...................... Acc (-)
Bleu ...................... Ignition (-)
Bleu/Blanc ............ Anti-démarreur (-)
Gris ....................... Impulsion de réarmement (-)
Rose...................... Sirène/Klaxon (-) 1 Amp
Mauve................... Passkey (-)
Blanc..................... Éclairage du plafonnier (-)
ENTRÉE
Bleu/Noir .............. Glow Plug (+)
Bleu/Rouge........... Glow Plug (-)
Rouge/Blanc......... Freins (+)
Blanc/Bleu*........... Frein d’urgence / à main (-)
Orange/Blanc ....... Interrupteur de porte ou plafonnier (+)
Brun/Blanc............ Interrupteur de porte ou plafonnier (-)
Blanc/Vert ............. Sonde de température / Aux (-)
Violet/Noir............ Interrupteur de valise (-)
Noir/Vert............... Interrupteur de capot (-)
Vert/Rouge ........... Alternateur / Générateur (+)
Noir/Blanc............. Signal Tachymétrique
*IMPORTANT : À brancher seulement pour le mode transmission manuelle
Jumper 1...... Tach......Avec Jumper = Normal
Sans Jumper = Bas
Entrée Blade
Rouge........... + 12V (2A Max) pour relai #85/#86
Jumper 3 ......Avec Jumper = AM Sans Jumper = FM
Boucle noire .....Intact = Manuel
Couper = Automatique
Port télématique pour
téléphone intelligent
Jumper 2...... Starter kick
H7 et H8
H9 H10
AMFM
Antenne
*Enlever le jumper 3
A- Bouton de programmation
et de contournement
B- Interruption On/Off
Pour le démarrage à
distance seulement. Pas
de courant aux relais à la
position Off.
DEL DEL
-+
-
+
Réglage
desensibilité Rouge -
Déclencement
d’alarme
Vert -
Pré-alerte

ISTART 3 AM / FM
Version AI3-F
INSTALLATION GUIDE
STEP 1 - CODING AM / FM TRANSMITTERS
The system can store up to 3 different remote control codes in memory.
LED on the module and antenna are
ashing when the unit is power on. Turn the Ignition On, press the
programming button once, you see
and hear 1 parking light and horn
conrmation, turn Ignition Off.
Turn Ignition back On, press the
programming button once, you see
and hear 2 parking light and horn
conrmations, turn Ignition Off.
Within one minute, turn Ignition On
and within 3 seconds tap the foot brake
3 times, the LED on the module and the
antenna will blink rapidly.
Press the Lock button of each transmitter
you want to code one after the other. When
the unit receives the transmitter conrmation
it will ash the parking lights and sound the
horn* each time.
Ignition Off.
STEP 2 - CODING ADDITIONAL TRANSMITTERS (with existing transmitter)
Press Unlock button of the existing
transmitters.
Repeat step 4, 5 & 6 of the above
section.
NOTE :
Everytime you re-code a new transmitter
you must code all existing transmitters in
the same time or the older transmitters will be
bumped off for security reason
TACH LEARNING ** MANDATORY **
Key Start / LED stays solid.
• Press and hold the Lock +
Unlock buttons on the remote
transmitter until the parking
lights start ashing.
• Then re-lease the buttons.
Parking lights will ash 6 times,
pause and 1 time if the tach signal is
read correctly. You will then hear
1 horn conrmation* (if horn wire is
connected). The tach is programmed
NOTE : in manual transmission
mode the process will be the
same, except of 1 horn conr-
mation, you will hear 6 horn
conrmation
Ignition Off
IGN IGN
IGN
OFF OFF
OFF
OFF
1
1
1 2 3 4
4 5 6
2
2
3
3
x1 x1
1 min
x3
*Optional
*Optional
x1
INSTANT DIAGNOSTIC
REMOTE STARTER
PARKING LIGHT Stay on 2 sec
then Off 2 Flash 4 Flash 5 Flash 6 Flash 7 Flash 8 Flash
Press START Toggle switch
is Off Valet Not ready* Hood Foot Brake Hand Brake RS-232 Code *
*AUTOMATIC a)startwithkeytoconrmTachsignal
b)checkiftheloopiscut
c) do not connect hand brake
* MANUAL TRANSMISSION a)startwithkeytoconrmTachsignal
b)theblackloopmustbeuncut
c)nomanualsettingsequencesareperformed
d)handbrakewiremustbeconnected
e)release(down2sec)andpull(up2sec)handbrake
*RS-232 CODE ERROR RS-232issendingingearsignal

INSTALLATION GUIDE ISTART 3 AM / FM
INSTANT DIAGNOSTIC
ALARM
HORN / SIREN 1 chirp 4 chirps 5 chirps Silence
Press LOCK Normal Door Hood, F/B, H/B Ignition
NOTE:Intheeventthatthevehiclehasthedomelightdelaylongerthan6sec,inordertoavoidthe4chirpswhenthedoorsarelocked
bythetransmitter,gotoProgrammingOptions4.04(DomeDiagnostic)andDisablethisfeature.
INFRACTION 2 chirps 4 chirps 5 chirps 6 chirps
Press UNLOCK Normal Door Hood, F/B, H/B Ignition
OVERRIDE / VALET / EMERGENCY
Turn the key to Ign On & within 6 sec.Press & hold the programming button.
Siren or horn will stop sounding, alarm and
starter kill will be cancelled instantly in case of
lost or malfunction of the transmitter.
The LED will stay On then Off in a cycle of
5 seconds.
To reactivate the alarm function, repeat step 1 and 2 . System will chirp Twice (2)
with 2 parking light ash to conrm.
GET IN PROGRAMMING OPTIONS
Press Unlock once. Turn Ign On then Off. Hold the programming button until
5 chirps or ashes
Press Lock
for table 1, Unlock
for table 2, Mute, Aux or Option for table
3 and Start for table 4. Once a table is selected, press programming
button the number of times to the chosen
option.
Press remote button accordingly to the
selected feature
TO SELECT ANOTHER TABLE
Repeat points 3, 4, 5 & 6
TO EXIT PROGRAMMING ** MANDATORY **
Repeat points 2 & 3. Parking lights will ash 5 times to conrm the end of the operation.
IGN
IGN
OFF
1
1
4
4
2
2
5
5 6
3
3
Version AI3-F
TABLE 1 FONCTIONS DÉFAUT
APPUYER SUR LOCK APPUYER SUR UNLOCK APPUYER SUR
3eBOUTON APPUYER SUR START
1.01 Réinitialisation Dernièrespréférences Préférencespardéfaut
1.02 Tempsdemarche 20minutes 15minutes 10minutes 3minutes
1.03 Démarragedenuit 6minutes 10minutes 15minutes 20minutes
1.04 Verrouillageparign/frein Désactivé Activé Unlockseulement Lockseulement
1.05 Impulsiondéverrouillage 1 fois 2foisUnlock 4secUnlock 4secLock&Unlock
1.06 Modeantidémarreur Actif(IGNdétectée) Passif(IGNdétecté) Actif(sansIGNdétectée) Passif(sansIGNdétectée)
1.07 Modealarme Désactivé Activé
1.08 Passif(automatique) Désactivé Activé Toujoursactivé
1.09 Avecousansverrouillage Sans Avec
1.10 Programmation4erelai Antidémarreur 2eIgnition 2eAccessoire 2eStart
1.11 ClignotementduDel Activé Désactivé
1.12 Choixducontournement ADS - iDataLink Fortin
1.13 Diagnostiquealarme Sélectionné Relevédes6derniersévénements,voirannexes
1.14 Diagnostiquedémarreur Sélectionné Relevédes6derniersévénements,voirannexes
1.15 Modededémarrage Tach Quickstart*(voir4.08) PTS(voir4.08) Tachvirtuel(voir4.09)
1.16 Télématique Désactivé MyStart2 MyStart 1 + Interface
Tach FONCTIONS DEFAULT
PRESS LOCK PRESS UNLOCK PRESS 3RD BUTTON PRESS START
1.01 Reset mode Go to last setting Go to defeault setting
1.02 Running time mode 20 min 15 min 10 min 3 min
1.03 Cold start timer mode 6 min 10 min 15 min 20 min
1.04 Ignition Lock (foot brake) Disable Enable Unlock only Lock only
1.05 Door lock / Unlock Pulse Single pulse Double pulse unlock 4 sec Unlock 4 sec Lock & Unlock
1.06 Starter kill mode Active (Detect IGN.) Passive (Detect IGN.) Active (w/o Detect IGN.) Passive (w/o Detect IGN.)
1.07 Alarm mode Disable Enable
1.08 Last door arming Disable Enable All Time Enable
1.09 Last door arming Without door lock With door lock
1.10 Fourth Relay Programmation Starter Kill 2nd Ignition or Anti Grind 2nd Accessory 2nd Start
1.11 LED ash Enable Disable
1.12 Bypass Selection ADS - iDataLink Fortin
1.13 Diagnostic mode for alarm Select This will reproduce the last 6 triggered zone events
1.14 Diagnostic mode for remote starter Select This will reproduce the last 6 start failure events
1.15 Starter Tach Quick START* (set 4.08) PTS (set 4.08) Tachless (set 4.09)
1.16 Telematic Disable MyStart2 MyStart 1 + Interface

INSTALLATION GUIDE ISTART 3 AM / FM
TABLE 2 FONCTIONS DEFAULT
PRESS LOCK PRESS UNLOCK PRESS 3RD BUTTON PRESS START
2.01 TrunkPulse(Unlock+Mute) Regularpulse Latchwhenhold LatchtoggledbyTX 5secpulse
2.02 SlidingDoorsAux2(unlock1.5sec) Regularpulse Latchwhenhold LatchtoggledbyTX 5secpulse
2.03 SlidingDoorsAux1(unlock1.5sec) Regularpulse Latchwhenhold LatchtoggledbyTX 5secpulse
2.04 TriggerInput Trunk StartTriggerinput
2.05 Valet/Override Viapushbutton 6timesFootBrake
2.06 FuelTypeSelection Gas Diesel(Goto2.07&2.8)
2.07 DieselModeSelection Timerdiesel Glow plug*
2.08 DieselTimerSelection 8sec 12sec 15 sec 20sec
2.09 WhenRemoteStartDoorRelock Disable Enable Enableafterstartonly
2.10 NumbersofTriesforStartAttempt Onetry Two tries* Three tries*
2.11 Turbo mode timer adjustment* 45 sec* 60 sec* 90 sec* 120 sec*
2.12 AUXOutputSelection Trunkrelease SlidingDoors&TrunkEnable
2.13 Domelightsupervision 45 seconds 20seconds Parkinglights Horn
2.14 Trunk input detect for manual
transmission* Disable* Enable*
2.15 Telematicstart/stopwithseparate
button Disable Enable
2.16 Re-armwhenshutoff Enable Disable
TABLE 3 FONCTIONS DEFAULT
PRESS LOCK PRESS UNLOCK PRESS 3RD BUTTON PRESS START
3.01 Horn/SirenSelection Horn Siren
3.02 HornSetting Default Extended Extended-3ms Extended+3ms
3.03 Horn/SirenConrmation ChirpEnable Chirpsonlywhenlockbutton
ispressedasecondtime Fullmute Muteonlyon
Unlock
3.04 Horn/SirenIgnitionMonitor Disable Enable
3.05 StartModeforTX RegularStart SafeStartPressLockthenStart Safe Start
PressStart2Times
3.06 SafetyAutoRelock EnablewithAlarmmode DisablewithAlarmmode Enablewithnoalarm
(doorinputmustbe
connected)
3.07 PulseBeforeIgnition 1.5sec 0.5sec 3sec
3.08 IgnitionValetMode
whensystemisdisarmedonly Disable EnableIgnitionOn5times
3.09 *Manual transmission setting
(see 3.15 & 3.16) *Auto shut off *Shut off by remote
FB On/ HB On/ FB Off/
Key Off/ Exit/ Eng shut
in 10sec
3.10 10/20 sec delay exit mode With door lock* Without door lock*
3.11 UnlockDriverDoor Disable Enable TobeusedonlywithRS232DataPort
3.12 PasskeyOutputSelection PasskeySecure Non-Secure TobeusedonlywithRS232DataPort
3.13 Protocolunlockwhileremotestart Disable Enable TobeusedonlywithRS232DataPort
3.14 Manual Setting Cranking* Standard Crank* Overcrank +2 sec*
3.15 Manualtransmission:unlock
beforeexit Enable Disable
3.16 Manualtransmission:silentmode Disable Enable
TABLE 4 FONCTIONS DEFAULT
PRESS LOCK PRESS UNLOCK PRESS 3RD BUTTON PRESS START
4.01 PasskeyOutputProgramming
Options PasskeyStandard Staygroundwithignition 3rdIgnition 3rd Start
4.02 RearmWireOutput
ProgrammingOptions 2003GMDisable Enabletoremotelockwhen
enginerunning
4.03 DomelightBypass Disable Enable
4.04 DomeDiagnostic4Chirp Enable Disable
4.05 Crank Time Adjustments* Min cranking 0.7 sec* Min cranking 0.9 sec* 1.2 sec* 1.5 sec*
4.06 Crank Time Adjustments* Max cranking 10 sec* Max cranking 3.5 sec*
4.07 N/A N/A N/A
4.08 Engineshutoffwhenvoltagedrop
below 13.25V 13V 12.75V 12.5V
4.09 Tachlesscrankingadjustment Default 5% Less 5% More 10%More
4.10 MuteButtonSelection Mute Trunk Stop
4.11 White / Green Wire Key sense Temperature Sensor input
4.12 TemperatureSensor Disable -20degreeC -25degreeC
4.13 ACCrelayselection ACC(+)/ACC(-) IGN(+)/IGN(-) START(+)/(-) PASSKEY(+)/(-)
4.14 ARMpulse Standard Beforelockpulse
4.15 Disarm/Unlock Standard Passkey+Ign Passkey+Acc+Ign Passkey+Acc
4.16 Parkinglightoffafter3minutes Disable Enable
Version AI3-F
Note: Choosing option 1.15 Quick Start, all the subsequent options with an * are no longer available.

INSTALLATION GUIDE ISTART 3 AM / FM
WIRING DIAGRAM
Version AI3-F
H1
H2
H3
H4
H5
5
H6
H8H7
1
2
3
4
H9
A
B C
H1
Red ....................... +12V Input
Green – (#87)........ 2nd AUX Output (+) or (-)
Yellow – (#30)........ 2nd AUX Input (+) or (-)
OR
Yellow – (#30)........ Starter kill Motor side
Purple – (#87a)...... Startek kill Key side
Blue ...................... Ignition Output (+)
Brown ................... Heater/AC Output (+)
Orange ................. Starter Output (+)
Red ....................... +12V Input
*Ignore Purple wire if Starter kill is not being used
H2
Black ..................... Ground
Green/White......... To parking lights (-) or (+) of the car
White .................... Polarity selection for parking lights
H5
White .................... Lock (-) Output
Red ....................... +12V Output
Green.................... Unlock (-) Output
H6
RS-232 Input for By-pass module
White .................... Tx
Blue ...................... Rx
Black ..................... Ground
Red ....................... +12V
H4
OUTPUT
Yellow ................... Trunk (-)
Yellow/White......... Factory alarm disarm (-)
Green/Black.......... Aux 1 (-)
White/Red ............ Aux 2 (-)
Orange ................. Start (-)
Brown ................... Acc (-)
Blue ...................... Ignition (-)
Blue/White............ Starter kill (-)
Grey...................... Pulse to re-arm (-)
Pink....................... Siren/Horn (-) 1 Amp
Purple ................... Passkey (-)
White .................... Domelight Supervision (-)
INPUT
Blue/black............. Glow Plug (+)
Blue/Red............... Glow Plug (-)
Red/White ............ Brake pedal (+)
White/Blue*.......... Emergency or hand brake (-)
Orange/White....... Door switch or domelight (+)
Brown/White......... Door switch or domelight (-)
White/Green......... Temperature Sensor/AUX (-)
Violet/Black .......... Trunk (-)
Black/Green.......... Hood switch (-)
Green/Red............ Generator (+)
Black/White .......... Tach
*Note : To connect for manual transmission only
Jumper 1...... Tach......With Jumper = Normal
Without Jumper = Low
Blade Input
Red..... + 12V (2A Max) O/P for extra Relay #85 (or #86)
Jumper 3 ......With Jumper = AM Without Jumper = FM
Black loop ......Not cut = Manual
Cut = Automatic
Telematics port
(for Smart phone)
Jumper 2...... Starter kick
H7 et H8
H9 H10
AMFM
Antenna
*Remove Jumper 3
A- Programming & Override
switch
B- On/Off Switch
ONLY for remote starter
fucntion. No Power when
switch is at the Off
position.
LED LED
-+
-
+
Sensitivity
Adjustment Red -
Alarm
Green -
Pre-Warning
Table of contents
Languages:
Other DSE Transmitter manuals
Popular Transmitter manuals by other brands

Lectrosonics
Lectrosonics M185 operating instructions

aci
aci STRAP ON Series Installation & operation instructions

Halemeier
Halemeier S-Mitter basic MultiWhite2 quick start guide

NIVELCO
NIVELCO THERMOCONT TT Series Installation and programming manual

C. Crane
C. Crane 024 S operating instructions

Lectrosonics
Lectrosonics M175 quick start guide