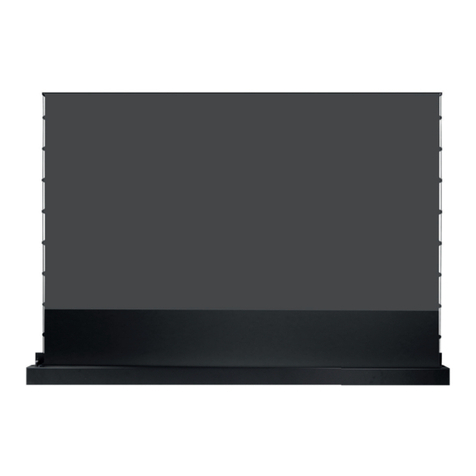
DSPro MotorScreen User manual

DANSK
DS-DISPLAY A/S |SKELMARKSVEJ 6 |2605 BRØNDBY | WWW.DS-DISPLAY.DK |TELEFON 36 720 720 |FAX 36 720 722
ADVARSEL!
Dette lærred skal være forsvarligt fastgjort til væggen. Hvis det ikke er mon-
teret korrekt, kan det resultere i, at lærredet falder ned og eventuelt beska-
diger personer eller udstyr.
INSTALLATIONSVEJLEDNING
Tab Tension motorlærred
Udpakningsinstruktioner
Åben indpakningen forsigtigt og læg indholdet på et stykke pap eller en anden beskyttende over-
ade for at undgå beskadigelse. Kontroller at pakkens indhold stemmer overens med tilbehørs-
oversigten på næste side. Kontroller også om de medfølgende komponenter er modtaget ube-
skadiget. Brug ikke beskadigede eller defekte dele.
Vigtige sikkerhedsoplysninger
Montér og brug dette produkt med varsomhed. Læs venligst vejledningen inden påbegyndelse
af montering og følg nøje alle instruktioner. Benyt passende sikkerhedsudstyr under montering.
Kontakt venligst en kvaliceret installatør for hjælp hvis du ikke forstår vejledningen, er i tvivl om
din vægkonstruktion eller om sikkerheden ved montering.
Brug ikke dette produkt til andre formål, eller i andre kongurationer end de udtrykkeligt angivne
i denne vejledning.Vi fraskriver os hermed ethvert ansvar eller skade som følge af forkert monter-
ing eller forkert brug af dette produkt. Kontakt venligst din forhandler ifm. reparation.
1
Bemærk: De skruer og beslag, der følger med denne indpakning, er ikke beregnet til montering i
gibsvæg, og du bedes derfor kontakte den lokale isenkræmmer for vejledning om hvilket tilbehør,
som egner sig bedst til dette formål.

DANSK
2
BRUGSANVISNING
Om brug af lærredet
1. Lærredet skal så vidt muligt køres op i kabinettet, når det ikke er i brug. Sørg for, at der ikke sidder
insekter, støv og lignende på lærredet, når det rulles op.
2. Den igangværende rulle-operation må ikke overstige re minutter. Gør den det vil motoren auto-
matisk stoppe for at undgå overophedning. Efter nedkøling (ca. 10-15 minutter) virker rulle-
funktionen igen.
3. For at sikre optimal projektions-eekt, skal du være opmærksom på følgende:
3.1 Undgå at kradse og ridse lærredet
3.2 Brug en ren klud eller blød børste til rengøring af lærredet
4. Lærredet må ikke monteres i fugtige lokaler.
5. Lærredet kan rengøres med en fugtig klud.
Lærredet er egnet til brug i hjemmebiografer, biografer, skoler, klubber, underholdning, multi-
medie undervisning og mødelokale mv.
Lærredet leveres med en intern og en ekstern trådløs ernbetjening til brug efter eget valg:
RF ernbetjening (inden for 100 meter) eller Infrarød ernbetjening (inden for 50 meter).
Manuel betjening:
Tryk på kontrol enheden og stop efter eget valg. Lærredet stopper nøjagtig, hvor du ønsker det,
under op og nedrulning.
RF ernbetjening:
Benyt de tre knapper (Op , Ned , og Stop ) på ernbetjeningen for op- og nedrulning.
Begge løsninger har tidskontrol under op- og nedrulning, og begge stopper automatisk når
endepunktet er nået. Begge løsninger har integreret intelligent power-funktion, der automatisk
træder i kraft, hvis op- og nedrulning overstiger re minutter. Lærredet stopper med at køre, indtil
motoren er nedkølet igen.
Det glidende vægbeslag og smarte ophæng reducerer unødvendige problemer og pladsmangel
under installationen. Efter installation kan lærredet anvendes med standard 220V-240V.
□
VIGTIGT!
Tilslut ikke strømmen, før du er helt færdig med monteringen af lærredet
Manuel kontrol RF ernbetjening
Op
Stop
Ned

Installation af vægbeslag og montering af kassette
1. Marker de steder, hvor hullerne til beslaget skal
placeres. Sørg for at de er i vatter.
2. Forbor hullerne og indsæt rawplugs. Sørg for at
rawplugs bankes helt ind i muren.
3. Monter vægbeslaget på væggen med skruer.
Step 1
DANSK
3
MONTERINGSVEJLEDNING
TILBEHØRSOVERSIGT
Lærred - 1 stk. M4x12 skuer - 2 stk. M6x12 skruer - 2 stk. M5x40 skruer - 4 stk.
Rawplugs - 4 stk. Kroge & Ringe - 2 sæt Vægbeslag - 2 stk. Ophængsskinne - 2 stk.
1. Tegningen viser vægbeslaget monteret på
væggen.
A B
1. Monter vægbeslaget i skinnen på bagsiden af
kassetten, samtidig med at du indsætter låse-
skruen i bunden af vægbeslaget.
1. Stram skruerne i bunden af vægbeslagene. Det er
vigtigt, at skruerne er monteret og spændt
korrekt, da lærredet ellers kan falde ned.
C D

Step 2
DS-DISPLAY A/S |SKELMARKSVEJ 6 |2605 BRØNDBY | WWW.DS-DISPLAY.DK |TELEFON 36 720 720 |FAX 36 720 722
TAK FORDI DU HAR VALGT ET AF VORES PRODUKTER
DANSK
4
Ophæng af lærred
1. Ophængsskinnen er fastspændt i korrekt position
i henhold til den anbefalede afstand. Fjern den, fra
fabrikken, fastspændte skrue og skru i stedet
ringene i ophængsskinnerne.
2. Sørg for, at de ikke kan bevæge sig.
1. Ring og ophængsskinne er sikkert fastspændt.
F
1. Tilt kabinettet for nemmere montering. Krogen
må ikke placeres for tæt på væggen. Der skal være
ca. 50 mm mellem væg og krog.
1. Der skal være ca. 10 mm mellem kabinet og væg.
E
G H

DS-DISPLAY A/S |SKELMARKSVEJ 6 |2605 BRØNDBY | WWW.DS-DISPLAY.DK |TELEFON 36 720 720 |FAX 36 720 722
CAUTION!
This screen must be securely attached to the wall. If the screen is not
properly installed it may fall, resulting in possible injury and/or damage.
Note: The mounting components and hardware supplied in this package are not designed for instal-
lations on plasterboard walls. If the hardware you need for your installation is not included, please
consult your local hardware store for proper mounting hardware for the application.
Unpacking Instructions
Carefully open the carton, remove contents and lay out on cardboard or other protective surface
to avoid damage. Check package contents against the Supplied Parts List in the next page to
assure that all components were received undamaged. Do not use damaged or defective parts.
Important Safety Information
Install and operate this product with care. Please read this instruction before beginning the instal-
lation, and carefully follow all instructions contained herein. Use proper safety equipment during
installation. Please call a qualied installation contractor for help if you don’t understand these
directions or have any doubts about the safety of the installation. If you are uncertain about the
nature of your wall, consult a qualied installation contractor.
Do not use this product for any purpose or in any conguration not explicitly specied in this
instruction. We hereby disclaims any and all liability or damage arising from incorrect assembly,
incorrect mounting, or incorrect use of this product.
ENGLISH
5
INSTALLATION INSTRUCTION
Tab Tension Screen
Manual and electric

USER INSTRUCTION
ENGLISH
6
About the canvas
1. The screen must, as far as possible, be driven up into the cassette when not in use. Make sure that
there are no insects, dust and durt on the canvas when it is rolled up.
2. The current scroll operation must not exceed four minutes. If so, the engine goes o automati-
cally to prevent overheating. After cooling (about 10-15 minutes) the roller function works again.
3. To ensure optimal projection eect, you should be aware of the following:
3.1 Avoid scratching the screen
3.2 Use a clean cloth or soft brush to clean the screen
4. The screen should not be installed in damp rooms.
5. The screen can be cleaned up with a damp cloth.
The screen is suitable for use in home theaters, cinemas, schools, clubs, entertainment, multi-
media training and meeting room etc..
The screen comes with an internal and an external wireless remote control for your choice:
RF remote control (within 100 meters) or Infrared remote control (within 50 meters).
Manual operation:
Press the control unit and stop freely. The screen will stop exactly where you want it to stop, during
ups and downs.
RF remote control operation:
Use the three buttons (Up , Down and Stop ) on the remote control to operate the screen.
Both solutions have time control during ups and downs, and both will stop automatically when the
end point is reached. Both solutions have integrated intelligent power function that automatically
comes into force if the ups and downs operation are going on for more than four minutes. The
canvas will stop running until the engine has cooled down again.
The sliding wall brackets and smart mounting reduces unnecessary problems and lack of space
during installation. After installation, the screen can be used with standard 220V-240V.
□
CAUTION!
Do not turn on the power before the complete installation of the screen is done
Manual controll RF Remote control
Up
Stop
Down

ENGLISH
7
Mounting instruction
1. Mark the places where the holes for the bracket
must be placed. Make sure they are leveled.
2. Drill holes and insert rawlplugs. Make sure no
plug is left outside the wall.
3. Mount the wall bracket to the wall with screws.
Step 1
SUPPLIED PARTS LIST
Screen - 1 pcs. M4x12 screws - 2 pcs M6x12 screws - 2 pcs. M5x40 screws - 4 pcs.
Rawlplugs - 4 pcs. Hook & Rings - 2 set Wall bracket - 2 pcs. Mounting track - 2 pcs.
1. Wall bracket mounted on the wall.
A B
1. Mount the wall bracket into the slot at the back of
the cassette while inserting the screw at the
bottom of the wall bracket.
1. Tighten the screws in the bottom of the wall
bracket. It is important that the screws are
installed and tightened properly. Otherwise the
screen may fall down.
C D

DS-DISPLAY A/S |SKELMARKSVEJ 6 |2605 BRØNDBY | WWW.DS-DISPLAY.DK |TELEFON 36 720 720 |FAX 36 720 722
THANK YOU FOR CHOOSING ONE OF OUR PRODUCTS
ENGLISH
8
Step 2 Hanging installation
1. The mounting track is secured with a screw in the
correct position according to the recommended
distance. Remove the xed screw and replace it
with the ring.
2. Make sure that the mounting track can not move.
1. Ring and mounting track are secured.
F
1. Tilt the chassis for easy installation.The hook
should not be placed too close to the wall. There
should be approx. 50 mm between the wall and
the hook.
1. There should be approx. 10 mm between the
cassette and the wall.
E
G H
This manual suits for next models
5
Table of contents
Languages:
Popular Projection Screen manuals by other brands

Fromm&Starck
Fromm&Starck STAR RS100S43 01 user manual

EliteProAV
EliteProAV EDGE FREE Aeon ALR Series user guide

Dönges
Dönges JD200271 Assembly instructions

Grandview
Grandview Super Mobile LS-E Series installation guide

Ryobi
Ryobi 890079001 user guide

Draper
Draper Ambassador 220V Installation & operating instructions

Elite Screens
Elite Screens M85XWS1-SRM user guide

Banner
Banner EZ-SCREEN LPM Installation

Da-Lite
Da-Lite Designer Manual Instruction book

JAROLIFT
JAROLIFT Profi Line 4250558262931 Original instructions

Screen Technics
Screen Technics CINEMASNAP XL instructions

Elite Screens
Elite Screens M85XWS1-SRM user guide