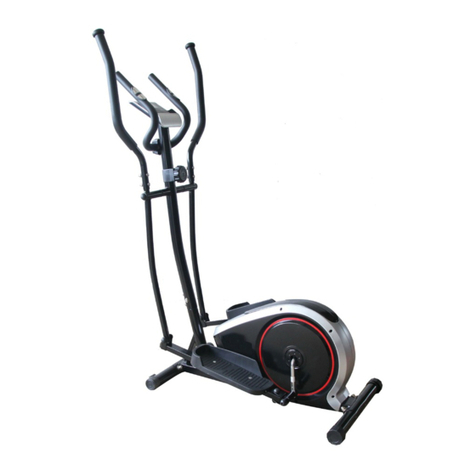
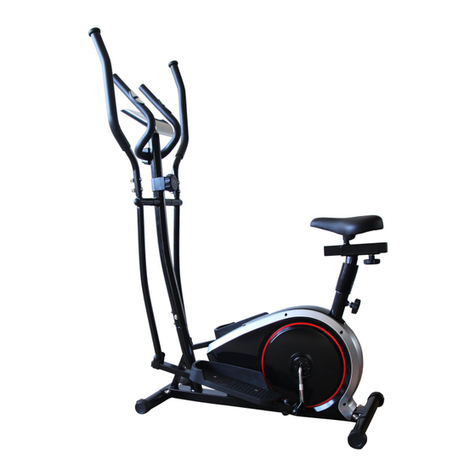
Durafit DFIEA001 Instruction Manual

IMPORTANT !
Please read all instructions carefully before using this product. Retain
this manual for future reference.
DURAFIT ELLIPTICAL (DFIEA001)
OPERATING INSTRUCTION MANUAL

1
SAFETY INSTRUCTIONS
Basic precautions should always be followed, including the following safety instructions
when using this equipment: Read all instructions before using this equipment.
1. Read all the instructions in this manual and do warm up exercises before using this
equipment.
2. Before exercise, in order to avoid injuring the muscle, warm-up exercise of every position
of the body is necessary. Refer to Warm Up and Cool Down Routinepage.
3. After exercise, relaxation of the body is suggested for cool-down.
4. Please make sure all parts are not damaged and fixed well before use. This equipment should
be placed on a flat surface when using. Using a mat or other covering material on the ground is
recommended.
5. Please wear proper clothes and shoes when using this equipment; do not wear clothes that
might catch any part of the equipment.
6. Do not attempt any maintenance or adjustments other than those described in this manual.
Should any problems arise, discontinue use and consult an Authorized Service Representative.
7. Do not use the equipment outdoors.
8. This equipment is for household use only.
9. Only one person should be on the equipment while in use.
10. Keep children and pets away from the equipment while in use. This machine is designed for
adults only. The minimum free space required for safe operation is not less than two meters.
11. If you feel any chest pains, nausea, dizziness, or short of breath, you should stop
exercising immediately and consult your physician before continuing.
12. The maximum weight capacity for this product is 110kgs.
WARNING:Before beginning any exercise program consult your physician. This is
especially important for the persons who are over 35 years old or who have pre-existing health
problems. Read all instructions before using any fitness equipment.
CAUTION:Read all instructions carefully before operating this product. Retain this
Owner’s Manual for future reference.

2
2
1
2
3
1
9
8
8
5
3
5
1
5
3
9
1
4
5
3
Assemble Drawing

3
PARTS LIST
No.
Description
Qty
No.
Description
Qty
1
CONSOLE
1
35
Right Tap Bolt
1
2
Tube of handrail
1
37
Wave washer
2
3
Cross recessed countersunk head screws
1
38
Block Nut 1/2"-LH*7T
1
5
8levels Speed Controller
1
39
Block Nut 1/2"-RH*7T
1
6
Front Handrail
1
40
Left Stepper
1
10
Half round Hexagon screw M8*16
16
41
Right Stepper
6
11
Curved Gasket φ8.2*φ20*1.5R28
18
42
Half round Hexagon screw M8*35
4
14
Car Frame
1
43
Flat Washer φ8.5*φ16*2T
9
15
Front Foot tube
1
53
M8 Cap Nut
2
19
Left up Handrail
1
54
Carriage Bolts M8*65
2
21
Right up Handrail
1
55
Back foot tube
1
23
Half round Hexagon screw M8*16
2
81
Up of Induction line
1
24
Flat Washerφ26*φ8.5*2T
1
82
Lower of Induction line
1
26
The center shaft bushing
2
83
Lower line of Speed Controller
1
27
Left lower handrail
1
88
Wave washer φ19.5*φ30*0.3T
2
28
Right lower handrail
1
90
Flat washerφ13*φ24*1.5T
2
34
Left Tap Bolt
1
HARDWARE PACKING LIST
#26 Central axis liner
1.#23 Hexagonal bolt M8*16
2.#24 Gasketφ28*φ8.5*2T
3. #88 Springφ19*φ30*0.3T
1.#42 Hexagonal bolt M8*30
2.#43 Gasketφ8*φ16*1.5T
3. #45 Lock Nut M8
Spanner
Spanner
Hexagon wrench
ASSEMBLY INSTRUCTIONS

4
1. Front /Rear stabilizer assembly
Please remove all screws from
stabilizers firstly, then connect the Front
/Rear stabilizer into the main frame
correctly and fasten them with screws by
spanner on accessory bag. Pay attention:
the front stabilizer marked with #15, the
Rear stabilizer marked with #55.
2. Handrail tube assembly
Please remove all screws from the tube
(#2) firstly, Then, connect Inner
induction line (Upper) (#4) into Inner
induction line (lower) (#5), and next,
make the handrail tube fixed to the
main frame, Make sure that it is locked
by spanner and wrench.

5
3. Left & Right lower handrail and tube assembly
Please set Central axis liner (#26) and
wave washer (#88) into the handrail tube
(#2). Next, set the left & right rear
handrail (#27/28) into the handrail tube
(#2) and use gasket (#24) and Half round
Hexagon screw (#23) to lock it by
spanner. Left and right Pedal arm (#32/33)
which be fixed by bolt (#34/35) and
spring gasket (#37) and gasket (#90); Use
the wrench to lock crank (#68), according
to the direction of the rotation lock. Then
lock it tightly by the lock nut (#38/39).
4. Left & right up handrail and tube assembly
Please set left & right up handrail (#19/21)
into left & right rear handrail (#27/28),
and use socket head cap screw (#10) and
curved gasket(#11) by wrench. And then
set left & right pedal (#40/41) into left &
right pedal arm. Use two pieces gaskets
(#43) , 1 piece half round hexagon screw
(#42) and flange nut (#44) to make sure
that its locked by wrench.
9
0
3
9

6
5. Front handrail assembly
Let the induction line through the hole of
handrail tube. Set Front handrail (#6)
with socket head cap screw (#10) and
curved gasket(#11). Make sure that it is
locked by wrench.
6. Console panel assembly
.Connect the two induction line
between console panel and handrail
tube, then insert the upper cable line
into console panel, and then set the
console panel into handrail tube. Use
Cross recessed countersunk head
screws to lock it by wrench.

7
CONSOLE INSTURCTION
BUTTONS:
MODE
To confirm all settings
JOGGLE WHEEL -
UP
Rotate right (or press it) to select training mode and adjust function value
up. Rapidly rotate to increase the value fast
JOGGLE WHEEL -
DOWN
Rotate left (or press it) to select training mode and adjust function value down.
Rapidly rotate to decrease the value fast
RESET
To clear the set-up value. Press RESET key and hold for 2 seconds to reset all
function figures
TOTAL RESET
To power on the console again
RECOVERY
To test heart rate recovery status
BODY FAT
To start or stop body fat testing
FUNCTIONS
:
SCAN
Displays all function TIME→DISTANCE →CALORIES →PULSE→
RPM/SPEED in sequence
RPM
Displays the pedaling Rotation Per Minute. The RPM and SPEED will switch to
another display in every 6 seconds after exercise starts
SPEED
Displays the user’s exercise speed
TIME
1.
Youcan use joggle wheel to set target time between 0:00 to 99:00 for count
down function.
2.
It can be set up by the user or accumulated automatically for countup
function.
DISTANCE
1.
Your can use joggle wheel to set target distance between 0.00 to 99.50for
count down function.
2.
It can be set up by the user or accumulated automatically for count up
function.
BODY FAT
In STOP mode, press the BODY FATbutton to start body fat measurement.
During measuring, user has to hold both hands on the handgrip. And the
LCD will display “-”“--““---” “---------------------------“ for 8 seconds until
computer finish measuring. LCD will display BMI, FAT% by turn every 3
seconds.

8
OPERATION PROCEDURE:
1. Installs 2 pieces of 1.5V #3 batteries, then the screen will display as following “Drawing A” and have
“Bi” sound at the same time, then enter to the personal data setting and press “MODE” button for
confirmation.After that, it goes to the next step to the main menu as “Drawing B”.
Drawing A Drawing B
2. Get access to the set-up mode of TIME/DISTANCE/CALORIES/PULSE. When you are in each set- up
mode, for example in the time set-up mode, time value is blinking, you can use joggle wheel to adjust
the value and press “MODE” for confirmation. The set-up of DISTANCE, CALORIES & PULSE is the
same.
3. With any signal been transmitted into the monitor, the value of TIME, DISTANCE, CALORIES start to
count up as Drawing C. When there is any function has been preset the target (TIME or DISTANCE or
CALORIES), the function will be counting down from the preset to zero while the training starts. Once
the target is achieved to zero, the monitor start to beep for 8 seconds, and the function will be counting up
from zero directly if the training is going. Press “MODE” button for confirmation and skip to next set-up.
4. In SCAN mode shown as “Drawing C”. RPM/SPEED/TM/DIST/CAL/PULSE will skip to display in
every 6 seconds. The order is as follows.
Drawing C
5. Youcan also press “MODE” button to select single function display except RPM & SPEED
function. The RPM & SPEED function will switch display.
6. RECOVERY:
(1) When the user presses “RECOVERY” button, the RECOVERY function is active. At this time only
PULSE and TIME is working, other functions will not be displayed, and the Sensor Input is
not available. TIME starts to count down from ”0:60”, Pulse signal will be blinking according user’s
heart rate BPM. When Time counts down to “0”, it will show F1~F6 (F1 is the best, F6 is the worst).
(2) LCD display as follows: (RECOVERY start condition & endcondition).
(3) If the count down action to 0:00 is not completed and there is no pulse signal, the count down action
has to be done and shown F6.
(4) If you press the RECOVERY button prior to count down to 0:00, it will be end and return to the
main menu.

9
TROUBLE SHOOTING GUIDE
1. Verify that all the bolts and nuts are locked properly and the turning parts should be turned freely
without damaged parts.
2. Clean the equipment with soap and slightly damp cloth only. Please do not use any
solvent to clean the equipment.
Problem
Potential Cause
Corrections
Base is unstable.
1. Floor is not flat or there is
small object under the front
or rear stabilizer.
2. The rear stabilizer end caps
have not been leveled when
adjusting.
1. Remove the object.
2. Adjust the rear stabilizer end caps.
Handlebar is
shaking.
The Bolts are loose.
Tighten the Bolts.
Loud noise from
the moving parts.
The interval of the parts is
improper tighten.
Open the covers to adjust.
No resistance when
riding the bike.
1. The interval of the magnetic
resistance increases.
2. Tensioncontrolknobis
damaged.
3. Beltslips.
4. Thebearingsetisdamaged.
1. Open the covers to adjust.
2. Change the tension control knob.
3. Open the covers to adjust.
4. Change the bearing set.
If you still can’t solve the problems after taking the solutions above, please contact our
Customer Care @ contactus@durafit.in or 6383151885/7806811343 to resolve the issue through our
Pan- India Service Network.

10
Warm Up Exercises
Asuccessful exercise program consists of a warm-up, aerobic exercise, and a cool-down. Do the
entire program at least two and preferably three times a week, resting for a day between workouts.
After several months, you can increase your workouts to four or five times per week.
Warming up is an important part of your workout, and should begin every session. It prepares your
body for more strenuous exercise by heating up and stretching out your muscles, increasing your
circulation and pulse rate, and delivering more oxygen to your muscles. At the end of your workout,
repeat these exercises to reduce sore muscle problems. We suggest the following warm-up and cool-
down exercises:
Inner Thigh Stretch
Sit with the soles of your feet together with your knees pointing
outward. Pull your feet as close into your groin as possible.
Gently push your knees towards the floor. Hold for 15 counts.
.Hamstring Stretch
Sit with your right leg extended.
Rest the sole of your left foot against your right inner thigh. Stretch
toward your toe as far as possible. Hold for 15 counts. Relax and
then repeat with left leg extended.
Head Roll
Rotate your head to the right for one count, feeling the
stretch up the left side of your neck. Next, rotate your
head back for one count, stretching your chin to the
ceiling and letting your mouth open. Rotate your head to
the left for one count, and finally, drop your head to your
chest for one count.
Shoulder Lift
Lift your right shoulder up toward your ear for one count. Then lift
your left shoulder up for one count as you lower your right shoulder.

11
Calf-Achilles Stretch
Lean against a wall with your left leg in front of the right and
your arms forward. Keep your right leg straight and the left
foot on the floor; then bend the left leg and lean forward by
moving your hips toward the wall. Hold, then repeat on the
other side for 15 counts.
Toe Touch
Slowly bend forward from your waist, letting your back
and shoulders relax as you stretch toward your toes.
Reach down as far as you can and hold for 15 counts.
Side Stretch
Open your arms to the side and continue lifting them until
they are over your head. Reach your right arm as far
upward toward the ceiling as you can for one count. Feel
the stretch up your right side. Repeat this action with your
left arm.
Table of contents
Other Durafit Elliptical Trainer manuals
Popular Elliptical Trainer manuals by other brands

Life Fitness
Life Fitness X5 Assembly & operation manual

Pro-Form
Pro-Form 640s Manual Del Usuario

Pro-Form
Pro-Form PFCCEL3805.0 user manual

CARDIOSTRONG
CARDIOSTRONG CST-EX40-BG Assembly and operating instructions

HEALTH RIDER
HEALTH RIDER Crosstrainer 2000s Elliptical Manual Del Usuario

Nautilus
Nautilus E514c Assembly manual