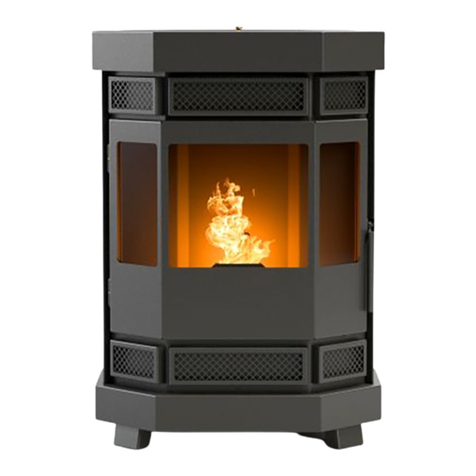
Duroflame Batavia T4 User manual

20.4
Manual Batavia T4 - Rembrand T3 - Carré T3

Page 2 from 37

Page 3 from 37
Introduction 5
1Warranty conditions and recommendations 5
Warranty conditions 5
Safety recommendations 7
Operating recommendations 8
2Operation 9
The fuel 9
3Installing the stove 10
Precautions 10
Stove location 10
Connection 11
4Starting a pellet stove 12
Starting up for the first time 12
Switching on the pellet stove 13
4.2.1 Ignition 13
Operation 13
Button Controller 14
Leds 14
Button explained 16
5User manual 16
SWITCH ON/OFF 16
Setting the power level 16
Read and reset error 17
DHS Toolbox 17
6Periodic maintenance 18
General maintenance 18
6.1.1 Cleaning the burn pot and ash pan 18
6.1.2 Cleaning the glass 18
6.1.3 Cleaning of painted metal parts 18
6.1.4 Cleaning the combustion chamber 18
6.1.5 Cleaning the pellet tank 19
6.1.6 Maintenance schedule 19
Annual maintenance 19
7Problems and solutions 24
No pellet supply 24
No ignition 24
Pellet stove gets too hot 25

Page 4 from 37
It gets too hot in the house 26
8Read and reset error 26
9Fault messages and solutions 26
9.1.1 ERROR 1 26
9.1.2 ERROR 5 26
9.1.3 ERROR 6 27
9.1.4 ERROR 8 27
9.1.5 ERROR 9 27
10 Parts 27
Explanation parts 27
10.1.1 Circuit board 27
10.1.2 Control panel 27
10.1.3 Data cable 27
10.1.4 Auger Motor 27
10.1.5 Auger 27
10.1.6 Pressure monitor 27
10.1.7 Maximum thermostat 28
10.1.8 Ignition Glow plug 28
10.1.9 Flue gas fan 28
10.1.10 Convection fan 28
10.1.11 Encoder 28
10.1.12 Flue gas temperature sensor 28
11 Technical specifications 29
12 Electrical diagram 31
13 Declarations of conformity 32
14 Performance declaration 35

Page 5 from 37
Introduction
Dear customer,
We would like to thank you for choosing and trusting Duroflame pellet stoves.
Duroflame pellet stoves are designed, developed and manufactured in the
Netherlands with the utmost precision and attention. This is to maximise user
enjoyment and protect the safety of both the user and the installer.
To get the most out of your Duroflame stove and use it as safely as possible, we
recommend that you read this manual carefully before using the stove.
We also recommend that you keep the manual within easy reach of the stove for
easy and quick access. In case the manual is lost or damaged, you can request a
copy from Duroflame. The manual is also available on our website.
Important items in this manual are represented by the images below. Pieces of text
will also be executed in bold to draw extra attention.
Important symbols:
Caution:
For this warning symbol, read the corresponding paragraph
carefully. This text contains information you need to know
for proper and safe operation of the pellet stove.
Information:
This symbol indicates important information on the proper
functioning of the pellet stove.
Due to the constant improvement of Duroflame products, Duroflame reserves the
right to make changes and additions to this manual without prior notice. Copying (in
part) of this manual is prohibited without permission from Duroflame.
1Warranty conditions and recommendations
Warranty conditions

Page 6 from 37
Duroflame guarantees a 2-year warranty on its pellet stoves, provided the warranty
certificate (invoice) and accompanying documents are present. This guarantee does
not apply to parts subject to normal wear and tear, for example the burn pot. The
electrical and electronic components and the fans are covered by a 2-year
warranty, with the exception of the glow plug. Only if it can be shown immediately
upon purchase that the glow plug is defective from the factory is this covered by the
warranty. The guarantee does not apply to parts that become defective due to lack of
maintenance and/or the use of poor quality pellets. The guarantee also does not
apply if damage occurs due to atmospheric influences, natural disasters, electric
current surges, fire, faulty (electrical) installation or maintenance not carried out in
accordance with the manufacturer's instructions.
•Duroflame will ensure that the agreed deliveries are carried out properly and in
accordance with the standards (applicable in its industry), but will never give a
more far-reaching guarantee in respect of these deliveries and work than as
expressly agreed between the parties.
•During the warranty period, Duroflame guarantees the usual normal quality and
soundness of the delivered goods.
•If a warranty has been issued by the manufacturer or supplier for the goods
delivered by Duroflame, such warranty shall apply equally between the parties.
Duroflame shall inform the other party accordingly.
•If the purpose for which the other party wishes to treat, process or use the goods
differs from the usual purpose of these goods, Duroflame only guarantees that
the goods are suitable for this purpose if it has confirmed this to the other party
in writing.
•No appeal to the guarantee is possible as long as the other party has not yet paid
the price agreed for the goods and/or the fee agreed for the work.
•The previous paragraph does not apply to consumers.
•In the event of a justified claim under the guarantee, Duroflame will - at its
discretion - take care of repair or replacement of the goods free of charge, the
correct execution of the agreed work or a refund or discount on the agreed price.
If there is additional damage, the provisions of the liability clause included in
these general terms and conditions shall apply.
•Contrary to the previous paragraph, the consumer has the choice between repair
or replacement of the goods or still carrying out the agreed work correctly, unless
this cannot reasonably be required of Duroflame. Instead, the consumer may
always dissolve the contract by written declaration or demand a discount on the
agreed price.
•We strongly recommend leaving the stove door ajar during periods when the
stove is not in use. This will prevent moisture problems.

Page 7 from 37
Safety recommendations
•Installation, repair and maintenance of the stove should only be carried out by
qualified personnel. Pay particular attention to electrical connections and
connections. Ensure that all electrical connections are securely fastened to
prevent contact with the rest of the stove.
•All local provisions, including those referring to national and European standards,
must be respected when installing and using the appliance.
•The appliance should not be used by children under 8 years of age. This
appliance may be used by children over 8 years of age and by persons with
reduced physical, sensory or mental capabilities or lack of the necessary
experience and knowledge if they are supervised or instructed in how to use the
appliance safely as well as understand the hazards associated with its use.
Children should not play with the appliance. Keep the appliance and the power
cord out of reach of children under 8 years of age. Do not allow cleaning and
maintenance by children unless they are over 8 years old and supervised.
•After unpacking the product, check it thoroughly and carefully. If the contents of
the package are incomplete or incorrect, contact the dealer from whom you
purchased the product. Do not leave packaging material within the reach of
children or persons with reduced physical, sensory or mental capabilities for
whom it may present a danger.
•All packaging materials can be reused in similar uses or possibly as waste
similar to municipal solid waste, in accordance with regulations.
•A broken stove that is beyond repair contains valuable raw materials that can
be reused after processing. Therefore, seek advice from the municipal cleaning
service for environmentally friendly disposal and processing.
•For proper application and use of the stove, it is important that each user reads
this manual carefully and completely and follows the instructions.
•The stove may only be used for the application for which it is designed. The
manufacturer cannot be held liable for damage caused by improper use and/or
application.
•Do not place objects on the stove and make sure objects are placed at a safe
distance from the stove. Failure to follow this recommendation may cause a fire
hazard.
•Responsibility for improper use of the stove lies entirely with the end user and
exempts Duroflame from all liability.
•Any modification to the stove and replacement with non-original parts may
compromise the safety of the user and exempts Duroflame from all liability. It is
forbidden to apply these modifications and replacements without written
permission.

Page 8 from 37
•Do not twist or pull electrical cables, even when the stove is disconnected from
the mains.
•Do not close or reduce vents. Vents are necessary for proper combustion and
prevent the stove from overheating.
•Avoid touching the hot parts of the stove without protective clothing or
accessories.
•It is not permitted to operate the stove with an open fire chamber door. This could
cause smoke formation in the room.
•The stove is an electrical appliance, therefore be careful with moisture and liquids
around the stove. Before carrying out cleaning and/or maintenance, we
recommend that you switch off the stove before doing so, then perform its
shutdown procedure and then unplug it.
•The stove must be connected to a circuit breaker and an earthed socket, in
accordance with standards 73/23 EEC & 93/98 EEC.
•Incorrect installation or poor maintenance may cause damage to persons,
animals or objects. In this case, Duroflame disclaims all liability.
•The stoveshould be fully cleanedandserviced after every 1,200 hours of burning
or after every year of use.
Operating recommendations
•Using the control panel, switch off the stove in case of a malfunction or poor
operation.
•After the stove does not start up correctly, unburnt pellets should be removed
before a new start-up attempt is made.
•Never manually throw pellets into the burn pot.
•Never light the stove in any other way than the described start-up procedure.
•Install the stove in a suitable room equipped with ventilation, electricity, a flue
outlet and fire-fighting equipment.
•Do not let the room heated by the stove overheat, as this can cause health
problems
•In case of fire in the flue, switch off the stove and keep the door closed.
•If the stove is on a combustible surface, there should be a fire-resistant sheet of
steel or glass under the stove.

Page 9 from 37
2Operation
The fuel
Duroflame pellet stoves use pellets as fuel. Pellets consist of wood fibres that
are pressed together under very high pressure. After which, without any
additives, they take on their solid form. It is not permitted to burn any raw
materials other than wood pellets in Duroflame pellet stoves, not even to light the
stove. If this is done, the warranty will be voided and safety compromised.
It is important that the composition of the pellets is of good quality. The quality of the
pellets affects the combustion and fouling of the stove.
It is allowed to use, as fuel, only sawdust-based natural wood pellets (also called
pellets) certified class A1 according to standard ISO 17225 2 (ENplus A1 or DIN
Plus). Any biomass fuel other than these wood pellets is prohibited.
Characteristics of good pellets are:
Diameter: 6-7 mm
Length: 30 mm
Hard pressed
Free of additives, adhesives and resin
Calorific value of 20,244 kJ/kg
Moisture content of 7%
Bad pellets cause the following problems:
Poor combustion
Clogging the burn pot
Blockage of flue pipes
A quickly soiled window
Lots of ash and unburnt pellets
Please note that damp pellets can cause poor combustion and therefore the
above problems. Store your pellets dry and at least one metre away from the
stove. We recommend choosing your pellets carefully. Using bad pellets can damage
your pellet stove, voiding the manufacturer's guarantee and liability.

Page 10 from 37
3 Installing the stove
Precautions
Installation of the stove must be carried out by qualified personnel.
The stove must only be installed in a suitable room, the room must:
•Comply with the operating and environmental conditions (described in this
manual).
•Be supplied with electricity (230V 50 Hz (73/23/EEC))
•A properly installed ground/earth connection is necessary.
•Be equipped with a chimney flue or vertical indoor or outdoor flue.
•Be provided with earthing, in accordance with EU standards.
Combustion of the pellets in the pellet stove produces flue gases. To
discharge these flue gases, the stove must always be connected to a flue or a
vertical indoor or outdoor flue. These flue gases are barely visible, but can become
very hot. Therefore, avoid contact with the flue gases.
Stove location
The position of the stove depends on the space and the possibility of chimney/flue
installation. Consult the local authorities about the local rules for stove installation
with regard to the chimney/flue pipe and other regulations laid down in this regard.
The manufacturer declines all responsibility if the installation does not comply with
current legislation.
For proper cooling of the stove, proper distribution of heat from the stove and to
promote fire safety, distances from other objects must be taken into account. See
chapter 9 for exact dimensions, this varies for each stove. The stove must also be
positioned in such a way that there is a good possibility to clean and maintain the
stove and flue pipes.
The stove should be installed on a flat part of the floor. It can also be levelled
using the special feet supplied with the stove. Make sure the stove is level and has no
slope. This can lead to strange behaviour during combustion and a poor connection
to the flue.
It is not permitted to place the stove in a bedroom, in a bathroom, in a shower,
in a room where there is a risk of explosion or outdoors. The stove should also
not be placed on a floor that does not seem suitable to support the weight of the
stove. If the stove is located on a combustible surface, there should be a fireproof
sheet of steel or glass under the stove.

Page 11 from 37
Connection
Electrical connection
It is important that the stove is installed by qualified personnel. Connection to
the mains is by means of the power cable provided. Ensure that the plug
remains accessible at all times when the appliance is installed. Ensure a properly
earthed socket. The stove is protected by a fuse at the back of the stove.
Connection to the flue gas duct
This chapter describes the conditions that the flue gas duct must meet. These
conditions prescribed by us should in no way be considered a substitute for existing
regulations. All local provisions, including those referring to national and European
standards, must be observed when installing the flue gas duct.
The factory is not responsible for any malfunction of the stove due to the use of a flue
that does not comply with the conditions and regulations.
•Have the flue and pellet stove installed by qualified personnel.
•The internal diameter of the duct should be equal to or greater than 80
mm.
•Use only steel or stainless steel pipes for the ductwork, not plastic or
aluminium.
•Use only pipes with a silicone sealing ring for the duct, which are
resistant to high temperatures.
•When taking bends, always use tees with an inspection facility for annual
maintenance.
•The connection between the stove and the chimney should be as short as
possible to ensure a good draught and to prevent condensation.
•Do not use more than three 90° bends (tees).
•Horizontal sections should not exceed 2 metres in length with a minimum
angle of 5°.
•Do not connect more than 1 appliance to a flue.
•Use insulated pipes outdoors to prevent condensation.
Ventilation
For proper combustion in the stove, it is necessary to provide good ventilation to the
room in which the stove is located. Poor combustion can be caused by poor
ventilation in the house. This can especially occur in modern, airtight homes. Even in
rooms where (electric) ventilation is present, poor combustion can occur more
quickly. Applying/installing proper ventilation can prevent these problems. Good
ventilation at the stove is mandatory.

Page 12 from 37
The air intake must have a total net area of 100 cm². This area should be increased if
there are (electric) extraction or heating systems in the same room (e.g. an extractor
hood or wood stove).
On all Duroflame pellet stoves it is possible to connect an external air inlet. By using
this external air inlet, the pellet stove uses outside air for combustion. The
combustion of the stove is then no longer influenced by the ventilation in the room.
Ask your dealer about the possibilities.
The air inlets listed above must guarantee a minimum capacity of 50m³/hour.
The air inlet must not be blocked under any circumstances.
4 Starting a pellet stove
Starting up for the first time
Caution! When using the stove for the first time, observe the following advice:
•The curing process of the lacquers is finished only after burning the stove a
few times. This curing process can give off fumes and odours that are not
released later.
•Use the stove on medium power the first few times to allow all mechanical
parts to settle and the paints to harden. This promotes the stove's longevity.
•Keep children away from the stove, the fumes released can be harmful to
children's health. Adults should also be careful with these fumes and avoid
inhalation as much as possible.
•Do not touch parts and surfaces until they have cooled down completely, the
parts and surfaces may still be unstable.
•Ventilate the room very well several times after and during initial use.
•The very first start-up of the pellet stove may take longer than usual.
Because the auger is not yet filled with pellets, it takes longer for the pellets
to settle in the burn pot.
It is even possible that it takes too long and the pellet stove gives an error
message (Error1).
Perform the following points before starting the pellet stove for the first time:
•Make sure the pellet stove is installed correctly, as described in the previous
paragraphs.
•Fill the reservoir with pellets and check that there are pellets in the reservoir.

Page 13 from 37
•Check that the burn pot is placed as far back as possible and that the glow
plug is in front of the hole in the burn pot.
•Check that the door is properly closed.
Switching on the pellet stove
You do this by using the power switch. The power switch is the switch next to the
power cable plug.
4.2.1 Ignition
•Check that there are enough pellets in the reservoir.
•Check that the burn pot is clean or that it is placed as far back as possible
and that the glow plug is in front of the hole in the burn pot.
•Check that the door is properly closed.
Operation
A pellet stove works as follows: The pellet stove has a built-in reservoir for
pellets. From this reservoir, the pellets are transported to the burn pot by an
auger. A glow plug is used to ignite the pellets in the burn pot. The air required
for combustion is forced past the burn pot by the flue gas fan. The flue gases
resulting from combustion are removed by the flue gas fan.
Depending on the model, the pellet stove can create a warm air flow in the room
in two ways. One way is through a room fan inside the stove and the other way
is through natural convection. Since these airflows also prevent the stove
from overheating, it is very important that the applied airflow works and is
not blocked.
Do not cover the stove with material. Do not place objects on the upper part of
the stove, including pans, sheets or objects.

Page 14 from 37
Button Controller
-The controller consists of 1 button and 6 multicoloured
LEDs.
-The functions of each are explained below.
Leds
There are 6 LEDs near the Button.
The first from the left is the STATE LED, which represents the working state of
the device.

Page 15 from 37
LED STATUS
The STATE LED changes colour and flashing pattern based on the current
state of the stove.
Table 1. Meaning of the LED status
State
Colour and pattern
Normal operation
Constant green
Adjust power level
Pulse green
Cooling down
Flashing blue
Error
Flashing red
Access Point active - Available for connection
Flashing yellow
Connected access point
Constant Yellow
The 5 remaining LEDs are called POWER LEDs.
Their colour depends on the current state of the stove.
The 5 Power LEDs can indicate two colours, green and blue.
Table 2. Meaning of the five POWER LEDs
Colour
Description
Green
Selected power level
(1 LED means Power Level 1 | 5 LED Average = Power
Level 5)
Blue
Cooldown process (5=100% | 1=0% | 0= cooldown
complete)

Page 16 from 37
Button explained
The button can be pressed clockwise or anti-clockwise.
Table 3. Use of the button
Use
Description
Turn clockwise
Select a higher power level
Turn anticlockwise
Select a lower power level
Press once
Reset error - disable WiFi access point
Long press (>5 seconds)
Switch on WiFi access point
5 User manual
SWITCH ON/OFF
While the stove is OFF, all LEDs are switched off.
By turning the knob clockwise, the STATE LED and the first from the POWER
LEDs turn green. The STATE LED flashes for 3 seconds to wait for your final
selection. After 3 seconds, it saves your choice and operates at the POWER
LEVEL you selected.
Depending on how many LEDs are green, in addition to the STATE LED, that is
the POWER LEVEL that the stove goes to after the Ignition process.
Setting the power level
The power level can be set between 0 and 5 using the knob. The power level is
increased by turning the knob clockwise and decreased by turning it anti-
clockwise.

Page 17 from 37
The STATE LED flashes for 3 seconds to wait for your final selection. After 3
seconds, it saves the selection and operates at the power level selected.
Power level 4
Read and reset error
The stove is equipped with a series of sensors
and control mechanisms to ensure the safe
operation of the unit.
In case of an error of any of these control
mehanisms, an error will be recognised by the
stove controller. In case of an error, the STATE
LED turns red and starts flashing.
The FAULT CODE can be read by counting the number of flashes.
Check the error list for the error code corresponding to the number of flashes.
After the fault has been recognised and the source problem resolved and fixed,
the alarm on the controller can be reset by pressing the button once.
The STATE LED turns green for 2 seconds to confirm the reset.
DHS Toolbox
The DHS Toolbox can be used to read or change parameters and system
configuration from a technician and authorised personnel. The Toolbox can
connect to the revolute via Wi-Fi or direct connection. Changes are not allowed
in the parameters of this menu, as this may cause irreparable damage to the
heating device.

Page 18 from 37
6Periodic maintenance
General maintenance
For a long service life of the stove, it is important to carry out regular
maintenance and clean the stove as described in the following paragraphs. For
(fire) safety reasons, it is necessary to have a full service carried out by
qualified personnel after every year of use, or every 1,200 burning hours.
Perform all maintenance and cleaning when the stove is switched off, the plug
is unplugged and the stove has cooled down.
Never use caustic or aggressive cleaning agents on both external and internal
parts. Using these agents may lead to corrosion and damage. Use of these
agents will void the warranty.
Have broken parts replaced by your dealer or manufacturer.
6.1.1 Cleaning the burn pot and ash pan
Before each use, clean the burn pot and ash pan. Cleaning the burn pot is
important for proper combustion. Without cleaning the burn pot, the holes in the
burn pot can become clogged and air cannot reach the combustion properly.
This causes slagging. When cleaning, make sure no ash or pellets are left
under the burn pot.
6.1.2 Cleaning the glass
To keep a clear view of the fire, it is necessary to clean the glass in the door.
How often the glass needs to be cleaned depends on the pellets used. You can
clean the glass with a damp paper towel dabbed in ash. You can then use this
cloth to clean the window. After this, you can rub the window dry.
The glass in the stove can withstand high temperatures, but it may break if it
cools down too quickly. Therefore, always wait with cleaning agents until the
stove has cooled down completely. If the glass is broken, the stove must no
longer be used and the glass must be replaced by qualified personnel.
6.1.3 Cleaning of painted metal parts
Painted parts can be cleaned with a damp cloth or a (natural) chamois
(because of lint) Do not use aggressive, corrosive cleaning agents or oil-
based cleaning products. Do not use petrol, alcohol or similar.
6.1.4 Cleaning the combustion chamber
It is important to regularly vacuum out and empty the pellet stove properly.
To do this, use a hoover suitable for sucking ash or a special ash hoover.

Page 19 from 37
6.1.5 Cleaning the pellet tank
Clean the pellet reservoir every 3 months, depending on your pellets and
consumption. If too much dust and sawdust accumulates at the bottom of
the reservoir, the auger may not be able to load enough pellets or the
auger may even jam and cause damage.
6.1.6 Maintenance schedule
Parts/ Period
For every use
2 days
7
days
90
days
Yearly &
after 1200
burning
hours
Burn pot
x
Window
x
Fire chamber
x
Flue system/heat exchanger
x
Pellet tank
x
Annual maintenance
Every year or after 1200 hours of burning, the pellet stove should undergo a
complete servicing, for the preservation of your stove and your own safety. The
stove should be completely dismantled and the heat exchanger and flues
cleaned. This is important as otherwise the stove will become clogged with ash
and dust. This annual maintenance should be carried out by qualified personnel.
Below are the different models with the parts to dismantle for cleaning the flue
and heat exchanger.

Page 20 from 37
a. Batavia T4
Figure 11-Exploded view
Figure 2- Combustion Pot
Figure 3- Vermiculite Lining
This manual suits for next models
2
Table of contents
Other Duroflame Stove manuals
Popular Stove manuals by other brands

Arada
Arada Cassette Stove installation guide

Bronpi
Bronpi Dama Hydro Installation, operating and service instructions

Valor
Valor MADRONA MF28JN Homeowner's manual

Palazzetti
Palazzetti V15 Installation and maintenance manual

Plamen
Plamen CALOREX 100 Tehnical instruction

Comfort Glow
Comfort Glow CSBNT OWNER'S OPERATION AND INSTALLATION MANUAL

Stanley
Stanley Erin Installation and operating instructions

Ambassade
Ambassade CG 641 P General manual

MCZ
MCZ SUITE-CLUB-MUSA Hydromatic 16/24 installation guide

Morso
Morso DB15 Installation and operating instructions

Harvia
Harvia M3 SL Instructions for installation

Heta
Heta Classic Series operating instructions