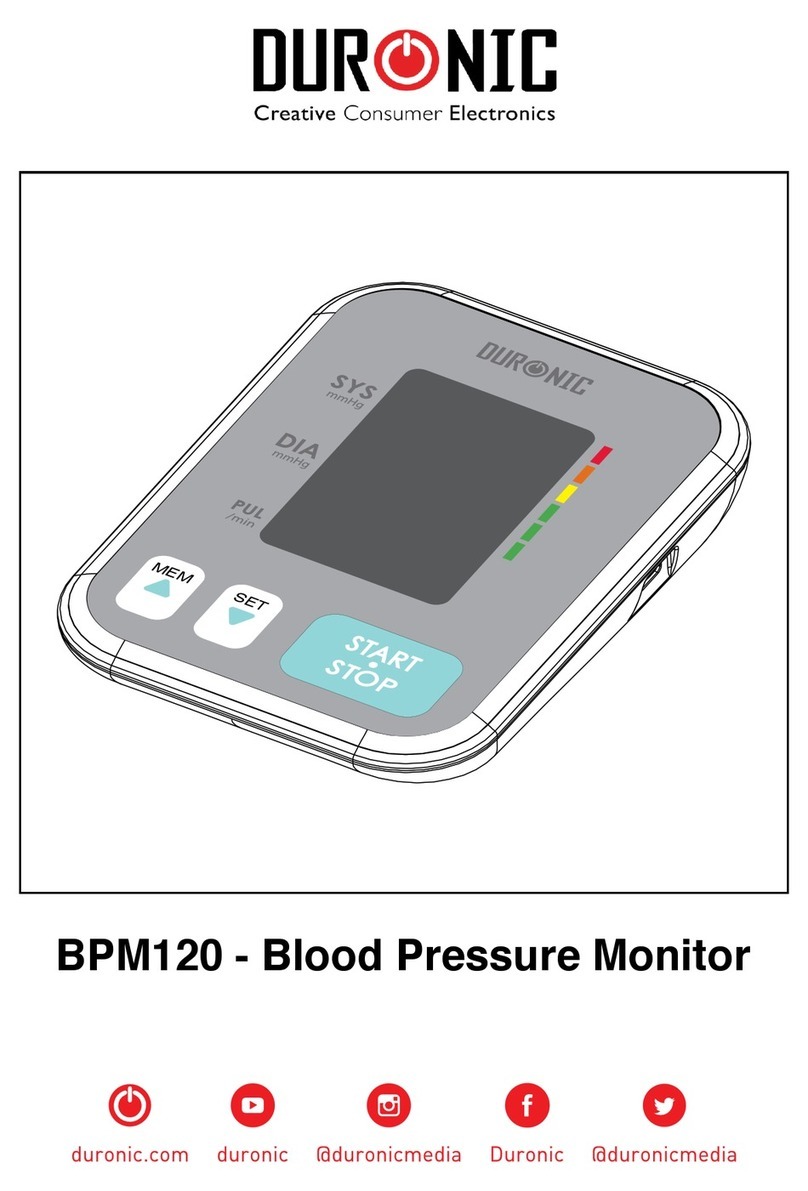
Duronic BPM200 User manual

BPM200 - Blood Pressure Monitor
PLEASE READ ALL THE INSTRUCTIONS BEFORE USE

2

3
English Manual
Manuel d’utilisation en français
Gebrauchsanleitung auf Deutsch
Manual de Instrucciones en Español
Manuale D’istruzioni In Italiano
Instrukcja obsługi. Polski
5
32
55
78
101
124
Contents

4

5
English Manual

6
Thank you for selecting SHINEMART arm type blood pressure monitor.
The monitor features blood pressure measurement, pulse rate measurement and
auto-save the result. The design provides you with two years of reliable service.
Readings taken by the blood pressure monitor are equivalent to those obtained
by a trained observer using the cuff and stethoscope auscultation method. This
manual contains important safety and care information, and provides step by step
instruction for using the product.
Read the manual thoroughly before using the product.
Features:
• 59x47mm Digital LCD display
• Maximum 99 x 2 groups records
•Inating measuring technology
The symbols shown below may appear in the user manual, labeling or other
components. They are the standard requirement.
Icon Key
THE OPERATION GUIDE
MUST BE READ Type BF Applied Parts
This product complies with the
MDD93/42/EEC requirements.
DISPOSAL: Do not dispose this
product as unsorted municipal
waste. Collection of such waste
separately for special treatment is
necessary.
Manufacturer Direct Current
Species Serial Number Wellkang Ltd
Suite B, 29 Harley Street,
London, W1G 9QR,UK
Manufacture Date Degree of protection against the
ingress of water.
IP21
SN

7
• This device is intended for adult use only. Do not use this device on children.
• This device should not be used on any female who is, or is suspected of
being, pregnant. Besides providing inaccurate readings, the effects of this
device on the foetus are unknown.
• This device is intended for non-invasive measuring and monitoring of arterial
blood pressure. It is not intended for use on any extremities other than the
arm and should not be used for any other functions other than obtaining a
blood pressure measurement.
• Contact your doctor if you are concerned about your blood pressure. This
device is for self-monitoring and should not be used for self-diagnosis.
• Do not adjust, begin or end medical treatment or medication without asking a
doctor for treatment advice.
• If you are taking medication, consult your doctor to determine the most
appropriate time to measure your blood pressure.
• When this device is used to measure patients who have common arrhythmias
such as atrial or ventricular premature beats or atrial brillation, the results
from this device may vary.
• If you are concerned about your blood pressure result, please consult your
doctor.
• If the arm cuff pressure exceeds 40 kPa (300 mmHg), the unit will
automatically deate the cuff. Should the cuff not deate when pressure
exceeds 40 kPa (300 mmHg), detach the cuff from the arm and press the
‘START/STOP’ button to stop ination.
• The device is not AP/ APG equipment and is not suitable for use in the
presence of a ammable anaesthetic mixture of air with oxygen or nitrous
oxide.
Safety Information

8
• To avoid measurement errors, please avoid using the device in areas with
a strong electromagnetic eld radiated interference signal or electrical fast
transient/ burst signals.
• The user must check that the equipment functions safely and see that it is in
proper working condition before being used.
• This device is not suitable for continuous monitoring during medical
emergencies or operations. Otherwise, the patient’s arm and ngers can
become numb, swollen and even purple due to a lack of blood.
• Please use the device as instructed in this user manual. If you do not do
so, the performance and lifetime usage of the device will be impacted and
reduced.
• During use, the user/patient will be in contact with the cuff. The materials
of the cuff have been tested and found to comply with the requirements of
ISO 10993-5:2009 and ISO 10993-10:2010, therefore should not cause any
irritation.
• Use only Duronic authorised parts and accessories. Parts and accessories
not approved for use with the device may result in operational failure.
•The device should not need to be calibrated within the rst two years of use.
• If you have any problems with this device, such as setting up, maintaining
or using the device, please contact the Duronic Customer Care Team for
assistance.
• Do not open or repair the device by yourself. If you experience any problems
with your device, contact Duronic for assistance.
• When cleaning the device, please use a soft cloth to clean the whole unit. Do
not submerge it in water or any other liquid, and do not use any abrasive or
volatile cleaners.

9
When using Batteries
• The operator or user of this device should not touch the output of batteries
and the patient simultaneously.
• If using batteries in the device, please ensure that the correct size batteries
are used, as described in this manual. Do not use any other type of battery as
this may damage the device.
•If any battery uid should leak and get into your eyes, rinse your eyes with
plenty of clean water and contact a doctor immediately.
When using a Power Adaptor
• If using a power adaptor with this device, please ensure that you do not
handle the power cable or plug with wet hands.
• Do not use a power adapter if the cable or plug is damaged.
• Do not yank the power cable to remove it from the plug socket. Always grasp
the plug and pull it out to disconnect it.
• When plugging the device into a mains socket, please ensure the power
supply is 220-240V ~ 50/60Hz.
Contact Information
Distributed by: Shine-mart Ltd
Manufactured by: Shenzhen Jumper Medical Equipment Co. Ltd
Authorised European Representative: Wellkang Ltd

10
1. User Icon
2. Sound on
3. Systolic Pressure
4. Diastolic Pressure
5. Heartbeat
LCD Display
6. Pulse
7. Arrhythmia
8. Date/Time Display
9. Low Battery
10. Unit
11. Blood Pressure / Level
Indicator
12. Memory Icon
13. Memory Number
14. Average Reading
Value
1
2
6
7
4
3
5
10
9
11
12
13
14
8
Symbol Description
SYS Systolic blood pressure
DIA Diastolic blood pressure
Pul/min Pulse per minute
Time (hour:minute)
Memory log value
mmHg mmHg (unit of mesurement)
Low battery
Arrhythmia / irregular heartbeat

11
Components Included
Choice of Power Supply
1. Air Jack
2. User/Set Button
3. Start/Stop Button
4. USB External Power Supply
5. Memory Button
1. Battery powered mode: 4*AAA batteries
2. DC adaptor powered mode: 5V through a USB cable (not included)
Cuff
22~36cm
(Type BF applied part)
Blood Pressure Monitor
4*AAA Batteries
1
2
3
4
5
Caution: It is important to ensure that you use the correct batteries or
power adapter in your machine to avoid any damage incurring.

12
Caution:
• Remove batteries if the device is not likely to be used for some
time.
• Old batteries are harmful to the environment, do not dispose them
with other daily rubbish. Remove the old batteries from the device
and follow your local recycling guidelines. Do not dispose of
batteries in re; batteries may explode or leak.
Arrhythmia / Irregular Heartbeat Detector
This blood pressure monitor is equipped with Irregular Heartbeat
(IHB) Detection. During each measurement this monitor records
the heartbeat intervals and works out the standard deviation. If
the calculated value is larger than or equal to 15, this equipment
will light up the ‘IHB’ symbol on the screen when displaying the
measured result.
Caution: The appearance of the ‘IHB’ icon indicates that a pulse irregularity
consistent with an irregular heartbeat was detected during measurement.
Usually this is NOT a cause for concern. However, if the symbol appears often,
we recommend you seek medical advice. Please note that the device does not
replace a cardiac examination, but serves to detect pulse irregularities at an early
stage.
The Installment and Replacement of Battery
1. Slide off the battery cover.
2. Install the batteries by matching the correct polarity, as shown.
3. Replace the cover.
Replace the batteries when the following occurs:
• The icon shows
• The display dims
• The display does not light up

13
Setting the Date, Time and Unit
It is important to set the clock before using your blood pressure monitor, so that a
time stamp can be assigned to each record that is stored in the memory.
(Year: 2000-2050, Time: 24 H)
1. When the monitor is off, press and hold down the ‘USER/SET’ button for 5
seconds. The ‘User 1’ icon will ash.
2. Press the ‘USER/SET’ button to change the year. Srcoll through the year
using the ‘MEMORY’ button.
3. Press the ‘USER/SET’ button to change the date (month/day). Scroll through
the year using the ‘MEMORY’ button.
4. Press the ‘USER/SET’ button to change the time (hour/minute). Scroll
through the time using the ‘MEMORY’ button.
5. Press the ‘USER/SET’ button to change the unit of measurement (mmHg/
KPa). Srcoll through the time using the ‘MEMORY’ button.
USER/SET
BUTTON
MEMORY
BUTTON

14
Selecting or Changing Users
Clearing the Memory
To clear the memory and delete all of the saved records, press and hold the
‘MEMORY’ button for 3 seconds. When it shows ‘M’ on the screen, continue to
hold the ‘MEMORY’ button and press the ‘USER/SET’ button at the same time.
The screen will show ‘ALL EE’. This means the records have all been deleted.
When there are no records stored, the screen will show ‘NO’.
When the monitor is off, press and hold down the ‘USER/SET’ button for 5
seconds. The ‘User 1’ icon will ash, then you can press the ‘MEMORY’ button to
change the setting to ‘User 2’.
USER/SET
BUTTON

15
Accessing the Memory
The reading measured will save automatically. To access and scroll through the
saved readings, press the ‘MEMORY’ button. You can switch between ‘User 1’
and ‘User 2’ by pressing the ‘USER/SET’ button.
The blood pressure monitor can automatically store 99 measurements for two
users, and automatically replace the 99 measurement data when the memory is
full.
After the blood pressure monitor has been used several times, press the
‘MEMORY’ button in the shutdown state to display the average blood pressure of
the last three measurements.
Press the ‘MEMORY’ button again to display the rst group of blood pressure
measurement values and look up the memory group number next to it.
MEMORY
BUTTON

16
How to Use
1. Tie the cuff on your upper arm,
then position the tube off-center
toward the inner side of arm in
line with the little nger.
Fastening the Arm Cuff
2. The cuff should be snug but
not too tight. You should be able
to insert one nger between the
cuff and your arm.
3. Sit comfortably with your left
arm resting on a at surface.
Tips
• Rest for 5 minutes before measuring.
• Wait at least 3 minutes between measurements. This allows your blood
circulation to recover.
• For a meaningful comparison, try to measure under similar conditions. For
example, take daily measurements at approximately the same time, on the
same arm, or as directed by a medical professional.

17
How to Take a Measurement
1. Ensure that the cuff is tted properly on your arm. Press the
‘START/STOP’ button to turn on the monitor. The device will
nish the whole measurement automatically.
2. The cuff will inate. When fully inated the cuff can feel slightly tight or
uncomfortable. This is normal. If it is intollerable or you have any concerns,
press the ‘START/STOP’ button to stop the machine and seek professional
medical advice.
Display when cuff inates
When the pulse is detected, the screen will display the “heart” symbol and ash to
your pulse rhythm.
Display when cuff deates.
3. Your reading is nished. The screen will
continue to display the measurement results,
unless you press ‘START/STOP’ button to turn
off the machine. Otherwise, the machine will
shutdown automatically after 30 seconds.
The reading measured will save automatically.
To access and scroll through the saved readings,
press the ‘MEMORY’ button.

18
Tips for Obtaining an Accurate Measurement
Wait at least 1 hour after eating or
drinking.
Do not measure immediately after
consuming caffeinated drinks such as
tea and coffee, or after smoking.
Do not take a measurement when
talking or moving your ngers.
Wait at least 20 minutes after taking a
bath.
Do not take a measurement in a very
cold environment.
Do not take a measurement when you
need to use the toilet.
Please follow the below tips to ensure you achieve an accurate measurement:

19
Maintenance
In order to get the best performance, please follow the below instructions.
Store in a dry place and avoid direct
sunlight.
Avoid the monitor touching water.
If the machine gets wet, dry
immediately afterwards.
Avoid dusty environments and
unstable temperatures.
Avoid intense shaking and collision.
Use a wet (well wrung) cloth to remove
any dirt.
Do not clean the cuff with water and
never immerse the cuff in water or
any other liquid.

20
Why does my blood pressure vary throughout the day?
Why do I get a different blood pressure at home compared to
the hospital?
Individual blood pressure varies naturally
multiple times during the day. It is also
affected by the way you tie your cuff around
your arm and the position of your arm during
measurement. For this reason, we advise you
take measurement at the same time of day and
in the same position.
Please note: If the user takes medication the
pressure will vary more.
If you wish to measure a second time, wait
at least 3 minutes before taking another
measurement.
Blood pressure is different even throughout the day due to weather, emotions,
exercise etc.
Also, there is the “white coat” effect, which means blood pressure usually
increases in clinical settings due to anxiety or nerves.
What you need to pay attention to when you measure your blood pressure at
home:
- If the cuff is tied properly.
- If the cuff is too tight or too loose.
- If the cuff is tied on the upper arm.
- If you feel anxious.
Advice: Take 2-3 deep breaths before beginning a measurement as this will help
get a more accurate result. If you are particular anxious or upset, relax yourself for
4-5 minutes until you calm down.
Other manuals for BPM200
1
Table of contents
Languages:
Other Duronic Blood Pressure Monitor manuals