DUTSCHER FlexA-200 User manual

I
Operation Manual
Version 1.0
FlexA-200
Microplate Reader
DOMINIQUE DUTSCHER SAS

II
Foreword
Thank you for purchasing our Microplate Reader. This user manual describes how the
instrument works and the operation guide, please read carefully before operation and
keep for future reference.
Opening check
Please check the instruments as well as all accessories with packing list when you first
open it. If you find any wrong or missing, please contact distributor or manufacturer.
File No.: AS148SM
Version No.: Dec. 2019
DOMINIQUE DUTSCHER SAS

III
Safety Warning and Guidelines
1. Important information for safe use
Any improper operation without reading manual is forbidden, otherwise there
will be risks in cause accidental injury or electrical shock.
Do read manual carefully and operate safely according to this guidelines.
This instrument intended to use in Scientific Research Only!
2. Safety Tips
The operation, maintenance and repair of the Instrument should comply with the basic
guidelines and the remarked warning below. If you don’t comply with them, it will have
effect on the scheduled using life of the Instrument and the protection provided.
Indoor use only.
Warning: Biological contamination!! All samples for test, quality control,
calibration are regarded as infectious, and any part contact with samples
will also need to be treated as infectious. Please wear gloves when operate
this device.
Before using the device, read the Manual carefully. These units are
designed for use in laboratory environments. The device must be used by
skilled personnel with the appropriate training.
Warning: Avoid injury. Keep your body or any part of body away 15cm (or
more) from the instrument when running.
Users should have a clear main idea on how to use this instrument before
operate, do read this user manual carefully.
DOMINIQUE DUTSCHER SAS

IV
The operator should not open or repair the Instrument by himself, which
will result in losing the qualification of repair guarantee or occur accident.
If there is some wrong with the Instrument, please contact manufacturer
for repair.
Before power on, guarantee the voltage used should be accordant to the
voltage needed, and the rated load of electrical outlet should not lower
than the demand.
If the electric line is damaged, you should replace it with the same type. You
should assure there’s nothing on the electric line and you should not put
the electric line in the ambulatory place.
Hold the socket when you pull out the plug, and don’t pull the electric line
only.
The Instrument should be put in the place of low temperature, less dust, no
water and no sun or strong lamp. What’s more, the place should be good
ventilation, no corrosively gas or strong disturbing magnetic field, far away
from central heating, camp stove and other hot resource.
Power off when you finish your work. Pull off the connector plug when
there’s long time no use of the Instrument and cover it with a cloth or
plastic paper to prevent from dust.
Pull the connector plug from the socket at once in the following cases, and
contact the vendor:
There is some liquid flowing into the Instrument;
Drenched or fire burned.
Abnormal operation: such as abnormal sound or smell.
Instrument dropping or outer shell damaged.
Malfunction
DOMINIQUE DUTSCHER SAS

Contents
Foreword.................................................................................................................................................... II
Opening check............................................................................................................................................II
Safety Warning and Guidelines................................................................................................................ III
1. Important information for safe use.............................................................................................. III
2. Safety Tips..................................................................................................................................... III
Chapter 1 Brief Introduction....................................................................................................................1
Chapter 2 Features.................................................................................................................................. 2
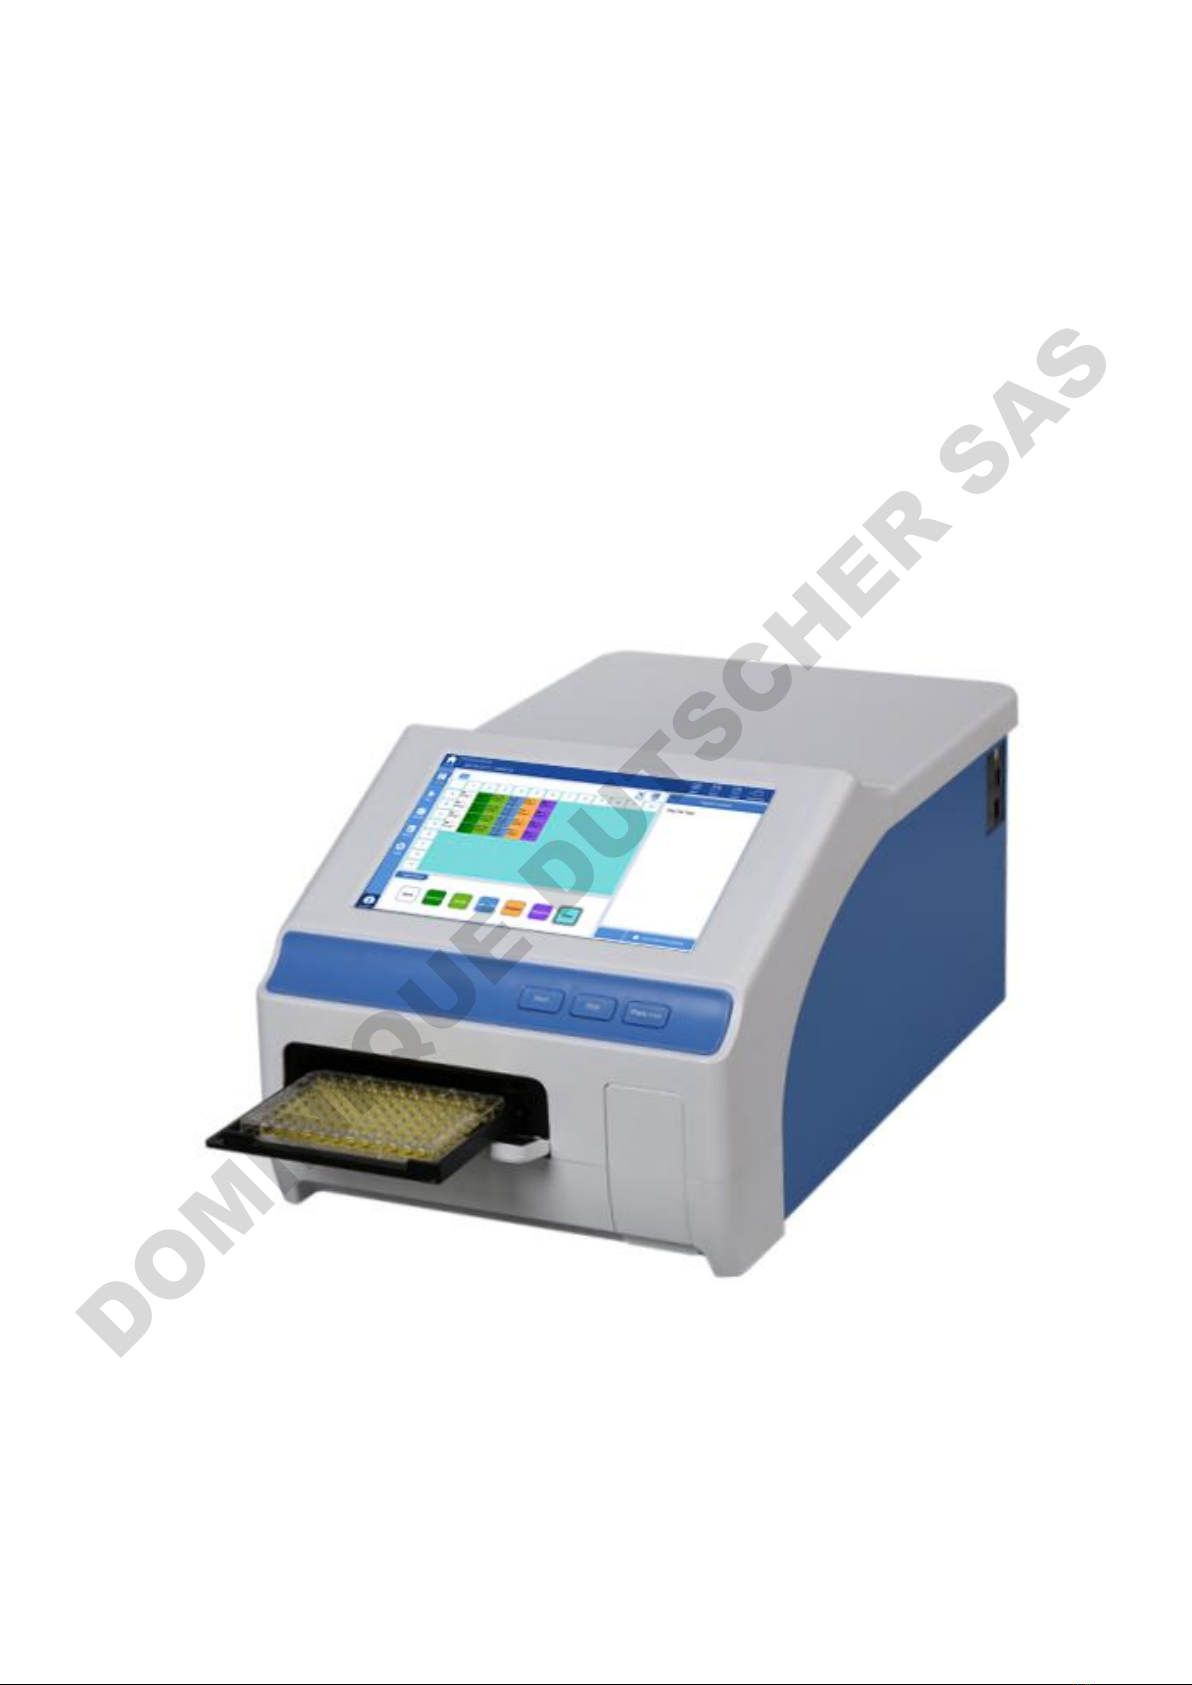
Chapter 3 Instrument Structure.............................................................................................................. 3
Chapter 4 Installation.............................................................................................................................. 4
1. Opening check................................................................................................................................ 4
2. Installation...................................................................................................................................... 4
3. Installation steps............................................................................................................................. 4
Chapter 5 Operation Guide..................................................................................................................... 6
1. Instrument self-check..................................................................................................................... 6
2. System settings............................................................................................................................... 7
3. Protocol Management.................................................................................................................... 8
4. Read a Microplate.........................................................................................................................10
5. Result processing.......................................................................................................................... 16
6. Report exporting...........................................................................................................................23
7. Power off.......................................................................................................................................23
Chapter 6 Maintenance, storage, transportation................................................................................. 24
1. Maintenance................................................................................................................................. 24
2. Storage and transportation.......................................................................................................... 24
Chapter 7 Trouble shooting................................................................................................................... 25
DOMINIQUE DUTSCHER SAS

FlexA-200 Microplate Reader Operation Manual Chapter 1 Brief Introduction
─1─
Chapter 1 Brief Introduction
This automatic microplate reader FlexA-200 is professional instrument for ELISA ,
measuring concentration, absorbance, positive or negative of the antibody and antigen
in the sample by testing the color of the Enzyme - Linked Immunosorbent Assay (ELISA).
This reader is widely used in clinical test, biology agriculture, food and environment
research, especially benefit from ELISA kits increasingly wide utilization.
Highlights:
1) With 10-inch touch screen.
2) Operating system allows acquisition, editing and saving of data.
3) It can be used alone, and also connect with PC by ReaderIt-II software for
plenty of data analysis.
4) 96-well visual layout allows easy setting of blank, sample, positive/negative,
quality control and multi-value comparison.
5) With dual optical system, as well as reference optical channel which guarantee
stable detection data.
6) End point method, kinetics and spectral scanning are available, as well as plates
with or without lids.
7) Xenon lamp with long lifetime which can reach to 109times.
8) With incubation function, the average temperature deviation between
wells≤0.5°C.
9) Self-checking optical path, top reading and mechanical motion.
10) With shaking function, time and speed are adjustable.
11) It supports USB data export, fast and easy to operate.
12) System multi-user hierarchical operation, easy for data management.
DOMINIQUE DUTSCHER SAS

FlexA-200 Microplate Reader Operation Manual Chapter 2 Features
─2─
Chapter 2 Features
Working conditions:
Ambient temperature: 10C~40C
The relative humidity: 30%~80%(No condensation)
Power: AC100-240V 50-60Hz 2A
Parameters:
Model
Parameter
FlexA-200
Light source
Xenon flash lamp / >109flashes
Wavelength
200~1000nm
Bandwidth
≤2.5nm
Wavelength accuracy
2nm
Wavelength repeatability
0.2nm
Read-out range
0.0-4.0 OD
Linearity@450nm
R2≥0.995 , (0.0 - 3.0]
Accuracy@450nm
±(1.0% + 0.003A) , (0 - 2.0]
±2.0% , (2.0 - 2.5]
Precision@450nm
CV < 0.5% (Precision mode); CV < 1.0% (Fast mode)
Stability@450nm
< 0.005A , (0.0 - 2.0]
< 2% , (2.0 - 2.5]
Measurement speed
< 10 seconds at Fast mode (96-well plate)
< 30 seconds at Precision mode (96-well plate)
Plate shaking
Linear
Incubation range
RT+ 4°C to 45°C
Temp. uniformity
±0.5°C @ 37°C
Connections
1 B-type of USB port for PC
1 Ethernet port
2 A-type of USB ports for devices
Power requirements
DC24V 6.67A 160W
Dimension (WXDXH)
300 x 500 x 290mm
Weight (kg)
15kg
DOMINIQUE DUTSCHER SAS

FlexA-200 Microplate Reader Operation Manual Chapter 3 Instrument Structure
─3─
Chapter 3 Instrument Structure
Structure
Rear cover
Touch screen
Roof cover
External Button
Plate holder
Front door
Extension module
USB Port
LAN Port
Switch
Power Socket
B-type
USB Port
Air outlet
DOMINIQUE DUTSCHER SAS

FlexA-200 Microplate Reader Operation Manual Chapter 4 Installation
─4─
Chapter 4 Installation
1. Opening check
Each FlexA-200 is thoroughly tested before shipping, but please check again when you receive the
instrument and contact your local distributor or manufacturer if:
•The outer package is damaged
•The outer package has any obvious moisture stains
•The outer package has marks of impact
•The outer package has signs of being opened
After opening, please check the instrument and box contents.
Confirm that all ordered accessories have been included.
Check the instrument’s appearance for any damage.
2. Installation
Working condition: locate instrument on a flat dry and clean work table, keep the front side
with enough space for plate holder in and out, also keeping 15cm space for back, left and right
side to enable put or connect wires.
Working environment:
a. Clean air free from corrosion steam or smoke.
b. Temperature should be within the range of +10°C ~ +40°C.
c. Relative humidity should be within the range of 30% ~ 80% to avoid condensation.
Note: KEEP INSTRUMENT AWAY FROM DESTRUCTIVE GAS OR LIQUID!
3. Installation steps
1Place the instrument on a stable and level surface.
Note: Please DO NOT loose any screw or parts without permission, or it will cause
instrument damage and make it out of warranty.
2Connect the instrument to an appropriate power outlet using the provided power cord.
Fig. 1
DOMINIQUE DUTSCHER SAS

FlexA-200 Microplate Reader Operation Manual Chapter 4 Installation
─5─
Note: Attention to the interface of the power adapter, please connect it to the power
according to the direction of the above picture.
3Switch “I/O” button to “I” to turn on the instrument, the front panel will cycle through a
start-up and self-test screen.
Warning: Don’t connect instrument to power socket without ground wire.
DOMINIQUE DUTSCHER SAS

FlexA-200 Microplate Reader Operation Manual Chapter 5 Operation Guide
─6─
Chapter 5 Operation Guide
1. Instrument self-check
This chapter introduces default protocol operation, beginning with self-check after power on.
Refer to the picture below:
Fig 2
User login interface will appear after self-checking, see Fig 3.
Fig 3
DOMINIQUE DUTSCHER SAS

FlexA-200 Microplate Reader Operation Manual Chapter 5 Operation Guide
─7─
Table 1
User type
Creation
Method
Default password
Permission
Export
Admin
Can not be
deleted
“123456”
For all files of Admin,
User and Guest
All can be
exported
User
Created by
Admin
Default is “123456” or
set when creating
Only for their own
files
Guest
Can not be
deleted
No password
Note: Please keep the Admin password, or contact the manufacturer or your distributor when
forgotten the password of Admin.
Home interface as below Fig 4.
Fig 4
The “Admin” button on the lower left is for logout to login interface.
2. System settings
Users can can make system settings according to their needs, details see Fig 5.
DOMINIQUE DUTSCHER SAS

FlexA-200 Microplate Reader Operation Manual Chapter 5 Operation Guide
─8─
Fig 5
Note: 1. The instrument need to be restarted after date and time settings finished.
2. The function of maintenance is only for manufacturer use, does not open for users.
3. Click “Home” button on top left corner for the main interface.
3. Protocol Management
Click “Absorbance” to Fig 6 interface. This interface mainly composed by six parts: the
navigation bar at the top, the sidebar, the main display area, the optional bar, switching bar/type
select area and the status bar at the lower right area.
Fig 6
The navigation bar
The optional bar
Switching bar
The Sidebar
The main display area
DOMINIQUE DUTSCHER SAS

FlexA-200 Microplate Reader Operation Manual Chapter 5 Operation Guide
─9─
Protocol name can be modified by clicking it directly.
The default name of a new protocol is the system time, and it
can be modified by manual. A hint will pop-up when a
modified protocol not saved.
Save is for the current protocol saving which can be found in
protocol list.
A shortcut for exporting raw data to U disk in format of csv.
Including sorting, delete, import, export, rename and save as
etc. Protocol list will be appear if clicking “Protocols” button,
see Fig 7, click blank area will close the protocol list interface.
Unfold state Protocol edit state
Fig 7
DOMINIQUE DUTSCHER SAS

FlexA-200 Microplate Reader Operation Manual Chapter 5 Operation Guide
─10 ─
When the protocol list is in unfold state, users can do below operations:
Search: Enter keyword to carry out searching automatically.
Sorting: protocols can be sorted according to “Name”, “Date” and “State”. “demo1”,
“demo2” and “demo3” are always line on the first three position.
Import: importing protocols from U disk to instrument.
Rename: for protocol name changing.
Save as: save as a new protocol.
Edit: “Edit” button is locate on the top right corner, see Fig 7 unfold state.
Account: Protocols of other accounts can be checked, but this function is only available for
Admin account.
When protocol list in edit state, below operations are available:
Sorting: protocols can be sorted according to “Name”, “Date” and “State”.
Checkbox: “” can be chosen for more than one for batch operation.
Delete: delete selected protocols.
Export: for exporting selected protocols to U-disk.
Cancel: Return to the unfold state of protocol list.
4. Read a Microplate
After protocol created, the next step is parameter settings according to experiment
requirements.
4.1 Plate layout setting
The interface will move to layout interface automatically after finishing create a new
protocol.
Fig 8
DOMINIQUE DUTSCHER SAS

FlexA-200 Microplate Reader Operation Manual Chapter 5 Operation Guide
─11 ─
Meanwhile, the switching bar will turn out to be type select which includes 6 sample types, as
well as clear option. Choose the right sample type, the optional bar will change accordingly, then
click corresponding wells of the main display area to finish the settings.
Note: the whole plate can be set if clicking the blank area on top left corner of the main display
area.
With white color on the interface, it is as blank control during
running measurement. All blanks are duplicate wells in a same
group.
Standard sample well which is used for creating standard
curve, it is with green color. The optional bar will changed
after clicking “Standard”, see Fig 9.
Replicates: switch it on when setting the same standard
for multiple wells.
Concentrations: After setting the concentration and unit of the
first well, the protocol will finish subsequent standard samples
automatically according to the set operator and step size, also
users can modify by manual by clicking corresponding wells.
Eg.: If the set concentration is 125ng/μL, the operator is “×” and
the step size is “2”, the concentration of the first well should be
125ng/μL, the second well 250ng/μL and the third 500ng/μL… etc.
Sample groups: one sample group can have one standard curve.
For quality control during tests, it is with light green. It
includes replicates and sample group, settings are the same as
wells of standard samples.
With blue color, users can set several wells as unknown well,
besides replicates and sample group, it has another option
“Factor” for the dilution times of the solution, so as to get the
concentration of the solution directly.
1: X means a solution was diluted by X times.
With orange color, users can set several wells as positive, as
well as sample groups.
With purple, also several wells can be set as negative, and
sample groups as well.
For clearing sample well settings.
DOMINIQUE DUTSCHER SAS

FlexA-200 Microplate Reader Operation Manual Chapter 5 Operation Guide
─12 ─
Fig 9
Note: Elisa plate layout can be carried out before or after testing, for example, users can set
all wells as “unknown”, do absorbance test, then layout of plate. The test data and layout are
separated, users can modify or analyze the layout of historical data in real time.
Remark: the absorbance value of the test can not be changed!
4.2 Parameter setting
After finishing the Elisa plate layout settings, click “Run” on the side bar to Fig 10.
Fig 10
Meanwhile the switching bar will turn out to be controller which mainly includes below
DOMINIQUE DUTSCHER SAS

FlexA-200 Microplate Reader Operation Manual Chapter 5 Operation Guide
─13 ─
functions:
Incubator: this function can make the plate detection chamber up to specified
temperature, the temperature displays is the real time temperature.
Wavelength: shows wavelength parameters of the current protocol.
Shake: this function can be on or off
Progress bar: displays the running status of the current protocol.
Plate in/out: control the plate holder in and out, also there is Physical button on the front
of the enclosure.
Start/Stop: also Physical button on the front of the enclosure.
Shake: this button is independent from the shaking function in settings, and specially used
for plate defoaming.
Meanwhile, the optional bar turns out to be step settings which separated into three settings
according to different specific measurement method: Endpoint, Kinetic and Spectrum, for more
details see below table 2.
DOMINIQUE DUTSCHER SAS

FlexA-200 Microplate Reader Operation Manual Chapter 5 Operation Guide
─14 ─
Table 2
Endpoint
Kinetic
Spectrum
┗Selected Parameters
┗Wavelength
┗Mode
┗Fast
┗Precision
┗Wavelength
┗λ1 (405)
┗λ2 (450)
┗λ3 (492)
┗λ4 (630)
┗Wavelength
┗Mode
┗Fast
┗Precision
┗Wavelength
┗λ1 (405)
┗λ2 (450)
┗λ3 (492)
┗λ4 (630)
┗Wavelength
┗Mode
┗Fast
┗Precision
┗Wavelength
┗Start Wavelength
┗End Wavelength
┗Step
┗Kinetic
┗Total Time
┗Total Time
┗Kinetic region
┗No. of readings
┗Number
┗Kinetic region
┗Shake
┗Speed
┗Low
┗Medium
┗High
┗Type
┗Continuous
┗Pulsed
┗Time
┗Shake
┗Speed
┗Low
┗Medium
┗High
┗Type
┗Continuous
┗Pulsed
┗Time
┗Shake
┗Speed
┗Low
┗Medium
┗High
┗Type
┗Continuous
┗Pulsed
┗Time
┗Wait Time at start
┗Wait Time at start
┗Wait Time at start
┗Area Selection
┗Area Selection
┗Area Selection
About wavelength option, Endpoint and Kinetic configured with four wavelengths(defaults are
405nm, 450nm, 492nm and 630nm), users can click modify wavelength by manual, but the value
must be within the range 200nm~1000nm. Spectral analysis can accept wavelength of any band,
but also should be within 200nm~1000nm.
In addition, there is a button named “Log” on top right corner of the main display area, the
button is only available after the current protocol been executed.
The “Log” is mainly used for recording the finishing time of each step of the protocol.
Note: Steps can not be edited if a protocol been executed, users can save it as a new one and
then edit.
DOMINIQUE DUTSCHER SAS

FlexA-200 Microplate Reader Operation Manual Chapter 5 Operation Guide
─15 ─
4.3 Detect a Elisa plate
Click “ ” on screen or “Plate in/out” on the front of the enclosure, place an Elisa plate
on the plate holder, attention to the direction please, see Fig 11.
Fig 11
Click button “ ” on screen or pressing “Start” button on the enclosure. If the protocol has
been implemented, a hint will pop out for re-naming the protocol, input a new name, click “ok” to
run the protocol, meanwhile, the plate holder will move into the Reader for sample detection, the
screen will turn dark as Fig 12 and all buttons will unavailable except stop button “ ” , or users
can press “Stop” button on the enclosure.
Fig 12
DOMINIQUE DUTSCHER SAS
Table of contents
Other DUTSCHER Laboratory Equipment manuals