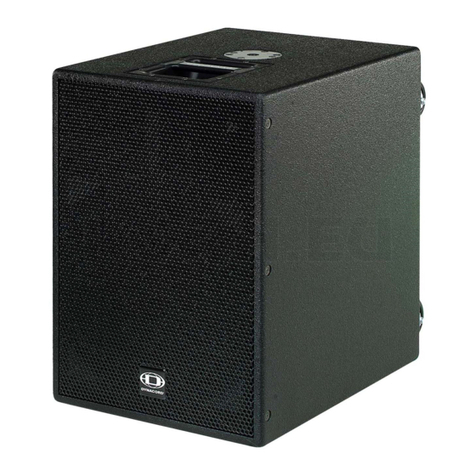
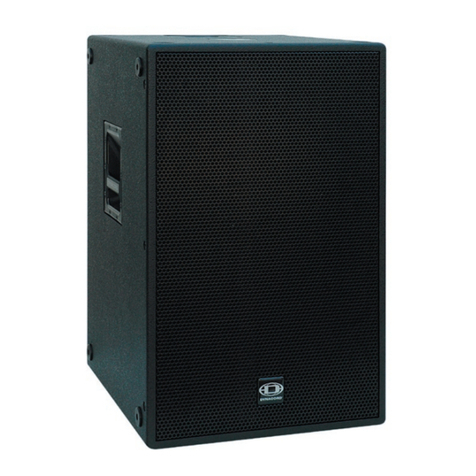
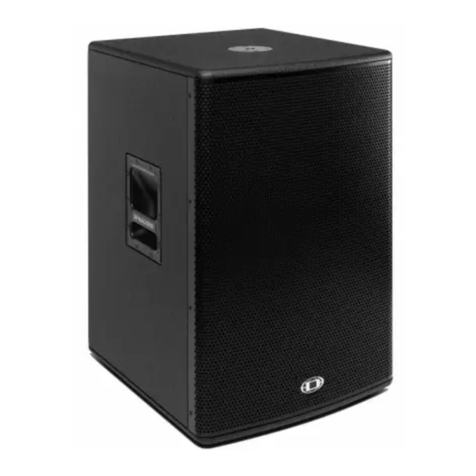
Dynacord PSD 218 User manual

PSD 215 | 218
POWERED SUBWOOFER
Owner‘s Manual | Bedienungsanleitung

PSD 215 | 218
2

PSD 215 | 218
3
CONTENTS
INTRODUCTION . . . . . . . . . . . . . . . . . . . . . . . . . . . . . . . . . . . . . . . . . . . . . . . . . . . . . . . . . . . . . . . . . . . . . . . . . . . . . . . 5
Scope of Delivery, Unpacking and Inspection . . . . . . . . . . . . . . . . . . . . . . . . . . . . . . . . . . . . . . . . . . . . . . . . . . 5
Warranty . . . . . . . . . . . . . . . . . . . . . . . . . . . . . . . . . . . . . . . . . . . . . . . . . . . . . . . . . . . . . . . . . . . . . . . . . . . . . . . 5
HF-Interference . . . . . . . . . . . . . . . . . . . . . . . . . . . . . . . . . . . . . . . . . . . . . . . . . . . . . . . . . . . . . . . . . . . . . . . . . . 5
INSTALLATION . . . . . . . . . . . . . . . . . . . . . . . . . . . . . . . . . . . . . . . . . . . . . . . . . . . . . . . . . . . . . . . . . . . . . . . . . . . . . . . . 6
Controls, Indicators and Connections . . . . . . . . . . . . . . . . . . . . . . . . . . . . . . . . . . . . . . . . . . . . . . . . . . . . . . . . 6
Menu mode . . . . . . . . . . . . . . . . . . . . . . . . . . . . . . . . . . . . . . . . . . . . . . . . . . . . . . . . . . . . . . . . . . . . . . . . . . . . . 8
Power amplifer and cooling . . . . . . . . . . . . . . . . . . . . . . . . . . . . . . . . . . . . . . . . . . . . . . . . . . . . . . . . . . . . . . . . 12
Quickstart . . . . . . . . . . . . . . . . . . . . . . . . . . . . . . . . . . . . . . . . . . . . . . . . . . . . . . . . . . . . . . . . . . . . . . . . . . . . . . 12
SPECIFICATIONS . . . . . . . . . . . . . . . . . . . . . . . . . . . . . . . . . . . . . . . . . . . . . . . . . . . . . . . . . . . . . . . . . . . . . . . . . . . . . . 24
Block Diagram . . . . . . . . . . . . . . . . . . . . . . . . . . . . . . . . . . . . . . . . . . . . . . . . . . . . . . . . . . . . . . . . . . . . . . . . . . . 25
Dimensions . . . . . . . . . . . . . . . . . . . . . . . . . . . . . . . . . . . . . . . . . . . . . . . . . . . . . . . . . . . . . . . . . . . . . . . . . . . . . 26
Setup Examples . . . . . . . . . . . . . . . . . . . . . . . . . . . . . . . . . . . . . . . . . . . . . . . . . . . . . . . . . . . . . . . . . . . . . . . . . 27
INHALT
EINFÜHRUNG . . . . . . . . . . . . . . . . . . . . . . . . . . . . . . . . . . . . . . . . . . . . . . . . . . . . . . . . . . . . . . . . . . . . . . . . . . . . . . . . . 15
Lieferumfang, Auspacken und Überprüfen . . . . . . . . . . . . . . . . . . . . . . . . . . . . . . . . . . . . . . . . . . . . . . . . . . . . . 15
Garantie . . . . . . . . . . . . . . . . . . . . . . . . . . . . . . . . . . . . . . . . . . . . . . . . . . . . . . . . . . . . . . . . . . . . . . . . . . . . . . . 15
INSTALLATION . . . . . . . . . . . . . . . . . . . . . . . . . . . . . . . . . . . . . . . . . . . . . . . . . . . . . . . . . . . . . . . . . . . . . . . . . . . . . . . . 16
Bedienelemente, Anzeigen und Anschlüsse . . . . . . . . . . . . . . . . . . . . . . . . . . . . . . . . . . . . . . . . . . . . . . . . . . . . 16
Menü . . . . . . . . . . . . . . . . . . . . . . . . . . . . . . . . . . . . . . . . . . . . . . . . . . . . . . . . . . . . . . . . . . . . . . . . . . . . . . . . . . 18
Leistungsverstärker und Kühlung . . . . . . . . . . . . . . . . . . . . . . . . . . . . . . . . . . . . . . . . . . . . . . . . . . . . . . . . . . . . 22
Quickstart . . . . . . . . . . . . . . . . . . . . . . . . . . . . . . . . . . . . . . . . . . . . . . . . . . . . . . . . . . . . . . . . . . . . . . . . . . . . . . 23
SPECIFICATIONS . . . . . . . . . . . . . . . . . . . . . . . . . . . . . . . . . . . . . . . . . . . . . . . . . . . . . . . . . . . . . . . . . . . . . . . . . . . . . . 24
Block Diagram . . . . . . . . . . . . . . . . . . . . . . . . . . . . . . . . . . . . . . . . . . . . . . . . . . . . . . . . . . . . . . . . . . . . . . . . . . . 25
Dimensions . . . . . . . . . . . . . . . . . . . . . . . . . . . . . . . . . . . . . . . . . . . . . . . . . . . . . . . . . . . . . . . . . . . . . . . . . . . . . 26
Setup Examples . . . . . . . . . . . . . . . . . . . . . . . . . . . . . . . . . . . . . . . . . . . . . . . . . . . . . . . . . . . . . . . . . . . . . . . . . 27

PSD 215 | 218
4
IMPORTANT SAFETY INSTRUCTIONS
1. Read these instructions.
2. Keep these instructions.
3. Heed all warnings.
4. Follow all instructions.
5. Do not use this apparatus near water.
6. Clean only with a dry cloth.
7. Do not cover any ventilation openings. Install in accordance with the manufacturer’s instructions.
8. Do not install near heat sources such as radiators, heat registers, stoves, or other apparatus (including amplifiers) that produce heat.
9. Do not defeat the safety purpose of the polarized or the grounding-type plug. A polarized plug has two blades with one wider than the other. A grounding type plug has two
blades and a third grounding prong. The wide blade or the third prong are provided for your safety. If the provided plug does not fit into your outlet, consult an electrician
for replacement of the obsolete outlet.
10. Protect the power cord from being walked on or pinched particularly at plugs, convenience receptacles, and the point where they exit from the apparatus.
11. Only use attachments/accessories specified by the manufacturer.
12. Use only with the cart, tripod, bracket, or table specified by the manufacturer, or sold with the apparatus. When a cart is used, use caution when moving
the cart/apparatus combination to avoid injury from tip-over.
13. Unplug this apparatus during lightning storms or when unused for a long period of time.
14. Refer all servicing to qualified service personnel. Servicing is required when the apparatus has been damaged in any way, such as power-supply cord or
plug is damaged, liquid has been spilled or orbjects have fallen into the apparatus, the apparatus has been exposed to rain or moisture, does not operate
normally, or has been dropped.
15. Do not expose this equipment to dripping or splashing and ensure that no objects filled with liquids, such as vases, are placed on the equipment.
16. To completely disconnect this equipment from the AC Mains, disconnect the power supply cord plug from the AC receptacle.
17. The mains plug of the power supply cord shall remain readily operable.
18. No naked flame sources, such as lighted candles, should be placed on the apparatus.
19. The product should be connected to a mains socket outlet with a protective earthing connection.
IMPORTANT SERVICE INSTRUCTIONS
CAUTION: These servicing instructions are for use by qualified personnel only. To reduce the risk of electric shock, do not
perform any servicing other than that contained in the Operating Instructions unless you are qualified to do so. Refer
all servicing to qualified service personnel.
1. Security regulations as stated in the EN 60065 (VDE 0860 / IEC 65) and the CSA E65 - 94 have to be obeyed when servicing the appliance.
2. Use of a mains separator transformer is mandatory during maintenance while the appliance is opened, needs to be operated and is connected to the mains.
3. Switch off the power before retrofitting any extensions, changing the mains voltage or the output voltage.
4. The minimum distance between parts carrying mains voltage and any accessible metal piece (metal enclosure), respectively between the mains poles has to be 3 mm and
needs to be minded at all times. The minimum distance between parts carrying mains voltage and any switches or breakers that are not connected to the mains
(secondary parts) has to be 6 mm and needs to be minded at all times.
5. Replacing special components that are marked in the circuit diagram using the security symbol (Note) is only permissible when using original parts.
6. Altering the circuitry without prior consent or advice is not legitimate.
7. Any work security regulations that are applicable at the locations where the appliance is being serviced have to be strictly obeyed. This applies also to any regulations
about the work place itself.
8.
All instructions concerning the handling of MOS-circuits have to be observed.
Speakon is a registered trademark of Neutrik AG
The lightning flash with arrowhead symbol, within an equilateral
triangle is intended to alert the user to the presence of uninsulated
”dangerous voltage” within the product’s enclosure that may be of
sufficent magnitude to constitute a risk of electric shock to per-
sons.
The exclamation point within an equilateral triangle is intended to
alert the user to the presence of important operating and
maintance (servicing) instructions in the literature accompanying
the appliance.
NOTE: SAFETY COMPONENT (MUST BE REPLACED BY ORIGINAL PART)

PSD 215 | 218
5
1 Introduction
The PSD 215 and PSD 218 are high-performance powered
subwoofers designed to simplify creating active 2-way sys-
tems. They use an integrated 2-channel digital power am-
plifier with internal 24-bit 1-into-3 DSP controller to
optimize the sound quality and protect the subwoofer and
full range system used with it. Examples for such systems
are combinations of PSD subwoofers with full-range D-Li-
te, Corus and VariLine and the new TS 400 array cabinet.
Both models are vented direct-radiators exhibiting out-
standing transient response and capable of delivering very
high sound pressure levels. The enclosures are made from
well braced 15 mm Baltic birch plywood with a protective
coating capable of withstanding the rigors of use on the
road. Recessed handles are ergonomically shaped to en-
sure easy transportation and setting-up – tasks further fa-
cilitated by the tour grade castors. A recessed stand
adaptor with an M20 thread is provided on the top of the
enclosure for the pole-mounting of full-range systems. The
horizontal format of the enclosure allows placement be-
neath the stage or provides an exceptionally stable base
for pole-mount speakers.
The PSD 215 is equipped with a 15" Electro-Voice
DVX3159 woofer specially developed for use in compact
subwoofers. It sets a new standard for minimum size and
maximum acoustic output, while maintaining impressive
deep bass high sound pressure levels.
The PSD 218 with an 18" Electro-Voice DVX3180 long-ex-
cursion woofer delivers the performance demanded of 18"
subwoofers in professional concert sound applications. It
produces extended low frequency response from a com-
pact enclosure with plenty of punch.
Both models use a highly efficient Class D technology am-
plifier and a microprocessor-controlled switched-mode
power supply to deliver 2 x 1000 watts RMS into 4 ohms
for highest quality audio performance. All DYNACORD
power amplifiers are capable of withstanding the most ex-
treme rigors of touring, they are protected against over-
heating, overload, short circuit, back EMF and open-circuit
operation as well as HF or DC at the output. Thermal sta-
bility is assured by an extremely quiet continuously vari-
able speed fan. PROTECT and LIMIT LEDs indicate the
current operating status of the power amplifiers.
The integrated 24-bit digital controller with internal 48-bit
double-precision resolution exhibits a 1-into-3 topology:
SUB channel, TOP channel and an additional DSP Out. The
stored factory presets are optimized for combinations with
DYNACORD fullrange cabinetts. Generic presets for other
combinations and special programs for cardioid and bass
arrays are also provided. The system-alignment-delay, the
polarity and naturally also the level can be edited by the us-
er. The System EQ allows adjustments to be made for the
acoustics of the room. The DSP Out also offers an adjust-
able delay, high-pass and shelving equalizer as well as a
level control. It is therefore ideally adapted, among other
things, to the use of an active delay box. Signal generators
with sine, pink noise or spike pulses are integrated to facil-
itate tuning the PA and the setting of delay times. In all, 25
program locations are provided (20 factory presets + 5
user memories). All three channels are equipped with
state-of-the-art look-ahead peak anticipation limiters, the
SUB channel also includes a Thermal Energy Management
and Protection (TEMP) limiter. The TEMP limiter provides
thermal protection for the transducer.
1.1 Scope of Delivery, Unpacking and
Inspection
Carefully open the packaging and take out the cabinet. In-
spect the cabinet’s enclosure for damages that might have
occured during transportation. Each cabinet is examined
and tested in detail before leaving the manufacturing site
to ensure that it arrives in perfect condition at your place.
Please inform the transport company immediately if the
cabinet shows any damage. Being the addressee, you are
the only person who can claim damages in transit. Keep
the cardboard box and all packaging materials for inspec-
tion by the transport company.
Keeping the cardboard box including all packing materials
is also recommended, if the cabinet shows no external
damages.
HINT: Do not ship the cabinet in any other than its orig-
inal packaging.
Packing the cabinet like it was packed by the manufacturer
guarantees optimum protection from transport damage.
1.2 Warranty
Visit www.dynacord.com for warranty information.
1.3 HF-Interference
This equipment has been tested and found to comply with
the limits for a Class B digital device, pursuant to Part 15
of the FCC Rules. These limits are designed to provide rea-
sonable protection agains harmful interference in a resi-
dential installation. This equipment generates, uses and
can radiate radio frequency energy and, if not installed and
used in accordance with the instructions, may cause harm-
ful interference to radio communications. However, there
is no guarantee that interference will not occur in a partic-
ular installation. If this equipment does cause harmful in-
terference to radio or televsion reception, which can be
determined by turning the equipment off and on, the user
is encouraged to try to correct the interference by one or
more of the following measures:
•1ActiveSubwoofer
• 1 Owner‘s Manual (this document)
• 1 Mains Cord (lockable)
• 1 Warranty Certificate including Safety Instructions
• Reorient or relocate the receiving antenna
• Increase the separation between the equipment and receiver
• Connect the equipment into an outlet on a circuit different from that
to which the receiver is connected
• Consult the dealer or an experienced radio/TV technician for help
PSD 215 | 218
6
2 Installation
2.1 Controls, Indicators and Connections
PROTECT
PARAMETER
MENU/ENTER
DESIGNED AND ENGINEERED IN GERMANY.
MAINS IN ON
OFF
PSD
POWERED SYSTEM SUBWOOFER
3200 W MAXIMUM AMPLIFIER OUTPUT CAPABILITY
INPUT THRU
SERVICE
DSP OUT
OUTPUT WIRING CLASS 2
TOP SPEAKER
OUTPUT
EXTERNAL SUB
OUTPUT
MIN. LOAD
IMPEDANCE
8 OHMS
MIN. LOAD
IMPEDANCE
4 OHMS
THIS DEVICE COMPLIES WITH PART 15 OF THE FCC RULES. OPERATION
IS SUBJECT TO THE FOLLOWING TWO CONDITIONS: 1. THIS DEVICE
MAY NOT CAUSE HARMFUL INTERFERENCE, AND 2. THIS DEVICE
MUST ACCEPT ANY INTERFERENCE RECEIVED, INCLUDING
INTERFERENCE THAT MAY CAUSE UNDESIRED OPERATION.
RISK OF ELECTRIC SHOCK
DO NOT OPEN
CAUTION
WARNING:
THIS LOUDSPEAKER SYSTEM CAN PERMANENTLY DAMAGE HEARING!
USE EXTREME CARE WHEN SETTING SOUND PRESSURE LEVELS!
WARNING:
AVIS:
THIS CLASS B DIGITAL APPARATUS COMPLIES WITH CANADIAN
ICES-003. CET APPAREIL NUMÉRIQUE DE LA CLASSE B EST
CONFORME À LA NORME NMB-003 DU CANADA.
SHOCK, DO NOT EXPOSE THIS APPLIANCE TO RAIN OR MOISTURE.
TO REDUCE THE RISK OF FIRE OR ELECTRIC
LIMIT
ON
RISQUÉ DE CHOC ELECTRIQUE - NE PAS OUVRIR
10 8 7 5
4
9
11
2
6
3
1
12
13
Number Description
1Mains connector, lockable (MAINS IN)
2Mains switch (ON/OFF)
3Output connector (Speakon) for sub audio signal (EXTERNAL SUB OUTPUT)
4Output connector (Speakon) for mid/hi audio signal (TOP SPEAKER OUTPUT)
5USB connector (SERVICE)
6Output connector (XLR) for DSP line level audio signal (DSP OUT)
7Output connector (XLR) for line level audio signal (THRU)
8Input connector (XLR or phone) for line level audio signal (INPUT)
9MENU/ENTER rotary encoder
10 Display with four function keys
11 Protection indicator (PROTECT)
12 Limit indicator (LIMIT)
13 Power on/off indicator (ON)

PSD 215 | 218
7
1 MAINS CONNECTOR (MAINS IN)
The PSD receives its power supply via
the lockable MAINS IN connector. Only
the provided power cord may be used.
Connect the PSD only to a mains net-
work, which corresponds to the requi-
rements indicated on the type plate.
Press the yellow button at the plug to disconnect the pow-
er cord.
2 MAINS SWITCH (ON/OFF)
Mains switch for switching the unit‘s power
ON or OFF. The ON LED lights after turning
the power ON. If the mains cord is correctly
connected, mains voltage is present and the
LED does not light upon power-on, please
contact your local dealer.
3 OUTPUT FOR SUB SIGNAL (EXTERNAL SUB OUTPUT)
This output socket is for the connec-
tion of an additional passive subwoo-
fer. The PSD has a built-in DSP for
signal processing of the signal
applied to the INPUT port. The lower
band of the processed signal is
played back by the PSD and is also
present at this output. We recommend connecting a
PSE 215 to a PSD 215 or a PSE 218 to a PSD 218.
HINT: Only connect subwoofers with a minimum power
rating of 500 WRMS and a minumum impedance
of 8 ohms.
4 OUTPUT FOR MID/HI SIGNAL (TOP SPEAKER OUTPUT)
This output socket is for the connec-
tion of a passive satellite cabinet.
The PSD has a built-in DSP for signal
processing of the signal applied to
the INPUT port. The upper band of
the processed signal is present at
this output. The output provides a
power capacity of up to 1000 WRMS into 4 ohms.
HINT: The minimum allowable impedance at the TOP
SPEAKER OUTPUT is 4 ohms.
5 USB CONNECTOR (SERVICE)
This connector is reserved for future func-
tions.
6 OUTPUT FOR DSP OUT SIGNAL (DSP OUT)
The DSP output signal – i.e. the post-digital-si-
gnal-processing-unit audio signal – is present
at the DSP OUT connector. The DSP OUT can
be utilized for feeding the digitally processed
audio signal from the PSD to additional powe-
red speakers or amplifiers (without DSP mo-
dule). Use the DSP OUT Settings dialog (see page 10) in
the menu for configuring the output signal. The output si-
gnal is electronically balanced with a maximum level of
+15 dBu. Output impedance is 150 ohms.
7 OUTPUT CONNECTOR (THRU)
The output connector provides the INPUT si-
gnal for ”carrying through“ the input signal.
This allows a simple cabling from one device
to another.
8 INPUT CONNECTOR FOR AUDIO SIGNAL (INPUT)
Electronically balanced input for the connec-
tion of a line level signal source such as mixer,
signal processor, etc. Establishing a connec-
tion is possible via phone or XLR-type plugs.
Whenever possible, balanced signal feed is
always preferable to guard against potential
noise or HF-interference.
9 ROTARY ENCODER (MENU/ENTER)
Adjust the volume (SUB Level) of the PSD by
turning the MENU/ENTER rotary encoder. In
menu mode (see page 8) the MENU/ENTER
rotary encoder is used for navigation and for
selecting and editing parameters. Press the
MENU/ENTER rotary encoder to select or
execute the highlighted menu item.
10 DISPLAY WITH FOUR FUNCTION KEYS
The PSD includes a premium OLED display. Compared to
general LC displays the OLED display is brighter, has a
greater contrast ratio and a wider viewing angle. The start
screen appears after switching the PSD on. After a few
seconds the active preset and other system parameters
are displayed. Now you can adjust the volume (SUB Level)
of the PSD by turning the MENU/ENTER rotary encoder.
Illustration 2-1: Display during normal operation
Number Description
1 DSP preset name
2 Subwoofer level
3 INPUT signal indicator (Meter)
4 Opens the DSP Out Settings dialog
5 Opens the System Equalizer dialog
6 Opens the Preset Select dialog
7 Opens the System Alignment dialog
PRESET:
INPUT SIGNAL: LOW
DSPOUT EQ PRESET ALIGN
7
6
5
4
3
2
SUB Level: - 6dB =
VariLine VL 262
1

PSD 215 | 218
8
11 PROTECTION INDICATOR (PROTECT)
The PROTECT indicator lights red when one
of the extensive protection circuits – against
thermal overload, HF-induction, DC at the outputs, and
short circuit protection – is activated. In protect mode, the
speaker outputs are muted and the amplifier inputs are
short circuited to prevent the power amp from being
damaged.
In this case you should first check whether the ventilation
louvers are blocked. Another cause could be, that you have
connected to many speakers per power output. Please
also disconnect the Speakon connectors and check the
speaker cables for short circuits. During power-on opera-
tion the PROTECT LED always lights for some seconds, si-
gnalizing that the protection circuitry is operational.
12 LIMIT INDICATOR (LIMIT)
The LIMIT indicator signals that you are operating
the PSD at the internal power amp’s limit. Fre-
quent blinking of the LED is acceptable, since the amp-
lifier’s incorporated clip limiter prevents distortion.
Continuous lighting indicates that you have to be aware of
degradation in the outputted sound. In that case, the input
level has to be reduced. The LIMIT LED also lights if the
output level is reduced because of high amplifier tem-
perature.
13 POWER ON/OFF INDICATOR (ON)
The ON LED lights green if the mains switch is ON
and the mains cord is connected correctly.
2.2 Menu mode
Press the MENU/ENTER rotary encoder during normal ope-
ration to access the menu mode. When entering the menu
mode the main menu (see illustration 2-6) is indicated.
In menu mode the MENU/ENTER rotary encoder and the
four function keys below the display are used for naviga-
tion and for selecting and editing parameters. Turn the
MENU/ENTER rotary encoder to the left or to the right to
move the cursor in the menu. Press the MENU/ENTER rota-
ry encoder to select or execute the highlighted menu item.
If a menu entry was highlighted, the corresponding dialog
is opened. If a parameter was highlighted, the value is
shown in inverse font and can be edited by turning the
MENU/ENTER rotary encoder. Press the MENU/ENTER
rotary encoder again to apply the edited parameter value.
The bottom line of the display indicates the function for
the four function keys. The following table describes some
of the functions avialable in menu dialogs.
PRESET SELECT
This dialog allows selecting a factory preset (e.g. F01) or a
user memory (e.g. U01). Turn the MENU/ENTER rotary
encoder to select a entry from the list. Press the MENU/EN-
TER rotary encoder to activate the selected preset or
memory. Press the OK function key to activate the selected
preset or memory and return to the menu. Pressing the
BACK function key returns to the menu.
PRESET SAVE
This dialog allows saving the edited factory preset to a user
memory (U01 to U05). Turn the MENU/ENTER rotary enco-
der to select the user memory where the edited preset
should be stored to.
Illustration 2-2: Access the menu mode by pressing the MENU/
ENTER rotary encoder
Illustration 2-3: Main Menu
Preset Save
Main Menu
System Equalizer
System Alignment
Preset Select
EXIT
Function Description
BACK Returns to the next higher menu level.
ESC Discards all edits in the dialog and returns to normal operation.
or Move the cursor to the left or to the right.
PRESET Opens the User Presets dialog to store the edited parameters as
an user memory.
OK Confirms the entry, e. g. when editing the name of an user
memory.
Table 2-4: Function keys
Illustration 2-5: Preset Select
Illustration 2-6: Select User Memory
F01: TS 400 - EUROPE
Preset Select
BACK OK
F02: TS 400 - USA
F03: VariLine VL 262
F04: VariLine VL 122
U01: Delay Line 10m
Select User Memory
BACK OK
U02: ---
U03: ---
U04: ---

PSD 215 | 218
9
Press the MENU/ENTER rotary encoder to open the Set
Preset Name dialog. This dialog is used to change the user
memory‘s description. Turn the MENU/ENTER rotary enco-
der to the left or right to edit the highlighted character.
Pressing the MENU/ENTER rotary encoder accepts the de-
sired symbol and moves the cursor to the next character.
Move the cursor to the left or to the right by pressing the
or function keys. Select the symbol or press the OK
function key to quit editing the name. Pressing the BACK
function key returns to the menu.
SYSTEM EQUALIZER
This dialog is used to edit the 6 band System Equalizer fil-
ter settings. Select a filter band (e.g. 160 Hz) by pressing
the or function keys.
Turn the MENU/ENTER rotary encoder to set the level amp-
lification (boost, accentuation) or reduction (cut,
lowering) of a band. The filter setting is illustrated by a
fader. Pressing the OK function key returns to the menu.
Pressing the FLAT function key resets all filter bands to
0dB.
SYSTEM ALIGNMENT
This dialog allows to set up the basic speaker settings of
the PSD system. Turn the MENU/ENTER rotary encoder to
highlight an entry in the left column of the System
Alignment dialog. Press the MENU/ENTER rotary encoder
to select the corresponding value in the right column. Now
turn the MENU/ENTER rotary encoder to edit the value and
press the MENU/ENTER rotary encoder again to apply the
new value. The following table lists the entries of the
dialog, please also refer to the block diagram on page 25.
Illustration 2-7: Menu structure of the PSD
SUB Delay
SUB Polarity
Generator
System Alignment
Testsignal
SYS Level
Display Brightness
Factory Reset
Firmware Info
Device Setup
Delay Unit
Display Auto Dim.
Level
Lo EQ
Hi EQ
DSP Out Settings
Hi-Pass
Delay
Main Menu
Preset Select
Preset Save
System Equalizer
System Alignment
DSP OUT Settings
Lock Device
PRESET
INPUT SIGNAL: LOW
DSPOUT EQ PRESET ALIGN
SUB Level: -42dB =
TS 400-A
Device Setup
SYS Delay
Lock Level
Illustration 2-8: Set Preset Name
Set Preset Name
OK BACK
DEFGHIJK MNOPQRSTL
Delay Line 10m
Illustration 2-9: System Equalizer
System Equalizer
80 160 315 800 3.15K 10K
OK FLAT
+10dB 0dB+5dB 0dB +5dB +10dB

PSD 215 | 218
10
Pressing the OK function key returns to the menu. Pressing
the RESET function key resets the setting of the parame-
ters SYS Level, SYS Delay, SUB Delay and SUB Polarity to
factory defaults (see page 11). Pressing the GENOFF func-
tion key switches the signal generator off.
DSP OUT SETTINGS
This dialog allows adjusting the DSP OUT signal for your
application.
Turn the MENU/ENTER rotary encoder to highlight an entry
in the left column of the DSP OUT Settings dialog. Press
the MENU/ENTER rotary encoder to select the corres-
ponding value in the right column. Now turn the MENU/EN-
TER rotary encoder to edit the value and press the MENU/
ENTER rotary encoder again to apply the new value. The
following table lists the entries of the DSP OUT Settings
dialog, please also refer to the block diagram on page 25.
Pressing the OK function key returns to the menu. Pressing
the RESET function key resets the setting of all parameters
in the DSP OUT Settings dialog to factory defaults (see
page 11). Pressing the GENOFF function key switches the
signal generator off.
LOCK DEVICE
This dialog allows locking PSD system settings from being
modified by a user. A four digit code number (PIN) is used
for access control. Use the Lock Level parameter in Device
Setup menu (see page 11) to select the set of protected
parameters. Turn the MENU/ENTER rotary encoder to the
left or right to edit the highlighted character. Pressing the
MENU/ENTER rotary encoder accepts the desired symbol
and moves the cursor to the next character. Move the cur-
sor to the left or to the right by pressing the or func-
tion keys. Pressing the BACK function key returns to the
menu without locking the PSD. Press the OK function key
to lock the PSD using the indicated PIN.
Parameter Description
SYS Level This parameter allows adjusting the volume level of the PSD
system. This relative parameter (-10 dB to +6 dB) affects the
volume of:
• the PSD,
• the TOP SPEAKER OUTPUT and
• the EXTERNAL SUB OUTPUT.
SYS Delay This parameter allows timing adjustment of the complete loud-
speakers system driven by the PSD amplifier. This parameter
(max. 100.0m) affects the delay of:
• the PSD,
• the TOP SPEAKER OUTPUT and
• the EXTERNAL SUB OUTPUT.
The preferred delay unit can be selected in the Device Setup
dialog (see page 11).
SUB Delay This parameter allows timing adjustment of loudspeakers dri-
ven by the PSD amplifier (e.g. alignment of top speaker and
subwoofer).
Enter a positive value (e.g. 50cm) if the PSD is closer to the
audience than the top speaker, in this case the subwoofer
signal is delayed. Enter a negative value (e.g. -100.0cm) if the
top speaker is closer to the audience than the PSD.
The preferred delay unit can be selected in the Device Setup
dialog (see page 11).
SUB Polarity This parameter offers the possibility to invert the sub audio
signal, i.e. to rotate its phase by 180°.
Generator The PSD input channel includes a signal generator. This
parameter allows adjusting the signal level of the generated
signal. Set this parameter to OFF if no signal should be
generated. The parameter Testsignal (see below) allows selec-
ting the generated signal type.
Testsignal This parameter allows selecting the signal type to be
generated. Following signal types are available:
• Pulse: Spike pulse
• Noise: Pink noise
• 40 Hz to 1000 Hz: Sine signal
Illustration 2-10: System Alignment
SYS Delay : 0.0m
System Alignment
SUB Delay : 0.0cm
SUB Polarity : Normal
RESET OK GENOFF
SYS Level : 0dB
Illustration 2-11: DSP OUT Settings
Parameter Description
Level This parameter sets the signal level (-50 dB to +6 dB) of the DSP
OUT signal. Select MUTE if no signal should be output.
Delay A maximum delay of 100.0m can be set for the DSP OUT signal.
The preferred delay unit can be selected in the Device Setup dialog
(see page 11).
Hi-Pass Allows configuring the high pass filter (12 dB/Oct) of the DSP OUT
signal:
• Thru: High pass filter is deactivated
• 20 to 200 Hz: Frequency of filter
HINT: Select Thru if the output signal should include the
sub signal, e.g. if an active fullrange speaker system
is connected to DSP OUT. Activate the Hi-Pass if the
DSP OUT is used for monitor or delay applications,
when a high bass level is not necessary.
Lo EQ This parameter allows 10 dB amplification/attenuation of the low
frequency part of the DSP OUT signal.
Hi EQ This parameter allows 10 dB amplification/attenuation of the high
frequency part of the DSP OUT signal.
Illustration 2-12: Enter Lock PIN
Delay : 0.0m
DSP OUT Settings
Hi-Pass : Thru
Lo EQ : 0dB
RESET OK GENOFF
Level : 0dB
Enter Lock PIN
BACK OK
0000

PSD 215 | 218
11
DEVICE SETUP
This dialog can be used for editing system parameters and
checking system properties. Some menu entries (e.g. Dis-
play Brightness) can be edited in the Device Settings
dialog after pressing the MENU/ENTER rotary encoder.
Other entries (e.g. Firmware Info) will open another dialog
when pressing the MENU/ENTER rotary encoder.
Display Brightness
The currently set display brightness (from 5% to 100%) is
indicated in the right column. Press the MENU/ENTER rota-
ry encoder to edit the value. Turn the MENU/ENTER rotary
encoder to the left to decrease the display brightness.
Turn the MENU/ENTER rotary encoder to the right to incre-
ase the display brightness. Press the MENU/ENTER rotary
encoder to apply the selected brightness. Pressing the
BACK function key returns to the menu.
Display Auto Dim.
The currently set time interval is shown. After the time in-
terval (from 10 seconds to 60 minutes) has expired the dis-
play backlight is dimmed. Press the MENU/ENTER rotary
encoder to edit the value. Turn the MENU/ENTER rotary
encoder to the left to shorten the time interval, or deac-
tivate the auto dim function by selecting Off. Turn the
MENU/ENTER rotary encoder to the right to extend the
time interval. Press the MENU/ENTER rotary encoder to
apply the selected setting. Pressing the BACK function key
returns to the menu.
Delay Unit
This parameter lets you select the unit of measurement
(Meter, Feet, Millisec or Samples) for the delay in the Sys-
tem Alignment dialog or DSP OUT Settings dialog. Press
the MENU/ENTER rotary encoder to edit the value. Turn
the MENU/ENTER rotary encoder to select the delay unit.
Press the MENU/ENTER rotary encoder to apply the se-
lected setting. Pressing the BACK function key returns to
the menu.
Lock Level
This parameter lets you select the the set of PSD parame-
ters to be locked after entering the PIN (see Lock Device
dialog). Table 2-14 lists the dialogs or parameters that will
be locked for the available lock levels.
HINT: The SUB Level parameter is never locked, so mut-
ing or adjusting the volume of the PSD is always
possible.
Factory Reset
The PSD can be reset to factory settings. Pressing the
MENU/ENTER rotary encoder opens a „Also clear User-
Mem?“ dialog box that lets the user choose between YES
or NO by turning the MENU/ENTER rotary encoder. Select
YES if all User Memories should be cleared. Select NO if
the User Memories should not be cleared. Pressing the
MENU/ENTER rotary encoder opens a safety dialog box
„Are you sure?“ that lets the user choose between YES or
NO by turning the MENU/ENTER rotary encoder. If YES has
been selected, pressing the MENU/ENTER rotary encoder
resets the PSD to its factory settings (see table 2-15) and
opens the Preset Select dialog. If NO has been selected, all
parameters stay unchanged and the display returns to the
menu. Pressing the BACK function key returns to the me-
nu.
Firmware Info
Press the MENU/ENTER rotary encoder to open the Firm-
ware Info dialog. This dialog shows the firmware versions
that are actually installed in the PSD. Pressing the BACK
function key returns to the menu.
Illustration 2-13: Device Setup
Display Auto Dim. Off
Device Setup
Delay Unit Meter
Factory Reset ENTER
BACK
Display Brightness 100%
Dialog/Parameter Control 1 Preset 2 System 3 DSPOut
Main Menu MENU/ENTER
(press)
locked locked locked
Preset Select PRESET locked locked locked
System Equalizer EQ locked locked
System Alignment ALIGN locked locked
DSP OUT Settings DSPOUT locked
SUB Level MENU/ENTER
(turn)
Table 2-14: Lock Level
Parameter Value
SUB Level 0 dB
System Equalizer flat (0dB)
SYS Level 0dB
SUB Delay 0.0cm
SUB Polarity Normal
Generator OFF
Testsignal Pulse
DSP OUT Level 0dB
DSP OUT Delay 0.0m
DSP OUT Hi-Pass Thru
DSP OUT Lo EQ 0dB
DSP OUT Hi EQ 0dB
Display Brightness 100%
Display Auto Dim. Off
Delay Unit Meter
Table 2-15: Factory Default Settings

PSD 215 | 218
12
2.3 Power amplifer and cooling
This is a powered subwoofer with a very high efficient
amplifier module and as a result does not get really hot.
The temperature of the amplifier module is monitored. In
the rare event it does get too hot it will automatically shut
down to protect itself. Once its temperature has returned
to within its operating range the amp will turn back on.
This may happen when the speaker is operated in very high
ambient temperatures and the enclosure is exposed to di-
rect sunlight. Always ensure adequate cooling and appro-
priate shade to keep the ambient temperature around the
PSD within the specified operating temperature range.
CAUTION: The rear panel of the PSD serves as a heat
sink for the power amplifier. Certain body
parts may be hot during operation.
2.4 Quickstart
This quickstart explains installation and operation of two
PSD 215 + TS 400 subwoofer satellite systems used to-
gether with a DYNACORD CMS mixer.
CAUTION: After system installation is complete, make
sure to first power on the mixing console
and to position the master faders at their
lowest setting before switching the power
of the PSDs to ON. Use the output faders to
establish the desired volume setting. Other-
wise, switching and power-on noise or the
high level audio signal of an inadvertently
playing audio source could result in high
acoustic outputs, that in some cases might
even lead to hearing damage.
1. Set up your satellite cabinets on the left and right
hand side on pole-mount stands (using the M20
thread on top of the enclosure) with the lower edges
of the speaker systems being approx. 1 meter above
the heads of the audience. In this way you will gain
longer throw and the listeners in the front rows are
safe from high acoustic level peaks.
2. On each side connect the satellite speaker to the
TOP SPEAKER OUTPUT on the rear of the PSD 215
using suitable Speakon speaker cables.
3. Connect the Master Outputs of your mixer to the
INPUT on the left or right PSD 215 using appropriate
XLR type cables. Position the mixer‘s master faders
at their lowest setting and afterwards power on the
mixer.
4. Connect the PSD 215 to the mains outlet using the
supplied mains cord. Plug the connector into the
MAINS IN socket. Use the Mains switch to power ON
the PSD, the ON LED lights green.
5. After the first power on of the PSD 215 the Preset
Select dialog automatically appears in the display (to
open the dialog manually, press the PRESET function
key).
6. Select the TS 400 preset from the preset list by
turning the MENU/ENTER rotary encoder.
7. Press the MENU/ENTER rotary encoder to load the
preset.
8. Press the BACK function key to exit the Preset Select
dialog.
9. Repeat steps 5 to 8 at the second PSD 215.
10. Connect an audio source, e.g. CD player, to a line
level input of the mixer. Set all rotary controls of the
mixing console input channel to their center position.
Adjust the input channel’s ‘Gain‘ control so that the
Peak LED should not light at all or blink only once in
a while.
11. Slowly raise channel fader and master faders on the
mixing console to the desired positions – i.e. volume
settings.
12. The tonal balance between bass and mid-high range
can be adjusted using the SUB Level parameter (see
page 8) or the System Alignment dialog (see page 9)
of the PSD 215.
13. Your system is now ready for operation. Individual
sound adjustments necessary can be made using the
System Equalizer dialog (see page 9) of the PSD.
14. Now, have fun with your PSD system!
15. After use, first switch off both PSD 215 and then the
mixing console, so that distracting power-off noise
will not occur. When using a DYNACORD CMS mixer,
no power-off noise will be output from the ‘Master
Outputs‘. This allows switching off the mixer first
without a problem.
PSD 215
PSD 215
TS 400
TS 400
PROTECT
PARAMETER
MENU/ENTER
MAINSIN ON
OFF
PSD
POWEREDSYSTEM SUBWOOFER
3200W MAXIMUM AMPLIFIER OUTPUT CAPABILITY
INPUT THRU
SERVICE
DSPOUT
OUTPUTWIRINGCLASS 2
TOPSPEAKER
OUTPUT
EXTERNALSUB
OUTPUT
MIN.LOAD
IMPEDANCE
8OHMS
MIN.LOAD
IMPEDANCE
4OHMS
LIMIT
ON
PROTECT
PARAMETER
MENU/ENTER
MAINSIN ON
OFF
PSD
POWEREDSYSTEM SUBWOOFER
3200W MAXIMUM AMPLIFIER OUTPUT CAPABILITY
INPUT THRU
SERVICE
DSPOUT
OUTPUTWIRINGCLASS 2
TOPSPEAKER
OUTPUT
EXTERNALSUB
OUTPUT
MIN.LOAD
IMPEDANCE
8OHMS
MIN.LOAD
IMPEDANCE
4OHMS
LIMIT
ON
INPUT THRU
SERVICE
DSP OUT
OUTPUT WIRING CLASS 2
TOP SPEAKER
OUTPUT
EXTERNAL SUB
OUTPUT
MIN. LOAD
IMPEDANCE
8 OHMS
MIN. LOAD
IMPEDANCE
4 OHMS
INPUT THRU
SERVICE
DSP OUT
OUTPUT WIRING CLASS 2
TOP SPEAKER
OUTPUT
EXTERNAL SUB
OUTPUT
MIN. LOAD
IMPEDANCE
8 OHMS
MIN. LOAD
IMPEDANCE
4 OHMS
CMS 1000

PSD 215 | 218
13

PSD 215 | 218
14
WICHTIGE SICHERHEITSHINWEISE
1. Lesen Sie diese Hinweise.
2. Heben Sie diese Hinweise auf.
3. Beachten Sie alle Warnungen.
4. Richten Sie sich nach den Anweisungen.
5. Betreiben Sie das Gerät nicht in unmittelbarer Nähe von Wasser.
6. Verwenden Sie zum Reinigen des Gerätes ausschließlich ein trockenes Tuch.
7. Verdecken Sie keine Lüftungsschlitze. Beachten Sie bei der Installation des Gerätes stets die entsprechenden Hinweise des Herstellers.
8. Vermeiden Sie die Installation des Gerätes in der Nähe von Heizkörpern, Wärmespeichern, Öfen oder anderer Wärmequellen.
9. Achtung: Gerät nur an Netzsteckdose mit Schutzleiteranschluss betreiben. Setzen Sie die Funktion des Schutzleiteranschlusses des mitgelieferten Netzanschlusskabels
nicht außer Kraft. Sollte der Stecker des mitgelieferten Kabels nicht in Ihre Netzsteckdose passen, setzen Sie sich mit Ihrem Elektriker in Verbindung.
10. Sorgen Sie dafür, dass das Netzkabel nicht betreten wird. Schützen Sie das Netzkabel vor Quetschungen insbesondere am Gerätestecker und am Netzstecker.
11. Verwenden Sie mit dem Gerät ausschließlich Zubehör/Erweiterungen, die vom Hersteller hierzu vorgesehen sind.
12. Verwenden Sie zusammen mit dieser Komponente nur vom Hersteller dazu vorgesehene oder andere geeignete Lastkarren, Stative,
Befestigungsklammern oder Tische, die Sie zusammen mit dem Gerät erworben haben. Achten Sie beim Transport mittels Lastkarren darauf, dass das
transportierte Equipment und der Karren nicht umfallen und möglicherweise Personen- und/oder Sachschäden verursachen können.
13. Ziehen Sie bei Blitzschlaggefahr oder bei längerem Nichtgebrauch den Netzstecker.
14. Überlassen Sie sämtliche Servicearbeiten und Reparaturen einem ausgebildeten Kundendiensttechniker. Servicearbeiten sind notwendig, sobald das
Gerät auf irgendeine Weise beschädigt wurde, wie z.B. eine Beschädigung des Netzkabels oder des Netzsteckers, wenn eine Flüssigkeit in das Gerät
geschüttet wurde oder ein Gegenstand in das Gerät gefallen ist, wenn das Gerät Regen oder Feuchtigkeit ausgesetzt wurde, oder wenn es nicht normal arbeitet oder
fallengelassen wurde.
15. Stellen Sie bitte sicher, dass keinTropf- oder Spritzwasser ins Geräteinnere eindringen kann. Platzieren Sie keine mit Flüssigkeiten gefüllten Objekte, wie Vasen oder
Trinkgefäße, auf dem Gerät.
16. Um das Gerät komplett spannungsfrei zu schalten, muss der Netzstecker gezogen werden.
17. Beim Einbau des Gerätes ist zu beachten, dass der Netzstecker leicht zugänglich bleibt.
18. Stellen Sie keine offenen Brandquellen, wie z.B. brennende Kerzen auf das Gerät.
19. Dieses SCHUTZKLASSE I Gerät muss an eine NETZ-Steckdose mit Schutzleiter-Anschluss angeschlossen werden.
WICHTIGE SERVICEHINWEISE
ACHTUNG: Diese Servicehinweise sind ausschließlich zur Verwendung durch qualifiziertes Servicepersonal. Um die Gefahr
eines elektrischen Schlages zu vermeiden, führen Sie keine Wartungsarbeiten durch, die nicht in der
Bedienungsanleitung beschrieben sind, außer Sie sind hierfür qualifiziert. Überlassen Sie sämtliche
Servicearbeiten und Reparaturen einem ausgebildeten Kundendiensttechniker.
1. Bei Reparaturarbeiten im Gerät sind die Sicherheitsbestimmungen nach EN 60065 (VDE 0860) einzuhalten.
2. Bei allen Arbeiten, bei denen das geöffnete Gerät mit Netzspannung verbunden ist und betrieben wird, ist ein Netz-Trenntransformator zu verwenden.
3. Vor einem Umbau mit Nachrüstsätzen, Umschaltung der Netzspannung oder sonstigen Modifikationen ist das Gerät stromlos zu schalten.
4. Die Mindestabstände zwischen netzspannungsführenden Teilen und berührbaren Metallteilen (Metallgehäuse) bzw. zwischen den Netzpolen betragen 3 mm und sind
unbedingt einzuhalten.
5. Die Mindestabstände zwischen netzspannungsführenden Teilen und Schaltungsteilen, die nicht mit dem Netz verbunden sind (sekundär), betragen 6 mm und sind
unbedingt einzuhalten.
6. Spezielle Bauteile, die im Stromlaufplan mit dem Sicherheitssymbol gekennzeichnet sind, (Note) dürfen nur durch Originalteile ersetzt werden.
7. Eigenmächtige Schaltungsänderungen dürfen nicht vorgenommen werden.
8. Die am Reparaturort gültigen Schutzbestimmungen der Berufsgenossenschaften sind einzuhalten. Hierzu gehört auch die Beschaffenheit des Arbeitsplatzes.
9.
Die Vorschriften im Umgang mit MOS-Bauteilen sind zu beachten.
Speakon is a registered trademark of Neutrik AG
Das Blitzsymbol innerhalb eines gleichseitigen Dreiecks soll
den Anwender auf nicht isolierte Leitungen und Kontakte im
Geräteinneren hinweisen, an denen hohe Spannungen
anliegen, die im Fall einer Berührung zu lebensgefährlichen
Stromschlägen führen können.
Das Ausrufezeichen innerhalb eines gleichseitigen Dreiecks
soll den Anwender auf wichtige Bedienungs- sowie Ser-
vicehinweise in der zum Gerät gehörenden Literatur
aufmerksam machen.
NOTE: SAFETY COMPONENT (MUST BE REPLACED BY ORIGINAL PART)

PSD 215 | 218
15
1 Einführung
Die PSD 215 und PSD 218 sind Hochleistungs-Subwoofer
mit integrierten digitalen 2-Kanal Leistungsverstärkern und
einem 24 Bit 1-in-3 DSP-Controller. Sie eignen sich damit
hervorragend zum sehr einfachen und komfortablen
Aufbau von aktiven 2-Weg-Systemen ohne zusätzliche ex-
terne Controller und Endstufen.
Beispiele dafür sind Konfigurationen mit Fullrange-
Kabinetten der D-Lite, Corus- und VariLine-Serien und ins-
besondere dem TS 400 Array-Kabinett. Beide Modelle sind
ventilierte Direktstrahler mit hervorragendem Einschwing-
verhalten und sehr hohem Schalldruck. Die Gehäuse sind
aus 15 mm Birken-Multiplex gebaut und bieten durch ihre
2K-Struktur-Lackierung eine belastungsfähige, für den
harten Einsatz on-the-road geeignete Oberfläche. Die Laut-
sprecher sind durch robuste Stahlgitter vor Beschädi-
gungen geschützt. Ergonomisch geformte Griffschalen
tragen zum Komfort bei Transport und Aufbau ebenso bei
wie die stabilen Rollen auf der Gehäuserückseite. Das ho-
rizontale Format erlaubt die leichte Platzierung unter Büh-
nen. Gleichzeitig ist es aber auch ein enorm standsicheres
Fundament bei Aufbauten mit Hochständer-Stangen, hier-
für ist auf der Oberseite ein Adapterflansch mit M20-
Gewinde eingelassen.
Der PSD 215 realisiert den idealen Kompromiss zwischen
kleinstmöglicher Gehäuse-Größe und höchster akustischer
Leistung. Er ist mit einem 15“ Electro-Voice DVX3159 Laut-
sprecher bestückt, der speziell zum Einsatz in kompakten
Subwoofern entwickelt wurde und beeindruckt trotz der
sehr geringen Abmessungen mit einem fundamentalen
Tiefbass und hohem Schalldruck.
Der PSD 218 ist naturgemäß etwas größer und wartet mit
einer Performance auf, wie sie von typischen 18“-Subwoo-
fern im professionellen Concert-Sound erwartet wird. Er
ist mit einem 18“ Electro-Voice DVX3180 Langhub-Chassis
bestückt und bietet ein weit hinabreichendes Tiefbass-
Fundament.
Beide Modelle verfügen über eine integrierte, äußerst
leistungsstarke 2-Kanal-Endstufe mit einer Nennausgangs-
leistung von 2 x 1000 Watt RMS an 4 Ohm in moderner, ho-
cheffizienter Class-D-Technologie mit einer Audio-
Performance auf höchstem Niveau. Die gesamte Stromver-
sorgung erfolgt aus einem äußerst laststabilen, mikropro-
zessorgesteuerten Schaltnetzteil, wodurch eine massive
Gewichtseinsparung gegenüber herkömmlichen Ringkern-
transformatoren erreicht wird. Zur Betriebssicherheit
tragen ferner ein Überspannungsschutz und eine Ein-
schaltstrombegrenzung (Softstart) bei.
Die PSD Power-Module verfügen selbstverständlich über
alle von DYNACORD-Endstufen bekannten Schutzschal-
tungen und erfüllen die extremen Anforderungen des
harten Tour-Betriebs. Die Endstufen sind gegen Überhit-
zung, Überlast, Kurzschluss, Back-EMF, Leerlauf, sowie
Hochfrequenz oder Gleichspannung am Ausgang ge-
schützt. Beide Ausgänge werden dabei getrennt über-
wacht, so dass im Fehlerfall nur der betroffene Kanal abge-
schaltet wird. Beim Einschalten des Gerätes werden die
Leistungsausgänge verzögert zugeschaltet, um eventuelle
Störgeräusche zu vermeiden.
Die thermische Stabilität wird durch einen stufenlos ge-
regelten Lüfter mit sehr niedrigem Geräuschpegel gewähr-
leistet. Außerdem verfügen die Endstufenkanäle über
einen intelligenten Thermo-Limiter, im Falle einer dro-
henden Überhitzung werden lediglich die Leistungsspitzen
durch einen musikalisch arbeitenden Clip-Limiter beg-
renzt. Auf diese Weise wird das vollständige Abschalten
der Endstufe wirkungsvoll verhindert, ohne dass es dabei
zu einer merklichen Absenkung der Lautstärke kommt.
LEDs für PROTECT und LIMIT zeigen den jeweiligen Be-
triebszustand der Endstufen an.
Der integrierte 24 Bit Digital-Controller mit interner 48 Bit
Double-Precision Auflösung stellt eine 1-in-3 Topologie zur
Verfügung: SUB-Channel, TOP-Channel und einen zusätz-
lichen DSP OUT. Im Speicher sind optimierte Factory-
Presets für Kombinationen mit DYNACORD Fullrange-
Kabinetten, generische Presets für andere Kombinationen
und Spezial-Programme für Cardioid- und Bass-Arrays vor-
handen. System-Alignement-Delay, Polarity und natürlich
Level können vom Benutzer editiert werden. Mit dem Sys-
tem Equalizer im Eingang können Anpassungen an die
Raumakustik vorgenommen und abgespeichert werden.
Der DSP OUT verfügt ebenfalls über ein einstellbares
Delay, Hi-Pass und Shelving Equalizer, sowie einen Level-
Steller. Er eignet sich damit zum Beispiel bestens für die
Ansteuerung einer aktiven Delay-Box. Zur bequemen
Einmessung und zum Einstellen der Delay-Zeit sind Signal-
generatoren mit Sinus, Pink-Noise oder Nadelimpulsen in-
tegriert. Insgesamt sind 25 Programmplätze vorhanden
(20 Factory-Presets + 5 User-Memories). In allen drei Kanä-
len stehen modernste Look-Ahead-Peak-Anticipation Limi-
ter zur Verfügung, der SUB Kanal bietet zusätzlich einen
Thermal Energy Management and Protection (TEMP) Limi-
ter. Der TEMP-Limiter schützt die Lautsprecher vor thermi-
scher Überlastung.
1.1 Lieferumfang, Auspacken und
Überprüfen
Öffnen Sie die Verpackung und entnehmen Sie das
Kabinett. Überprüfen Sie das Kabinett auf äußere Be-
schädigungen, die während des Transports zu Ihnen aufge-
treten sein könnten. Jedes Kabinett wird vor Verlassen des
Werks eingehend untersucht und getestet und sollte in ein-
wandfreiem Zustand bei Ihnen ankommen. Falls das
Kabinett Beschädigungen aufweist, benachrichtigen Sie
bitte unverzüglich das Transportunternehmen. Ein
Transportschaden kann nur von Ihnen, dem Empfänger,
reklamiert werden. Bewahren Sie den Karton und das Ver-
packungsmaterial zwecks Besichtigung durch das
Transportunternehmen auf. Die Aufbewahrung des Kar-
tons samt Verpackungsmaterial wird auch dann angeraten,
wenn das Kabinett keine Beschädigung aufweist.
ACHTUNG: Versenden Sie das Kabinett nie ohne das
originale Verpackungsmaterial. Für best-
möglichen Schutz vor Transportschäden
verpacken Sie das Kabinett wie es
ursprünglich im Werk verpackt wurde.
1.2 Garantie
Hinweise zur Garantie finden Sie auf www.dynacord.com
•1AktiverSubwoofer
• 1 Bedienungsanleitung (dieses Dokument)
• 1 Netzkabel (verriegelnd)
• 1 Garantiekarte mit Sicherheitshinweisen

PSD 215 | 218
16
2 Installation
2.1 Bedienelemente, Anzeigen und Anschlüsse
PROTECT
PARAMETER
MENU/ENTER
DESIGNED AND ENGINEERED IN GERMANY.
MAINS IN ON
OFF
PSD
POWERED SYSTEM SUBWOOFER
3200 W MAXIMUM AMPLIFIER OUTPUT CAPABILITY
INPUT THRU
SERVICE
DSP OUT
OUTPUT WIRING CLASS 2
TOP SPEAKER
OUTPUT
EXTERNAL SUB
OUTPUT
MIN. LOAD
IMPEDANCE
8 OHMS
MIN. LOAD
IMPEDANCE
4 OHMS
THIS DEVICE COMPLIES WITH PART 15 OF THE FCC RULES. OPERATION
IS SUBJECT TO THE FOLLOWING TWO CONDITIONS: 1. THIS DEVICE
MAY NOT CAUSE HARMFUL INTERFERENCE, AND 2. THIS DEVICE
MUST ACCEPT ANY INTERFERENCE RECEIVED, INCLUDING
INTERFERENCE THAT MAY CAUSE UNDESIRED OPERATION.
RISK OF ELECTRIC SHOCK
DO NOT OPEN
CAUTION
WARNING:
THIS LOUDSPEAKER SYSTEM CAN PERMANENTLY DAMAGE HEARING!
USE EXTREME CARE WHEN SETTING SOUND PRESSURE LEVELS!
WARNING:
AVIS:
THIS CLASS B DIGITAL APPARATUS COMPLIES WITH CANADIAN
ICES-003. CET APPAREIL NUMÉRIQUE DE LA CLASSE B EST
CONFORME À LA NORME NMB-003 DU CANADA.
SHOCK, DO NOT EXPOSE THIS APPLIANCE TO RAIN OR MOISTURE.
TO REDUCE THE RISK OF FIRE OR ELECTRIC
LIMIT
ON
RISQUÉ DE CHOC ELECTRIQUE - NE PAS OUVRIR
10 8 7 5
4
9
11
2
6
3
1
12
13
Nummer Beschreibung
1Netzeingang, verriegelnd (MAINS IN)
2Netzschalter (ON/OFF)
3Ausgang (Speakon) für Sub-Signal (EXTERNAL SUB OUTPUT)
4Ausgang (Speakon) für MItten- und Hochton-Signal (TOP SPEAKER OUTPUT)
5USB-Anschluss (SERVICE)
6Ausgang (XLR) für DSP-Ausgangssignal mit Line-Pegel (DSP OUT)
7Ausgang (XLR) zum Weiterschleifen des Audio-Signals mit Line-Pegel (THRU)
8Eingang (XLR/Klinke) für Audio-Signal mit Line-Pegel (INPUT)
9MENU/ENTER-Drehencoder
10 Display mit vier Funktionstasten
11 Anzeige Schutzschaltung (PROTECT)
12 Anzeige Limiter (LIMIT)
13 Anzeige Betrieb (ON)

PSD 215 | 218
17
1 NETZEINGANG, VERRIEGELND (MAINS IN)
Die Spannungsversorgung des PSD er-
folgt ausschließlich über das mit-
gelieferte IEC-Netzkabel über diese
verriegelnde Netzbuchse. Zum
Abziehen des Steckers drükken Sie die
gelbe Verriegelungs-Taste am Stecker.
Schließen Sie den PSD nur an eine geeignete Netzversor-
gung an, die den auf dem Typenschild angegebenen
Anforderungen entspricht.
2 NETZSCHALTER (ON/OFF)
Netzschalter zum Ein- und Ausschalten des
Gerätes. Sollte die ON-LED nach dem Ein-
schalten nicht leuchten, prüfen Sie zuerst
ob das Netzkabel angesteckt und Netzspan-
nung vorhanden ist. Ist dies der Fall und
trotzdem keine Funktion vorhanden,
kontaktieren Sie bitte Ihren Fachhändler.
3 AUSGANG FÜR SUB-SIGNAL (EXTERNAL SUB OUTPUT)
Dieser Ausgang ermöglicht den An-
schluss eines zusätzlichen passiven
Subwoofers. Der PSD besitzt einen
integrierten DSP zur Signalverarbei-
tung des am INPUT-Anschluss an-
liegenden Signals. Das Tieftonsignal
des am INPUT-Anschluss anliegen-
den Signals wird vom PSD selbst wiedergegeben und liegt
zusätzlich an diesem Ausgang an.
Für ein optimales Ergebnis schließen Sie an einen PSD 215
einen PSE 215 bzw. an einen PSD 218 einen PSE 218 an.
HINWEIS: Es dürfen ausschließlich Subwoofer mit
einer Belastbarkeit von mindestens
500 WRMS und einer minimalen Impedanz
von 8 Ohm angeschlossen werden.
4 AUSGANG FÜR MITTEN- UND HOCHTON-SIGNAL (TOP
SPEAKER OUTPUT)
Dieser Ausgang ermöglicht den An-
schluss von passiven Top-Teilen. Der
PSD besitzt einen integrierten DSP
zur Signalverarbeitung des am IN-
PUT-Anschluss anliegenden Signals.
Das Mitten- und Hochtonsignal liegt
an diesem Ausgang an. Der Ausgang
liefert eine maximale Leistung von 1000 WRMS an 4 Ohm.
HINWEIS: Die minimal zulässige Impedanz am Ausgang
TOP SPEAKER OUTPUT beträgt 4 Ohm.
5 USB-ANSCHLUSS (SERVICE)
Dieser Anschluss ist für zukünftige Funk-
tionen vorgesehen.
6 AUSGANG FÜR DSP-AUSGANGSSIGNAL (DSP OUT)
An der XLR-Buchse DSP OUT liegt ein vom
digitalen Signalprocessing verarbeitetes Si-
gnal an. Der Ausgang DSP OUT kann ver-
wendet werden, um weitere Endstufen (ohne
DSP Modul) oder aktive Lautsprecher mit
einem Line-Signal aus dem PSD zu versorgen.
Zur Anpassung des Signals verwenden Sie den DSP OUT
Settings Dialog im Menü, siehe Seite 20. Das Ausgangs-
signal ist elektronisch symmetrisch mit einem Maximal-
pegel von +15 dBu. Die Ausgangsimpedanz beträgt
150 Ohm.
7 AUSGANG FÜR LINE-SIGNAL (THRU)
Die XLR-Buchse THRU dient zum „Weiter-
schleifen“ des INPUT-Signals zu weiteren
Geräten und liegt direkt parallel zur INPUT-
Buchse. Dies ermöglicht eine einfache Ver-
kabelung von einem Gerät zum nächsten.
8 EINGANG FÜR LINE-SIGNAL (INPUT)
Elektronisch symmetrischer Eingang für hoch-
pegelige Signalquellen wie Mischpult- bzw. Si-
gnalprozessor-Ausgänge. Der Anschluss kann
dabei wahlweise über Klinken- oder XLR-
Stekker vorgenommen werden. Um etwaigen
externen Brumm- oder Hochfrequenz-
Einstreuungen vorzubeugen, sollte die Signaleinspeisung,
wenn möglich, symmetrisch erfolgen.
9 DREHENCODER (MENU/ENTER)
Durch Drehen des MENU/ENTER-Drehenco-
ders kann die Lautstärke des PSD (SUB Le-
vel) angepasst werden. Befindet man sich im
Menü (siehe Seite 18) kann durch Drehen im
Menü navigiert oder ein selektierter Parame-
ter angepasst werden. Durch Drücken wird
der gewählte Wert bzw. Eintrag im Menü ausgewählt.
10 DISPLAY MIT VIER FUNKTIONSTASTEN
Der PSD ist mit einem hochwertigen OLED-Display ausge-
stattet. Im Vergleich zu üblichen LC-Displays sind OLED-
Displays wesentlich heller, kontrastreicher und sind
unabhängig vom Blickwinkel optimal abzulesen.
Nach dem Einschalten des PSD wird der Startbildschirm
angezeigt. Nach einigen Sekunden werden das momentan
aktive Preset und weitere, wichtige Informationen ange-
zeigt. Durch Drehen des MENU/ENTER-Drehencoders kann
die Lautstärke des PSD (SUB Level) angepasst werden.

PSD 215 | 218
18
11 ANZEIGE SCHUTZSCHALTUNG (PROTECT)
PROTECT leuchtet rot auf, wenn eine der
umfangreichen Schutzschaltungen gegen
Übertemperatur, Hochfrequenz, Gleichspannung oder
Kurzschluss aktiv ist. Um die Leistungsverstärker vor Zer-
störung zu schützen werden in diesem Fall die Laut-
sprecher abgeschaltet und der Eingang der Endstufe
deaktiviert.
Tritt dies auf, überprüfen Sie bitte zuerst ob nicht etwa die
Zu- oder Abluftschlitze am Gerät abgedeckt sind. Eventuell
haben Sie auch zu viele passive Lautsprecher je End-
stufenausgang angeschlossen. Überprüfen Sie auch die
Verkabelung, ob nicht etwa ein Kurzschluss am Laut-
sprecherausgang besteht. Entfernen Sie dazu die
Speakon-Lautsprecherkabel vom Gerät.
Beim Einschalten des Gerätes wird die PROTECT LED für
einige Sekunden aufleuchten. Dies ist normal und zeigt
Ihnen, dass alle Schutzmechanismen aktiviert sind.
12 ANZEIGE LIMITER (LIMIT)
Die LIMIT-LED zeigt beim Aufleuchten an, dass
der interne Leistungsverstärker im Grenzbereich
der Aussteuerbarkeit betrieben wird. Kurzzeitiges Auf-
leuchten ist unkritisch, da der Audio-Limiter im Leistungs-
verstärker die Verzerrungen ausregelt. Dauerndes
Aufleuchten deutet auf eine Übersteuerung des Verstär-
kers hin, die zu Klangeinbußen führen kann und durch Ab-
senkung des Eingangspegels vermieden werden sollte. Die
LIMIT-LED leuchtet auch dann auf, wenn der Aus-
gangspegel aufgrund hoher Endstufen-Temperatur redu-
ziert wird.
13 ANZEIGE BETRIEB (ON)
Die ON-LED leuchtet grün, wenn der PSD mit dem
Stromnetz verbunden und eingeschaltet (ON) ist.
2.2 Menü
Durch Drücken des MENU/ENTER-Drehencoders wird im
Display das Haupt-Menü (Main Menu), also die oberste
Ebene der Menüstruktur (siehe Abbildung 2-5), geöffnet.
Im Main Menu und den weiteren Untermenüs werden der
MENU/ENTER-Drehencoder und die vier Funktionstasten
unter dem Display für die Navigation, Auswahl und
Parameteränderung verwendet. Durch Drehen des MENU/
ENTER-Drehencoders kann die Markierung im Display be-
wegt werden. Durch Drücken des MENU/ENTER-Drehenco-
ders wird der markierte Eintrag ausgeführt bzw.
ausgewählt. Handelt es sich um einen Menü-Eintrag, wird
das entsprechende Untermenü geöffnet. Handelt es sich
um einen Parameter, wird der Parameter invers dargestellt
und kann anschließend durch Drehen des MENU/ENTER-
Drehencoders geändert werden. Durch erneutes Drücken
des MENU/ENTER-Drehencoders wird der geänderte Wert
dann übernommen.
Die unterste Zeile im Display zeigt stets die Funktion der
vier Funktionstasten an, die bei Betätigung der Taste aus-
geführt wird. Folgende Tabelle erläutert einige der in den
verschiedenen Dialogen zur Verfügung stehenden Funk-
tionen.
Abbildung 2-1: Anzeige während des Normalbetriebs
Nummer Beschreibung
1 Anzeige des geladenen Preset
2 Anzeige der eingestellten Subwoofer-Lautstärke
3 Anzeige des momentanen INPUT-Signalpegels
4 Öffnet das DSP Out Settings Menü
5 Öffnet den System Equalizer Dialog
6 Öffnet den Preset Select Dialog
7 Öffnet das System Alignment Menü
PRESET:
INPUT SIGNAL: LOW
DSPOUT EQ PRESET ALIGN
76
5
4
3
2
SUB Level: - 6dB =
VariLine VL 262
1
Abbildung 2-2: Wechsel in das Menü durch Drücken des MENU/
ENTER-Drehencoders
Abbildung 2-3: Main Menu
Funktion Beschreibung
BACK Führt in das darüberliegende Menü zurück.
ESC Verwirft alle im Dialog vorgenommenen Änderungen, die
noch nicht gespeichert wurden, und schließt das Menü.
bzw. Bewegt den Cursor um eine Stelle nach links bzw. rechts.
PRESET Öffnet den User Presets Dialog um das editierte Preset als
User Memory abzuspeichern.
OK Bestätigt die Eingabe, z. B. bei der Eingabe von Texten
Tabelle 2-4: Funktionen der vier Funktionstasten
Preset Save
Main Menu
System Equalizer
System Alignment
Preset Select
EXIT

PSD 215 | 218
19
PRESET SELECT
Dieser Dialog ermöglich die Auswahl eines Factory-Presets
(z. B. F01) bzw. eines User-Memory (z. B. U01).
Scrollen Sie in der Liste durch Drehen des MENU/ENTER-
Drehencoders. Drücken des MENU/ENTER-Drehencoders
lädt den momentan selektierten Eintrag. Drücken der
Funktionstaste OK lädt den momentan selektierten Eintrag
und führt gleichzeitig in das Menü zurück. Drücken der
Funktionstaste BACK führt in das Menü zurück.
PRESET SAVE
Dieser Dialog ermöglicht das Abspeichern eines editierten
Presets in einem der fünf Speicherplätze U01 bis U05.
Wählen Sie im Select User Memory Dialog den gewünsch-
ten Speicherplatz durch Drehen des MENU/ENTER-
Drehencoders.
Drücken des MENU/ENTER-Drehencoders öffnet den Set
Preset Name Dialog.
Im Set Preset Name Dialog kann die Bezeichung des User
Memory eingegeben werden. Drehen Sie den MENU/EN-
TER-Drehencoder nach links oder rechts, um das mit dem
Cursor markierte Zeichen zu ändern. Drücken des MENU/
Abbildung 2-5: Menüstruktur des PSD
SUB Delay
SUB Polarity
Generator
System Alignment
Testsignal
SYS Level
Display Brightness
Factory Reset
Firmware Info
Device Setup
Delay Unit
Display Auto Dim.
Level
Lo EQ
Hi EQ
DSP Out Settings
Hi-Pass
Delay
Main Menu
Preset Select
Preset Save
System Equalizer
System Alignment
DSP OUT Settings
Lock Device
PRESET
INPUT SIGNAL: LOW
DSPOUT EQ PRESET ALIGN
SUB Level: -42dB =
TS 400-A
Device Setup
SYS Delay
Lock Level
Abbildung 2-6: Preset Select
F01: TS 400 - EUROPE
Preset Select
BACK OK
F02: TS 400 - USA
F03: VariLine VL 262
F04: VariLine VL 122
Abbildung 2-7: Select User Memory
Abbildung 2-8: Set Memory Name
U01: Delay Line 10m
Select User Memory
BACK OK
U02: ---
U03: ---
U04: ---
Set Preset Name
OK BACK
DEFGHIJK MNOPQRSTL
Delay Line 10m

PSD 215 | 218
20
ENTER-Drehencoders übernimmt das gewählte Zeichen
und bewegt den Cursor um eine Stelle nach rechts. Mit
den Funktionstasten bzw. kann der Cursor nach links
bzw. rechts bewegt werden. Wählen Sie das Zeichen
oder drücken Sie die Funktionstaste OK um die Eingabe zu
beenden. Drücken der Funktionstaste BACK führt in das
Menü zurück.
SYSTEM EQUALIZER
Im Eingang des PSD befindet sich ein grafischer 6-Band
Equalizer. Verwenden Sie zum Auswählen des ge-
wünschten Frequenzbandes (z. B. 160 Hz) die Funktions-
tasten bzw. , das selektierte Frequenzband ist mit
einem Rahmen hervorgehoben. Den Verstärkungsgrad
(Boost) oder die Abschwächung (Cut) des gewählten Fre-
quenzbandes können Sie durch Drehen des MENU/ENTER-
Drehencoders von -10 dB bis +10 dB einstellen. Die vor-
genommenen Änderungen werden zusätzlich in Form der
veränderten Fader-Stellung grafisch dargestellt. Drücken
der Funktionstaste OK führt in das Menü zurück. Drücken
der Funktionstaste FLAT setzt alle Frequenzbänder auf
0dBzurück.
SYSTEM ALIGNMENT
Der System Alignment Dialog bietet verschiedene Op-
tionen zur optimalen Einrichtung eines PSD-Systems.
In diesem Dialog kann durch Drehen des MENU/ENTER-
Drehencoders ein Eintrag in der linken Spalte markiert und
durch Drücken des MENU/ENTER-Drehencoders der ent-
sprechende Wert in der rechten Spalte ausgewählt wer-
den. Der ausgewählte Wert wird nun durch Drehen des
MENU/ENTER-Drehencoders angepasst. Erneutes Drücken
des MENU/ENTER-Drehencoders führt in die linke Spalte
zurück. Folgende Tabelle erläutert die Einträge des System
Alignment Dialogs, bitte beachten Sie hierzu auch das
Blockdiagramm auf Seite 25. Drücken der Funktionstaste
OK führt in das Menü zurück. Drücken der Funktionstaste
RESET setzt die Werte der Parameter SYS Level, SYS
Delay, SUB Delay und SUB Polarity auf die Werksein-
stellungen (siehe Seite 22) zurück. Drücken der Funktion-
staste GENOFF deaktiviert den Signalgenerator.
DSP OUT SETTINGS
Dieser Dialog ermöglicht das an der DSP OUT-Buchse aus-
gegebene Signal der jeweiligen Anwendung anzupassen.
Durch Drehen des MENU/ENTER-Drehencoders wird ein
Eintrag in der linken Spalte markiert und durch Drücken
des MENU/ENTER-Drehencoders der entsprechende Wert
in der rechten Spalte ausgewählt. Der ausgewählte Wert
wird nun durch Drehen des MENU/ENTER-Drehencoders
angepasst. Erneutes Drücken des MENU/ENTER-
Drehencoders führt in die linke Spalte zurück. Folgende
Tabelle erläutert die Einträge des DSP OUT Settings
Dialog, bitte beachten Sie hierzu auch das Blockdiagramm
auf Seite 25. Drücken der Funktionstaste OK führt in das
Menü zurück. Drücken der Funktionstaste RESET setzt die
Abbildung 2-9: System Equalizer
Abbildung 2-10: System Alignment
System Equalizer
80 160 315 800 3.15K 10K
OK FLAT
+10dB 0dB+5dB 0dB +5dB +10dB
SYS Delay : 0.0m
System Alignment
SUB Delay : 0.0cm
SUB Polarity : Normal
RESET OK GENOFF
SYS Level : 0dB
Parameter Beschreibung
SYS Level Dieser Parameter erlaubt die Lautstärkeanpassung des mit
dem PSD betriebenen Lautsprechersystems. Die hiermit vor-
genommene relative Pegelanpassung im Bereich -10 dB bis
+6 dB wirkt also gleichzeitig auf:
• den PSD selbst,
• den Ausgang TOP SPEAKER OUTPUT sowie
• den Ausgang EXTERNAL SUB OUTPUT.
SYS Delay Dieser Parameter erlaubt die Verzögerung des gesamten, mit
dem PSD betriebenen Lautsprechersystems. Der hier einge-
stellte Wert (maximal 100.0m) wirkt also gleichzeitig auf:
• den PSD selbst,
• den Ausgang TOP SPEAKER OUTPUT sowie
• den Ausgang EXTERNAL SUB OUTPUT.
Die Einheit des Verzögerungswertes kann im Device Setup
Menü (siehe Seite 21) eingestellt werden.
SUB Delay Dieser Parameter erlaubt die zeitliche Anpassung des mit dem
PSD betriebenen Lautsprechersystems, z. B. bei räumlich ver-
setzt angeordnetem Subwoofer und Top-Teil. Stellen Sie einen
positiven Wert (z. B. 50cm) ein, wenn der Subwoofer näher
beim Publikum platziert ist als das Top-Teil, hierdurch wird das
Sub-Signal verzögert. Umgekehrt wird bei negativen Werten
(z. B. -100.0cm) das Top-Signal verzögert. Die Einheit des Ver-
zögerungswertes kann im Device Setup Menü (siehe Seite 21)
eingestellt werden.
SUB Polarity Dieser Parameter erlaubt die Einstellung, ob das Subwoofer-
Signal mit normaler Phasenlage (Normal) oder invertiert
(Invert) ausgegeben werden soll.
Generator Im Eingang des PSD befindet sich ein Signalgenerator. Dieser
Parameter erlaubt die Aktivierung des Signalgenerators und
die Pegeleinstellung des generierten Signals. Wählen Sie OFF
um den Generator zu deaktivieren. Der Signaltyp kann über den
Parameter Testsignal (siehe unten) eingestellt werden.
Testsignal Dieser Parameter erlaubt die Auswahl des vom Signalgenerator
erzeugten Signaltyps. Folgende Signaltypen sind verfügbar:
• Pulse: Nadelimpuls
• Noise: Rosa Rauschen
• 40 Hz bis 1000 Hz: Sinussignal
Abbildung 2-11: DSP OUT Settings
Delay : 0.0m
DSP OUT Settings
Hi-Pass : Thru
Lo EQ : 0dB
RESET OK GENOFF
Level : 0dB
Table of contents
Languages:
Other Dynacord Subwoofer manuals

Dynacord
Dynacord POWERSUB 112 User manual

Dynacord
Dynacord VariLine Sub28 Quick start guide

Dynacord
Dynacord SUB 112 User manual

Dynacord
Dynacord SUB 1.18 User manual

Dynacord
Dynacord VariLine Sub18 Quick start guide

Dynacord
Dynacord SUB 2.18 User manual

Dynacord
Dynacord 800 A User manual

Dynacord
Dynacord POWERSUB 315 User manual

Dynacord
Dynacord PowerSub 312 Quick start guide

Dynacord
Dynacord MADRAS M18 User manual