Dyson 360 Vis Nav User manual

User manual
SV12 JN.00000 PN.000000-00-00
00.00.00 VERSION NO.01
Contents
Getting started
Downloading the MyDyson™app
Connecting to Wi-Fi
Setting up your dock
Setting the language
Preparing to clean
Starting a clean
Mapping your home
Zoning your home
Scheduling and reviewing cleans
Looking after your robot
Emptying your bin
Washing your filter
Maintaining your brush bar
Cleaning your camera lens and sensors
Alerts
Resetting and upgrading software
dyson 360 visnav

Getting started
Eight LEDs allow
the robot to
clean in low-light
conditions.
Auto mode
Analyses dust levels,
automatically optimising
suction power.
Boost mode
Boosts suction to clean
ground-in dirt and pet
hair. Extra power with
less run time.
Quiet mode
Reduces noise for
peaceful areas – and
longer run time.
Triple-action brush bar
Intelligent navigation
Power modes
Four modes, to clean
your way.
LCD touchscreen lets
you see real-time
feedback and choose
between modes.
Swipe through menus,
tap to select, press
and click to confirm
your selection.
LCD touchscreen
Quick mode
Piezo sensor
Detects changes in dust
levels, automatically
increasing suction power
where needed.
Edge cleaner
Tailor your robot with the
MyDyson™app
Set your robot’s behaviour to
suit your lifestyle. Have it learn
your home’s layout, so you can
schedule it to clean when, where
and how you want – only with the
MyDyson™app. If you haven’t
already, download it now.
Automatically redirects
suction to pick up dust
and debris right up to
the wall.
Extends the full width of the
machine to clean edge-
to-edge. Black anti-static
carbon fibre filaments
extract fine dust from hard
floors, stiff nylon bristles
remove ground-in dirt from
carpets, and soft woven
nylon captures large debris.
LED light ring
26 sensors. 360°
panoramic vision.
Allowing the robot to
systematically navigate
and adapt.
To stay on top of every day
cleans in open areas. Your
robot won’t deep clean
edges and corners.
Close up of orange
quick mode arrow
as shown on
machine screen.
Close up of green quiet
mode arrow as shown
on machine screen.
Close up of red
boost mode arrow
as shown on
machine screen.
Close up of blue
auto mode arrow
as shown on
machine screen.
The LCD touchscreen is
located on the top of the
robot between the bin and
LED light ring
Brush bar is housed
within the front of the
robot
The domed
LED light ring
is located at
the top of the
machine to the
front

Apple and the Apple logo are trademarks of Apple Inc., registered in the U.S. and other countries.
App Store is a service mark of Apple Inc., registered in the U.S. and other countries. Google Play and
the Google Play logo are trademarks of Google Inc.
Connecting to Wi-Fi
Downloading the MyDyson™app
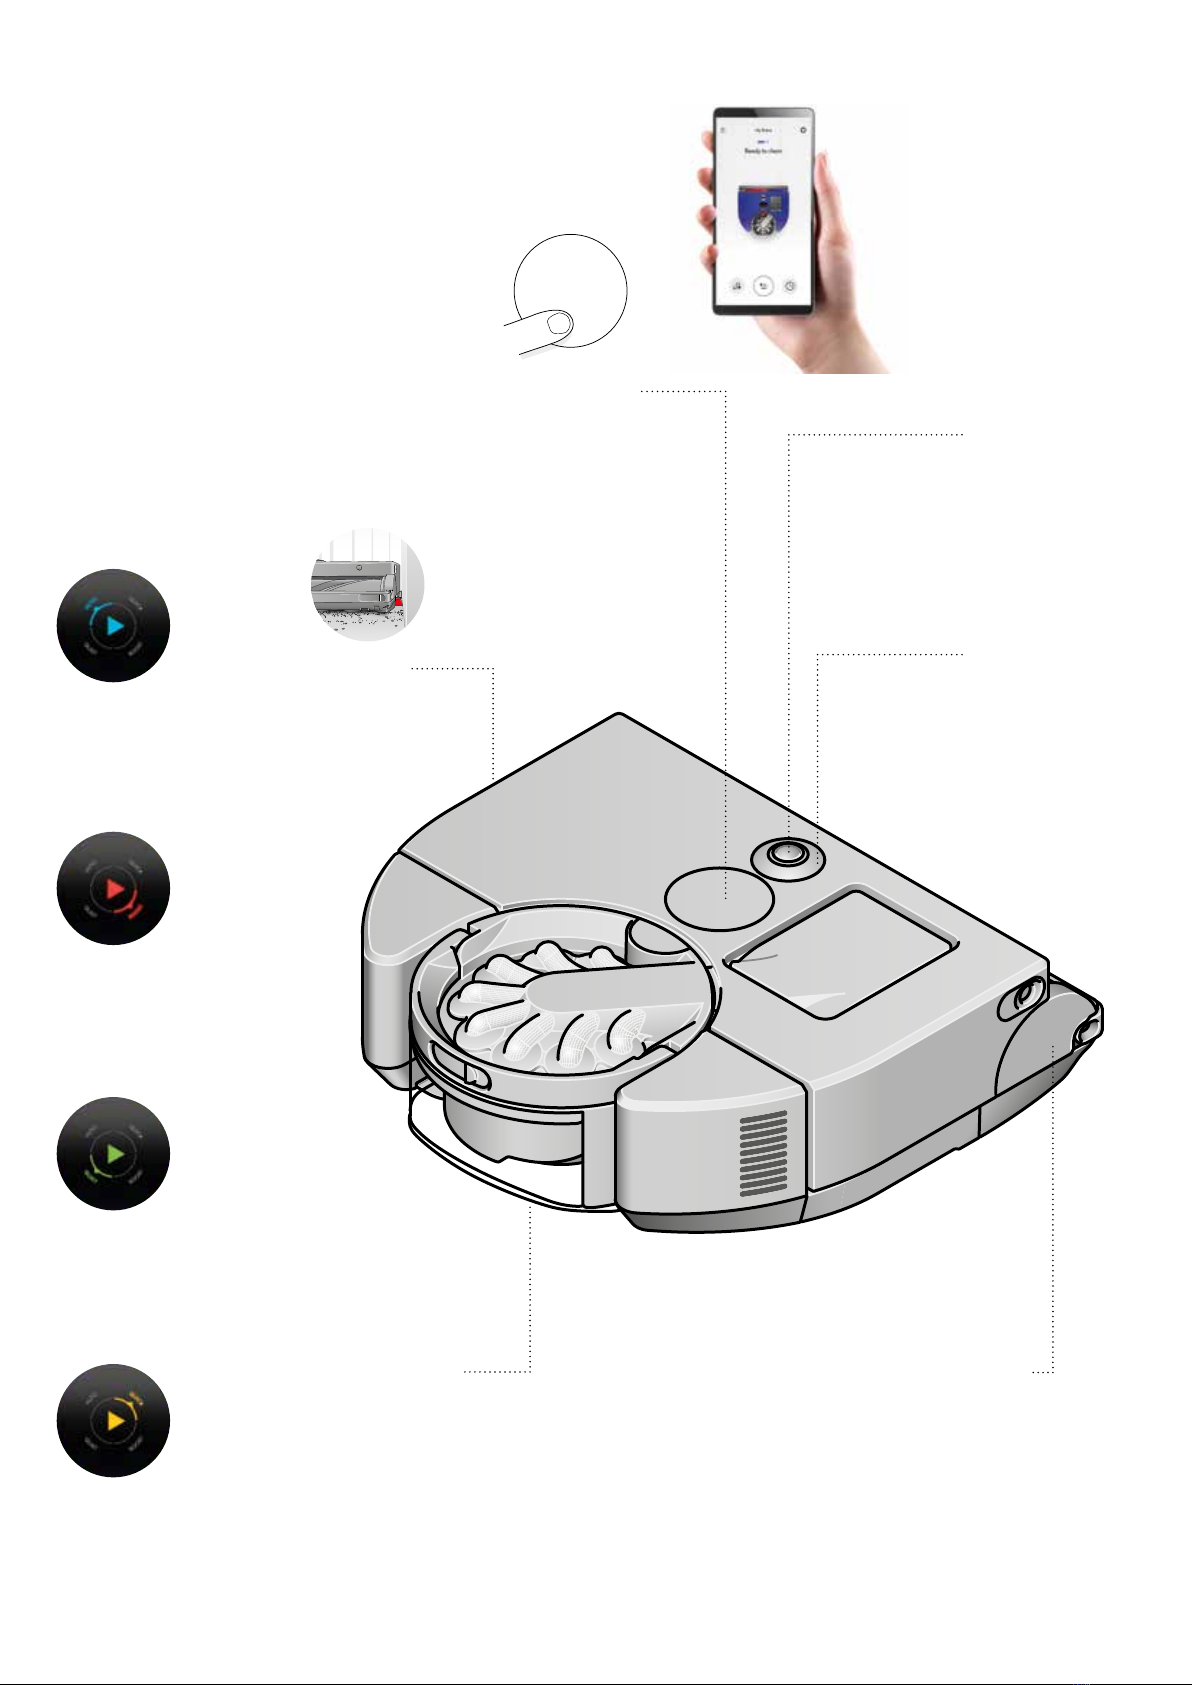
Control your robot – wherever you are. You can start cleaning, check your
robot’s progress or troubleshoot a problem. If you haven’t already,
download the app now for extra features and the latest updates.
Download the MyDyson™app from the App Store or Google Play.
Open the app and follow the on-screen instructions to create a new account.
Download the MyDyson™app
Choose your robot and follow the instructions on the MyDyson™app
to get connected.
Connection problems
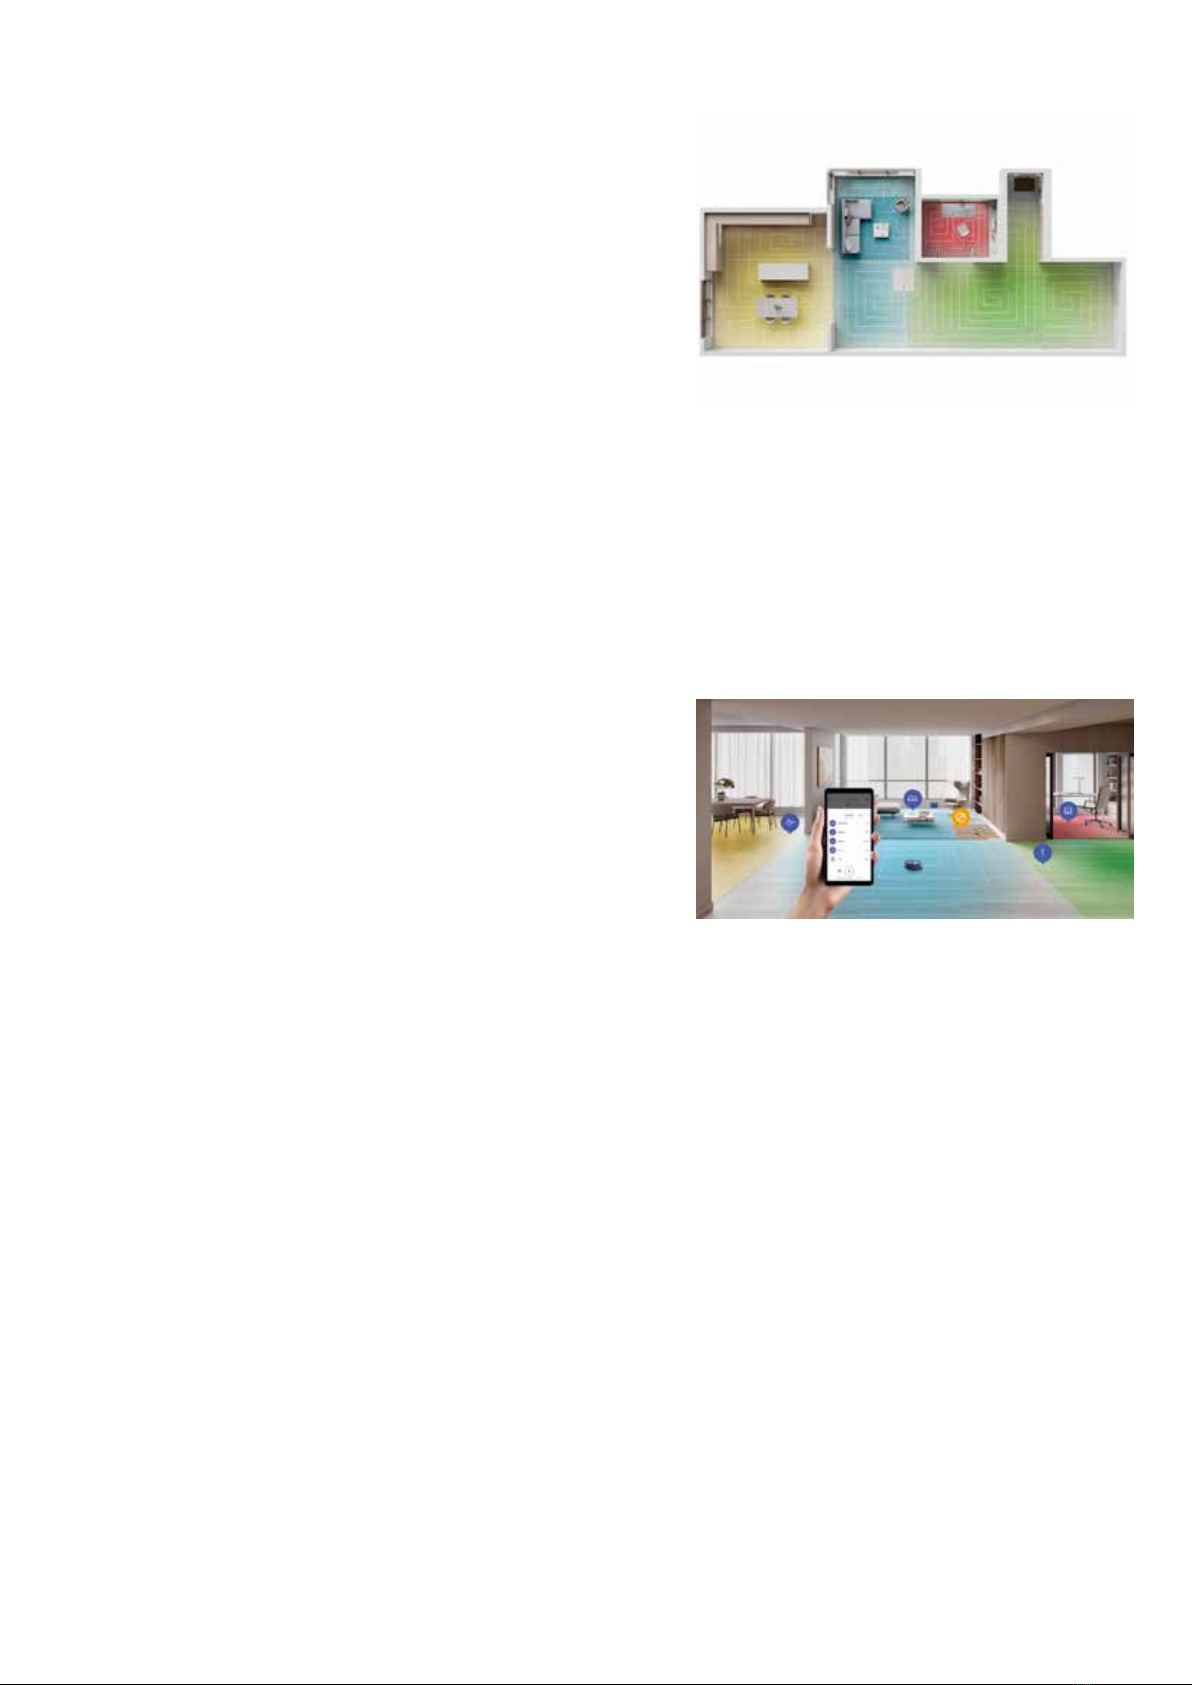
Your robot accesses the Dyson cloud through your home Wi-Fi network.
If you have a problem connecting, your robot can help get you back online.
Go into the settings menu on your robot’s LCD touchscreen and press
and click the Wi-Fi icon. Your robot will indicate what Wi-Fi network it is
connected to and the signal strength.
If your robot has failed to connect, press and click on ‘Check connection’ to
diagnose the problem. If your robot is not connected to your Wi-Fi router or
the internet, try the following:
Move your robot close to your Wi-Fi router, then turn your robot off and on
again to reconnect.
Check other devices on the same Wi-Fi network can access the internet.
If not, turn your router off and on again. If the problem persists, contact your
internet service provider.
If you have changed your Wi-Fi network settings, you may need to
re-connect your robot. Follow the ‘Change or add new Wi-Fi network’
instructions to re-connect.
If your robot is not connected to the Dyson cloud, try connecting to your robot
again later.
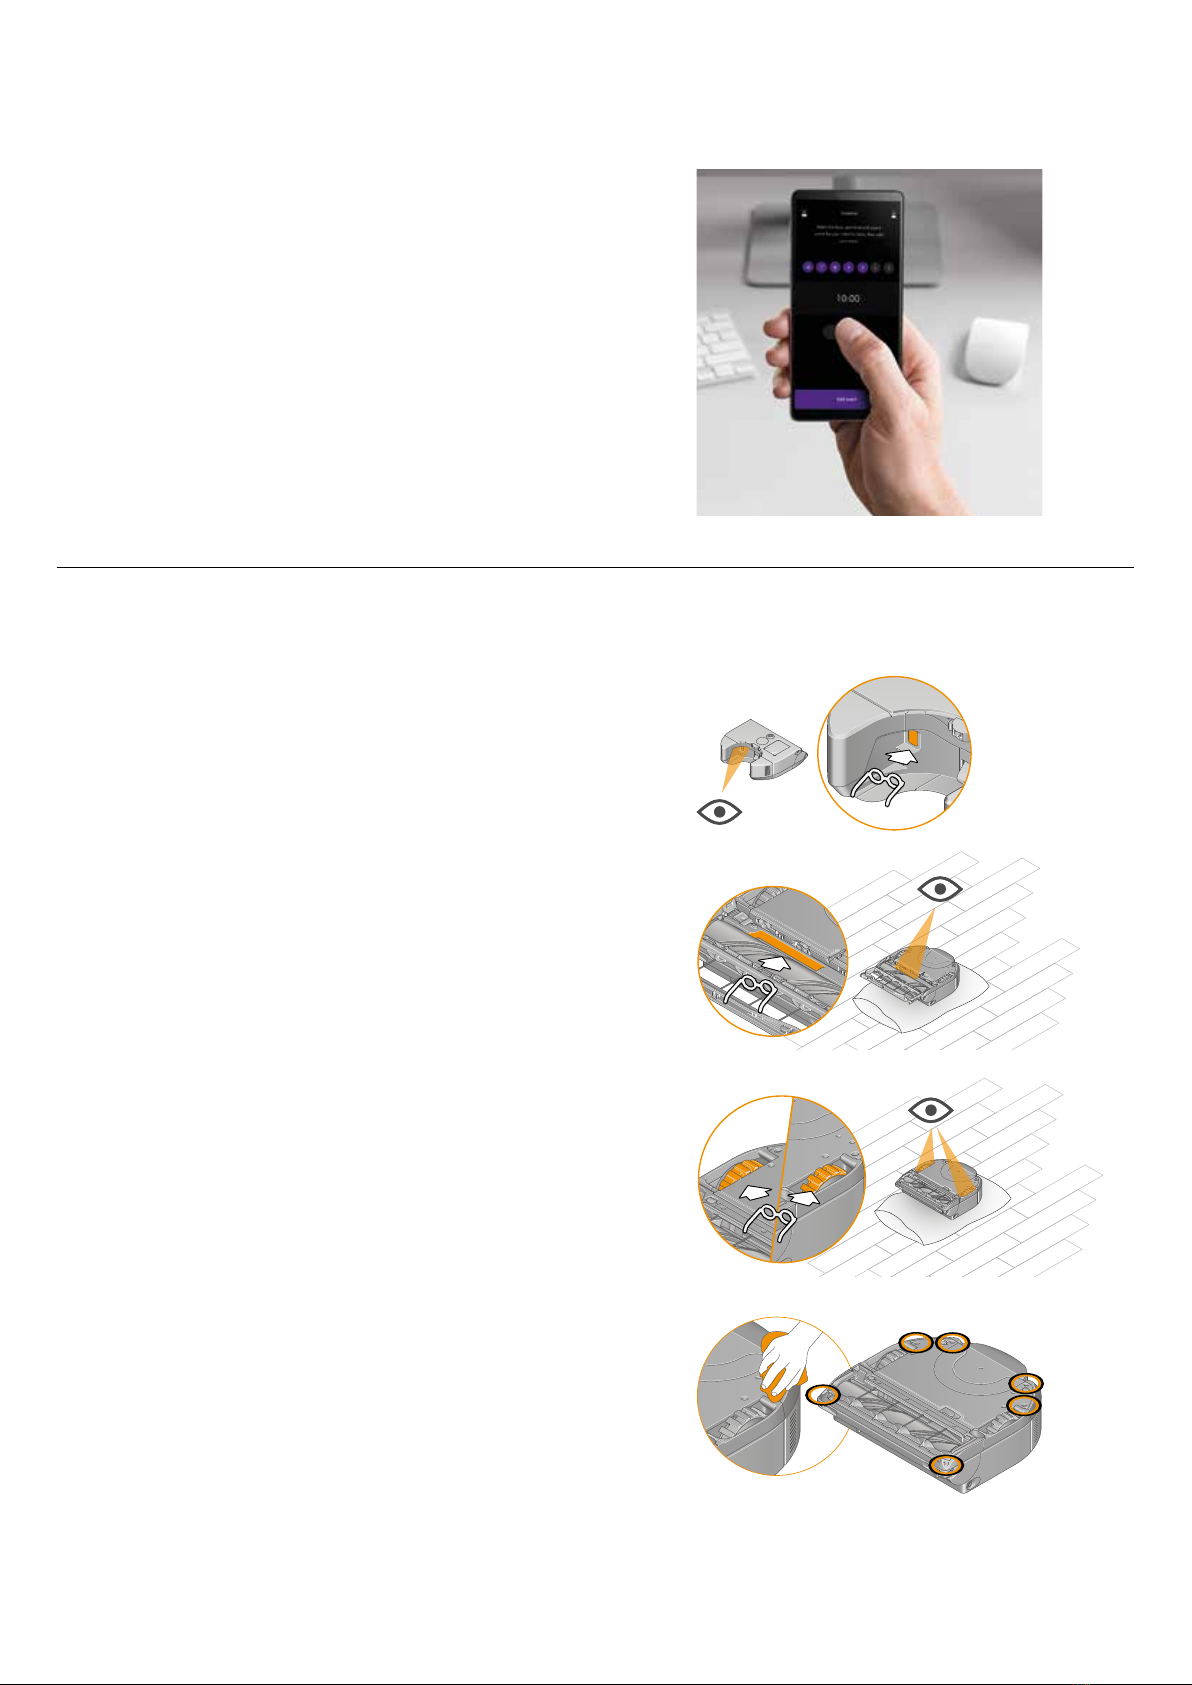
Changing or adding a new Wi-Fi network
Open the settings menu in the MyDyson™app and scroll down to
‘Add new Wi-Fi’.
Follow the on-screen instructions to add a new Wi-Fi network.
Hold mobile
device close to the
robot to pick up
signal

Setting up your dock
Choose a location
Assemble your dock
It’s important that you locate the dock carefully, as the robot will need clear
access to it.
The dock should be located against a wall, on a level surface, close to a
mains power supply. Make sure the position is out of bright sunlight and
not obscured under a table or other furniture.
The dock also needs to have at least 50 cm of clear space around the sides
and at least 1m in front.
Plug the charger connector in to the back of the dock and connect to the
mains power supply. A blue LED will light up when power is connected.
Wrap any excess cable around the cable tidy on the back of the dock.
Align the back panel of the dock with the floor section and press until it clicks
into place. The back panel is removable if you need to dismantle your dock.
Standby power
To save energy when it’s on the dock, your robot will go into standby mode
and the LCD touchscreen will dim.
You can activate your robot by pressing the LCD touchscreen, or by using
the app or voice control.
Powering off
If you need to turn off your robot’s power, take it off the dock. Press and hold
the screen until the Power off menu appears on the screen. Press and click
the LCD touchscreen to confirm.
Place your robot on the dock to turn the power on again.
Plug in and charge
Place your robot on the dock. Your robot will turn on and the
LCD touchscreen will light up.
The power cable
should be inserted
into the socket located
on the top, right hand
side on the back of the
dock.
The robot sits in the
front of the dock
between the floor plate
and the front ridge.

Preparing to clean
Setting the language
Caring for your floors
Prepare your home
Remove thin rugs or loose objects that your robot may suck up. Tidy small
items such as shoe laces or thin cables that your robot won't detect and may
get tangled in the brush bar.
Clean any liquid spills or sharp items that could damage your robot.
Open all doorways and clear away any furniture or items that are not
permanent so that your robot can access all areas.
Clear away any obstructions from drops or steps.
Language
Settings
About
When you first set up your machine, you’ll need to select the language your
robot will use.
Scroll up and down, through the languages.
When the language you’d like is highlighted, press and click the LCD
touchscreen to confirm your selection.
Check that the underside of your robot is clean and free from any objects that
may cause damage.
Before vacuuming your flooring, rugs, and carpets, check the manufacturer’s
recommended cleaning instructions.
The brush bar on your robot can damage certain carpet types and floors.
Some carpets will fuzz if a rotating brush bar is used when vacuuming.
We recommend blocking access or creating a ‘No brush bar’ area in the
MyDyson™app.

Starting a clean
Start from the dock
Start the clean by choosing your power mode then press and click the LCD
touchscreen or from the app, to start the clean. Your robot will clean all
areas that are accessible.
Your robot will return to the dock to charge when the battery is low.
Once your robot has charged, it will automatically continue its clean.
Starting a clean off the dock
To clean a specific area or a different level, start your robot away from the dock.
Your robot will clean all the accessible space it can reach on a single charge.
Your robot won't return to the dock to charge, when the battery is low, but return
to its starting point.
You won’t be able to start your clean from the MyDyson™app and your robot
won’t obey room boundaries or restrictions.
Start from the dock with the MyDyson™app or voice control
Start the clean using either the MyDyson™app or with voice control that you
have set up.
Choose to use a customised clean of an individual room, a selection of
rooms, or clean all accessible areas. Your robot will clean following your
mapping, zoning and restriction settings in the MyDyson™app.
Use the MyDyson™app to start your clean or press and click the LCD
touchscreen. You can start your clean from the dock or pick up your robot
and move it to a specific position.

Mapping your home
Prepare to map your home
Before mapping, it’s a good idea to tidy up any loose objects from the floor,
open internal doors and remove any items that may be moved between
cleans. Place your robot on the dock and you can start mapping.
Building a complete map can take time, and depends on the size of your
home (100 sq m may take approximately 90 minutes). During the mapping
process, leave your robot to create your map. It will return to the dock by itself
when mapping is complete.
Create a map
Your robot follows an optimised route to systematically clean your home,
with the brush bar and suction turned off to minimise the time taken to
map. For best results, avoid interrupting your robot while it's mapping.
Your robot needs a complete and accurate map of your home, so if there
are any problems during mapping, it's better to start again.
Multiple floors
If your home has more than one floor level, you can create a map for each
storey or level of your home.
When you clean on a different level of your house, you’ll need to move your
robot’s dock to each level and start each mapping mission from the dock.
Check www.dyson.com for the option to purchase additional docks.
Unlock intelligent features with the MyDyson™app
Your robot works in tandem with the MyDyson™app to intelligently navigate
and deep clean your home. Easily connect to see where it’s cleaned, create
zones and customise your robot’s behaviour.
Creating a map of your home with the MyDyson™app lets your robot learn
the layout. This gives you more control over where and how your robot cleans
areas of your home.

Zoning your home
Adding restrictions
No climb
No brush bar
Avoid areas
Your robot will avoid climbing in areas where obstacles may cause it to get
stuck, such as furniture with pedestals or low level items.
Your robot will vacuum in this area with the brush bar turned off. This is useful
where there are delicate floors or long-pile rugs.
You can select areas on your map for your robot to avoid. This can be used in
areas with cables, clothing or toys, where your robot might get stuck. You can
also avoid entire rooms, such as the bathroom.
Customising cleans
Pick a zone or selection of zones to clean.
Choose a power mode for your selected zone.
Your robot will clean zones in the order that minimises the time
taken to complete the clean.
Once you’ve created a map, follow the instructions on the MyDyson™app to
create zones.
Divide your map into zones. Once you divide your map into different zones,
you can choose when and how each zone is cleaned.
Tap on the map to add zone dividers.
You may want to use room boundaries so that you can customise the clean
for each room.
Using the MyDyson™app, you can select areas that your robot needs to
avoid, turn off the brush bar or avoid climbing in that area.
Aerial view of zones showing
furniture and boundaries

Scheduling cleans
Reviewing cleans
Scheduling and reviewing cleans
Looking after your robot
Look after your robot
Look after your battery
Your machine won’t operate or charge if the ambient temperature is below
5°C (41°F). This is designed to protect both the motor and battery.
You'll need your serial number, located behind the bin.
Register your robot
For more information and support videos for your machine go online:
www.dyson.com/support
Check airways for blockages
Check your robot regularly for blockages in the airways. Remove the bin and
check for debris in the airway behind it.
Check brush bar for obstructions
Check the brush bar regularly and remove any threads, hair and any other
debris that may cause an obstruction.
Check wheels for obstructions
Turn your robot over on a soft surface to protect the lens. Check that
the wheels are clear of any threads, hair or other debris that may
cause an obstruction.
For optimum performance, regularly clean your robot and
check for obstructions.
Clean optics obstructions
Regularly check that your camera and sensors are clean and free from any
dirt or smears. Use a soft, dry, lint-free cloth to clean the optics.
Wash your filter
Wash your filter regularly and leave to dry completely.
Use the MyDyson™app to see a map of where your robot has cleaned.
Your robot will update its map at the end and periodically during a clean.
You can use the map to see where your robot has got stuck during a clean,
then use this as a guide to add restrictions.
Your map will indicate the levels of dust detected during the clean, you may
want to clean areas with higher dust more often.
If your robot is dusty, wipe with a dry lint-free cloth.
Don’t use detergents or polishes to clean your robot.
Keep your robot’s software up to date with the MyDyson™app.
Use the MyDyson™app to schedule cleans for times when you’re not at home,
or clean high traffic areas more frequently.
With the bin
removed, the
airway can be
found on the left
hand side of the
main body.
With the robot on its
back, look between
the roller bar and its
housing.
With the robot on
its back, check the
wheels located on
the bottom of the
robot, on either side.
With the robot
on its back, the
sensors can be
found on both
sides of the
bottom. There
are sensors on
the front corner
edge and two
pairs located
towards the bin.

Emptying your bin
Empty your bin as soon as the dirt reaches the MAX level
Remove your bin
Release the dirt
Close the bin
Cleaning your bin
Minimise dust contact
Push the bin base upwards until your bin and bin base click into place.
Push your bin back into place, make sure it clicks securely back into your robot.
Clik
Clik
Clik
Hold your bin over a rubbish container, pointing downwards.
Push the cyclone release button on the handle.
Your bin will slide down, cleaning the shroud as it goes, the bin base will
open, releasing the dirt.
Cover your bin tightly in a dustproof bag while you empty. Remove your bin
carefully, seal the bag tightly and dispose.
Press the bin removal catch on the top of your robot and lift your bin away.
Use the handle to carry your bin.
Your bin isn’t dishwasher safe and using detergents, polishes or air
fresheners to clean it isn’t recommended, as it could damage your robot.
Empty your bin and press the bin empty catch. This is located under the
cyclone, on the bin runner.
Slide your bin off the runner and put the cyclone to one side.
Only use a damp, lint-free cloth to clean your bin.
Make sure that your bin and seals are completely dry before replacing.
Push bin back into
place at the rear of
your machine until you
hear a click
With the handle lifted,
the cyclone release
button is located in the
middle of the handle.
The bin removal catch is
located behind the screen on
the top of the robot. This can
be pressed and the bin pulled
away from the main body.

Washing your filter
Remove your filter
Before washing your filter, tap it gently over a bin to remove any loose dust
and debris.
Tap your filter
Wash the outside
Wash with warm, running tap water – gently rubbing your filter with your
fingers to remove the dirt.
Repeat until the water runs clear.
Wash the inside
Wash with warm, running tap water. Don't use detergent, or wash it in a
dishwasher or washing machine.
Place your hand over one end of your filter.
Fill the filter with warm tap water.
Place your hand over the open end of the filter and shake it firmly to remove
trapped dirt and debris.
Repeat these steps until the water runs clear.
Press the filter unit on the top of your robot and it will pop up. Lift it out of the
robot and remove the filter inside.
Shake out the water
Dry your filter
Clik
Wash your filter at least once a month to maintain optimum suction power.
Important: your filter must be completely dry before you put it back into the
machine. Your machine could be damaged if used with a damp filter.
The filter unit housing your washable filter can be wiped with a damp,
lint-free cloth to remove any dirt or dust.
For more information and support videos for your machine go online:
www.dyson.com/support
Empty the filter and shake it firmly to remove excess water.
Shake with the filter in both an upward and downward position.
Keep shaking it until there’s no water coming from the filter.
Place your filter on its side and leave to dry for at least 24 hours in a
well-ventilated, warm place.
Don’t dry your filter in a tumble dryer, microwave or near a naked flame.
Important: your filter must be completely dry before you put it back into the
machine. Your machine could be damaged if used with a damp filter.
Locate filter unit
to the right of the
LCD touchscreen
and LED light ring
The filter is
cylindrical with filter
material around the
outside and inside.
Turn your filter so
that the open end
is upright
Turn filter on its
side and hold
under running
water
Reinsert filter into the
filter unit and replace the
filter unit to the right of
the LCD screen and LED
light ring

Maintaining your brush bar
To maintain optimum performance, check and remove hair and debris from
your brush bar at least once a month.
Remove your brush bar
Don’t put any part of your machine in a dishwasher or use detergents,
polishes orair fresheners.
Turn your robot over and place it on a soft surface.
Lift the red brush bar cover lever on the base of your robot and then press
the red brush bar release button.
Slide the brush bar out of your robot and remove any threads wrapped
around the brush bar. Remove debris from the brushbar recess,
including any threads wrapped around the rotating parts.
Pull the silver end cap from the brush bar and remove any threads from
the recess. Don’t wash the end cap.
Wash and dry your brush bar
If your brush bar needs washing, hold your brush bar under running water
and gently rub to remove any lint or dirt.
Remove as much excess water as possible. Run your hand down the length of
the brush bar to squeeze out the water.
Stand your brush bar upright. Leave to dry completely for at least 24 hours.
Important: your brush bar must be completely dry before you put it back into
the machine. Your machine could be damaged if used with a damp brush
bar.
Replace your brush bar
Before replacing, check that your brush bar is completely dry.
Push the end cap back onto the brush bar. Slide the brush bar back into your
robot, push down on it until the release button pops back up.
Close the brush bar cover and push the lever down to lock the cover in place.
Slide and lift the
brush bar out
from one end and
remove whole
component
Locate the brush bar lever
on the base of the robot
near the centre and above
the brush bar

Cleaning your camera lens and sensors
To maintain optimum performance, regularly check and clean dust,
debris and smears on the sensors.
We recommend that you check and clean your robot’s sensors at least once
a month.
Use a soft, dry, lint-free cloth to wipe the top sensors and camera lens. Do not
use cleaning fluids, liquids or sprays of any kind. Turn your robot over and
place on a soft surface. Use the same cloth to wipe the sensors on the bottom
of the machine.
For more information and support videos for your machine go online:
www.dyson.com/support
Locate seven sensors on the base of the machine. Two sensors
on either side towards the rear. Two are located on the front
corners. One sensor is located in the recess in front of the right
wheel.
Locate seven sensors. The first pair are at the sides
of the robot near to the front and top of the machine.
The second pair are at the front of the robot, either
side of the brush bar. The third pair are immediately
in front of the second pair facing forwards. The final
sensor is the LED light ring and camera on top of the
robot in front of the LCD touchscreen.”

Alerts
Icons will appear on the LCD touchscreen and in the MyDyson™app to alert
you that your robot needs your attention. Follow the instructions on the
MyDyson™app to clear the alert.
If you’re unable to clear the alert, call the Dyson Helpline.
Brush bar stuck
The brush bar has stopped spinning. Lift the robot and check that there
are no obstructions. Follow the ‘Maintaining your brush bar’ instructions to
remove the brush bar.
Set up a restriction in the MyDyson™app if this alert continues to happen in a
specific area of your home.
Battery not detected
Check your battery is fitted correctly.
Battery low. Place on dock.
Put your robot on the dock to charge.
Edge cleaner stuck
Check there isn’t any dust or debris blocking the edge cleaner. Remove the
obstruction, press and click the LCD touchscreen to resume the clean.
Set up a restriction in the MyDyson™app if this alert continues to happen in a
specific area of your home.
Airways blocked
Your robot has detected a blockage in the airways, that may require the bin
to be emptied.
Empty your robot’s bin following the instructions in the ‘Emptying your bin’
section of this manual.
To clear a blockage, follow the instructions in the ‘Looking after your robot’
section of this manual.
Check bin level
Check your robot’s sensors for threads, dust or smears, and clean following
the instructions in ‘Cleaning your camera lens and sensors’.
Bin not detected
Check bin is fitted correctly. Your robot won’t clean if the bin is missing or
incorrectly fitted.
Drop sensors obscured
Check your robot’s drop sensors for threads, dust or smears, and clean
following the instructions in ‘Cleaning your camera lens and sensors’.
Ambient temperature too low
Your robot’s internal temperature is too cold to clean. Put your robot back on
the dock and start the next clean once it has warmed up.
Filter not detected
Check filter is correctly fitted. Your robot won’t clean if the filter is missing or
incorrectly fitted.

Optics obscured
Check your robot’s camera and sensors for dirt, dust, fingerprints and
smears, and clean following the instructions in ‘Cleaning your camera lens
and sensors’.
Robot lifted
Your robot has detected that it has been lifted, or cannot move away from a
drop. Place your robot on the floor, away from any drops, press and click the
LCD touchscreen to resume the clean.
Set up a restriction in the MyDyson™app if this alert continues to happen in a
specific area of your home.
Robot moved
Your robot has detected that it has been moved. Place your robot on the floor,
away from any drops, press and click the LCD touchscreen to resume the clean.
Robot stuck
If your robot is unable to move, pick it up, move it away from any obstruction.
Press and click the LCD touchscreen to resume the clean.
Set up a restriction in the MyDyson™app if this alert continues to happen in a
specific area of your home.
Routine check
Your robot needs you to do a routine check of its systems.
Check your robot’s camera and sensors for dirt, dust, fingerprints and
smears, and clean following the instructions in ‘Cleaning your camera lens
and sensors’.
Lift the robot and check that there are no obstructions around its brush bar.
Follow the ‘Maintaining your brush bar’ instructions to remove the brush bar.
Place on dock
Your robot has a problem and needs you to place it on the dock.
Go into Settings on the MyDyson™app. Check your robot’s software is up to
date and automatic upgrades are enabled.
Robot temperature too high
Your robot’s internal temperature is too hot to clean. Put your robot back on
the dock and start the next clean once it has cooled down.
System error detected
Your robot has detected a system error.
To power off, press and hold the screen until the Power off menu appears on
the screen. Press and click the LCD touchscreen to confirm.
Place your robot on the dock to turn the power on again.
Go into Settings on the MyDyson™app. Check your robot’s software is up to
date and automatic upgrades are enabled.
Wash filter
Your robot has detected a blockage in the airways, that may require the filter
to be washed.
Empty your robot’s bin following the instructions in the ‘Emptying your bin’
section of this manual.
To clear a blockage, follow the instructions in the ‘Looking after your robot’
section of this manual.
If that does not resolve the issue, then follow the instructions in ‘Washing your
filter’ section of this manual.

Wheel stuck
Lift your robot and check for any obstructions or items that have become
entangled round the wheels.
Clear any obstruction following the instructions in the ‘Looking after your
robot’ section of this manual.
Set up a restriction in the MyDyson™app if this alert continues to happen in a
specific area of your home.
Unable to dock
Your robot has been unable to dock.
Check your dock is set up correctly by following the ‘Setting up your dock’
section in this manual.
Unable to return to dock
Your robot has been unable to return to its dock.
Your robot may have become boxed in by obstacles, ensure that its path back
to the dock is not obstructed.
Check your robot’s sensors for dust or threads and clean following the
‘Cleaning your camera lens and sensors’ section of this guide.
Your robot has its own lighting but this may not be sufficient in extremely dark
conditions. Keep lights on in the areas to be cleaned.
Go into Settings on the MyDyson™app. Check your robot’s software is up to
date and automatic upgrades are enabled.

Resetting and upgrading software
Changing ownership
When you first connect your robot to the MyDyson™app, you automatically
become its owner. Your personal data, such as Wi-Fi settings, cleaning
schedules and maps are linked to your account.
If you want to add another user, they should download the app and follow
the instructions. They’ll have the option to be a user or owner.
Owner – has full control of the data and users.
User – only has access to the functions available in the app and robot.
If you want to change ownership, or if a new user wants to take full ownership
of the robot, the robot will be removed from the original owner’s account.
A notification of change of ownership will be sent to the original owner.
Removing and resetting
To remove your robot from the app and remove your personal data, such as
maps, from the MyDyson™cloud, go into the Settings menu on the app and
remove your robot.
To erase data from your robot, go to Settings on the LCD touchscreen menu,
select ‘Erase Data’, press and click to confirm. This will erase personal data
stored on the robot, such as Wi-Fi passwords, and return your robot to its
factory settings.
Upgrading software
To get the best experience from your robot and to access all the latest
features, it’s important that your Robot’s software is up to date.
We recommend you use Auto updates.
Automatic updates
Open the Settings menu in the MyDyson™app and scroll down to Software.
Slide Auto update software to On.
When an update becomes available for your robot, it’ll automatically
download and install at the next available opportunity (when the robot is
inactive, on the dock and connected to Wi-Fi).
An update screen will be displayed on your robot. Don’t interrupt the update
until it has completed. Removing the battery during an update may cause
irreparable damage. We recommended you don’t press and hold the screen
during an update.
When the update is complete, the LCD touchscreen will return to the
Power mode screen and your robot is ready to use.
Manually update with a USB stick
Your robot’s software can be updated using a USB stick if a Wi-Fi network
isn’t available.
You’ll need to use a USB stick formatted to FAT32 with at least 1 GB free space.
The latest software update and release notes can be found on
www.dyson.com/support.
This software update should be the only item saved on to the USB stick.
Some web browsers may display the file in the browser instead of prompting
you to download it. Follow your browser’s process for saving the file onto
your USB stick.
Remove the bin and insert the USB stick into the port behind the bin. Replace
the bin and place your robot on the dock, making sure it’s powered. Select
‘Update with USB’ from the Settings menu on the LCD touchscreen.
Remove the bin and insert the USB stick into the port behind the bin.
Select ‘Upgrade’ from the menu on the LCD touchscreen.
Table of contents
Other Dyson Vacuum Cleaner manuals

Dyson
Dyson DC31 User manual

Dyson
Dyson DC20 User manual

Dyson
Dyson DC19T2I User manual

Dyson
Dyson Slim User manual

Dyson
Dyson DC 46 User manual

Dyson
Dyson DC 52 User manual

Dyson
Dyson DC24 Blueprint Limited Edition User manual

Dyson
Dyson V6 mattress User manual

Dyson
Dyson DC22 User manual

Dyson
Dyson DC24i User manual

Dyson
Dyson DC24 Blueprint Limited Edition User manual

Dyson
Dyson DC44 User manual

Dyson
Dyson DC05 Installation guide

Dyson
Dyson DC20 User manual

Dyson
Dyson DC17 Absolute User manual

Dyson
Dyson DC29 User manual

Dyson
Dyson Dc45 User manual

Dyson
Dyson V11 User manual

Dyson
Dyson DC25 All Floors User manual

Dyson
Dyson DC39 multi floor User manual