8
Looking for blockages
• Switch ‘OFF’ and unplug before looking for blockages. Failure to
do so could result in personal injury.
• Leave to cool down for 1-2 hours before looking for blockages.
• Beware of sharp objects when checking for blockages.
• Clear any blockage before restarting.
• Refit all parts securely before using.
• Please refer to 'Looking for blockages' illustrations or 'Online
support' section for additional guidance.
• To gain access to blockages behind the brush bar, remove the base
plate by using a coin to loosen the fastener marked with a padlock.
• Clearing blockages is not covered by your guarantee.
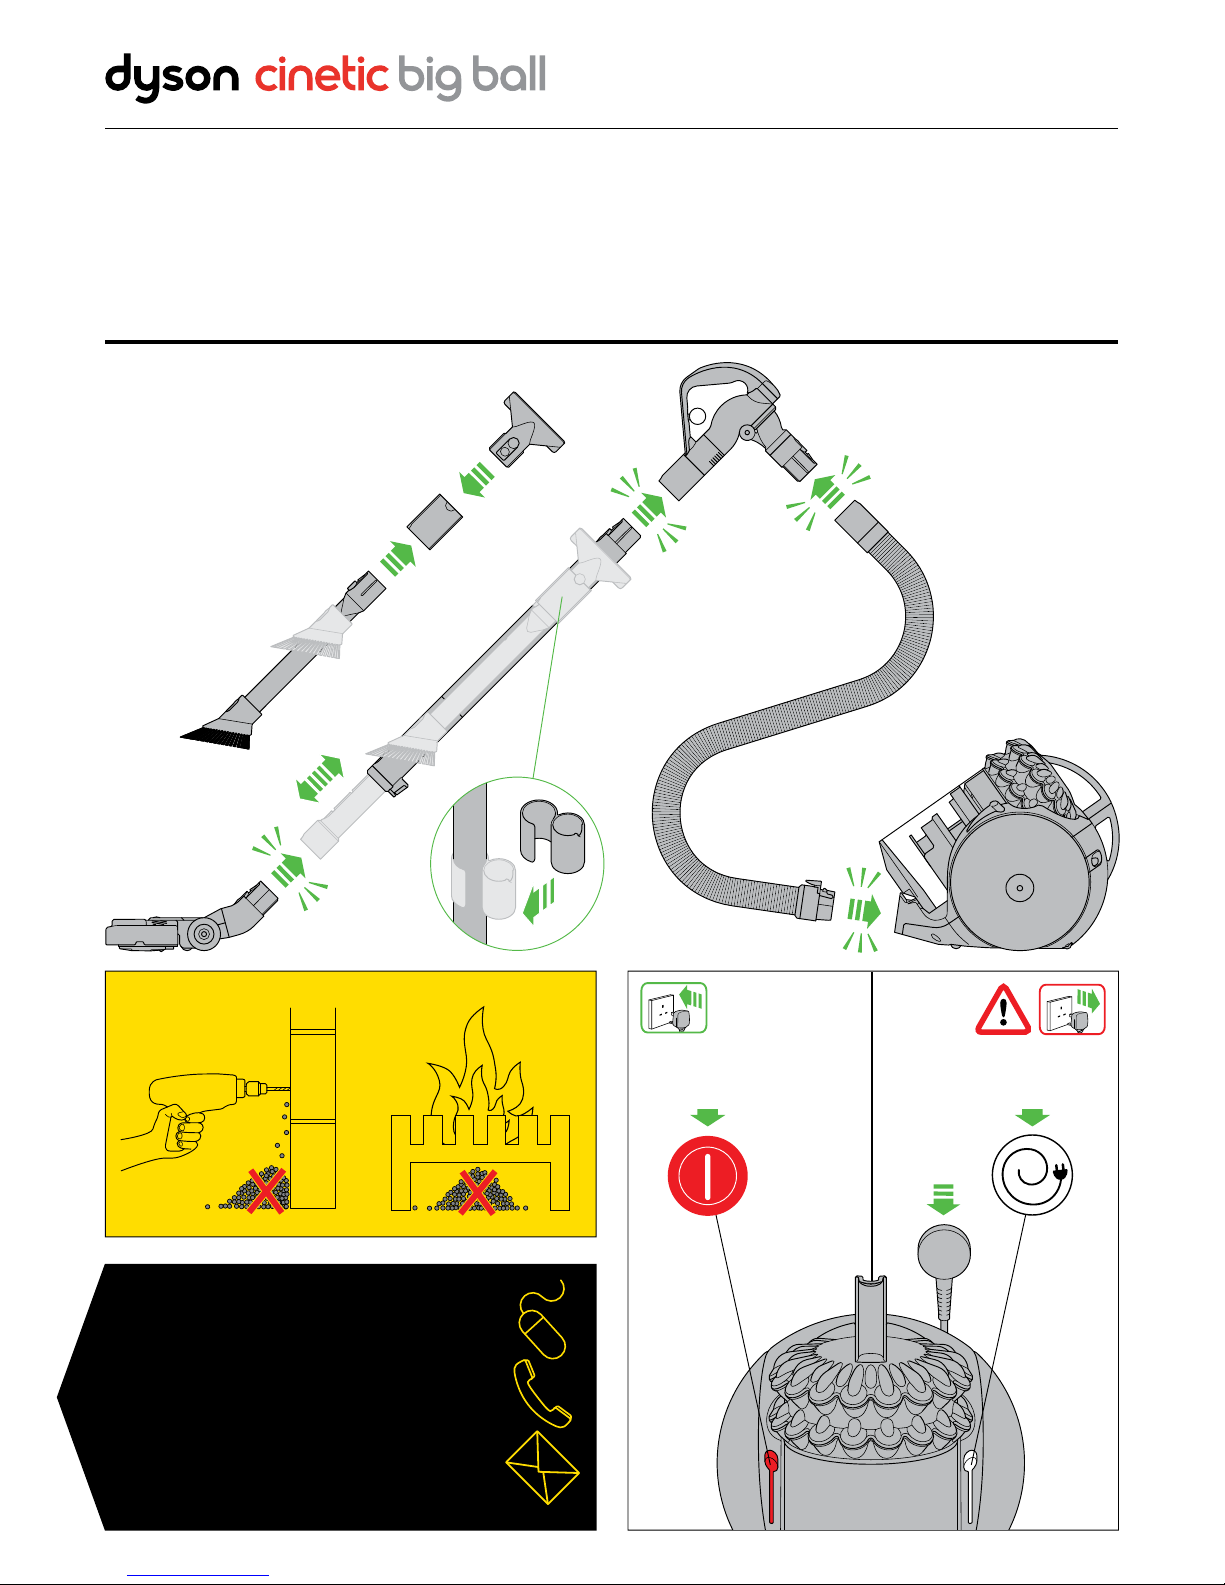
Brush bar – clearing obstructions
• If your brush bar is obstructed, it may shut ‘OFF’. If this happens
you will need to remove the brush bar as shown.
• Switch ‘OFF’ and unplug before proceeding. Failure to do so could
result in personal injury.
• Remove the brush bar by using a coin to loosen the fastener
marked with a padlock until it clicks.
• Beware of sharp objects when clearing obstructions.
• Replace the brush bar and secure it by tightening the fastener until
it clicks. Ensure it is fixed firmly before operating.
• Clearing brush bar obstructions is not covered by your guarantee.
• This appliance has carbon fibre brushes. Take care if coming into
contact with them, as they may cause minor skin irritation. Wash
your hands after handling the brushes.
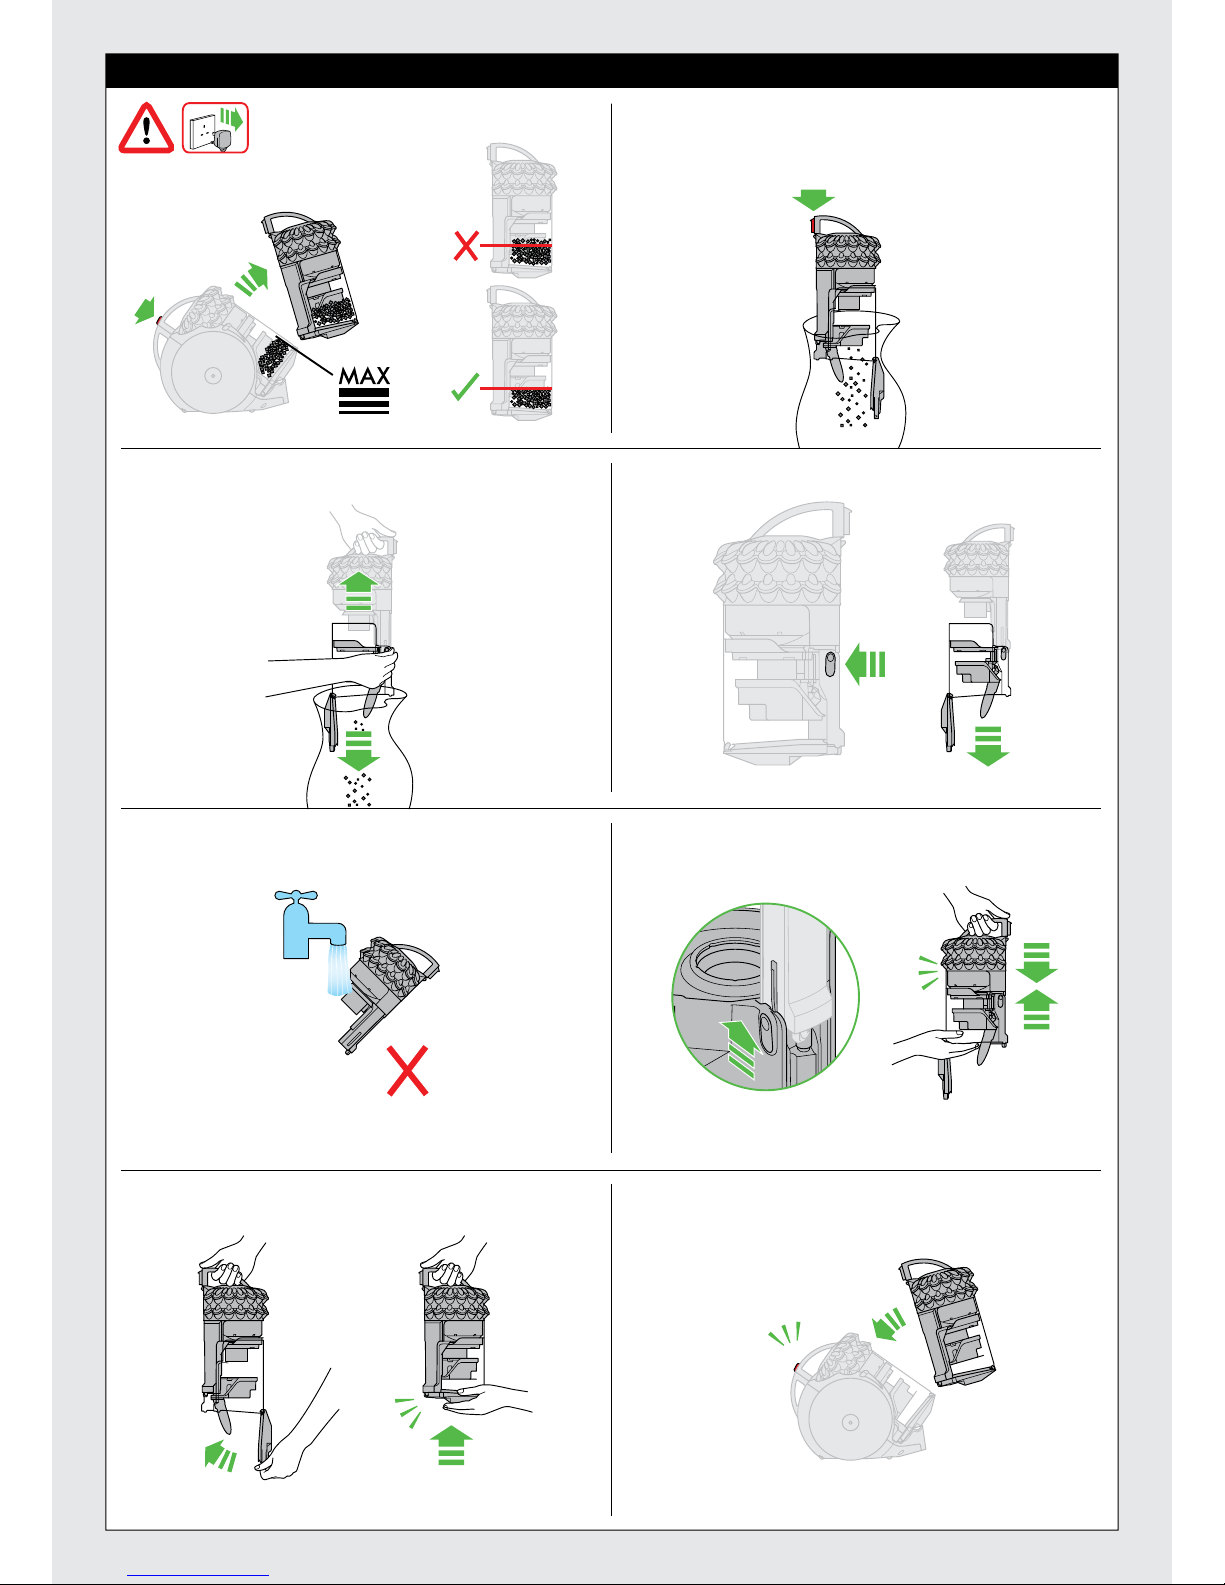
Emptying the clear bin
• Empty as soon as the dirt reaches the level of the MAX mark – do
not overfill.
• Switch ‘OFF’ and unplug before emptying the clear bin.
• To remove the cyclone and clear bin unit, push the red button on
the top of the carrying handle, as shown.
• To release the dirt, ensure the cyclone and clear bin unit is kept
vertical then firmly push the red button once more.
– The bin will slide down, cleaning the shroud as it goes.
– The bin base will then open.
– For stubborn dirt trapped in the cylinder, move mechanism up
and down until clear (please refer to 'Emptying the clear bin and
optional bin removal' illustrations).
• To minimise dust/allergen contact when emptying, encase the clear
bin tightly in a plastic bag and empty.
• Remove the clear bin carefully from the bag.
• Seal the bag tightly, dispose as normal.
• Close the clear bin by pushing the bin base upwards. Ensure that
the bin base clicks and the clip is securely in place.
• Locate the base of the clear bin onto the front of the main body and
lower the cyclone down until it clicks into place.
• In the event the clear bin unit does not open automatically, use the
small, silver release catch located towards the base of the clear bin
unit (see 'Emptying the clear bin' illustrations).
Cleaning the clear bin (optional)
In the event that it is necessary to clean the clear bin:
• Remove the cyclone and clear bin (see 'Emptying the clear bin') and
push the red cyclone release button.
• Pull the silver bin release button and slide the clear bin off the spine
of the cyclone.
• Please refer to 'Emptying the clear bin and optional bin removal'
illustrations for additional bin removal and replacing guidance.
• Clean the clear bin with a damp cloth only.
• Do not use detergents, polishes or air fresheners to clean the
clear bin.
• Do not put the clear bin in a dishwasher.
• Do not immerse the cyclone in water or pour water into
the cyclones.
• Ensure the clear bin is completely dry before replacing.
• To refit the clear bin:
– Insert the spine into the bin runner
– Push upwards until it clicks and then continue pushing until it
slides home.
• Close the clear bin by pushing the bin base upwards. Ensure that
the bin base clicks and the clip is securely in place.
Looking after your
Dyson appliance
• Do not carry out any maintenance or repair work other than
that shown in this Dyson Operating Manual, or advised by the
Dyson Helpline.
• Only use parts recommended by Dyson. If you do not this could
invalidate your guarantee.
• Store the appliance indoors. Do not use or store it below
3°C (37.4°F). Ensure the appliance is at room temperature
before operating.
• Clean the appliance only with a dry cloth. Do not use any
lubricants, cleaning agents, polishes or air fresheners on any part
of the appliance.
• If used in a garage, always wipe the base of the floor tool and base
of the appliance with a dry cloth after vacuuming to clean off any
sand, dirt or pebbles that could damage delicate floors.
Disposal information
• Dyson products are made from high grade recyclable materials.
Recycle where possible.
• This marking indicates that this product should not be disposed
with other household wastes throughout the EU. To prevent possible
harm to the environment or human health from uncontrolled
waste disposal, recycle it responsibly to promote the sustainable
reuse of material resources. To return your used device, please
use the return and collection systems or contact the retailer
where the product was purchased. They can take this product for
environmentally safe recycling.
Online support
• For online help, general tips, videos and useful information
about Dyson.
UK - www.dyson.co.uk/support
ROI - www.dyson.ie/support
Product information
Please note: Small details may vary from those shown.
Compatibility with previous Dyson tools and accessories
• Your new machine comes with the latest Dyson technology. As such
it is equipped with the latest Quick release catches that allow
quick and easy tool or accessory changes. However, this makes it
incompatible with previous generations of Dyson products.
• An adaptor which makes your new machine compatible with
older Dyson tools and accessories is available by contacting your
local Dyson Helpline (see ‘Dyson Customer Care’ section for
contact details).