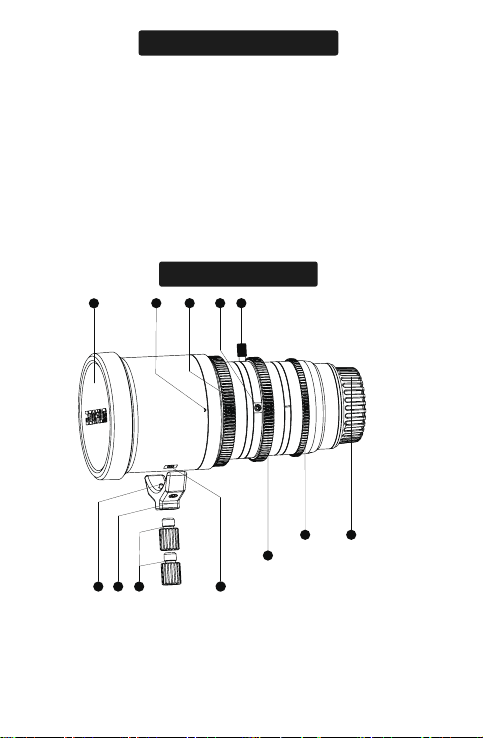
Introduction
Pictor Zoom series lenses are the products of DZOFILM for S35
cameras.
Thank you for your purchase of this product. Be sure that you
have read this manual and understood its content before using the
camera. Keep the manual where it will be read by all who use the
product.
For repair, inspection and internal test, please contact your
DZOFILM dealer.
Make sure that you use the lens correctly. Read the Manual
carefully before use.
● When using a matte box, do not pick up or hold the camera using
only the hood.
● Use a blower to remove dust and lint from the glass surfaces of
the lens or filter. To remove smudges and fingerprints, apply a small
amount of lens cleaner to a soft, clean cotton cloth or lens-cleaning
tissue and clean from the center outwards using a circular motion.
Do not leave smears or touch the glass with your finger.
● Never use organic solvents such as paint thinner or benzene to
clean the lens.
● Attach the front and rear caps when the lens is not in use.
● Store the lens and filter in cool, dry locations to prevent mold and
rust. Do not store in direct sunlight or with naphtha or camphor moth
balls.
● Please keep the lens dry and wipe th e water droplets off if there
are droplets on the glass surface.
● Leaving the lens near heater or in other extremely hot locations
could cause damage or warping.
● There may be a case that the glasses of the lens mist when the
lens is carried from a cool place to a high temperature and high
humidity. To avoid a mist on the glasses, before using the lens, let
the lens adjust to the ambient temperature of the place where the
lens will be used.
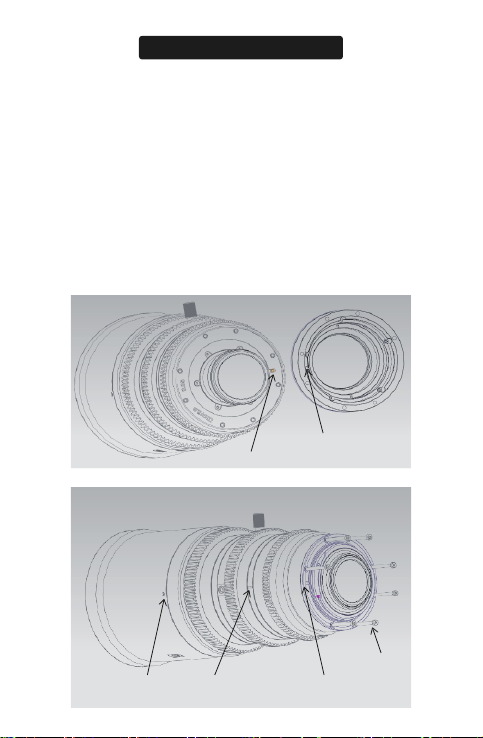
Product Care


 4.5/55 Operation manual")