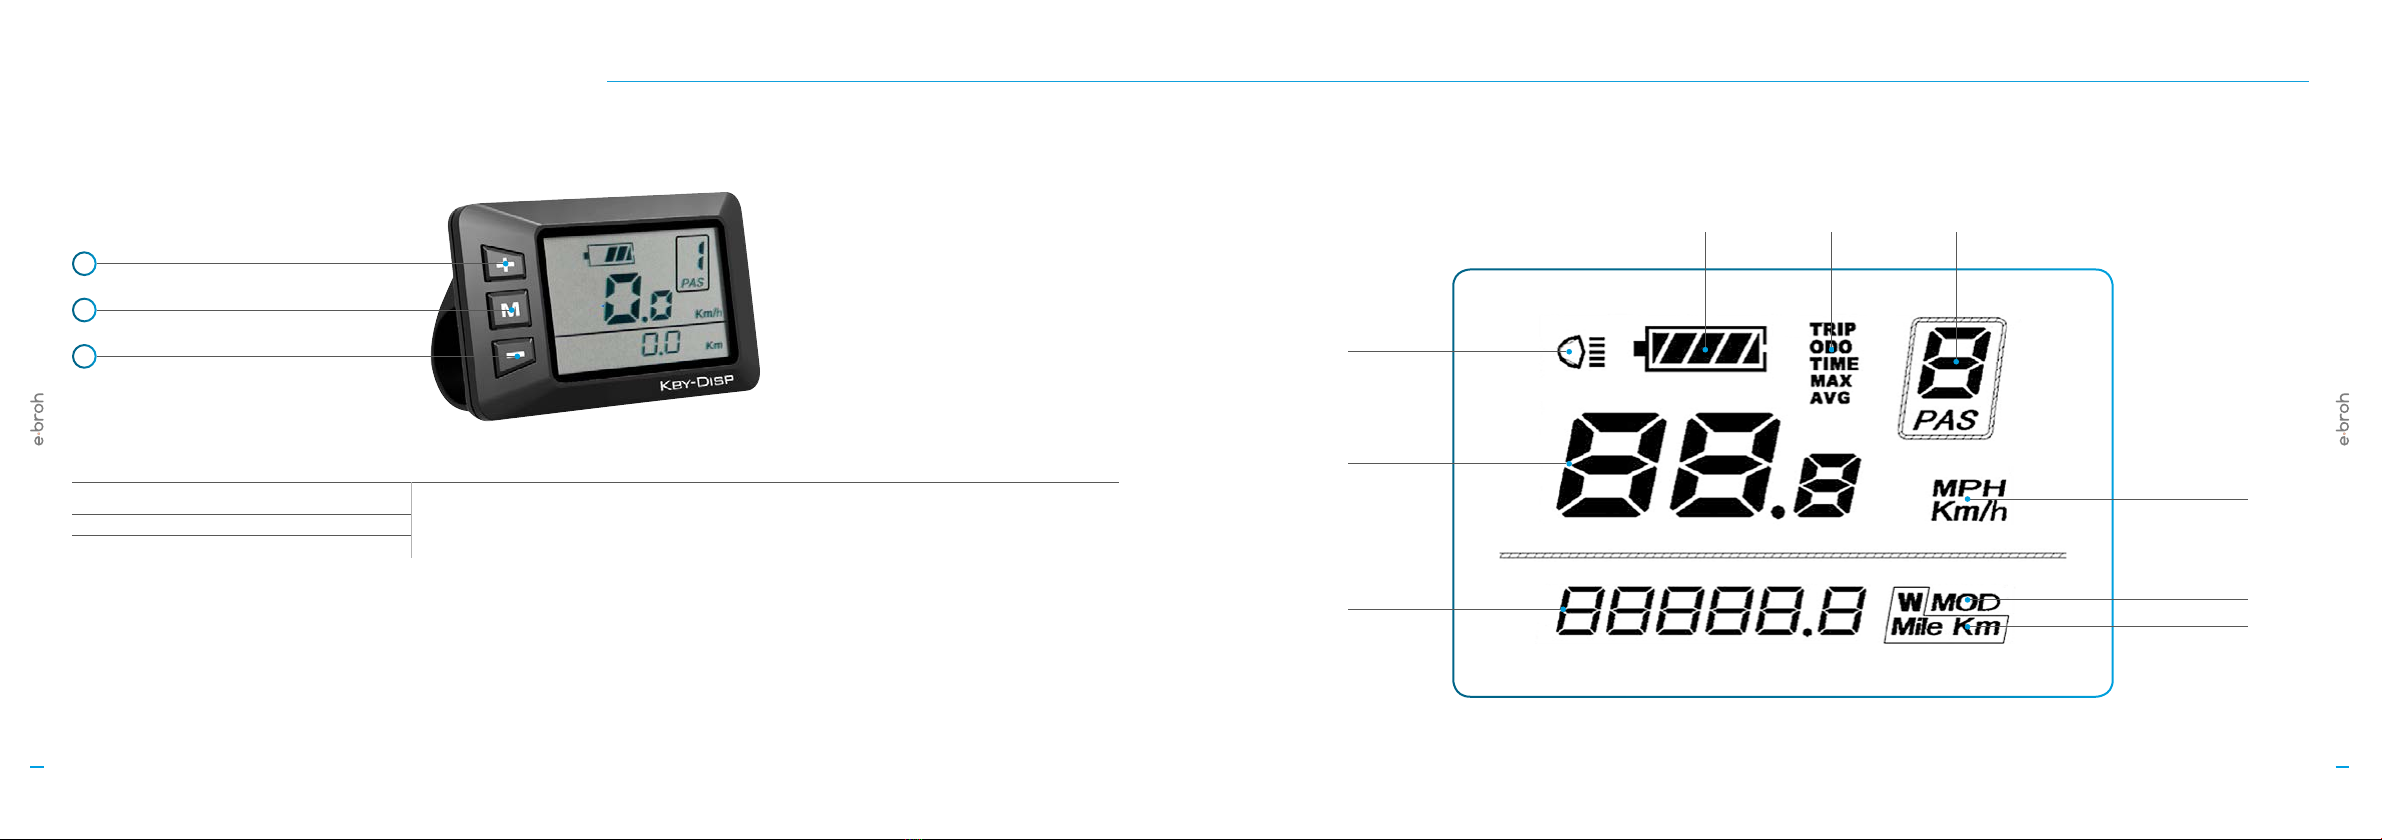
manuals.online logo
Brands
  1. Home
  2. •
  3. Brands
  4. •
  5. E-Broh
  6. •
  7. Bicycle
  8. •
  9. E-Broh PASION User manual

E-Broh PASION User manual

Other manuals for PASION

1

This manual suits for next models

1

Popular Bicycle manuals by other brands

Grace ONE manual

Grace

Grace ONE manual

Woosh Gran Camino manual

Woosh

Woosh Gran Camino manual

Razor FLASHRIDER 360 user manual

Razor

Razor FLASHRIDER 360 user manual

TAUBIK SOHO 2.0 user manual

TAUBIK

TAUBIK SOHO 2.0 user manual

Oxybul FREEbul 331067 manual

Oxybul

Oxybul FREEbul 331067 manual

Cycle Force Group BICYCLE BABY TRAILER & JOGGER Assembly instructions

Cycle Force Group

Cycle Force Group BICYCLE BABY TRAILER & JOGGER Assembly instructions

Giant TWIST FREEDOM DX datasheet

Giant

Giant TWIST FREEDOM DX datasheet

RAMBO R1000X2M-FF-BFD manual

RAMBO

RAMBO R1000X2M-FF-BFD manual

Vermeiren SAFARI Maintenance manual

Vermeiren

Vermeiren SAFARI Maintenance manual

Velec A2/36V owner's manual

Velec

Velec A2/36V owner's manual

Cervélo S3 2019 Assembly manual

Cervélo

Cervélo S3 2019 Assembly manual

Festo EGSC-BS-KF Instructions & Operating

Festo

Festo EGSC-BS-KF Instructions & Operating

Gio Electric H1 Volt owner's manual

Gio Electric

Gio Electric H1 Volt owner's manual

Huka orthros manual

Huka

Huka orthros manual

DAHON CIAO - 2009 manual

DAHON

DAHON CIAO - 2009 manual

Aprimatic ONDA 500 Installation, use and maintenance instructions

Aprimatic

Aprimatic ONDA 500 Installation, use and maintenance instructions

Greyp G6 Series user manual

Greyp

Greyp G6 Series user manual

Babboe Carve-E user manual

Babboe

Babboe Carve-E user manual

manuals.online logo
manuals.online logoBrands
  • About & Mission
  • Contact us
  • Privacy Policy
  • Terms and Conditions

Copyright 2025 Manuals.Online. All Rights Reserved.

MANEBROHB001EN
USER
MANUAL
2 3
1. SAFETY AND ANNOTATIONS 4
2. BASIC STRUCTURE AND NAMES 6
3. DIMENSIONES AND DISTANCES 8
4. DISPLAY AND CONTROL ENGINE AND BATTERY 10
5. BATTERY AND TAILLIGHTS 12
6. FOLDING THE EBIKE 13
7. TECHNICAL CHARACTERISTICS 14
8. USE AND MAINTENANCE 15
9. TROUBLESHOOTING 17
10. TRANSPORTATION, PARKING AND BICYCLE STORAGE 19
11. RECOMMENDATIONS 20
12. ROAD SAFETY 21
Content
4 5
1. SAFETY AND ANNOTIONS
Bicycles with electric force, are fitted with pedals and an auxiliary
electric motor, which can not propel exclusively.
Compared with bicycles, Ebikes include a motor, controls, and
battery charger. When circulating, electric power saving helps
circulate easily work.
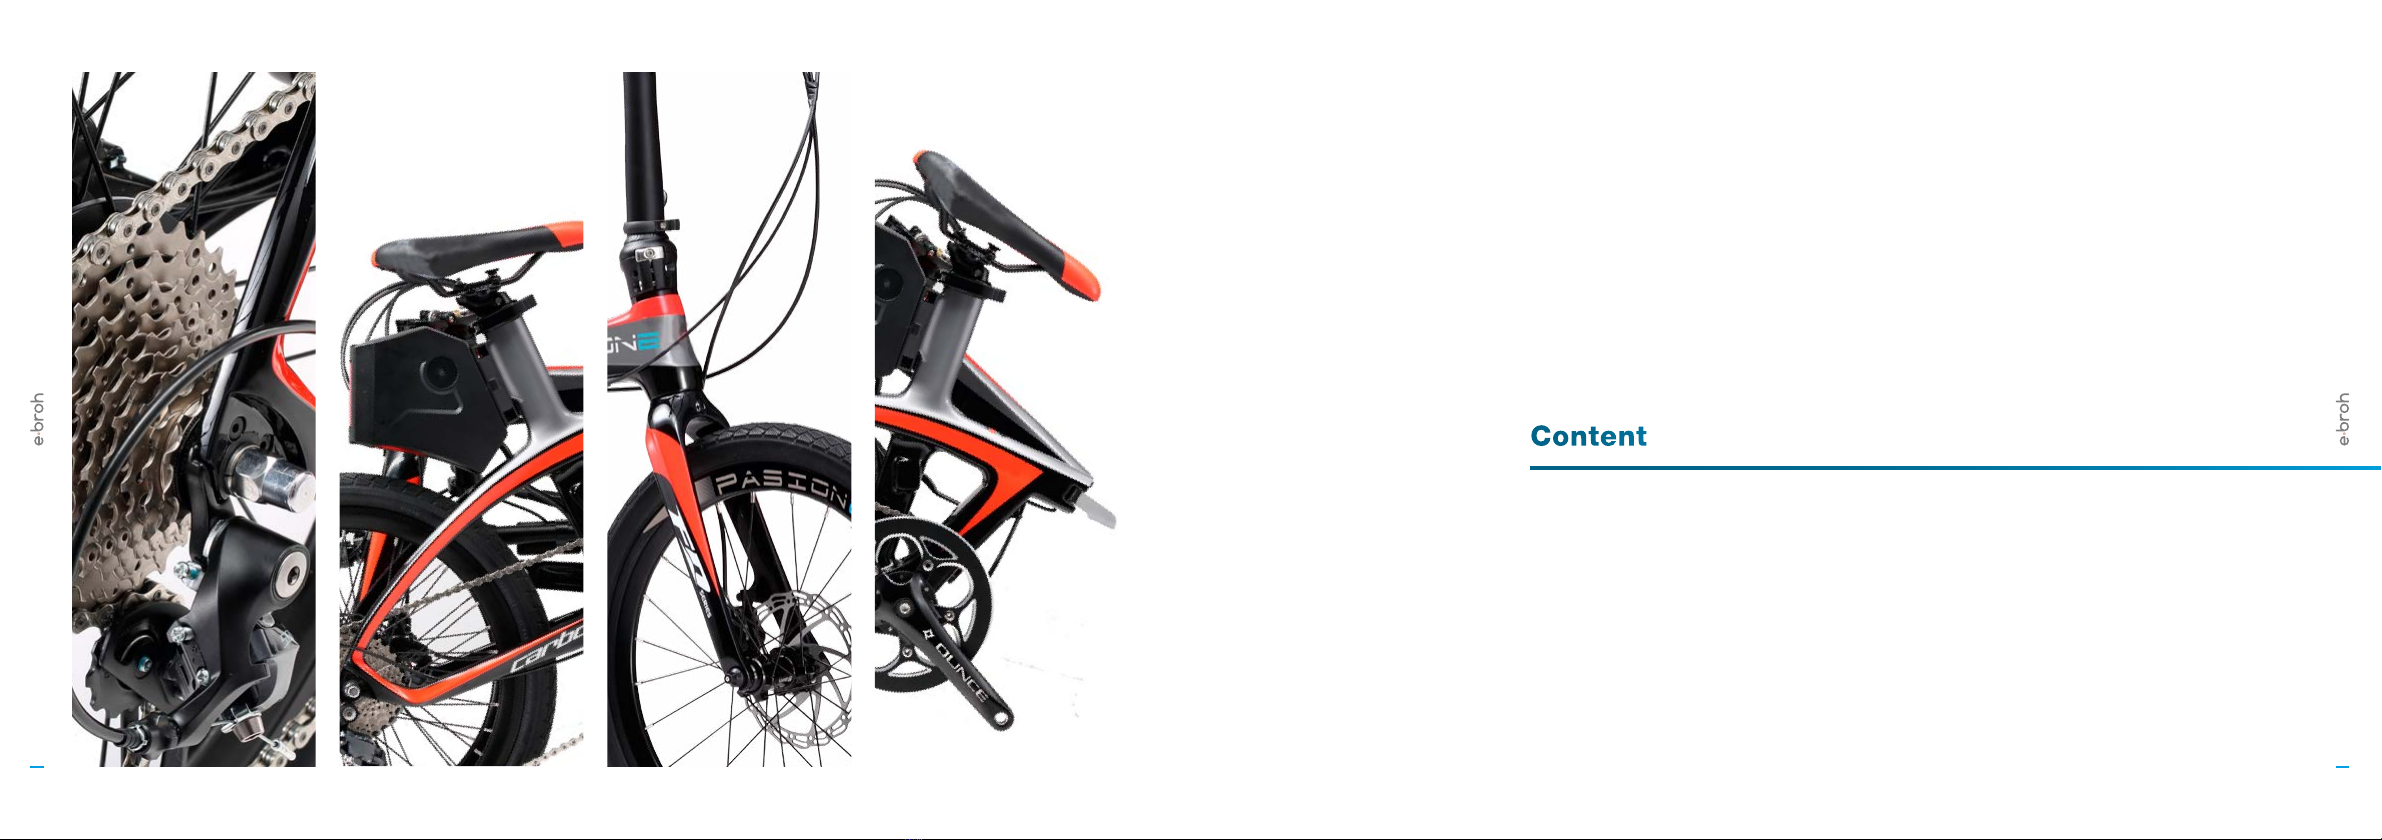
Components included:
Electric bicycle 1 ud.
Battery 1 ud.
Charger 1 ud.
Pedal 2 uds.
1.1. SAFETY INSTRUCTIONS
1. Do not use the electric bicycle without having read this manual carefully and having understood the operation and not leaving people who
can handle the ebike.
2. Prepare before riding: wear a helmet, gloves and other protective clothing to protect yourself in the event of an accident.
3. Circulation environmental conditions: the normal running distance can be between 40 and 80km (depending on the capacity of the
battery) with a temperature of -10 to 40C, without air and in the flat, without frequent exits and braking.
4. Maximum capacity: the maximum capacity of the bike is 100Kg along with a maximum load of 25 Kg. In the rack. If an accident occurs
when the load is greater than 125Kg., The company does not take responsibility.
5. In case of frequent braking, starts, slopes, front air, muddy roads, overload and others, the battery will consume a large amount of energy
that affects the mileage, so we recommend that you avoid the above factors when driving.
6. If you store the battery disconnected for a long time, be sure to charge it sufficiently. You will need an additional charge when your storage
is more than one month.
7. Be sure to pay attention: the electric bicycle can not wade for a long time because the water enters the controls and the motor can cause a
short circuit that damages the electrical device.
8. Disassembly or alteration without authorization is prohibited, the company is not responsible for any resulting damage.
9. The discarded battery can not be abandoned anywhere, it can cause environmental contamination. Go to your recycling at an
authorized center.
1.2. ANNOTATIONS
The electric bicycle is designed based on the original bicycle in combination with market demand and with special functions for use as a means
of transport.
At the time of purchase, please choose and buy a model adapted to your needs. Users must have learned the technique of riding a bicycle before
using it on public roads and roads. For your correct use and safety, please pay attention to the following details:
1. In the process of use, pay attention to check the condition of the motor mountings and the damper fork, and if you notice them loose, you
must tighten them correctly.
2. When starting an acceleration or a slope, pedal as far as you can to help reduce battery drain and lengthen assisted mileage.
3. On rainy days, please pay special attention to: when the water depth is greater than the height of the center of the wheel, it is likely that the
engine will get wet and result in failure.
4. The user must use the charger specified by the manufacturer to charge the battery. When charging, place the battery and charger
carefully.
5. It is forbidden for other elements to cover the battery case and charger to prevent heat. They should be kept in a well-ventilated
environment.
6. Please maintain adequate pressure on the wheels, to avoid: resistance when driving, and damage the tire and deform the tire.
7. The drivers of the bikes must abide by the traffic regulations, the speed of traffic must be controlled below 25km / h. The items you load
should not exceed 25Kg.
8. When driving at high speed or performing hard braking on a downhill, do not use the front brakes which can move your center of gravity
and cause a serious accident.
76
1
53
7
2
12
22
28
29
26
15 6 27
1097
30
30
23
16
18 17
13
14
11
19
20
8
4
21
24
25
2. BASIC STRUCTURE AND NAMES
2.1. STRUCTURE OF URBAN PASION - EBIKE PASIONE
1. CARBON FRAME 11. REAR DISK BREAK 21. VALVE
2. TILE (Seatpost) 12. FRONT HUB 22. FRONT BREAK
3. SEAT 13. RIM 23. REAR BREAK
4. STEEM 14. TIRE 24. BATTERY - REAR LIGHT (MOD. PASIONE)
5. HEADSET 15. BLICKING LIGTH CONTROL 25. LIGHT - BLICKING LIGTH
6. SHIFTER LEVER 16. CRANK ARM + CHAINRING 26. ENGINE CONTROL *
7. FRONT BRAKE LEVER 17. PEDAL 27. HANDLE BARS
8. FRONT FORK 18. CHAIN 28. UNLOCK FOLDING BUTTON
9. FRONT LIGHT 19. REAR DERAILLEUR 29. LEVER FOR LOCK / FOLDING FRAME
10. REAR BRAKE LEVER 20. CASSETTE & ENGINE (MOD. PASIONE)30. LEVER LOCK / FOLDING HANDLEBAR
* Instructions for use of control are supplied separately.
8 9
151 cm
50 cm
102,5 cm
79 cm
45 cm
80 cm
70 cm
3. DIMENSIONS AND DISTANCES
Width
40 cm
10 11
1
2
3
4. DISPLAY, ENGINE AND BATTERY CONTROL
Displayed information
Battery level indicator
Motor output indication
Assistance level indication
Speed indication
Trip distance and total distance
The push-assistance function
Trip time
The lighting On/Off
Error code indication
Various Parameters Settings
Recover Default Settings
Value
Area
Indication
Speed
Lighting
Indicator
Battery
indicator
Function
list
Assistance
level
Speed units
Setting
Range /
Power unit
Data
Display Segment LCD
Nominal voltage 24/36/48 V
Comunication UART / LIN / CAN
Assistance modes 0-5 / 0-7 / 0-9
Cover colours Black / White
Clamp diameter 22.2 mm
Test and certification
IP-Code IP65
Certifications CE / EN15194
1. BUTTON + / UP OPTION
2. START BUTTON (2 seconds) - MODE
3. BUTTON - / DOWN OPTION
1312
1
2
3
3
1
2
3
4
5
6
5. BATTERY AND REAR LIGHTS
1. CHARGER PLUG
2. OUTPUT DC 5V
3. LEFT / RIGHT BLICKING LIGHT
4. TRANSPORT AND EXTRACTION HANDLE
6. EBIKE FOLDING
1. Fold the pedals to the crank arm.
2. From the left side of the bike (dismount the bike) press the FOLDING UNLOCK BUTTON and release the LEVER FOR LOCK /
FOLDING FRAME.
3. Take with the right hand the saddle and with the left hand the HANDLE or the HEADSET. Gripping strongly the HANDLE lift the front wheel and
turn to the rear wheel until bike is folded. While you are folding the bike you can support and move slightly forward the rear wheel. When this
operation is finished you would be behind the bike.
4. Release the handle turning down the FOLDING HANDLE BAR. Then fold down the HANDLE BAR. In this position over the rear wheel you can
move for shor distance. If you wish to store o parking the bike.
5. Release the LEVER LOCK and drop down completely the SADDLE. (We recommend to mark the height of SADDLE where you sit confortably.)
6. Press the LEVER LOCK in order to lock the SADDLE in the folded position.
14 15
7. TECHNICAL CHARACTERISTICS 8. USE AND MAINTENANCE
8.1. RUTINARY CHECK BEFORE USE THE BICYCLE
1. Install the battery in the battery guides and be sure it is well adjusted and locked. Press start button in the battery and check that the
electronic system is on.
2. Safety checking (see the safety notes in this manual)
3. Check if the break levers returns to release position.
4. Check the break system: in dry surface 5,9 m. (+-21% front + rear) and wet surface 15 m.
8.2. DAILY USE, TECHNICAL INSPECTION AND MAINTENANCE
In the daily uso of the bicycle, if you don´t adjust the screwed mechanic and electrónic components can be lost. Revise every single component in
order to tighten and adjust the parts that it could be loosen or drop. So you avoid looses and breaks.
Electric
Battery
ENGINE. 36 V Max. 250 W brushless
BATTERY. SAMSUNG LITIO 8.7 Ah. (removable)
DISPLAY. KBY-DISP on / off, charge, 5 levels, speed, kilometers.
DERAILLEUR. SHIMANO SORA 9 V
BREAKS. SHIMANO M315
CHAIN. KMC
CRANKSET. 170 mm
WHEEL. 20 ‘’
WEIGHT. 15 Kg
16 17
9. TROUBLESHOOTING
Failure Cause Solution
Failure to change speed or too
slow maximum speed.
1. Battery discharged or low.
2. Command failure.
3. Engine control failure.
1. Charge the battery fully.
2. Replace the remote.
The motor is on but
it does not work.
1. Fault in the control.
2. Bad contact of the battery or contacts.
3. Engine control failure.
1. Replace the remote.
2. Reconnect and check the connections.
3. Replace the control.
Inadequate mileage for a load. 1. Low tire pressure.
2. Inadequate load.
3. The battery is damaged or its life extinguished.
4. Circular accelerating or braking or frequent slopes.
1. Inflate the wheels according
to the instructions.
2. Replace the charger.
3. Replace the battery.
The charger does not charge. 1. The cable is damaged or does not work.
2. The mains plug is damaged or does not work.
1. Replace the cable.
2. Check the line and repair.
* Authorized personal only.
* Any electrical repairs must be done by a specialized technician.
The repair by the user or unauthorized personnel may result in loss of the warranty and serious damage.
8.3. MAINTENANCE
To ensure the safety in public traffic circulation, check occasionally if the electronic functions works correctly, lost a part, all the mechanic parts are
in good working order, clean, chain lubricated, chainring and cassette lubricated, teeth not worn down, shifter and levers lubricated. Check the
worn down of the break shoe and break levers. Wheel pressure.
Inspection First 60 days 180 days 360 days 540 days 720 days
Adjust Adjust Adjust Adjust Adjust Adjust
Handle bar and components Tense Lubricate Lubricate Lubricate Lubricate Lubricate
Worn down chain Adjust Adjust and lubricate Adjust and lubricate Adjust and lubricate Adjust and lubricate Adjust and lubricate
Too loose screw Adjust Adjust Adjust Adjust Adjust Adjust
Worn down break shoes Replace Tense Replace Replace Replace Replace
Deformed or swing rim Adjust Adjust Adjust Adjust Adjust Adjust
Lost or bend valve Adjust Adjust Adjust Adjust Adjust Adjust
* Note. this table is a general reference and the maintenance cicles it depends of the use and bicycle conditions.
18 19
10. TRANSPORTATION, PARKING AND STORAGE OF THE BICYCLE
1. DO NOT park the bicycle in places of passage.
2. Use the kickstand to support the bike and avoid chafing.
3. The bicycle must only be transported in a vehicle complying with traffic regulations and avoiding damage by blows, wind.
4. To transport you can remove the wheels whenever you are careful and knowledge of reassembling correctly.
5. If you need to remove saddle and handlebar, first mark the position where you use them to reassemble them.
6. Store sheltered from moisture and sun covering with a cloth. Do not leave leaning on places where you can suffer bumps or deformations.
WARRANTY POLICY
Ebroh – Zeppelin offers a two-year guarantee for frame against any manufacturing defect to the first owner.
All of the other bicycle-mounted components, such as forks, wheels, transmission, brakes, seat post, stem and handlebar have a 2-year guaranty
against manufacturing defects, with the guarantee conditions offered by the respective manufacturers or distributors of components from other
brands originally assembled.
All parts and components exposed to wear will be exempt from guarantee such as covers, bushings, reducers, bearings,
chain, plates, sprockets, spokes, brake pads, brake discs and handlebars when the reason of the failure is attributable to the wear itself.
Bicycle battery and other electrical components, such as controller, display, wiring and motor, will have a guarantee for manufacturing defect
of 2 years.
This guarantee does not cover any problem caused by:
A wrong mounting, misuse or use of different bicycle model for which this one was designed, lack of maintenance, negligence, impact,
accidents, the use of bicycle or the frame in conditions not considered to be common, such as for example, competition, renting or use in
commercial activities.
All the bicycles, frames and components have recommended maintenance times and must be periodically reviewed by
an official distributor. Failure to comply with these conditions invalidates guarantee against manufacturing defects.
Technical service Ebroh