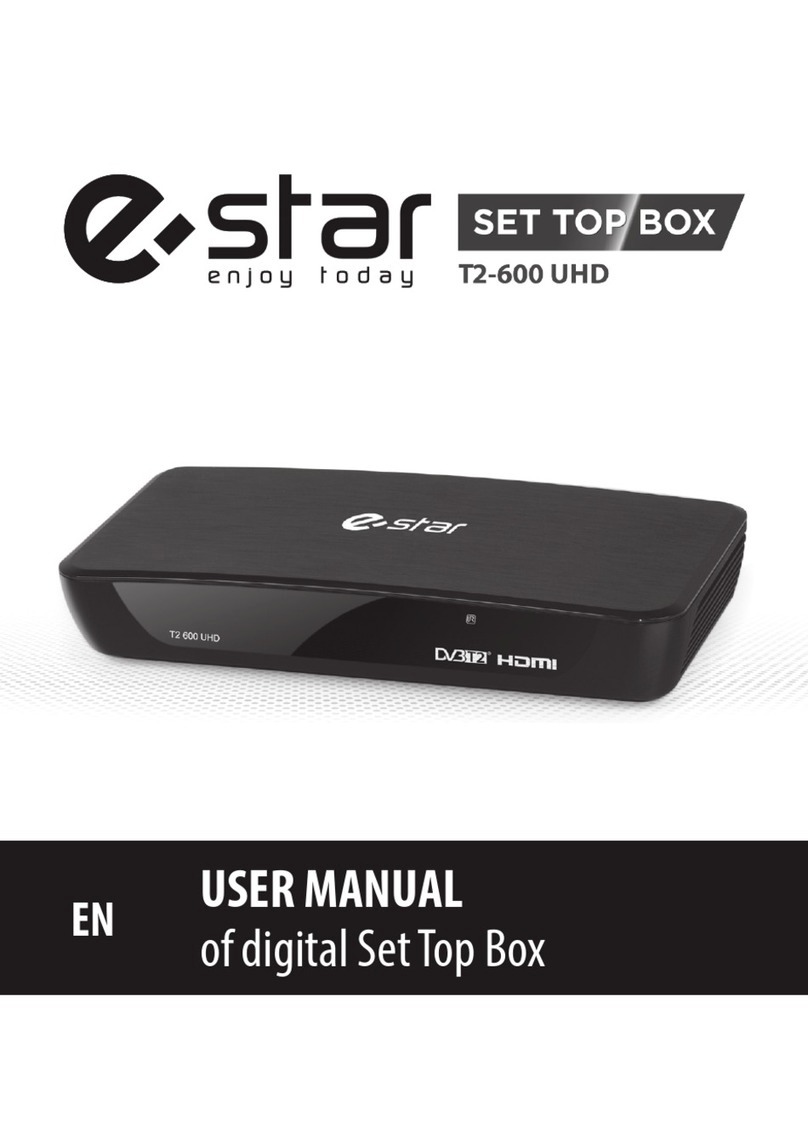
E Star T2-601 UHD User manual

1
EN
EN USER MANUAL
of digital Set Top Box
Please read this User Manual carefully to ensure proper use of this product and keep this manual for future reference.
Important Safety Instructions
1) Read these instructions.
2) Keep these instructions.
3) Heed all warnings.
4) Follow all instructions.
5) Do not use this apparatus near water.
6) Clean only with dry cloth.
7) Do not block any ventilation openings, install in accordance with the instructions.
8) Do not install near any heat sources such as radiations, heat registers, stoves, or other apparatus (including ampliers) that
produce heat.
9) Do not defeat the safety purpose of the polarized plug. If the provided plug does not t into your outlet, consult an electrician
for replacement of the obsolete outlet.
10) Protected the power cord from being walked on or pinched particularly at plugs, convenience receptacles, and the point where
they exit from the apparatus.
11) Only use attachments/accessories specied by the manufacturer.
12) Unplug this apparatus during lighting storms or when unused for long periods of time.
13) Refer all servicing to qualied service personnel. Servicing is required when the apparatus has been damaged in any way, such
as power- supply cord or plug is damaged, liquid has been spilled or objects have fallen into the apparatus, the apparatus has
been exposed to rain or moisture, does not operate normally, or has been dropped.
14) AC/DC adapter is used as the disconnect device, the disconnect device shall remain readily operable.
15) The ventilation should not be impeded by covering the ventilation openings with items, such as newspapers, table-cloth,
curtains, etc.
16) No naked ame sources, such as lighted candles, should be placed on the apparatus.
17) Attention should be drawn to the environmental aspects of battery disposal.
18) The use of apparatus in moderate climate.
19) The apparatus shall not be exposed to dripping or splashing and that no objects lled with liquids, such as vases, shall be
placed on the apparatus.
WARNING: To reduce the risk of re or electric shock, do not expose this apparatus to rain or moisture.
WARNING: The batteries shall not be exposed to excessive heat such as sunshine, re or the like.
Note: The marking plate was placed on bottom enclosure surface.
CAUTION
Risk of electric shock!
DO NOT OPEN!
ATTENTION
Risque de choc electrique!
NE PAS OUVRIR!
The symbol indicates that dangerous voltages constituting a risk of electric shock are present within this unit.
The symbol indicates that there are important operating and maintenance instructions in the literature accompanying
this unit.
This symbol indicates that this product incorporates double insulation between hazardous mains voltage and user
accessible parts .when servicing use only identical replacement parts .
This marking indicates that this product should not be disposed with other household wastes throughout the EU.
To prevent possible harm to the environment or human health from uncontrolled waste disposal, recycle it
responsibly to promote the sustainable reuse of material resources. To return your used device, please use the return
and collection systems or contact the retailer where the product was purchased. They can take this product for
environmental safe recycling.
CAUTION: When the apparatus was in electrostatic circumstance, it may be malfunction and need to reset by user.
The USB memory stick should be plug in the unit directly. USB extension cable should not be used to avoid failing of
data transferring and interference caused.

EN
1.REMOTE CONTROL SENSOR: Used to receive the signal from the remote control.
2. STANDBY INDICATOR: Used to visually show power state of the set top box, the green LED will be light if turned on the set top
box and the red LED will be light if the set top box entered standby mode.
3. USB JACK(Optional): Used to connect to an external USB 2.0 device. If an external hard disk is connected to the USB port, suggest
using the adapter which supplies DC5V/1.5A power to the hard disk, which is not included in this unit.
1. RF IN : This socket connects to your external aerial.
2. RF OUT: This socket will bypass the RF signal to either your TV or another video system.
3. COAXIAL: This socket connects to a coaxial socket on your surround sound system.
4. HDMI OUT: This socket connects to HDMI in device.
5. SCART OUT: This socket connects to your TV.
1. Front panel
2. Rear panel
Front and Rear Panel
POWERCH- CH+
USB IR
12
3
123 4 5

3
EN

EN
3 System & Menu
3.1 System
e current system supports: DTV Mode & Multi-media Mode. DTV Mode is for TV broadcasting; Multi-media Mode is for running
multimedia,game,recording,disk management, etc.
Auto entry DTV Mode aer starting system,press [SOURCE] to switch dierent mode.
3.2 Menu
Main menu as follows:
Pic 3.2 Menu
3.2.1Installation Menu
Set up only in DTV mode Set up only in USB mode Set up in both USB&DTV mode
Pic 3.2.1 Installation Menu

5
EN
3.2.2 Channel Menu
Pic 3.2.2 Channel Menu
3.2.3 Preference Menu
Set up only in DTV mode Set up only in USB mode Set up in both USB&DTV mode
Pic 3.2.3 Preference Menu

EN
Pic 3.2.4 Setting Menu
3.2.4 Setting Menu
Set up only in DTV mode Set up only in USB mode Set up in both USB&DTV mode
Pic 3.2.5 AV Menu
3.2.5 AV Menu
Set up only in DTV mode Set up only in USB mode Set up in both USB&DTV mode

7
EN
Pic 3.2.6 Game Menu
3.2.6 Game Menu
Set up only in DTV mode Set up only in USB mode Set up in both USB&DTV mode
4 DTV mode
4.1 Initialization
Initialization is needed for the rst-time entry into the system by setting language, country,time zone, Active antenna and channel num-
ber, etc. Aer nishing setting, choose [Start Search] and press [ENTER] to scan channels, and all available channels will be reserved
automatically. Menu display as follows (For Viewing TV program press EXIT):
Pic 4.1 Initialization
4.2 Language & Le and right channel switching
1. Under full-screen state, press [AUDIO] to match the language of the current program and show le& right Channel list:
Pic 4.2 language and le&
right Channel list

EN
2. Press [LEFT/RIGHT] to choose le & right channel or stereo: press [UP/DOWN] to choose language;
3. Press [ENTER] to Exit setup.
4.3 EPG
1. Press [EPG] to check Program information:
Pic 4.3.1 EPG Menu
Default EPG shows Now/Next Mode including 7 parts:
1 Mark 1 shows current EPG state;
2 Mark 2 shows current time and program information;
3 Mark 3 shows detailed date;
4 Mark 4 shows program, press [UP/DOWN] to switch program,or press [PAGE-/+] to switch pages.
5 Mark 5 shows Now Event,press [UP/DOWN] to check program, or press [LEFT/RIGHT] to change NOW or NEXT;
6 Mark 6 shows Next Event;
7 M ark 7 shows key function;
Red key: Switch EPG Mode.
Greed key: Recording tv programme of Mark 5 or make a record reservation of mark 6
2. Press Red key to entry Daily Mode:
Pic 4.3.2 Daily Mode
1 Press yellow key or blue key can change from Monday to Sunday.
2 Select playing tv shows, press green key to record

9
EN
3. Press Red key to entry Weekly Mode:
Pic 4.3.3 Weekly Mode
1. Press [LEFT/RIGHT] to switch windows.
2. Press yellow key or blue key to switch tv programmes of yesterday or tomorrow.
4.4 Teletext
Press [ TTX] to entry program menu:
1. Input page number (100~899) in Teletext to turn over;
2. Press [UP/DOWN] and [PAGE+/-] to switch pages;
3. Long press [UP/DOWN] for fast switch pages;
4. Press [ENTER] to change the transparency of TTX;
5. Press [LEFT/RIGHT] to switch to Sub page of current page, if choose [AUTO], it will switch to Sub pages automatically;
6. Four color key is used as Guidance, its specic functions are decided by code stream;
7. Press [TTX] or [EXIT] to exit

EN
5 Multimedia mode
Pic 5 Multi-media List
Press [SOURCE] to switch DTV Mode or Multi-media Mode. If you choose Multi-media Mode, it will check whether there is
USB(CARD) equipment automatically. If there is no USB(CARD) equipment or USB(CARD) equipment is pulled out, it will show like
pic 5.1:
Pic5.1 NO USB(CARD)
Insert USB ash and the initialization will be processed automatically:
Pic 5.2 USB(CARD)
Equipment
e partitions supported includes: FAT,FAT32 and NTFS.
6 Main menu
Main menu includes Installation,Channel,Preference,Setting,AV,Game.

11
EN
6.1 Installation
[Installation] includes Auto Search,Manual Search and Channel Filter. Notice: is manu can’t be choosed in Multi-media Mode.
Pic 6 Main Menu
Press [UP/DOWN] to choose [Installation], then press [ENTER]or [RIGHT] to input default password (0000):
Pic 6.1 Installation
6.1.1 Auto Search
Press [UP/DOWN] to choose [Auto Search] and then press [ENTER] or [RIGHT], it will shows massge to ask you whether delete previ-
ous tv programmes. Choose [YES] to enter [Auto Search]:
Pic 6.1.1 Auto Search

EN
System will scan programs and reserve them automatically:
Pic 6.1.1Auto Search
6.1.2 Manual Search
1.Press [UP/DOWN] to choose [Manual Search] and then press [ENTER] or [RIGHT]:
Pic 6.1.2 Manual Search
2. Deploy the parameters before manual scan, including following three parameters:
1. Channel NO.: scanning station ID, every country has some default station ID,you can modify it by using number key(0~9), if the sta-
tion ID was set up, other two parameters are no need to setting;
2. Freq(KHz): scanning frequency,the default frequency is 177500 KHz, you can modify it by using number key(0~9);
3. Bandwidth: Press [UP/DOWN] to choose [Bandwidth]. Press [ENTER] for setting the current scanning frequency
bandwidth.6MHz,7MHz,8MHz are available, the default bandwidth is 7MHz.
3. Aer setting up the scanning parameters, press [UP/DOWN] to choose [Manual search] and then press [enter.]
4. Aer nishing the searching, the system will exit the interface of searching program aromatically, reserve the tv programme informa-
tion and then return to [Installation] menu.
6.2 Channel
[Channel] has two options including [Channel Manager]and [Favorite List].In the [Main Menu], press [UP/DOWN] to choose [Chan-
nel] and then press [ENTER] or [RIGHT]. As picture 6.2 shows:
Pic 6.2 Main Menu

13
EN
6.3 OSD Language
[OSD Language] is mainly used to change the language of menu and tips. Press [UP/DOWN] to choose language and then press [EN-
TER] to conrm. Like pic 6.3 shows:
Pic 6.3 OSD Language
Setting
6.3.1 Multimedia
[Multimedia] can be set up in Multi-media Mode only.
Pic 6.3.1 Multimedia
1. [Movie Repeat]: Select loop mode when playing a video le: Dir,One,OFF
2. [Music Repeat]: Select loop mode when playing an audio le: Dir,One,OFF3
3. [Photo Repeat]: Select loop mode when playing a graphic le: Dir,OFF
4. [Bgmusic]: Select [YES] or [NO] to decide whether supporting bgmusic (when playing pictures or reading e-books)
5. [Slide Time]: Select slide time about playing pictures as the form of Slide-show
6. [Eect]: Select eect of playing pictures in slide-show.
6.4 Setting
[Setting] is used to set up or upgrade system.
Pic 6.4 Setting

EN
6.4.1 Timers
Timers is used to manage and edit the reserved program.Timers menu can display and edit name, starting time and type of reserved
program:
Pic 6.4.1 Timer List
From le to right are: number, program name, date, time, mode, reserved type.
Pic 6.4.1.1 Timer Edit
1. [Date] is used to appoint date,if you want to change date,aer choosing [Date], press [RIGHT] to edit;
2. [Program Name] is the name of appointed program,if you want to change name,aer choosing [Program Name], press [RIGHT] to
edit;
3. [Start Time] is used to set up the appointed time, if you want to change time,aer choosing [Start Time], press [RIGHT] to edit;
4. [End Time] can not be set up by users, when [Type] is VCR or Record Mode, it will change automatically according to Start time and
Duration which are set by user. When [Type] is other option, [End Time] will be consistent with [Start Time].
5. [Duration] can be set up in only one situation that [Type] is VCR or Record Mode, it is for setting up the lasting time of the burn
reservation, aer choose [Program Name], press [RIGHT] to enter the editing;
6. [Mode] is for setting up the appointed mode, including Once, Daily, Weekly and monthly. In Once mode,reservation only was set up
once, it will be deleted aer response; in Daily mode,it will be existed in appointed time every day; in Weekly mode, it will be existed in
appointed time every week; in Monthly mode,it will be existed in appointed time every month;
7. [Type] for setting up the reserved type,including ve types: Recorder, VCR, On, Channel and Standby. Recorder is for burning the
appointed program, you can select whether burn AD, TTX and Subtitle or not; VCR is also burning program, but it only can burn
program, can’t burn AD,TTX and Subtitle; when [Type] is On,if the set top box in standby mode, it will wake-up set top box automati-
cally and play the reserved program; when [Type] is Channel, it will go to the reserved program automatically in the setting time; when
[Type] is Standby, set top box will go to standby mode in the setting time.
8. [AD Recorder], [Subtitle Recorder], [Teletext Recorder] can be used in the only condition that [Type] is Recorder,for selecting
whether burn AD, TTX and Subtitle or not.

15
EN
6.4.2 Child Lock
[Child Lock] is for setting up Child lock, and limit program to avoid that children will contact some unsuitable information., choose
[Child Lock] and then press [ENTER], password input box will be popped up, and then input the correct password(the default pass-
word is 0000),you will enter the menu, as picture 6.4.2 shows:
Pic 6.4.2 Child Lock
[Child Lock] including the following three options:
1. [System Lock]:for using whether enable child lock or not;
2. [Parental Rating] :for setting up rating limitations, including the age limitation(4~18 )years old, if it is 0, and it suggests no limitation;
3. [Change Pin Code]:for changing password,aer choosing [Change Pin Code], press [ENTER], it will pop up the message box of
[Change Pin Code]. As picture 6.4.2.1 shows:
Pic 6.4.2.1Change Pin
Code
Enter the correct password, and aer entering the same new password twice,new password is set up successfully.
6.4.3 Factory Reset
[Factory Reset] is for restoring the system to factory settings, press [UP/DOWN] and choose the [Factory Reset], and then
press[ENTER], aer popping up password input box,input the correct password (the default is 0000),the system will restore to factory
settings,aer that, it will pop up systematic initial menu and guide the system to reinitialize.

EN
6.5 AV Setting
[AV] is for setting up the related options about video output, brightness, resolution, output format, etc. In [Main Menu], press [UP/
DOWM] to choose [AV],press [ENTER] to enter [AV], as Picture 6.5 shows:
Pic 6.5 AV Setting
6.5.1 Video Resolution
[Video Resolution] for setting up output video resolution and refresh rate, it supports up to 1080P_60 (Full HD). Aer choosing [Video
Resolution], press [ENTER], it will pop up the select list, as picture 6.5.1 shows:
Pic 6.5.1Video Resolution
Lists provide the following options: (P represents line-to-line scan, i represents interlaced scan):
1. 480: P_60,i_30
2. 576: P_50,i_25
3. 720: P_60,P_50
4. 1080: P_60,P_50,i_30,i_25 ([Aspect Ratio} only can choose 16:9,16:9PB)
6.6 Game
[Game] provide some games for leisure and entertainment. At present, system provide 5 games, aer choosing [Game], and then press
[ENTER] to enter [Game}, as picture 6.6 shows
Pic 6.6 Game

17
EN
e game provided by system:
1. Box Man
2. Tetris
3. Hit Rat
4. Go Bang
5. Sodoku
7 Record & Timeshi
7.1 Record
Under full-screen state, if you want to record the television programme, pls press [REC]. If you didn’t connect to any USB(CARD), it
will show this below message :
Pic 7.1 Without
USB(CARD) Equipment
If machine connected to USD(CARD) equipment, it will initialize USB(CARD) equipment and start to record, like the pic 7.1.1. If you
want to stop recording, pls press [STOP]; if you want to suspend record, pls press [PAUSE], like pic 7.1.2:
Pic 7.1.1 USB(CARD)
Initialization
Pic 7.1.2 Record Suspen-
sion

EN
In recording, press [INFO] can show detailed information , press [INFO] again, will show the list of what you are recording, like
pic7.1.3:
Pic 7.1.3 Record List
7.2 Timeshi
Timeshi is used to playback previous tv programme, there are 3 ways to use Timeshi. You can make the setting in [Main Menu]-
>[Preference]->[PVR Cong], like the pic 7.2:
Pic 7.2 PVR Cong
[Timeshi] Menu has three option:
1. Auto : When you are in optional channels, it will open Timeshi automatically.
2. Pause : Under full-screen state, press [PAUSE] to open Timeshi.
3. O : When in recording, press [PAUSE] or [FR] to open Timeshi.

19
EN

DE
DE Bedienungsanleitung
des digitalen Ansatzstückes
Lesen Sie bitte diese Bedienungsanleitung sorgfältig durch, um die sachgemäße Benutzung dieses Produktes zu sichern, und
bewahren Sie diese Anleitung für die künftige Referenz auf.
Wichtige Sicherheitsinstruktionen
1) Lesen Sie bitte diese Instruktion durch.
2) Bewahren Sie diese Instruktionen auf.
3) Beachten Sie alle Warnungen.
4) Folgen Sie allen Instruktionen nach.
5) Benutzen Sie das Gerät nicht in der Wassernähe
6) Reinigen Sie es mit dem trockenen Lappen.
7) Blockieren Sie keine Lüftungsönungen, installieren Sie gemäß den Instruktionen.
8) Installieren Sie nicht neben den Wärmequellen, solchen wie Radiatoren, Heizregister, Herde oder andere Geräte (inklusiveVerstärker), die die Wärme erzeugen.
9) Verletzen Sie bitte nicht die Sicherheitsbestimmung des polarisierten Steckers.Wenn der polarisierte Stecker zu Ihrer Austrittsönung nicht passt, beraten Sie
sich mit dem Elektriker wegen des Ersatzes von der alten Austrittsönung
10) Schützen Sie das Stromkabel vor dem Treten oder vor dem partiellen Einquetschen am Stecker, an den Steckdosen und an der Stelle, wohin sie aus dem Gerät
ausgehen.
11) Verwenden Sie nur Befestigungselemente / Zubehöre, die vom Hersteller bestimmt sind.
12) Schalten Sie das Gerät während der Gewitter oder im Falle, wenn es eine lange Zeitperiode nicht benutzt wird.
13) Richten Sie den ganzen Service an qualiziertes Service-Personal. Der Service wird benötigt, wenn das Gerät irgendwie beschädigt wurde, so wie z. B.:
Stromkabel oder Stecker beschädigt sind, die Flüssigkeit auf das Gerät verschüttet wurde oder die Objekte auf das Gerät gefallen sind, das Gerät dem Regen
oder der Feuchte unterzogen wurde, nicht normal funktioniert oder man es fallen lassen hat.
14) Der AC/DC-Adapter wird als Trennschalter benutzt, der Trennschalter soll mühelos funktionsfähig bleiben.
15) Die Belüftung soll nicht durch Bedeckung der Lüftungsönungen mit Gegenständen, solchen wie Zeitungen, Tischtuch, Gardinen usw. behindert werden.
16) Es dürfen keine oenen Flammenquellen, solche wie brennende Kerzen, auf das Gerät gestellt werden.
17) Man soll die Umweltaspekte der Batterieverwertung beachten.
18) Benutzen Sie das Gerät im gemäßigten Klima.
19) Das Gerät soll nicht dem Tropfen oder Spritzen unterzogen werden und es sollen keine mit der Flüssigkeit gefüllten Objekte, solche wie Vasen, auf das Gerät
gestellt werden..
WARNUNG: um das Risiko des Feuers oder elektrischen Schlages zu reduzieren, unterziehen Sie bitte nicht das Gerät dem
Regen oder der Feuchte.
WARNUNG: die Batterien sollen nicht der Überwärme, solcher wie Sonnenstrahlen, Feuer oder Ähnliches unterzogen werden.
Hinweis: das Typenschild wurde auf die Oberäche des unteren Teils vom Gehäuse plaziert.
CAUTION
Risk of electric shock!
DO NOT OPEN!
ATTENTION
Risque de choc electrique!
NE PAS OUVRIR!
Dieses Symbol zeigt an, dass es in diesem Gerät gefährliche Spannung, die das Risiko des elektrischen Schlages verursacht, gibt.
Dieses Symbol zeigt an, dass es wichtige Bedienungs- und Wartungsinstruktionen in der Dokumentation, die dieses Gerät begleitet,
vorhanden sind.
Dieses Symbol zeigt an, dass dieses Produkt eine Doppelisolation zwischen der gefährlichen Netzspannung und den für Benutzer
zugänglichen Teilen beinhaltet. Bei der Wartung verwenden Sie nur identische Ersatzteile.
Diese Markierung zeigt an, dass dieses Produkt zusammen mit anderen Haushaltsabfällen überall in der EU nicht verwertet werden darf.
Um einen eventuellen Schaden für die Umwelt oder menschliche Gesundheit von der nicht kontrollierten Verwertung der Abfälle zu
vermeiden, recyceln Sie es sachgemäß, um eine rationale erneuteVerwendung der Materialressourcen zu fördern. Um Ihr gebrauchtes
Gerät zurückzugeben, benutzen Sie bitte die Systeme für Zurückgabe und Sammlung oder kontaktieren Sie die Einzelhändler, bei den
das Produkt erworben wurde. Sie können dieses Produkt für das umweltsichere Recycling nehmen.
ACHTUNG: Falls das Gerät in der elektrostatischer Umgebung war, kann es dann falsch funktionieren und vom Benutzer eine
erneute Einstellung benötigen.
Der USB-Stick soll direkt ins Gerät eingesteckt werden. Das USB-Verlängerungskabel soll nicht verwendet werden, um den Ausfall
der Datenübergabe und die dadurch verursachte Störung zu vermeiden.
Table of contents
Languages:
Other E Star Set-top Box manuals
